
Likes
Comments
Share


@Batista
Follow
We are a couple who decided to plant cannabis for the first time during the covid-19 quarantine, and it helped us get through it, during and after grow =]
Before deciding to plant, we studied a lot and saw many diaries here, so we didn't have many surprises during the cycle, also because we were able to see, compare and know what to expect from our plant. It was really cool to see the result of what we had studied happening in practice, we learned a lot from Grow Diaries.
Definitely we will do a lot of different things next time, but overall we were satisfied to be able to smoke our own weed.
Grow diaries helped and motivated us a lot, both to learn new things and to organize and register our grow.
Our intention is to continue growing and sharing our experience here.
Weed love you to leave comments and tips in our diary, it helps us to learn and improve more and more. Thanks and see you all next grow! 👽😜👌

Likes
13
Share

@SouthGermanGrowGirl
Follow
So after 9 Weeks of Veg we are finaly in Bloom Modus
Someone broke the mainstream last night

Likes
28
Share


@Trickybis82
Follow
Lovely to smoke. With a great weight given the set back with nute lock. Which Is the downfall to this run. Because this happened In last 3weeks which certainly resulted in small buds. However I am totally pleased with final weight and smoke from.this girl. Xx


Likes
2
Share


@Khalico20
Follow
Fácil de cultivar muy agradecida empezando la preflor con mucha fuerza se estira un poco pero bien no crecerá mucho más, huele y aún no tiene flor muy suave su olor atrae y te saliva la boca haber como avanza!!
Buenos humos!!
Likes
24
Share


@3lementa1
Follow
This is the 8th week. Thursday will be 9 weeks of 12/12. Some trichs are amber. They just added a good bunch of girth over the past few days, but most of the pistils are red now. The rest of them have been dropping leaves consistenly but the canopy remains full so they must be putting out more leaves.
I just flushed to 80% runoff and found out that I had 1200ppm. I just got an ec meter but my last reading said closer to 600 so idk what happened there.
I flushed until I had runoff ppm of about 150. Now they're back in the grow tent. I don't want to keep assaulting them with my microscope. I think they're ready. Just gonna let them settle another day or two to dry out a bit.
I took one small branch off the small Wedding Cake plant on Thursday and I've just been watching it dry on my counter. It's been 5 days and the stem snaps but still leaves a fiber connecting. I put it into a small jar with a 64RH thing. I just want to try it. It already smells amazing.
The leaves on the big CBD Blue Shark plant are going really yellow and some other colours are starting to come out as well.
The buds all fattened up and got more frosty again. I was worried they were foxtailing but they got more calyxes underneath the peaks and have been making more of a pyramid shape. They're really close to peak. Harvest day will be March 17 or 18.
March 17 1023pm chopped and hung after lights off all day. RH was 65% before I chopped and 50% after I closed the window and cut the plants off the saturated pots. I did a wet trim to prevent mold. The buds are sticky af. Gonna hang them to dry for 7-9 days before curing in jars :)
March 18 : checked the RH when I woke up and it's chilling at 45% 😎
March 19 : just checked to see how they were drying. There are seeds in every plant. RIP
I'll update when I put them in jars and again a few weeks later for final review. Overall it was a good grow despite the rocky start and a good introduction to the mainline technique and my new grow space. Next grow I should have everything pretty well dialed in.
March 23
They were hanging for 3 days. Rh was around 45, then spiked to 65 overnight when I forgot to turn the fans back on. Temp was high at around 26.they felt wet after 2 days, and bone dry after 4 days. The stems still didn't snap but I put them in jars anyway. A day later, jar RH was 50%. I burped all the jars and there was a smell from the new jars. I took all the weed out, washed out the jars, and did a dry trim on the weed.
One of the Wedding Cake plants must have gone hermie. I didn't see any bananas and didn't even realize there were seeds until the very end. The seed pods looked just like calyxes while the plants were growing. Many of the nugs are unusable. Under the sugar leaves are just layers and layers of seeds. Some weren't hit that badly. The CBD Blue Shark is much better off but still has some seeds.
I'm trying to stay positive. It's a bit of a shock though. I'm anxious to try the finished product. If the flowers at least taste good and have a good effect, all is not lost.

Likes
43
Share


@Humble_Lion
Follow
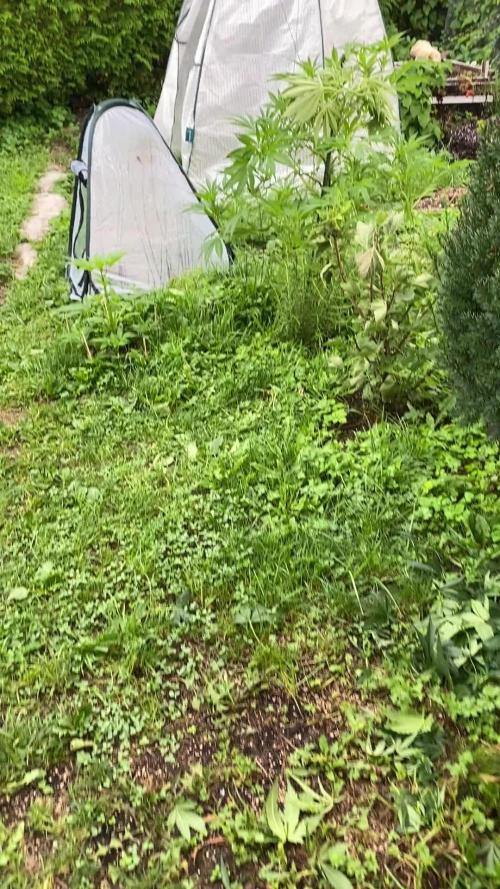
The greenhouse is now packed.
The night's got a little bit warmer, weather was partly cloudy and the temperatures during the day went up to 30 in the greenhouse.
They are ready for the final transplant and to be finally outdoors. This will happen after the next week.
Also most of the other plants will go to they're final place. Time to say goodbye.
The plants recovered well from topping.
Having my troubles to decide wich one of the two Mimosa Evo and Jack Herer plants might be the stronger ones? One i keep the other will go to some friend....


Likes
176
Share


@Herbalize
Follow
Hello folks
Havest Day 53 of flowering ( Life cycle 93 days )
Drying with 59% RH--17/18°C since about 10 Days
it's the start for curing.
Overall everything went well
I learned a lot, and I must be close to 0.7 G / W which is good in my opinion.
6 Plant was way too much with 40 days of growth and my little square meter , next time 4 max!
I would also reduce the doses of fertilizer because Canna remains strong enough
Now it's time to invest and improve some things !!! Soon ™️ 😋
Thanks to all who comment / like either to encourage or give advice
see you soon guys 😘
Peace Love and Weed 000

Likes
13
Share


@NordicClosetGrower
Follow
All quite steady overall. Would really like to have some internal ventilation going on in this cabinet.
No nutrient lock in site so far. Mayme time to start adding a bit more nutrients, the leafs are looking a bit discolored and on the yellow side in some spots.
Likes
6
Share


@Ts1Ko
Follow
I didn't expect it to be this good. It starts as sativa but in approximately 2 hours you realize that so much time has passed and you didn't even realize 😁 Hands up 🙌 Even though I expected bigger buds, but i think because of small pot they were smaller. And if we remember that fact that i was taking some everyday, i got great overall results. I'm proud of it ✌️😁
Likes
3
Share


@jardinprimitivo
Follow
Esta semana se rego con te de compost.
Se acomodo las plantas en la red.
Se aplico Oil 85 de mamboreta como preventivo.
Se realizo defoliacion a hojas grandes que tapen la luz a las de mas abajo.
Esta semana no se aplica ningun fertilizante. El fertilizante que estoy utilizando es peletizado y se aplica cada 21 dias junto con humus de lombriz.
Ya dan ganas de pasar a 12/12, pero lo voy a dejar una semana mas


Likes
6
Share


@Fleetwood
Follow
Wondering how much longer PK1 has before harvest. 80% of her pistils have turned amber.
Exploring mid week shows me I have at least another week...maybe 2

Likes
9
Share

@Sundancers
Follow
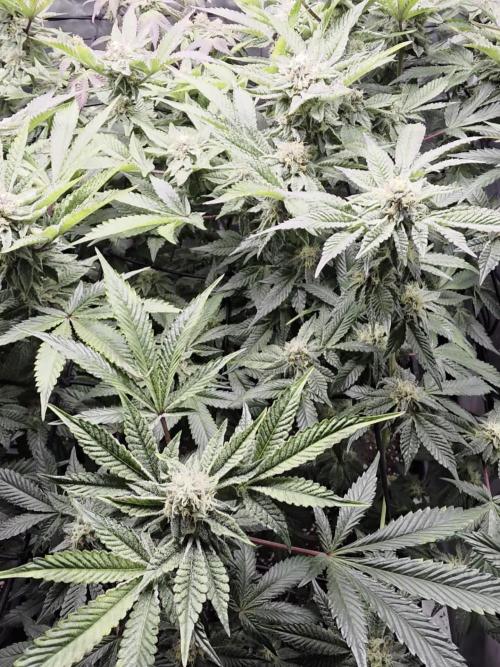
Sky steht jetzt da wie jemand, der gerade einen radikalen Frühjahrsputz hinter sich hat:
weniger Arme, dafür deutlich mehr Ausstrahlung.
Man sieht sofort: Hier mussten Triebe gehen. Viele sogar. Platzmangel, Luftzirkulation, Vernunft, die klassische Grower-Entscheidung zwischen Herz und Schere. Ergebnis: ein deutlich aufgeräumtes Gerüst mit Fokus auf die Top-Triebe, die jetzt alle schön im Licht stehen wie VIPs auf der Gästeliste.
Und die Buds?
Die haben in Woche 4 endgültig beschlossen, keine Theorie mehr zu sein. Die Colas strecken sich nach oben, dicht besetzt mit weißen Stempeln, die mittlerweile nicht mehr „Hallo“ sagen, sondern „Bleib noch ein paar Wochen“. Die Buds sind klar länger geworden, beginnen sich übereinander zu stapeln und wirken jetzt richtig säulenartig. Keine Kugeln mehr, das sind jetzt ernstzunehmende Blütenstände.
Harzproduktion ist sichtbar angezogen: ein feiner, gleichmäßiger Frost legt sich über die Zuckerblätter. Noch kein Zuckerschock, aber eindeutig der Moment, in dem man nach dem Anfassen der Pflanze unauffällig an den Fingern riecht.
Die unteren Bereiche sind deutlich luftiger, man merkt, dass die Energie jetzt konsequent nach oben geht. Genau so, wie man es in Woche 4 sehen will:
weniger Drama unten, mehr Geschäft oben.

Likes
27
Share


@AsNoriu
Follow
Day 79 since seed touched soil. Found some bud rot on other strains yesterday, so made early chop for #2 and #3. Both needed time, #2 needed like 3 more weeks, would be huge ;)))
Day 112 since seed touched soil. last one is done. Ganja Farmer 2024 project is over.
Happy Growing !!!


Processing
Likes
4
Share


@Shoots3845
Follow
Heavy rain all week again due to freak storms, very limited sunlight.
Notice leaf mites and some sort of caterpillars eating away at them
Likes
102
Share


@GirlGoneWeed
Follow
Here we are starting week 5 with this beautiful plant (the big one, I should give her a name...) who went through all her vegetation weeks showing great strength, thriving like a boss and making me so very happy! What a therapeutic experience 😎
On day 32 I decided to introduced a 1000W LED monstrosity light to the grow environment, hoping to give a nice boost on her first week of flower, than a rookie mistake happened...of course. I forgot to raise the lamp further up, that caused a slight burn on the tip of a hand-full of leaves. The good news is:
she is doing just fine as beautiful as ever.
:))
The little girl got another defoliation session and she is recovering well after mainlining last week, but man.... she slow...she very slow. There Is strength on her, I noticed her little branches curving against the mainline ties, she is sassy Im telling you. I am going to insist to see what happens.
Overall the girls are doing just fine, my two other seedlings are coming up sweet'n fast, I should've have planted all 4 at the same time! *FutureNote*
Now a quick question, what is the lifespan of a Chinese 4'' carbon filter from Amazon? Apparently 5 weeks LOL. Here I am now researching carbon filters, quality + price, to make a new order before my place smells like Snoop Dog's soul. #RookieGrowerProblems
Thank you all for following along,
Thank you for the tips and advices,
Stay Lit folks.


