
Likes
Comments
Share


@ReggaeShark_420
Follow
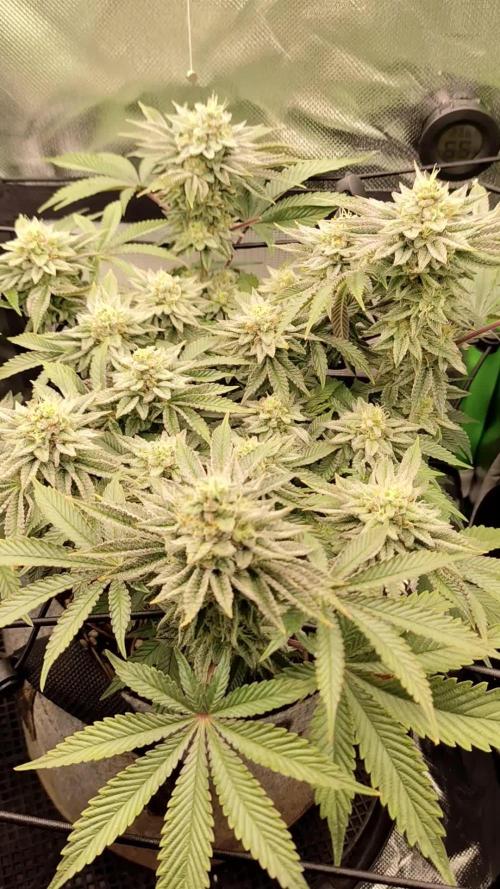
Day 99 for this girl. Finished her fourth flush session today and is real close to harvesting. Will give this girl one more day of light before putting her in the dark. She is super sticky and the tricones is on point.

Likes
2
Share


@Stankmeister
Follow
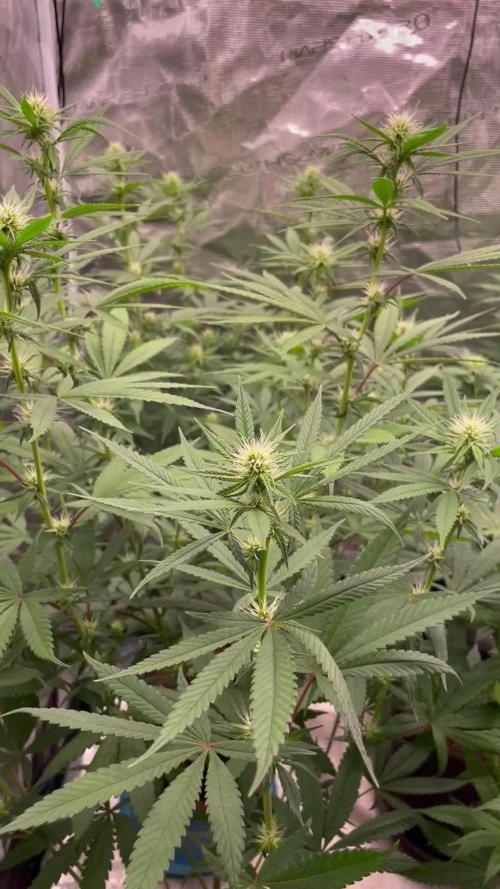
So a whole lot has happened in the last 2 weeks. My main goal has been setting up for season 3 outdoors in my new garden where I will test my theory.
I went a little hard on the plant ferment I made and have been feeding because the Whiskey Zulu and the Girl Crush because have a few spots on some leaves so I guess they might've briefly locked up a little. No problem with the Ogreberry though.
The Whiskey Zulu smells like purp—like GDP, the Ogreberry smells like fruitloops with some funk and a little like Northern Lights. The Girl crush smells like a sweet diesel og—and I've just switched her over to 12/12 not long ago.
For season 3:
I've ordered seeds from DDA who owns Boneyard Seeds Norcal on Dagga.garden please check him out before it's 2 late. Please checkout his fantastic selection of cultivars.
He goes by Mr. Toad on youtube if you have any questions. The man is a fantastic breeder and educator. [With my order of Roberts Creek Congo × Space Cheese seeds he sent 10 free The Ghost of Toadally Haze and 7 of a cbd/cbg strain for breeding called Holy Ogre. In the package was also brown rice ocb papers, a soil inoculent, boveda packs, terploc curing bag, stickers, and arugula seeds.]
I met DDA through a future cannabis project live, he was in he comments spreading killer knowledge and I asked him a few questions about my ideas and he educated me for a long ass time simply because he's all about it. That's a breeder whose genetics I want in my garden, (and then he sent me all the freebies without even knowing me.) The man will have my buisness for as long as he's selling seeds because he values education and fosting the next generation of growers. He gave me some tips about rooting clones and now I've rooted my 1st clone for this next season. I think the temperature wasnt consistent enough before...
I've started 3 Roberts Creek Congo × Space Cheese and they all popped within 14 hours with a 100% success rate. DDA — look him up.


Likes
20
Share


@Stickybudz420
Follow
Okay so it’s finally time to take this girl down this weekend it’s been 86 days from harvest now and she’s smelling lovely an looking frosty, hopefully she taste good to, been flushing her for a little over two weeks just to make sure! Will update after she’s dried an trimmed!! Happy growing peoples 👊 🌳

Likes
49
Share


@LockDownGrow
Follow
Ok just finnished a blunt of this a out an hour ago, and I do not smoke blunts lol
But it seems only right too do a real smoked reveiw ,
So the fbt7 has been dry now for about 2 weeks and in a jar and today was the day too take the first bud too try so I rolled a fat one " fat one in photos lol ,
So for me the flavour just isn't there yet and am hoping that will come after a cure ,
So I smoked this all too my self and qiukly ,
Within a few minutes I went white as a ghost as was twitching the the corner hehehe,
This is very strong bud and I would go as far as saying it's probably the strongest bud I've had in years ,
I am what I would describe as a joker smoker , as I turn my bud into oils and do not smoke it ,
But any serious cannabis smoker will absolutely love this strain ,
Well done fast buds and thank you :)

Likes
14
Share


@Rory420
Follow
Not a lot to report this week. The buds are growing well and the plants look healthy. They look bigger and better than my other 8 ball kush grows. I’m looking forward to the results.

Likes
55
Share


@Reyden
Follow
Devo dire che le due Gorilla RQS sono contente e stanno bene nei loro nuovi vasi da 11 L ed in confronto a settimana scorsa sembrano più sane e in forma, purtroppo sono stato quasi una settimana senza misuratore PH perché mi dava problemi e quindi per una volta non ero effettivamente sicuro quanto era bilanciata la soluzione ma penso di non aver fatto danni…andiamo avanti, ieri ho sciacquato solo con acqua a PH 5.9/6 e ora aspetto che asciuga bene questa volta salgo con EC e arrivo intorno a 1250…vediamo come reagiscono 🧐😶🌫️
Likes
22
Share


@CrazyFlowers07
Follow
Hola a todos aqui estamos en la tercera semana y este finde empiezo ya el low strees training !! Vamos a ver como cambia estructura la planta


Likes
19
Share


@mi_auto_grower
Follow
I sat this one out side just to blow up with sun light for the last two-three weeks that it has left
Likes
11
Share


@Suchy329
Follow
Leuft alles super ich bin sehr zufrieden
Ich hoffe das die nächste Woche genau so gut wird


Processing
Likes
1
Share


@Teddy01500
Follow
Bonjour à tous, ces derniers jours ce sont bien passé pour mes petit bébés elles grandissent doucement mais sûrement.C’est la première fois que je travail avec cette gamme de produits (je vous est mis des photos des produits 😉) pour l’instant j’en suis satisfait après, il faut voir le résultat final ce qui est moins facile 😂. Mes petit bébés commence leurs 5ème semaine (je me suis trompé d’une semaine 😕 désolé 😉) trop pressé!!! 😂 de mettre de nouvelles photos 😜. Je vous dis à là semaine prochaine vivement 😉 bonne journée à tous. Je vous remercie 😉.


Likes
4
Share

@blablamesh
Follow
The buds start getting thicker and thicker. Currently I feed the plant with 1.5 EC. This trichomes are mostly clear and starting to get cloudy. Here and there are some amber one's, but they look tiny and old, not sure what happend there. As of now I am planning to give the nutrient solution for at least a couple of days, but I also want to make sure there is one week where I can only give water to maybe get some more colours out of the plant (I really hoped for it to be purple?).

Likes
12
Share


@Marijuanaisland
Follow
As cores Red da Red hot cookies já começaram
Depois da troca de foto período elas esticaram bastante diferente de outras genéticas que tenho aqui belo desenvolvimento...

Likes
12
Share


@rickhaZe
Follow
debido a quemaduras que encontre en las plantas el dia 14/06, dia 29 desde germinacion, debi regar con cal max, ya que creo que hay falta de calcio - magnesio. aplique 1.2 ml por litro de agua.
no creo que sea exceso de ferti ya que todos riegos se han preparado con la dosis minima que indica.
se sigue regando con 0.4 L cada 48hrs
una tecnica que he hecho es ir acomodando o doblando las hojas hacia abajo dando prioridad a los bracitos de cada planta.
Dia 30: riego de agua 600 ml de agua
Dia 32: todas las plantas en floracion
Aplicamos solo tek groow ya que las manchas en las plantas se debian a falta de azúfre lo concluimos con un grupo de amigos todos growers y un agrónomo.
Por que queremos continuar con la tabla de grotek nutrients y el domingo dia 34 aplicar blossom blaster
Processing
Likes
43
Share


@Jack_Greenstalk
Follow
started flush on nemo on left, probably getting chopped in next week to 10 days, V still has a few more weeks to finish, after harvesting tops of nemo, I'll reweave V all around the tent to get more airflow, better light usage, and allow them to fill in and finish up. watching trichomes on Nemo, feed is just RO water with 20 ml of finish all the way til shes ready to get cut down. going to add a few ice cubes to outter edges of pot to slow trickle and cool the feed to bring out some blue, purple and silvers in fade

Likes
1
Share


Likes
11
Share

@sunshinegroww
Follow
Welcome week 4 she had clean up so more airflow and bigger top flowers she looks happy and in a good shape lets goooo

Likes
20
Share


@ArtisticGrown
Follow
This week has been great, ive been struggling with learning how to water the living soil, only using 0.5% of the 5 gallons pot so a little under a liter. But i cant tell of i need to give her more emmm! Used the organic bloom booster they seemed to like that! Taking things slow learning as we goo im super excited about this strain even tho shes been hard for me!
I got these little 6 inch stands to put under the pots so they are not getting cold on concrete and the soil stays warm! Soil is about 70 degrees and about 6.30 ph