


Processing
Likes
9
Share


@Tokologo
Follow
Day 78 plants are now going to grow outdoor.
Clones coming along nicely.
This week I'm giving the mothers a chance to get used to outdoor grow.
Day 84, mother enjoying the sun, got 91 clones from the first 3 batches.


Likes
13
Share


@TheMightyHermit
Follow
Honey Cream is starting to smell wonderfully, a Sweet almost candy/bubblegum smell, incredible !

Likes
245
Share


@Roberts
Follow
What can I say THC Bomb looks like it is gonna try to become a monster. It is really loving the Spiderfarmer SF-1000 light. I believe it is flowering slower, due to the persistent stretching still. Which is a good thing. I increase more blooming nutrition, and am lowering nitrogen levels. I also added a top layer of dynomyco for additional fungal action for flowering. Dunno if it will make a difference. Curious to see how big it is gonna grow. Hopefully huge🤞. Thanks again bomb seeds🔥💣💥🤯
Thank you grow diaries community for the support. The likes, and follows are greatly appreciated. Showing your support for fellow growers 🌱👍. Also would like to invite you to my YouTube channel for more cannabis related videos. Remember to smash that subscribe button. 😀 Happy growing everyone, and be safe out there.🌱🤜🤛

Likes
20
Share


@apmcfly76
Follow
She’s a big one cannot wait to see what she put out. she got unhappy and lost most of the fan leaf but she still going.

Likes
4
Share


@WeedbayGarden
Follow
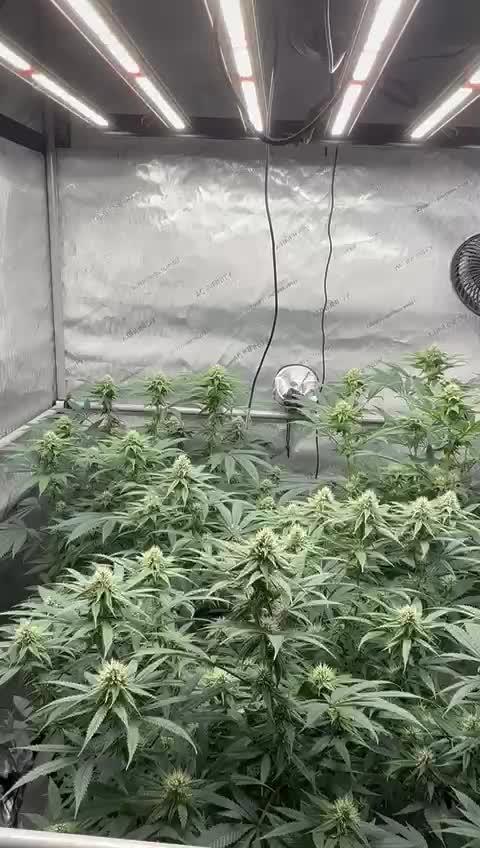
31.3 F50
2L of water for each plant. Last two weeks of flowering starting, happy happy :)
3.4 F53
1L of water for each plant, seems like the plants are starting to drink less and less. Which is totally okay by me, no need for water every 2 days. Other than that I lowered lights like 5cm since there isn't that much flowering time left, might as well "blast" em with the whole 70 watts lol.
5.4 F55
Lots of small creepy crawlers in the pots. Took a video of predator mite strolling around the fabric pot!


Likes
38
Share


@Oyziphar
Follow
DAY63 WEEK9 = Impatiently waiting till harvest time 😘 Beautiful to enjoy the plants ripening and finishing 😍😍😍
Congrats to BIOTABS, because their tablest are really superb 🙏 I'm super satisfied 😁😁😁
Wedding Gelato, Triple G, and Cookies Gelato are completely ripe.👍😃 All their buds are rockhard 💪😖
👉 Cookies Gelato have become completely purple with beautiful piled buds and orange pistils, and looks delicious. Smells of berries and 😵
👉 Wedding Gelato has round buds (easy to trim) with mixed colors : gold, brass, brown, yellow, red and green colors with orange pistils 😊 Fine and accessible smell, pleasant and no overbearing 😄 🙏
👉 Triple G will be the hardest to trim, because of her quirky shaped buds. She has big internodes and big buds scattered across her tall sturdy stalks. Beautiful buds, a pleasure for the eyes. Her smell is pungent, sometimes narcotic even. She will get you stoned in no time 😋
👉 Liberty Haze could have another week. But she lacks some nitrogen; watch her leaves turn yellow, and make her taste sooo soft 👻 She hasn't any purple or red colors, only green and yellow. Her buds are leafy, not that firm, but volumineus. She's soo sweet, with hints of lime. 😘
I defoliated the plants in week 3 because I had to treat the plants against spider mites. Because of this, the plants had fewer leaves, the light could penetrate much deeper and now the lower buds are ripen as well 🙏. I will continue to apply this technique in the future. 👍👍👍
These will be the last pictures before harvesting 😍

Likes
26
Share


@Growin_it
Follow
Asal got a trim to open up the air flow and a LST to spread the canopy a little more. Thinking I am done with the lateral spread at this point.
Benesh got the same treatment.
Asman has been taking the hits when I have overdone the LSTing. Thank goodness for masking tape and time to repair!

Likes
4
Share


@frenchylovegrow
Follow
✋Ding Dong le Cut a sonné pour les belles demoiselles la semaine dernière après une belle floraison
J'adore son feuillage qui à fait une belle sénescence et surtout c'est feuilles légèrement violet 😍 Remplit de trichomes 😍
Partis pour une petite semaine minimum de séchages et en bocaux 😎
Je vous dis à bientôt pour le résultat final 😉

Likes
5
Share


@Jays_Not_Here_Man
Follow
Easy week, girls have been doing pretty good. The cronk nutrients are a bit of a learning curve. Very potent stuff, I have been working my way up and am still at 1/2 recommended dose. Noticed some yellowing starting on the bottom leaves, have started to increase nutrient dose, hopefully no burn.
VPD has been good, they are just chugging along. Happy Gardening 🇨🇦❤️🌱😎💨

Likes
4
Share


@CelticSmokey88
Follow
What you guys thinking of these going start feeding them bio grow what else could I get

Likes
7
Share


@LeakyTitsBukkake
Follow
Use just solids of milk for the best plant, no contest only win.
Made it fresh, can't do no evil.
Plant soil fingers are thick and love milks, Strong plants bones and teeth.
Thank you much champion


Likes
Comments
Share


@BeggarsBelief
Follow
So everything took off in flower, I was super harsh with the defoliating which initially I regretted, but was surprised with how they packed out during the following weeks. In general it's impressive how hardy these plants are. Even the outdoor grows yielded some quality. Add some more nuets (overdrive and carbo load), before flushing about 14 days before harvest, next time I'll do this earlier and really the Runtz could have gone another week but my drying needs to happen in the same space as my growing for now. Apologies for the quality of image, I'm just using my phone and some bits I have to document, I collect records too, so expect weird noises lol. Build a rotating plat from a lazt susan I found, has been the best piece of kit added this season.


Processing
Likes
5
Share


topped August 28th 2018
Likes
9
Share


@Mr_nugs_lover_David
Follow
She looks super healthy and gorgeous,she's just starting to flower,so let's see how she reacts to the lst and lollipoping I applied on her,can't wait to see this amazing strain in full flower 😍💚👀


Likes
3
Share


@BigDirt
Follow
Entering week 3, Co2 was implemented and the plants love it. Will be spraying for pests this week.

Likes
7
Share

@Gardens_of_Of
Follow
They completed 4th week of flowering. They keep on growing new bud sides.
Humidity is still fluctuating between 52-55%. Temp is decreased to 23 Celsius in average which beings the VPD to 1,4.
Processing
Likes
31
Share


@Reaper
Follow
week 6 of the flowering period.
the buds become heavy i supported the plant with rope after i took the pics
looks like this crop will be ready in 2 weeks. straight tap water with bloom booster is all i give now.