


Likes
6
Share


@GrapevineGrower2
Follow
Straightforward with nothing to report out of the ordinary. I top watered on day 56 then let them dry back prior to harvest (day 61). Nice mix of milky and amber trichomes. Harvested early morning prior to lights on.
Processing
Likes
25
Share


@EelGrows
Follow
Week 6 Summary: First off, Happy New Year!! Ciao 2018, may 2019 be filled with peace, love, joy and dank buds 😄😉
Day 36-39: Started off nice well this week, considering the amount of defoliation I did on day 35. Some more stretching going on here but not too much, except 4AM3 has a central shoot I couldn't find a spot to LST that just started to shoot right up lol. Starting to show some nice frost on Day 36 too. 4AM2 is already starting to plump up a bit, don't think will get much more stretch on that one, seems like it will probably harvest the least. I might have overdone the defoliation on it on Day 35 lol. 4AM2 is the one I decided to top for the hell of it anyway because it had a really wierd growth mutation. Still, with less main tops to produce it might be the best bud of them all 😅
Day 37-42: Day 37 is when I started seeing a deficiency I thought might have been magnesium on 4AM1. Pictures to show up top. Since their next feeding wasn't scheduled until day 42 I waited. Day 38 and it had spread a little on the same plant, and typical calmag deficiencies started slowly showing up on a few other plants(really tiny amounts). I posted on reddit and pretty much confirmed my suspiscion of a calmag deficiency. Since I am watering twice a week, once with calmag ph'd to 6.8-6,9 and once with blume nutes ph'd at 6.3-6,5. The calmag feeding was done on day 42( as scheduled at full strength this time so hopefully the problem will go away. 4AM2 hasn't been watered yet, pot didn't feel completely light yet(plus she had the most runoff last feed), will get her dose tomorrow.
P.S. Really starting to smell like sweet berries! Mmm.. 😍
On to week 7!

Likes
12
Share

@valiotoro
Follow
Sweet cherry notes layered over a fizzy cola twist create a flavor profile as smooth as Sade’s voice.

Likes
2
Share


@payz420
Follow
13-02
seeds in wet papertowel and in ziplockbag
15-02
4 out 4 germ. placed in 1 inch hole in prewatered soil
17-02
4 seedlings, looking good
19-02
a little stretchy, measured ppfd and adjusted lamp to 30 cm above plant and dimmer set to 50% from 25%
20-02
water, 100ml pr plant
21-02
nice looking leaves.
22-02
water, 100ml pr plant

Likes
6
Share


@Brookillinit
Follow
I started the week super cropping. Each of these babies is looking great now.


Likes
21
Share


@Big0zGrower420
Follow
The plants are doing great so far and seem to be enjoying everything. The smaller CBD plant has caught up and the colorado cookies continues to be the largest so far.

Likes
2
Share

@Borberad
Follow
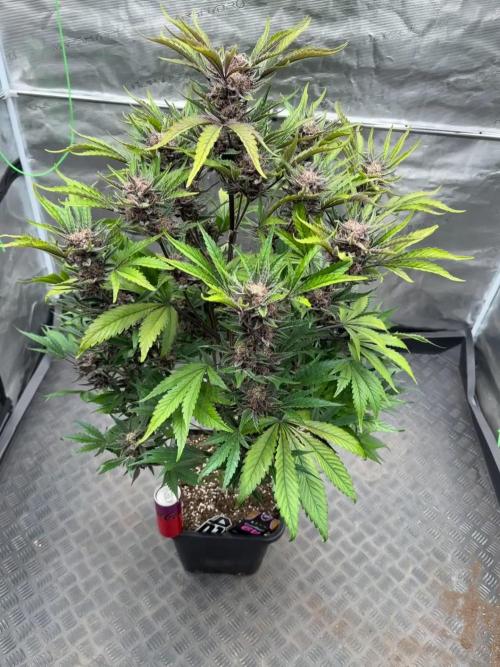
Das Blümchen gibt Vollgas! Die Blütenstände werden immer dicker und duften schon extrem betörend fruchtig. Der Duft sorgt mal wieder für Uneinigkeit. Melonendüfte oder doch Rhabarber? 🤣
Insgesamt sorgt die Pflanze bisher für Begeisterung. Die Buds sind für diese Phase schon extrem weit entwickelt obwohl gerade mal die Hälfte der angegebenen Blütezeit verstrichen ist. Wo das noch hinführt bleibt abzuwarten. Entweder sehen wir nach dem angegebenen 56 bis 63 Tagen keine Blätter mehr unter den Trichomen
Likes
18
Share


@NMGDOC
Follow
I was flushing all the plants since August 9.
You can see in the videos with de microscope ( I really try my best, but it was pretty difficult) the trichomes looks cloudy and some of them looks amber. Maybe in the videos you can't see it because my hand was really shaky.
August 17: all the plants were in dark.
August 18: i cleaned all the plants, buds, leafs, everything..., spraying water to remove the rests of potasic soap.
Today august 18, during the nigth, i'm going to harvest all the ladies.
In the past 3 days i didn't watering the plants and the smell was stronger.
August 19:
Before dry
-Critical Kush: 150g
-Red dwarf: 60g
-Syrup (2 plants): 270g
-Lemon (4 plants): 570g


Likes
46
Share


@Rollex420
Follow
Day 18
Transplanted today the plants into their 11L pots.😊
While instead i will let the Lemon Tree grow for another 4/5 days in the same pot because she only got 13 days, so I prefer to have it strengthened a little before the transplant.
Day 24
Mimosa, Meringue, and Kmintz were Topped, Defoliated and also applied a light LST to the main stems of the plants.
I will do the same for the Lemon Tree in the next 2/3 days..
I hope they have a quick recovery 🤞🏻
Day 27
LST also performed on the side branches of all plants except the Kmintz which is too small to bend its branches.
Also Today we got 21 days for the Lemon Tree which has a great shape! Carried out topping, LST and a little defoliation.. 🙌🏻
In the next few days I will let them grow them without further stress.
Have a great weekend gromies!! ☮️💚
Likes
11
Share


@blasterw32
Follow
Two watering and 1 feeding this week. They received their last dose of Flora Micro (3ml/ gal) and higher doses of Bloom (10ml/gal)
I've also defoliated them for the last time
-------------
CBD will be ready for harvest sooner, probably ~5 days. Thus, she'll receive only water this week
Moby Dick still 10~14 days, so she'll receive more heavy nuts this week
Gorilla Glue needs 7-10 days, so she'll also receive more heavy nuts.
It'll be difficult to harvest them in different batches due to space constrains, so I'll probably chop them next week (in 6 days)


Likes
25
Share


@TheeLemon
Follow
Everythings gone nicely this week. Had a big burst of growth, had to raise the lights higher than what would normally be their maximum!
Probably do a little defoliation over the next week.
Likes
14
Share


@Aircoholic
Follow
The end came surprisingly fast in the end - I had to move quick. I had to improvise a drying solution, since I only have a small grow room and not much space, since Fat Monkey Auto still takes some time to mature. A little grow chamber made of foam board, with a PC fan added for some air flow.
Can't wait to trim her and let her cure before entering the next phase.
Likes
25
Share


@herewegrow
Follow
Ordered a scale the other day so should have some more numbers tomorrow! Not going to sample anything until I get the scale, then I'll update with some more details.
Processing
Likes
2
Share


@K8T80
Follow
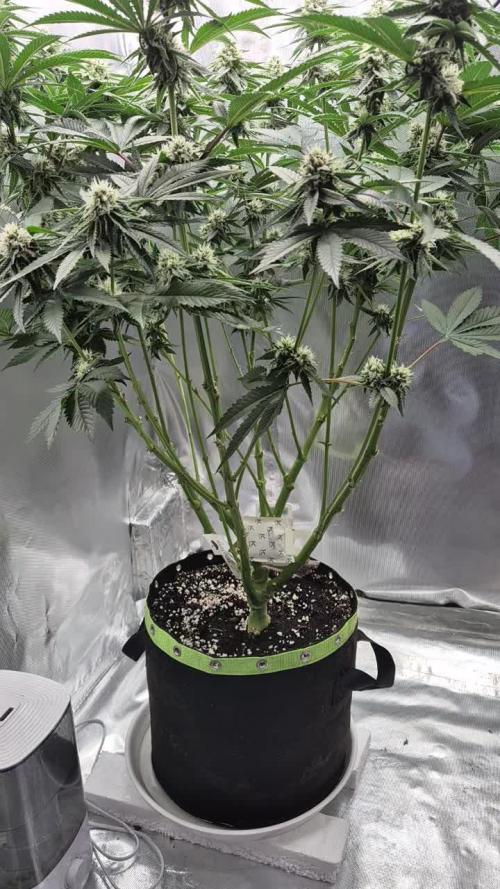
Giving her banana peel tea everyday 100mls with a 200ml of water. Hairs are turning orange and now just waiting for them to fatten up.

Likes
7
Share


@BigUncGotGaz
Follow
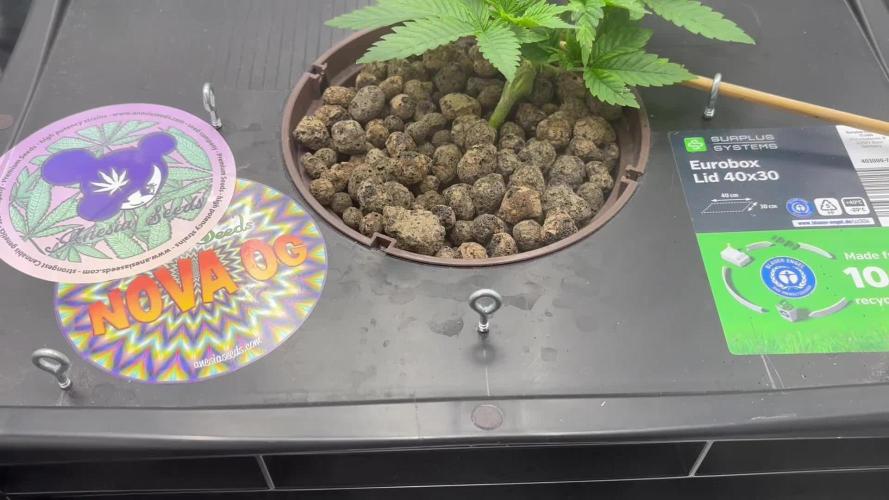
On Day 61 from seed my 5Gal feed went empty (Day 5 in flower) so I repeated the same exact feed without the CANNAZYM & activated the autopot system on day 62. By Day 64FS aka Day 8 in flower my reservoir went empty again so I repeated the exact previous feeding without Cannazym and activate the system the next day (Day9F)

Likes
13
Share


@420DeepGrow
Follow
Gracias al equipo de Royal Queen Seeds, en especial a @james, Marshydro y XpertNutrients y sin ellos esto no seria posible.
💐🍁 Gelato #44:
Los criadores de Tyson 2.0 criaron Gelato 44 a partir de cepas finas. Al cruzar la Sunset Sherbet y la Thin Mint Girl Scout Cookies, crearon un híbrido de dominancia índica que asesta fuertes golpes en el cuerpo y la cabeza.
Su contenido de THC del 22% crea sinergia con terpenos colocantes para ablandar los músculos
Mantenla hidratada y con una dieta constante y pasará por la fase de floración en unas ocho semanas. Las plantas de interior alcanzan una altura máxima de 120 cm y producen 400-450 g/m², mientras que sus homólogas de exterior alcanzan los 180 cm y producen hasta 600 g por planta.
🚀 Consigue aqui tus semillas:
https://www.royalqueenseeds.es/rqs-semillas-cannabis-tyson/663-gelato-44.html
💡FC6500: Eficiencia líder en el mercado: la lámpara de cultivo LED FC-E6500, que ostenta un estatus líder en el mercado, es una solución rentable con un PPE de 2,8 µmol/J y un rendimiento máximo de 2,5 g/vatio. Ofrece un PPF alto de 2026 umol/S y es adecuada para una cobertura de vegetación de 1,50 m x 1,50 m y una cobertura de flores de 1,20 m x 1,20 m.
Iluminación versátil y uniforme.
https://marshydro.eu/products/mars-hydro-fc-e-6500-730w-commercial-led-grow-light/?gad_source=1&gclid=Cj0KCQjw1qO0BhDwARIsANfnkv9IIrYSbmJqz8PqpJOIyWwJfp5bc3SGJgUV68USLQ4tjmXDYwoBuAsaAue3EALw_wcB
🚥 MarsHydro ADLITE UV/IR/RED:
Para lograr un crecimiento óptimo de las plantas y maximizar los rendimientos es un arte simple que depende en gran medida de las condiciones ambientales adecuadas. Reconociendo las limitaciones de la iluminación natural y las soluciones de iluminación tradicionales para satisfacer estas necesidades únicas, lanzamos ADLITE. Estas luces especiales UV, IR y roja están diseñadas para llenar áreas del espectro, proporcionando las altas longitudes de onda que las plantas necesitan para un crecimiento y desarrollo óptimos.
🚀 Consigue aqui tu Adlite:
https://marshydro.eu/collections/adlite-supplemental-lights/
🏠 : Marshydro 1.50 x 1.50 x 1.80, carpa 100% estanca con ventanas laterales para llegar a todos los lugares durante el grow
https://marshydro.eu/products/diy-150x150x200cm-grow-tent-kit
🌬️💨 Marshydro 6inch + filtro carbon para evitar olores indeseables.
https://marshydro.eu/products/ifresh-smart-6inch-filter-kits/
🍣🍦🌴 Xpert Nutrients es una empresa especializada en la producción y comercialización de fertilizantes líquidos y tierras, que garantizan excelentes cosechas y un crecimiento activo para sus plantas durante todas las fases de cultivo.
Consigue aqui tus Nutrientes:
https://xpertnutrients.com/es/shop/
📆 Semana 7:
Equivale a la semana 3, ya que el con el error que tuve en el cambio ellas no florecian.
Los cogollos comienzan a formarse y por fin se detiene su crecimiento. La resina empieza a estar presente en la hojas.