


Likes
Comments
Share


@LedDave
Follow
Hi guys. Here is week 2 update, baklava seem to he really going for it 😍 hoping for big dense buds from this girl. On the other side the crystal runtz has still been quite sensitive to nutes and water Aswel as an ongoing problem I've had since day one with her leaves.


Likes
5
Share


@GirlGoneWeed
Follow
Clones got transplanted into 1gal Rapid Stack pots, this will facilitate the next transplant into the live soil grow bed with no stress. Quick and easy transplanting with no root shock or damage to the plant.
Plants still drinking rain water, top dressed with Bokashi Pro-Gro, the soil is recycled and organic :)
Check my Instagram for more grow content @GirlGoneWeed

Likes
31
Share


@The_Bearded_Grower
Follow
Welcome to 📅 Day 22 of veg 4/5/2021 and boy am I happy with the growth on the girl under the MH TS1000 she is growing fast and strong and that's just what I want to see later today I will be mixing a new batch of nutes but that's about it
Update 📅 Day 25 of veg 4/8/2021 she is still growing very fast under the TS 1000. I have done some more LST as she grows. I have noticed some problems in the leaves but it is very little and I hope it will not get worse only time will tell. Happy growing and keep your stick on the ice 🏒


Likes
5
Share


@CannaBossBizz
Follow
The Fastberry ist doing ok at the Moment. Doesn't really flower i think. She's Not fattin up at the Moment. Maybe too much Stress. We'll See. Stay tuned 🤙🏽

Likes
8
Share


@Growing_Skills
Follow
Chinazes)we are flying high in height. We don’t pour fertilizer and only drink water. communication to everyone. Work for yourself!
Likes
24
Share


@Jays_Not_Here_Man
Follow
The girls have survived another week ❤️ I did a light defoliation and have been monitoring the RH closely. We have had a very damp week here, and the RH kept climbing and had my fan working hard.
They are starting to plump up and fill in 😋. They have also started to slow their drinking habits, instead of watering every three days, it has moved to every 4 now. Just a couple of weeks left, I think I will be harvesting these over Christmas 🎄, and will have some great bud ready for the new year! 🎉🎊🍾

Likes
8
Share


@NikoMew
Follow
Decent grow. A lil disappointed that I fucked the left most plant. It didn’t go completely to waste, gave it to a friend who wants to make hash from it. The other buds were quite nice though. Like I said, decent for the price.

Likes
1
Share

@BunnyBud
Follow
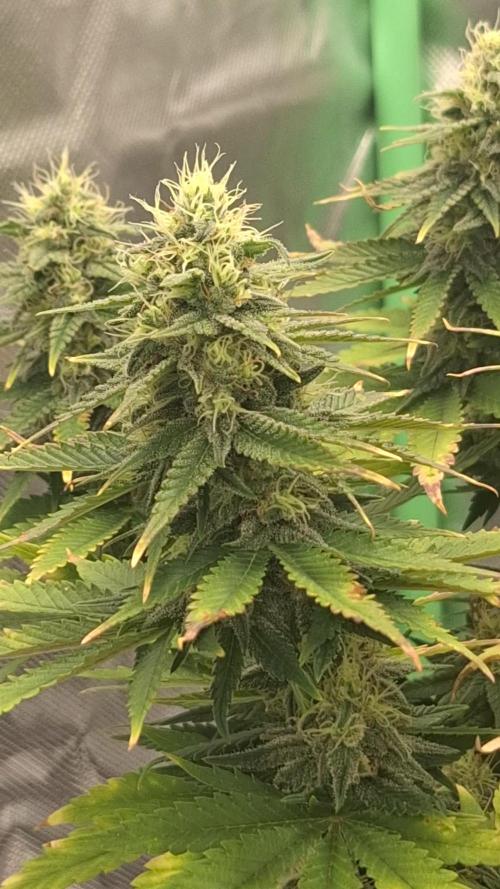
I noticed that the drainage EC exceeded 2.6. I'll have to correct that. 🙊
Likes
2
Share


@High_Grade_Dadli
Follow
Girls are doing well they are due a cut which will be sometime soon.. G4 is massive the main colar is eye level to me and about 5 nodes down from that are over my

Likes
45
Share


@MadeInGermany
Follow
Info:
Unfortunately, I had to find out that my account is used for fake pages in social media.
I am only active here on growdiaries.
I am not on facebook instagram twitter etc All accounts except this one are fake.
Flowering day 11
since time change
to 12/12.
Hi everyone 😀.
It has a very nice stretch and is developing really well :-).
Yesterday I got her GHSC Powder Feeding Bio Bloom for the first time given (2 g GHSC to 1 l coco).
In 14 - 20 days she will get another 1 g per l coco.
It was poured twice this week with 1.2 l each.
Otherwise the tent was cleaned and everything was refilled.
Have fun and stay healthy 🙏🏻
You can buy this Strain and Nutrients at :
https://greenhouseseeds.nl/
☝️🏼☝️🏼☝️🏼☝️🏼☝️🏼☝️🏼☝️🏼☝️🏼☝️🏼☝️🏼☝️🏼☝️🏼
Green House Seeds Company Cup Clone 🏆
Type:
Wonder Pie
☝️🏼
Genetics:
Wedding Cake x OG Kush
👍😍
Vega lamp: 2 x Todogrow Led
Quantum Board 100 W
💡
Flower Lamp : 2 x Todogrow Led
Cxb 3590 COB 3500 K 205 W
💡💡☝️🏼
Earth: Canna Coco
☝️🏼
Fertilizer: Bio Grow Feeding ( GHSC ) , Enhancer ( GHSC ) , Bio Bloom ( GHSC)
☝️🏼🌱
Water: Osmosis water mixed with normal water (24 hours stale that the chlorine evaporates) to 0.2 EC. Add Cal / Mag to 0.4 Ec Ph with Organic Ph - to 5.8

Likes
33
Share


@GrowmieDeLaStreet
Follow
I got the 3 starting seeds from an exchange with a redditor who accidentally pollinated his batch with a male, meaning I didn't start with the best genetic which in the end, probably induced the hermie. It turned out good overall but it did fuck up a lot of things.
I never thought 4 weeks of veg would be too much. They got tall in no time and almost tripled in height during the flowering stretch. Light burn had a significant impact on the trichome production of certain buds.
The mold is on me. I should have controlled the conditions better. I had to throw away 10-15g because of it. And really nothing guarantees I removed it all.
Plant B produced, in the books, a lot less than her sisters and that can be explained by 3 factors:
-Mold attacked it more than the others;
-I probably switched 1 or maybe 5 (who knows...) whole branches when they fell from the rope during the drying;
-I left a lot of tiny popcorn buds that got separated in the ''to be extracted'' jar.
The 3 plants were pretty similar in looks but gave rather different seeds.
A, the hermie, gave a lot of seeds in general but almost half of them were immature or wonky and got discarded;
B, a female, gave a lot of good ones but also quite a few bad ones. The have nice stripes giving them a tiger look;
C, another female, still hasn't been plucked of all it's seeds but the ones I already collected are really big, round and mat.
Plant A pollinated itself. Plant B got helped by me but C didn't received help from me nor the wind and still got hit, a lot less, but still. I'll never underestimate the propagation power of pollen again.
FINAL HARVEST:
PLANT A:
- 91g
- 281 viable seeds
PLANT B:
- 28g
- 297 viable seeds
PLANT C:
- 89g
- 149 viable seeds
167 mixed seeds from ABC
EXTRACT MATERIAL:
- 9g
TOTAL:
217g / 894 seeds
Height by weeks:
1 - 7 cm
2 - 20 cm
3 - 32 cm
4 - 49 cm
Switch
5 - 81 cm
6 - 107 cm
7 - 120 cm
8 - 124 cm
9 - 125 cm
10 - 126 cm
11 - 126 cm
12 - 128 cm
13 - 128 cm
Nice experience overall. A lot of thing could have gone better but the fact is I got a bunch of seeds for future pheno hunting and God knows I'll need to do some to straighten the genetic. See you all then!
Likes
42
Share


@cheetah844
Follow
Jack's one of the tallest plants out of all of them right now.
I topped and defoliated every plant. I'm trying to form them into canna-bushes. Hopefully I'm doing the correct training procedures to make them all grow that way both indoors and out.

Likes
15
Share


@Waveform
Follow
Waiting for first signs of life …
While we are, I thought I’d give you a short explanation on the software’s graphics in case you did not follow my first diary.
The one to the upper left, as its headline says, is the temperature graph. Most important line is the red one, showing the leaf temperature measured with an infrared temperature sensor. As there are no leaves yet, it is pointed towards one of the pot’s wall at soil level. Air temperature from a sensor that usually hangs around somewhere around top level is violet, and the grey line is the outside temperature close to the tent, helping the software to determine if a main blower action will effectively lower temperature.
As I learned from the first grow a plant day that corresponds to the natural day can cause enormous gaps both to temperature and humidity, I inverted the plant day now, starting their night at 11 a.m. So after the first day temperature will only vary around 1.5 °C, which is of course due to the low light intensity too.
Humidity graph on the upper right is quite crowded. Main line is the blue one, tent air humidity, which on this first day was between excellent 65 – 70% most of the time. For the moment humidifier is electrically disabled. There is quite some excess humidity on the tent floor and no reason to push this any further. Outside air humidity is grey again and taken from the same outside sensor that reports outside temperature.
The soil humidity sensors are simple analogue capacitive sensors which have their flaws. I am interpolating their measurements to have a somewhat smoother reading, but as you can see from the turquoise humidifier reservoir reading (in legend named as plant soil hum 1), they can get confused when humidity is very high and start to report random numbers for some time.
The most important graph for all growing stages is the lower left one, where the pink line meaning plant VPD should be inside the green optimum range for somewhat perfect conditions. This cannot be attained all of the time – dehumidifying isn’t as easy as humidifying –, but software tries its best to do so. Outside VPD is grey again.
The last graph is more for amusement than anything else. The light intensity sensor is hard to position correctly, and everything you see about illumination and DLI (orange and green, plus grey for the accumulated 24 h DLI) should be taken with some spoonful of salt. Any resemblance to real world professional instrument readings can be considered purely coincidental.
The violet line is the CO2 reading from such a sensor, and you can see that its tiny peaks correspond to even tinier black peaks at the bottom of the graph, reading TVOC values which in this case, once they will be more than possible measurement irregularities, can be interpreted as smell.
-------
End of week 1:
All seeds germinated. I wasn’t at home most of the time, and it turned out using the humidity sensor to monitor the humidifier’s tank wasn’t good for the stability of the system. Arduino crashed, so there are no pictures yet and no graphs to show. I have the feeling light was a bit low as the seedlings grew a bit tall, but with lights now up to 20% I guess this problem is fixed.
More tomorrow when I have some more data to share.
Even more end of week 1 (I extended this week to 9 days as I cannot tell when the seedlings started to show):
Lights are at 40%, meaning 40 W in total. No reason to give them new water until next week. As some flies showed up from the BioBizz soil, I added 2 yellow cards. So far, everything in normal ranges. I’ll switch the control to grow phase soon which will raise the VPD slightly by 0.5 kPa.
It’s interesting to see the CO2 level started to climb by 50% during their last night and has not come down to baseline afterwards. I restarted the app to check if the sensor had lost its calibration, but it still sits at around 660 ppm now.

Processing
Likes
58
Share


@Dahoola
Follow
-----------------------
Update start week 4:
-----------------------
We entered the first week of bloom for MBAP. Have had a perfect run-up and you notice that. She is ready to bloom abundantly. Besides the usual leaftucking, I also did some defoliation of the lower leaves and shoots. I have reduced the humidity in the room and we are now around 60%. New update later this week!
--------------
End week 4 :
--------------
End of the first week of flowering behind us. Everything is going well, good growth and budsites continue to develop. I further removed the lower shoots and did some leaftucking where necessary. She has developed into a beautiful, large and open plant. Ideal for her future bud development. On to the 2nd week of flowering. Until next week everyone!


Likes
20
Share


@MrPott
Follow
Switched to 18 hours light schedule now and she seems to be loving it so far. The lemon balms are keeping the soil nice and moist.
Likes
3
Share

@High_Grade_Dadli
Follow
Girls are coming on good cant complain still need to do some trimming

Likes
36
Share


@pifflestikkz
Follow
Day 121
31/08/24 Saturday
Feed today using de-chlorinated tap water pH 6 with Plagron products.
She is now settled, and now flipped. Like I said she has full roam now.
Video update, I'll get better pictures and videos when light is off ✌️💚
Day 123
02/09/24 Monday
De-chlorinated tap water pH 6 today with calmag.
Day 124
03/09/24 Tuesday
Feed again today using de-chlorinated tap water pH 6 with calmag.
Her pre flowering is in full now.
Day 126
05/09/24 Thursday
(End of week)
De-chlorinated tap water pH 6 only today full 5L no run off now. Will up to 6L next week.