


Likes
Comments
Share


@King_Green21
Follow
Day 83 - end of week 4 flowering and everything thing going good , super easy to grow so far with no problems. They have started giving of a really sweet smell can’t wait to taste 👅

Likes
2
Share
@Glasshousefarmer
Follow
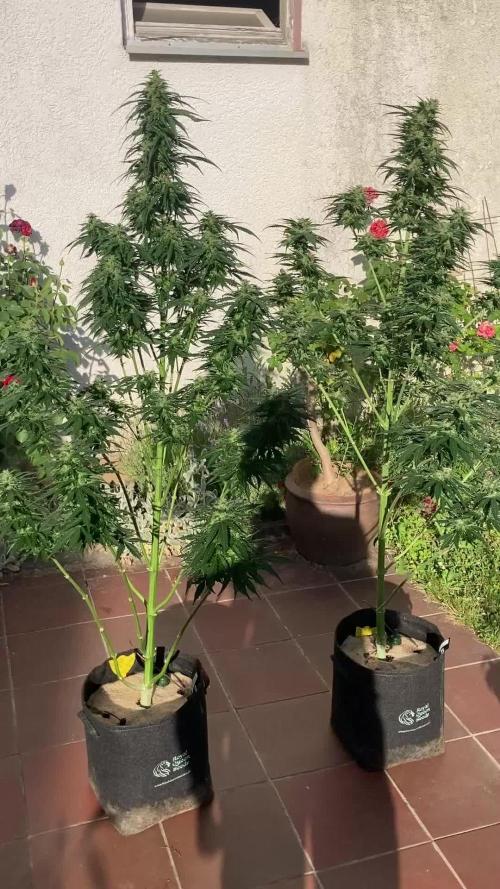
Harvest in week 11. One plant dried in a curefridge and the other one in a room for 10 days with just a little wet triming. After that the fully trimed buds cured for 10 days in jars with vivid fresh cure packs. The buds are nice and frosty with a great fruity smell. Good yield for my first try. THC is 16% and 13% with low CBD, but the effect can be very intense. I am very happy with my harvest.

Likes
69
Share


@Qutro
Follow
Hi there,
Here we go with the 4th week of veg.
As soon as they woke up from the stress of the transplant, they were given another dose of training session . We topped them on the first day of the week. Not yet, but two days later we removed 4-4 large fan leaves each and it became clear how much the lower branches of Marshmallow OG didn’t develop in the shade. I already had the feeling that this variety was not genetically stable. These shots looked quite mutant. They seem to adapt more slowly to the hard plant trainings I use most of the time. On this day we also bent the branches with a tent hook to allow better light penetration to the lower parts.👨🏻🌾🌱
They show quite strong indica characteristics at this early stage of the vegetation which is also clearly visible in the shape of the leaves.
It is possible that the planned 6-week veg won’t be enough, as they need much more time to regenerate than most varieties I’ve grown so far. Never mind, maybe even this way the possibility of a harvest before Easter can be maintained.
After the hard training session they got only half dosage of nuts as they lost a lot of foliage. On the last day of the week watered them again with full dosage. 💦
All in all, they seem healthy but not very happy. I'm adjusting to them a bit and hopefully we'll be just fine for next week.
Running the Ts3000 on 65% 42 cm above the canopy which means 450-480 ppfd. 💡🌞
Have a lovely weekend everyone!


Likes
9
Share

@BLAZED
Follow
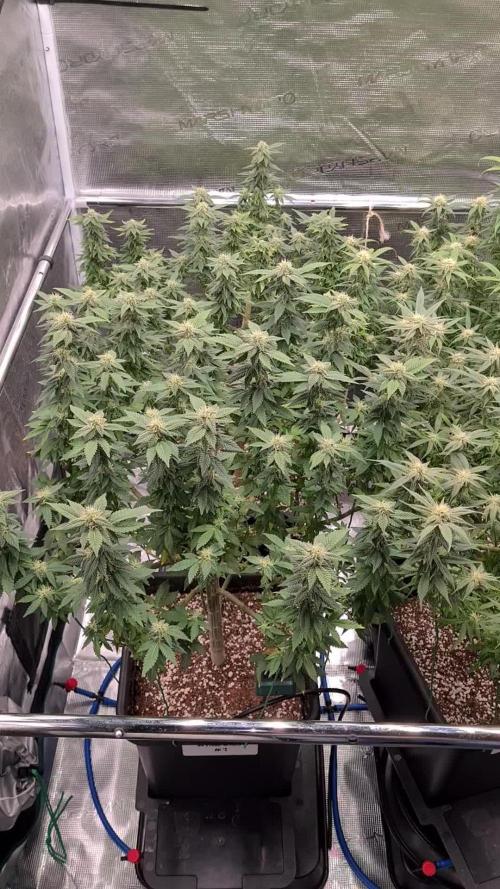
Week 17 (7-10 to 13-10)
7-10
Temps: 19.2 to 24.8 degrees
Humidity: 61% to 70%
Increased the light's intensity from 65% to 70%.
8-10
Temps: 20.3 to 25.6 degrees
Humidity: 60% to 73%
Watering: Both 500 ml.
9-10
Temps: 20.6 to 25.2 degrees
Humidity: 60% to 69%
Watering: Both 500 ml.
Dry Weight #1: 3.8 kg. #2: 3.8 kg.
10-10
Temps: 19.7 to 24.8 degrees
Humidity: 53% to 71%
Today i did a heavy defoliation. (Schwazzing)
11-10
Temps: 19.1 to 24.9 degrees
Humidity: 49% to 62%
Watering: Both 500 ml.
12-10
Temps: 18.4 to 23.9 degrees
Humidity: 50% to 61%
Watering: Both 500 ml.
Dry Weight: Both 3.7 kg.
13-10
Temps: 18.3 to 24.2 degrees
Humidity: 49% to 62%

Likes
3
Share


@Tony_Montana84
Follow
Die kleine Lady wächst sehr schön kompakt, bin gespannt wie groß sie wird. Hoffentlich nicht über 80 cm.
Likes
3
Share


@PoshGrow
Follow
Welcome to GhostGrow Chapter One by PoshGrow!
🌳 Week #12July 12th - July 19th
LAST WEEK!
-----
July 16th.
As I mentioned last week, theres 4 girls left in a tent: Alaskan #1, #2, #3 & #5.
Alaskan #1, #3 & #5 will be chopped down at the end of this week. Finally they are ready at flowering week #12!!
Alaskan #2 would be shame to cut her and throw it away, so I decided to let her finish with my next grow. I think she will be ready in 3 weeks max, so it wont interupt my next run.
Watering: every 2 days.
Alaskan #1, #3 & #5. From the middle of the week 11 watering only pH corrected water (6.2 - 6.3 pH) to fully flush them before harvest.
Alaskan #2 was flushed for 1 week, no nuts, just 6.2 pH water and started all over again. Fox Farm Trio with BB 15ml, GB 10ml, TB 10ml per gallon ratio. Going to water using Fox Farm official schedule till the last 2 weeks, then going flush like always.
Stay tuned for my next grow to find out how her life is going lol 😆
See you guys in a few days with the end of this grow and final harvest update!
Peace ✌️
P. S Song in the background Yelawolf - You and Me 👍

Likes
43
Share


@TheCannaProphet
Follow
~ FastBuds PAPAYA SHERBET Photoperiod~
Well here we go on another journey together through 'Canna-land' and this one's kinda special... forget that, it's VERY special because this is FastBuds newest surprise for the community, a FEMINIZED PHOTOPERIOD STRAIN!🤯
I was fortunate enough to score these seeds, of which only 1000 were available and can't wait to see what this strain can do! This Papaya Sherbet, according to FastBuds, is a hybrid with a 9-10 weeks flowering period. For a more detailed and accurate description of this strain the following from FastBuds says it best:
"Combining the massive stature of Papaya (Oni Selection) with the strength and resilience of one of our best keeper cuts (Sunset Sherbet), this strain develops into a big, expansive bush adorned with numerous bud sites that later transform into a generous harvest of medium-sized buds. Papaya Sherbet flowers deliver a signature flavor of premium cannabis with subtle citrus undertones that emerge upon inhaling. During growth, her aroma makes for a sweet yet pleasantly bitter fragrance, giving you an idea of what the smoke will taste like. Notably stress-resistant, Papaya Sherbet is a great choice for growers working in challenging environments. She is very forgiving and rebounds quickly from any adversity, allowing growers the freedom to experiment with confidence that she will take everything like a champion she is. This strain embodies resilience, flavor, and abundant yields in every grow cycle."
Sounds like an epic strain and I personally cannot wait for this lady to strut her stuff!😍
________________________________________________________________________________________________________________________________________________________________________________________________________________________________________________________________________________________________________________________
The Setup:
This is going to be an outdoor grow, but I have started the Papaya Sherbet photoperiod indoors as our weather is still a bit too chilly to put a newly sprouted seedling outside (nighttime temp's dipping regularly into the 40's℉).
The plan is simple... let her grow inside under a 19/5 light schedule until the nighttime temperatures are in the mid 50's℉, which shouldn't be long. After which, she'll be moved outside and transplanted into the soil which I have already setup and inoculated with beneficial microbes from BioTabs and slow release dry amendments from Gaia Green. Once she's established herself outside she'll be given periodic top dressings of Gaia Green 4-4-4 and 2-8-4 along with worm castings and Compost Tea's. Her grow area is approx. 5'x5' and I have posts and a trellis net set up already for when she gets bigger to aid in training her. Let the fun begin!🤪💚
________________________________________________________________________________________________________________________________________________________________________________________________________________________________________________________________________________________________________________________
Weekly Updates:
6/24- The FastBuds Papaya Sherbet photoperiod is now going into Week Seven from seed and is going strong! She has definitely increased her height and continues to sprout new growth! Her color and vigor also remain excellent having gotten past her early episode of getting her leaves chewed on.
Today I top dressed the Papaya Sherbet photoperiod with 2 cups of Gaia Green 4-4-4 along with 1 cup of Down To Earth Bio-Fish 7-7-2 and 1/2g of Wiggle Worm castings. After top dressing and working the amendments in by hand I replaced the straw coating over the soil and watered them in with 3g of straight well water via garden hose as usual.
6/26- Our summer is here and we're under an early heat wave this week with daytime temp's hitting the mid to upper 90's ℉ with heat indexes in the low 100's ℉... in short, IT'S FNG HOT!🔥🔥🔥
I'm watering the FastBuds Papaya Sherbet photo daily now with 5g of straight well water from the garden hose. I'm watering at sundown so that the water will have some time to soak down into the soil before the heat evaporates it. The coating of straw that I previously spread over the soil around her base has helped a lot as well.
6/28- Our weather is HOT now with heat indexes over 100℉ so I'm watering the Papaya Sherbet photoperiod every day with 5g of straight well water from the garden hose in the late afternoon once the plant is in the shade.
Other than the ever present leaf hoppers, which love the leaves but leave the flowers alone, and an occasional Japanese Beetle, there aren't any serious pest issues currently. The FastBuds Papaya Sherbet photoperiod continues to have excellent color and vigor, continuing to add new growth and increase her height, it seems daily!
6/30- The weather continues to relentlessly bake everything outside... And so, the daily watering continues!🌱🚿
Another healthy week for the FastBuds Papaya Sherbet photoperiod and I hope to see many more ahead!
Thank you for checking out my diary, your positive comments and support make it all worthwhile! 💚Growers Love!💚😎🙏


Likes
54
Share


@MarsHydroLED
Follow
Day 29 of flower
1 blue dream😋🔥
1 white kush(but it may be a Afghan hindu kush which is 100% indica with not alot of stretch) my white kush stretches like the blue dream but not this round. Lol
Grow light: Mars Hyrdo TSW 2000 at 100% power 24inches above 🌞☀️
Medium: coco coir mix with compost at a 50/50 ratio with 30% perlite added⛰️
Nutrients: fox farm dirty dozen 🦊🚜
Grow space: 4x4x7
Water: tap water (my tap water is allows 110ppm) left out for at least 24hours
Likes
53
Share


@Pr3m_85
Follow
Restart nutes Day 43 after 4 days watered with clear water at pH 6.0~6.2.
No stress !
Peace all 😌
Likes
19
Share


@GoldenWeedGrower
Follow
Legend
Timestamp: 📅
EC - pH: ⚗️
Temp - Hum: 🌡️
Water: 🌊
Food: 🍗
pH Correction: 💧
Actions: 💼
Thoughts: 🧠
Events: 🚀
Media: 🎬
D: DAY, G: GERMINATION, V: VEGETATIVE, B: BLOOMING, R: RIPENING, D: DRYING, C: CURING
________________________________
📅 D84/B22 - 07/02/24
⚗️ EC: 1 pH: 5.0
🌡️ T: 19-26 °C H: 55-65 %
🌊 8L
🍗 CalMag - Bloom A-B - B52 - Bud Candy - Big Bud
💧
💼
🧠 The VPD rate was stable on the right value for all the day ! Great, and many thanks to TrolMaster Tent-X !
🚀
🎬 Added Timelapse video and screenshots
________________________________
📅 D85/B23 - 08/02/24
⚗️ EC: 0.8 pH: 5.2
🌡️ T: 19- 24 °C H: 45-80 %
🌊 2L
🍗
💧
💼
🧠 I'm lowering down the EC as I see signs of burns on tips
🚀 Humidity went out of control for about 2h
🎬 I made a photoset with "Garlic Puppy" enjoy the pictures 😋. Added Timelapse video and screenshots
________________________________
📅 D86/B24 - 09/02/24
⚗️ EC: 0.8 pH: 5.2
🌡️ T: 20-26 °C H: 50-70 %
🌊
🍗
💧
💼 Little defolation
🧠
🚀
🎬 Added Timelapse video and screenshots
________________________________
📅 D87/B25 - 10/02/24
⚗️ EC: 0.8 pH: 5.2
🌡️ T: 22-24 °C H: 55-65 %
🌊
🍗
💧
💼 Little Defolation
🧠 The buds are forming
🚀 Today VPD was very stable
🎬 Added Timelapse video
________________________________
📅 D88/B26 - 11/02/24
⚗️ EC: 0.7 pH: 5.2
🌡️ T: 20-25 °C H: 50-77 %
🌊
🍗
💧
💼 Little Defolation
🧠
🚀 Humidity went out of control for about 2h
🎬 Added 8 pics of Nicole, the timelapse video and the screenshots
________________________________
📅 D89/B27 - 12/02/24
⚗️ EC: 0.7 pH: 5.5
🌡️ T: 19-25 °C H: 50-70 %
🌊 4L
🍗 CalMag - Bloom A-B - B52 - Bud Candy - Big Bud
💧
💼
🧠
🚀
🎬 Added timelapse video and screenshots
________________________________
📅 D90/B28 - 13/02/24
⚗️ EC: 0.9 pH: 5.8
🌡️ T: 19-25 °C H: 50-70 %
🌊 4L
🍗 CalMag - Bloom A-B - B52 - Bud Candy - Big Bud
💧
💼
🧠
🚀
🎬 Added timelapse video and screenshots

Likes
2
Share


Likes
7
Share


@Wheatbread420
Follow
This Strain is something, the beans popped the radical in 5-6 hours after submerging in water . No paper towel needed here ;) ..


Likes
9
Share


@Felin
Follow
Well watering @ 6.0 every two days,
Put 75% power of the light @ 37cm ~ 15 inch.
My dog eat half of a leaf while i was doin PH 😂
First leafs looks weird//sick 🤔 Maybe my "problem" is the low humidity around 50%, probably too slight.
Let's go and let's improve 😁


Processing
Likes
7
Share


@Kushizlez
Follow
Day 45-52
(Day 46) I just realized I forgot to zip up a small flap in the tent for at least 5 days or so. This probably made the added co2 useless. All the plants are slightly clawing and almost look overwatered, which is normal for plant at this stage but I wonder if the lower co2 levels are contributing at all.
I couldn’t help myself today and did a small defoliation. Hopefully this doesn’t stress them out too much. I took about 15-20 leaves per plant. I really want some of this larf on the bottom fill out more. Even by 10-15%.
(Day 47) Wow. I just noticed that #5 is putting on a thick layer of late frost. I’m guessing this has to do with all the mid flower feedings. Unfortunately the density on this girl lacking big time. Especially on the lowers. This could be genetic but there is too many variables at play to say for sure. If this stuff smokes proper I will continue to feed in mid flower.
Plants are really starting to fade out here now. #3 in particular has some odd red coloring in a few of the leaves.
(Day 48) I watered in 2 gallons on each plant making sure to get some decent runoff from each.
Sucks that #3 didn’t fill out. The genetic potential was definitely there, something just went awry after that tea I gave it. I have at least 2 or 3 clones of that I will try outdoors. It’s been a very P hungry plant too. The stems were purpling like crazy, even in veg. Some people say this can be fixed with a microbial product like Mammoth P or Tribus which I might try for my next grow.
#6 isn’t really filling out much either unfortunately. Tops look decent but everything under that is pretty leafy and airy.
#1 and #7 are the clear winners here. #1 especially is picture perfect. If I wasn’t working on another project after this I would clone just #1 and run another scrog like this from clone.
(Day 50) I was plucking some leaves today and I found a confirmed banana sticking out of one of the main colas on the stubby pheno. I didn’t defoliate this one too much so I wonder if it was caused by stress at all. I hope I don’t find anymore because we only have 10 days left here.
(Day 52) My family member trimmed up the m39. It looks super scraggly but has some decent crystal nonetheless. That’s partly why I would never use an amazon blurple for flowering. It just doesn’t have the same canopy penetration that a light like mine does. Although for a budget setup they’re pretty awesome.


Likes
11
Share


@LiamF
Follow
450ml of water with nutes on day 15
600ml of water with nutes on day 18
500ml of water with nutes on day 20
*DAY 20* found out my led driver has a hidden dimmer, turned down to 550PPFD
Overall she looking good
hoping to gain to height, started LST on day 21

Likes
15
Share


@Kurow
Follow
Had a bad humidity (spots on leave are wet spots that got handled ASAP) scare last week so got a dehumidifier up in there comfortably. Still smooth sailing.

Likes
19
Share


@A_Rolling_Stoner
Follow
Was not so strong in the beginning, but then became good.
It just fidn't cath up with the others.

