
Strawberry BubbleGum


Soil
Custom

Indoor
Room Type
LST
weeks 3-5
11 l
Pot Size
Start at Harvest
1
Week 1. Vegetation7y ago


5 cm
Height
20 hrs
Light Schedule
25 °C
Day Air Temp
6.6
pH
95 PPM
TDS
85 %
Air Humidity
22 °C
Solution Temp
19 °C
Night Air Temp
11 l
Pot Size
0.05 l
Watering Volume
50 cm
Lamp Distance
Nutrients 3

Root-Juice
3 mll

Acti-Vera
2 mll
Bio-Heaven
1 mll
Satori_Hanso Welcome to my first indoor grow!
This is going to be an interesting journey as I have zero experience in indoor growing and only knowledge I have is from books and online videos.
********************************
* BUILDING A GROW ROOM *
********************************
Before this journey begins I had to setup a grow room. Fortunately, there is small space in the attic area that is perfect to turn it into a grow room. Unfortunately, that room was completely uninsulated with bear walls. That means RH/temp problems. To do a complete and proper roof insulation it would have cost me a lot so I opted out for only cheaper version and that was to use 3cm thick Styrofoam boards between beams and roof plates just to reduce heat dissipation, for the walls 2cm Styrofoam boards and for the floors, I spread thick plastic sheet over it and placed on top 3cm Styrofoam boards wrapped in white plastic sheets. With those plastic sheets on, everything is washable with ease.
Now it’s time to test the room and see how the temperature holds. As I was worried, the room needed some heat source so I placed one heat radiator in the back of the room.
Next day I checked the temp and it was around 23°C. The insulation was working nicely as the radiator was not constantly on and outside was -10°C. All in all I was satisfied even with some small draft coming in which was impossible to close but on the upside it will actually provide constant flow of fresh air.
After renovation was done I had to decide how and where I should set up pots and lights.
Room dimensions look like a right-angled triangle with entrance height of 2m and floor length of 3m. Only middle of the room is usable for growing due to a roof slope. That allows height of the plants up to around 1m and with the 90 cm room width, the actual growing space for plants would be 90x100x120cm. Now all I need was lights that would cover that space.
*******************
* GROW LIGHTS *
*******************
Since last year I started reading about grow lights, as it turned out, there are so many brands, models and it’s very difficult to choose one, but quantum boards caught my attention with their high efficiency, low wattage and on top of that they are passively cooled.
After spending hours of browsing through different QB models I came across one company “EasyGrow Lighting” that was making quantum boards and something told me that this is it.
What stood out was free shipping, cheap prices and 5 year warranty and in case of a failure they will pick up the lights at your place and send it back repaired for free.
Now that sounds like a great deal.
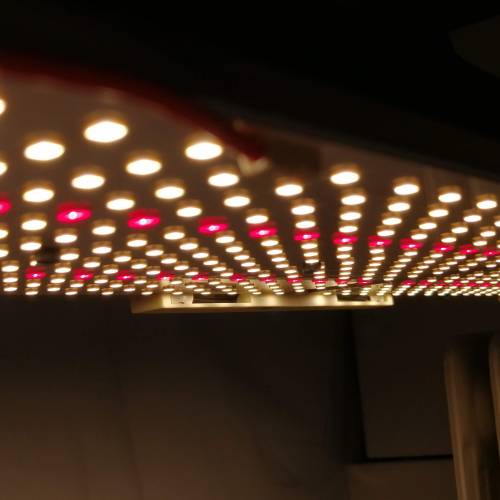
S600 Full Spectrum model is ideal for my grow space with its recommended coverage:
Grow stage: 120x120cm - 150x150cm with light distance 40-60cm
Flowering stage: 90x90cm - 120x120cm with light distance 30-40cm
Technical specs:
Chips: Samsung LM301B and Far red diodes Epistar 660nm
PPFD: 1075.60168 μmol/(m²·s)
Driver: Meanwell HLG
Light power: 0 - 250w
Luminosity: max. 228.99 lm/W
Lifetime: 100 000h in operation
Light dimension: 68x22 cm
Weight: 5 kg
Replacement for: 600W HPS
Yields: 2-2.5 g/W
Those are some great specs. The Samsung LM301B is one of the most efficient LEDs on the market and exceeds the 200lm/W limit. PPFD readings are over 1000 at distance of 40cm and goes up to 1800 at distance of 30cm. That’s going to be more than enough and plants will love it.
When the package arrived I was surprised how good the product was packed. At first glance you can see that the lights are professionally made and assembled and with the black heatsink they look beautiful. In the package was also power cable (3m), rope ratchet 2pcs suspension system with spare clips and steel wires to connect ratchet and lights.
What I also got was the EasyGrow Controller that has temperature/humidity probe and comes with 2 cables, one shorter and the other is 2m long, built-in timer for lights which you control via mobile app and it also comes with a light dimmer 0-250W. App has options like on/off light schedules, timers and you can monitor temp/humidity when you’re away from grow room. For me this is very useful as my grow room is in a different part of house and it keeps me somewhat closer to my plants.
One thing to mention is that controller and lights are already connected together so the whole light system is plug&grow out of the box. I’m really impressed with the whole package and I can’t wait to try out the lights.
*********************
* SOWING A SEED *
*********************
For my first winter indoor grow I chose sponsored Fast Buds FBT03 - Original Auto Bubble Gum.
Strain info:
Genes: Sativa / Indica
Genetics: BubbleGum Autoflowering
Flowering: 9 weeks
Harvest: 450-550gr/m2
Height: 80-130 cm
THC: Up to 20%
CBD: Very Low
Description:
“A plant that is easy to grow with harmonious, rich strawberry flavors, top shelf potency, quick blooming capabilities and will impress any commercial growers with a short flowering period. An old school gem that retains the ideal blend of indica and sativa, producing large yielding plants. Well suited for beginner growers who wish to see hybrid vigor displayed in its full form with a THC level of 20%. Only taking 9 weeks before she can be harvested, Original Auto Bubble Gum will pack on weight in a quick time frame, making her a perfect choice for growers who require big yields of quality flower.”
There are few things to do before the seed starts its journey.
For 11l pots I made my own light soil mix that consists of:
2l – black earth mix
1l – worm castings
1l – perlite
6l – coco coir
40g - Bio Guano
5g – Mycorrhizae
Bio Guano composition:
N - 3-5%
P2O5 - 9-12%
CaO - 23-28%
K2O - 1-2%
MgO – 0.5-1%
C (org) - 5-7%
org substance - 21-26%
I decided to do some layering in a pot so at the bottom of a pot I added a thin layer of coco coir, on top of it 1-2cm layer of perlite, then up to a half of pot added my light soil mix and sprinkled 20g of Bio Guano, then added 15cm of light soil mix, again sprinkled 20g of Bio Guano and then finished filling the pot with light soil mix. Mycorrhizae was mixed with the soil where the seed will be planted.
Time to start feeding the microbial life in the medium. I watered the medium with 500ml solution of 5ml/l molasses, Root Juice, Acti Vera, Bio Heaven, Fish Mix 1ml/l each, and once again after 12h. The pot was kept in a warm room at temp of 20°C.
Seed was pre-soaked in shot glass of water for 24h. Seed was then sowed 10cm from the corner of the pot.
To keep the RH at 80-90%, plastic bottle was placed on top of seed spot. Seeding broke surface after 48h.
Health & Growth:
- After the seedling broke surface she grew to 4 cm in first two days and stopped stretching.
- By the end of the week she grew 1cm more.
-
Watering:
- Instead of tap water I used distilled water in the first week.
- 100 ml of nutrient solution every other day just around the seedling.
- 500 ml of nutrient solution last day of a week so the medium doesn’t dry out and to keep microbial life in the medium happy.
Lighting:
- Each day power of lights was increased by 10W starting from 60W.
- Distance from plant started at 30cm and was daily raised gradually to 50cm.
9 likes
7 comments
Share
2
Week 2. Vegetation7y ago


7.5 cm
Height
20 hrs
Light Schedule
24 °C
Day Air Temp
6.3
pH
175000 PPM
TDS
85 %
Air Humidity
22 °C
Solution Temp
19 °C
Night Air Temp
11 l
Pot Size
0.05 l
Watering Volume
55 cm
Lamp Distance
Nutrients 4
Root-Juice
3 mll
Acti-Vera
2 mll
Bio-Heaven
1 mll
Satori_Hanso Health & Growth:
- seedling looks healthy and is developing nicely.
- there is no notable deficiencies or any kind of symptoms.
Watering:
- 120 ml of nutrient solution every other day around the seedling.
- 500 ml of nutrient solution last day of a week.
Lighting:
- each day power of lights was increased gradually to 175W starting from 130W.
- light distance from the plant was increased to 55cm.
12 likes
6 comments
Share
3
Week 3. Vegetation7y ago


9 cm
Height
20 hrs
Light Schedule
24 °C
Day Air Temp
6.3
pH
680 PPM
TDS
45 %
Air Humidity
22 °C
Solution Temp
19 °C
Night Air Temp
11 l
Pot Size
0.1 l
Watering Volume
55 cm
Lamp Distance
Nutrients 5
Root-Juice
3 mll
Acti-Vera
2 mll
Bio-Heaven
1 mll
Satori_Hanso Health & Growth:
- at day 16 LST was preformed on main stem
- every day main stem and leaves were pulled to sides
- plant looks healthy and is growing at fast pace
- there is no notable deficiencies or any kind of symptoms.
Watering:
- 200 ml of nutrient solution every other day around the seedling.
- foliar feed every other day with Alg A Mic, Acti Vera and Fish Mix 1ml/l each
- 500 ml of nutrient solution last day of a week.
Lighting:
- light power stayed at 175W for the whole week
7 likes
comments
Share
Used techniques
LST
Technique
4
Week 4. Vegetation6y ago


13 cm
Height
19 hrs
Light Schedule
24 °C
Day Air Temp
5.9
pH
715 PPM
TDS
40 %
Air Humidity
22 °C
Solution Temp
19 °C
Night Air Temp
11 l
Pot Size
0.5 l
Watering Volume
50 cm
Lamp Distance
Nutrients 5
Root-Juice
2 mll
Acti-Vera
2 mll
Bio-Heaven
2 mll
Satori_Hanso Health & Growth:
- side branches started to grow
- every day top and branches were pulled to sides
- LST continued throughout the week
- pre-flowering started at the end of the week and buds sites are starting to form
- plant bushed up, looks healthy and is growing vigorously.
- there is no notable deficiencies or any kind of symptoms.
Watering:
- 500 ml of nutrient solution every other day with pH water in-between.
- foliar feed every other day with Alg-A-Mic and Acti-Vera 2ml/l each
- 750 ml of nutrient solution last day of a week to completely saturate the pot.
Lighting:
- lights were lowered to 50 cm
- light power was increased to 250W at the middle of the week.
7 likes
4 comments
Share
Used techniques
LST
Technique
5
Week 5. Flowering6y ago


14 cm
Height
18 hrs
Light Schedule
24 °C
Day Air Temp
6.2
pH
780 PPM
TDS
40 %
Air Humidity
21 °C
Solution Temp
19 °C
Night Air Temp
11 l
Pot Size
0.75 l
Watering Volume
40 cm
Lamp Distance
Nutrients 6
Root-Juice
1 mll
Acti-Vera
2 mll
Bio-Heaven
2 mll
Satori_Hanso Health & Growth:
- plant exploded in growth this week
- LST continued on branches to open up middle of plant
- the idea is to pull branches to sides of a pot and create even canopy
- plant started flowering in the middle of the week
- plant looks healthy and continues growing vigorously.
- there is no notable deficiencies or any kind of symptoms.
Watering:
- switched nutrients from Fish-Mix to Bio-Grow
- 750 ml of nutrient solution every other day
- 750 ml of pH water between feeding
- foliar feed every other day with Alg-A-Mic and Acti-Vera 2ml/l each
Lighting:
- lights were lowered to 40 cm
- light power - 250W
8 likes
comments
Share
Used techniques
LST
Technique
6
Week 6. Flowering6y ago


14 cm
Height
18 hrs
Light Schedule
24 °C
Day Air Temp
6.5
pH
1458 PPM
TDS
40 %
Air Humidity
21 °C
Solution Temp
19 °C
Night Air Temp
11 l
Pot Size
1 l
Watering Volume
40 cm
Lamp Distance
Nutrients 7
Organic molasses
2.5 mll
Root-Juice
0.5 mll
Acti-Vera
2 mll
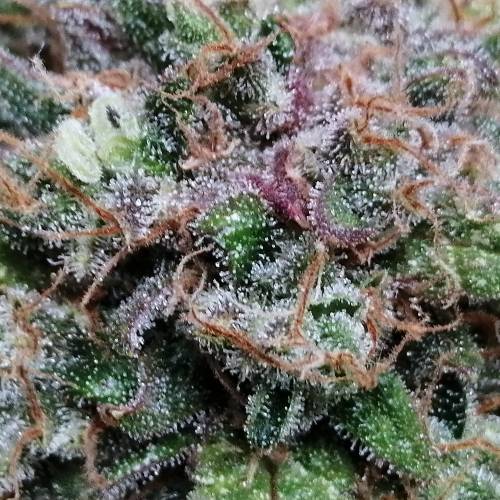
Satori_Hanso Health & Growth:
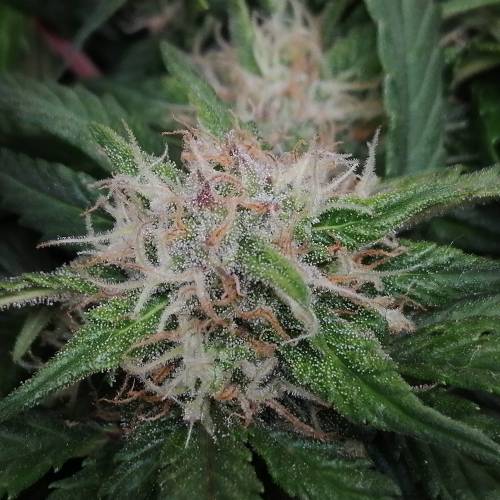
- plant is budding nicely
- small trichome production can be seen already
- plant looks healthy and continues budding
- there is no notable deficiencies or any kind of symptoms.
Watering:
- added organic molasses to the feed
- 750-1000 ml of nutrient solution every other day
- 750-1000 ml of pH water between feeding
9 likes
3 comments
Share
7
Week 7. Flowering6y ago


14 cm
Height
18 hrs
Light Schedule
24 °C
Day Air Temp
6.3
pH
Weak
Smell
1502 PPM
TDS
40 %
Air Humidity
21 °C
Solution Temp
19 °C
Night Air Temp
11 l
Pot Size
1 l
Watering Volume
40 cm
Lamp Distance
Nutrients 6
Organic molasses
2.5 mll
Acti-Vera
2 mll
Bio-Heaven
2 mll
Satori_Hanso Health & Growth:
- plant is budding nicely
- trichome production has increased
- plant looks healthy and there is no notable deficiencies or any kind of symptoms.
Watering:
- 750-1000 ml of nutrient solution every other day
- 750-1000 ml of pH water between feeding
7 likes
1 comment
Share
8
Week 8. Flowering6y ago


15 cm
Height
18 hrs
Light Schedule
24 °C
Day Air Temp
6.3
pH
Weak
Smell
1485 PPM
TDS
40 %
Air Humidity
21 °C
Solution Temp
19 °C
Night Air Temp
11 l
Pot Size
1 l
Watering Volume
40 cm
Lamp Distance
Nutrients 6
Organic molasses
2.5 mll
Acti-Vera
2 mll
Bio-Heaven
2 mll
Satori_Hanso Health & Growth:
- buds are balling up nicely
- trichome production has increased
- plant looks healthy and there is no notable deficiencies or any kind of symptoms.
Watering:
- 750-1000 ml of nutrient solution every other day
- 750-1000 ml of pH water between feeding
9 likes
1 comment
Share
9
Week 9. Flowering6y ago


15 cm
Height
18 hrs
Light Schedule
22 °C
Day Air Temp
6.3
pH
Weak
Smell
1000 PPM
TDS
30 %
Air Humidity
22 °C
Solution Temp
19 °C
Night Air Temp
11 l
Pot Size
1 l
Watering Volume
40 cm
Lamp Distance
Nutrients 5
Acti-Vera
2 mll
Bio-Heaven
2 mll

Alg-A-Mic
2 mll
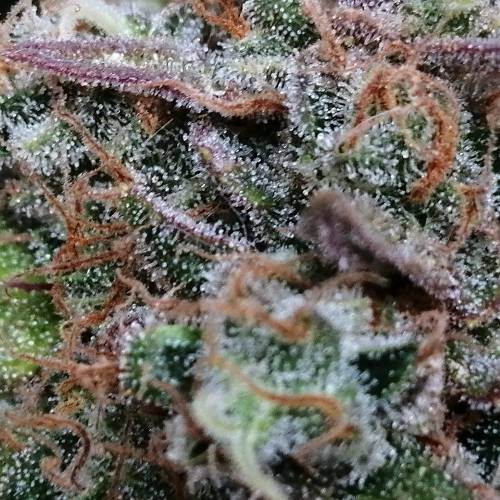
Satori_Hanso Health & Growth:
- buds feel very dense to the touch
- trichome frostiness is all over buds
- as it looks now, two more weeks till harvest 😎
Watering:
- 750-1000 ml of nutrient solution every other day
- 750-1000 ml of pH water between feeding
4 likes
comments
Share
10
Week 10. Flowering6y ago


15 cm
Height
18 hrs
Light Schedule
22 °C
Day Air Temp
6.3
pH
Weak
Smell
400 PPM
TDS
30 %
Air Humidity
22 °C
Solution Temp
19 °C
Night Air Temp
11 l
Pot Size
1 l
Watering Volume
40 cm
Lamp Distance
Nutrients 5

Flawless Finish
2 mll
Acti-Vera
2 mll
Bio-Heaven
2 mll
Satori_Hanso Health & Growth:
- buds got more denser from last week
- trichomes are almost ripe to desired stage
- Borg invasion (spider mites) started near end of week
- started flushing the plant for few more days and will cut it down next week
- was removing mites by hand using cotton sticks from every top just to mitigate damage a bit
- resistance is indeed futile in this case
Watering:
- 750-1000 ml of nutrient solution every other day
- 750-1000 ml of pH water between feeding
- from last 3 days of the week I started flushing the plant with Flawless finish
4 likes
comments
Share
11
Week 11. Flowering6y ago


15 cm
Height
18 hrs
Light Schedule
22 °C
Day Air Temp
6.3
pH
Weak
Smell
300 PPM
TDS
30 %
Air Humidity
22 °C
Solution Temp
19 °C
Night Air Temp
11 l
Pot Size
1 l
Watering Volume
40 cm
Lamp Distance
Satori_Hanso Health & Growth:
- plant looks mature enough for harvest
- Borg is still assimilating every bud it comes across
- reproduction of these critters is insane and the webbing production takes practically over night
- every time I remove them the next day they are back
- plant was harvested on day 75
Watering:
- 1000 ml of water every watering
4 likes
4 comments
Share
11
Week 11. Harvest6y ago
Happy Harvest Day!


10/10
Rated
Very interesting strain, in a positive way.
This small plant produced big, dense buds.
They give off citrusy scent with some sweet fruity background, unfortunately without strawberries.😞
It's quite pleasant to smoke as the after taste is somewhat sweet.
Vaping this makes all those terpenes skyrocket. Very nice experience.
Oh, did I tell you that hits like a truck. 🚚
Very potent strain. After first hit you get hit.
What actually surprised me is that it doesn't couch lock and it doesn't make you dull. 👌
That's a good combo.
I use it now as my daily driver. 😎
Show more
Translate
Spent 78 days
Ger Veg Flo Har
269 g
Bud wet weight per plant
64 g
Bud dry weight per plant
1
Plants
0.8 m²
Grow Room size
Easy
Difficulty

Creative, Hungry
Positive effects

Dry eyes
Negative effects

Citrus, Fruity
Taste
Height
Day air temperature
Air humidity
PPM
PH
Light schedule
Solution temperature
Night air temperature
Pot size
Lamp distance


Satori_Hanso This was my first indoor grow ever. So many new things I learned on this journey and encountered some new problems.
Plants life cycle went really well almost till the end when it was invaded by the Borg (spider mites).
Resistance was indeed futile so I had to take her down.
Few things I shouldn't do was LST the plant that much and feed her that much.
It actually needs a lot less of nutrients than I gave her.
In the end plant came out really short, 15 cm in height and 29cm in diameter.
Being that short I thought it would yield 20g max.
I was so wrong when I cut it down. The whole plant almost weight 270g .
That's a lot for such a small looking plant.
Due to Borg invasion I had to shave trim the buds to remove all the critters off.
After shave trimming, drying and curing buds, it weight 49g (plus 15g of trim).
They were dried for 6 days and cured for 7 days.
Buds came out at 65% humidity.
From seed to harvest it took 75 days.
4 weeks of vegging and 6.5 weeks of flowering. Now that's fast!⏩😎
If all conditions were perfect it could shave off a week.
This strain deserves a second grow so I will definitely grow it again.
19 likes
8 comments
Share
Equipment Reviews


34 comments
Sort by
popularity
popularity
newest
oldest

Fast_Buds  commentedweek 27y ago
Hey there,
Thanks so much for running a diary of our genetics 🙌
Let us know if you need any assistance, we’re more than happy to help.
Happy Growing !!! 🌱☘️🌴🍀🌿🌳
likes 4

Satori_Hanso commented7y ago
@Fast_Buds, Much appreciated !
likes 4

WildeWeed commentedweek 116y ago
Looks good man. Hope mine turns out about the same!
likes 2
Satori_Hanso commented6y ago
@WildeWeed, It can only be better than mine. 👊
likes 2
WildeWeed commented6y ago
@Satori_Hanso,
The smell of bubblegum really surprised me. It’s super strong
like 1

Buddha2 commentedweek 116y ago
Congratulations on your harvest! Looks really great! 👍
likes 2
Satori_Hanso commented6y ago
@Buddha2, Thanks! This strain is really good. 👌
likes 2

DOOBS_N_BREWS commentedweek 46y ago
Plants look nice and healthy! good job man!
likes 2
Satori_Hanso commented6y ago
@DOOBS_N_BREWS, Thanks a lot ! 🙏👊😎
likes 3

Dahoola commentedweek 17y ago
Good luck with your grow! I'll follow along
likes 2
Satori_Hanso commented7y ago
@Dahoola, Thanks !! 👊🙏
like 1

Denzul commentedweek 116y ago
Some beautiful buds you got there. Fat frosty and some beautiful colors. Awesome job growski. Keep doing your thing and may the ganja garden gods bless you along the rest of this journey.
like 1
Satori_Hanso commented6y ago
@Denzul, Thanks for kind words. 🙏
Plant made it till the end despite spider mites infestation. 😅
likes 2
Denzul commented6y ago
@Satori_Hanso, couldnt even tell looking at it. Glad you were able to salvage her and grow some fire nugs.
like 1
Satori_Hanso commented6y ago
@Denzul, Yea, it all turned ok in the end. Happy ending 😁
likes 2
WildeWeed commentedweek 66y ago
This right here is the reason we’re doing our bubblegum this way. Awesome grow so far man!
like 1
Satori_Hanso commented6y ago
@WildeWeed, If I knew it would be short like this, i wouldn't LST it this much. It's super short but with bulky buds. Next run I'm gonna just let her grow.
likes 2
WildeWeed commented6y ago
@Satori_Hanso, I actually have this one trained even lower than you do. Guess I’ll get ready for a dense little shrub. Lol
likes 2
WildeWeed commented6y ago
@Satori_Hanso, I really wish we would have done the daily photos like yours. I might start that now. That really helps watching and knowing what to expect day to day
like 1
Fast_Buds commentedweek 116y ago
Hey there,
Well done on your grow.
We hope you have enjoyed growing our genetics !!
Keep up the good work!
Happy harvest!!!🌾
like 1
Satori_Hanso commented6y ago
@Fast_Buds, Thank you very much!
The strain is really nice and as I mentioned, I use it as my daily driver 😎
likes 2

HiddenColorado commentedweek 46y ago
This is how diaries are supposed to be done. Daily pictures looks like me and you are the only ones. I’ll follow because of that.
like 1
Satori_Hanso commented6y ago
@@HiddenColorado, Thanks growmie !
likes 2

Wachsemilian commentedweek 27y ago
good luck dude😎👍
like 1
Satori_Hanso commented7y ago
@Wachsemilian, Thanks !! 👊
likes 2
Denzul commentedweek 27y ago
Lady looking good early on. Happy and healthy. Love this strain. Your in for a treat. Nice work. Keep doing what you've been doing and best of luck with the rest of the ride growmie.
like 1
Satori_Hanso commented7y ago
@Denzul, Thanks! I'm hope all works out.
likes 3

Mr_Weeds_Autos commentedweek 17y ago
Looks like your off to a great start... Amazing job with the new grow room also.
like 1
Satori_Hanso commented7y ago
@Mr_Weeds_Autos, Thanks! Now we'll see performance of lights. I hope they are good as advertised.
likes 2

amazongrow commentedweek 17y ago
Sounds like a very good light. Happy growing!
Tchau, do Brazil! =)
like 1
Satori_Hanso commented7y ago
@amazongrow, Muito obrigado !
likes 2
WildeWeed commentedweek 86y ago
These girls get pretty in a hurry!
like 1

Odin9 commentedweek 15y ago
Hey i like your feeding schedule and the hole job you have done ❤️🙏I use biobizz all the line im a first timer whit nutrients and I thinking try out your feeding plan😏✌️but I wonder do you watering whit ph water between??You say in the diary you feed them every other day??
likes

the end.
Enjoying this diary? Follow for more updates!


Prefer the old Diary view?
Go back to the old Diary view