


Likes
Comments
Share


@Pandi_Weed
Follow
Dia 1 en maceta de 2lts.
A la tierra le agregamos Great White para aumantar el crecimiento radicular, en pocos dias estiraran y se pondran muy bien

Likes
10
Share


@Plzgrow4me
Follow
BLOOMING.
I switched the light schedule to 12-12. They seem to be responding well to it.

Likes
7
Share


@Kirsten
Follow
The super soil mix I made was approximately constituted 8 gallons of;
☆ 60% Canna Coco
☆ 30% Perlite
☆ 9% Worm castings
☆ 1% Organic dry amendments.
- Ecothrive Life Cycle
- Ecothrive Charge
- Diatomaceous Earth
- Ground Cinnamon
- RHS Mycorrhizal Fungi granules
- Great White Mycorrhizal Fungi blend
14.3.25:
Northern Lights is looking great. 💚💜🧡
I watered a couple of litres over the last week. I've been watering around the whole pot to encourage root stretching and kick-start the dry amendments and feed the Mycorrhizae.
I left the first 2 inches around the seedling until today🌱
Today, I watered with 1.5 litres of dechlorinated water PH'd to 6.2 with:
♡ Black strap molasses
♡ Ecothrive Biosys
16.3.25:
Northern Lights got 2ltrs of dechlorinated water PH'd to 6.4 with;
♡ .5g Mega Crop Part A
♡ .5g Mega Crop Part B
I watered all around the outer perimeter of the pot inwards. I left the centre 3 inches dry.
18.3.25:
Northern Lights 💚💜
I decided to go ahead and top the plant. She looks to be strong and healthy.
I took the sterilised scissors and tried to cut it cleanly. I think, Surely will be interesting either way! 😅 she is currently 12 days old. Very pleased with the progress so far.
23.3.25:
The plant has taken very well to being topped. Growing well and strong 💪 looking forward to starting proper veg phase here soon! 😊
Thanks for checking in ✌️🌱🤞💚

Likes
3
Share


@Aerogrower1104
Follow
Currently in pre flower added general hydro nutrients on Wednesday to ease mY plant into that and then will do research on how to approach during flowering. I am happy that my plant is well I almost broke another fan leaf but was able to tape it up and now it’s okay. I plan on taking the tape off in a week or so probably. Excited to see where I will be at in 3 weeks :)


Likes
13
Share


@Lfuego22
Follow
Very good week, got some low stress training going on, some netting a little bit of defoliation happen this week.


Likes
8
Share


@Ctbest2023
Follow
Switched to an ph perfect sensi a few weeks ago forgot to change in diary.Did some defoliation this week mostly just the bottoms will do one more just to let air and light get through pistils are coming out and they are looking healthy

Likes
6
Share


@gr3g4l
Follow
Hola al mundo mundial.
De nuevo por aquí con nuevo seguimiento de mi humilde cultivo exterior.
Pasado el solsticio de verano.
Semillas en agua de osmosis 46 horas , luego entre servilletas unas 29 horas más y al sustrato, un sustrato light-Mix .
Segundo fué enterrar las semillas en el sustrato con precaución y ponerlo todo bajo unos fluorescentes de 150W 4000K 18/06h.
Antes de pasarlas a exterior me gusta tenerlas unos dias en interior, no muchos , entre 15-20 dias. Me gusta que salgan a ver el mundo ya con cierta madurez.

Likes
2
Share

@Terp-a-derp
Follow
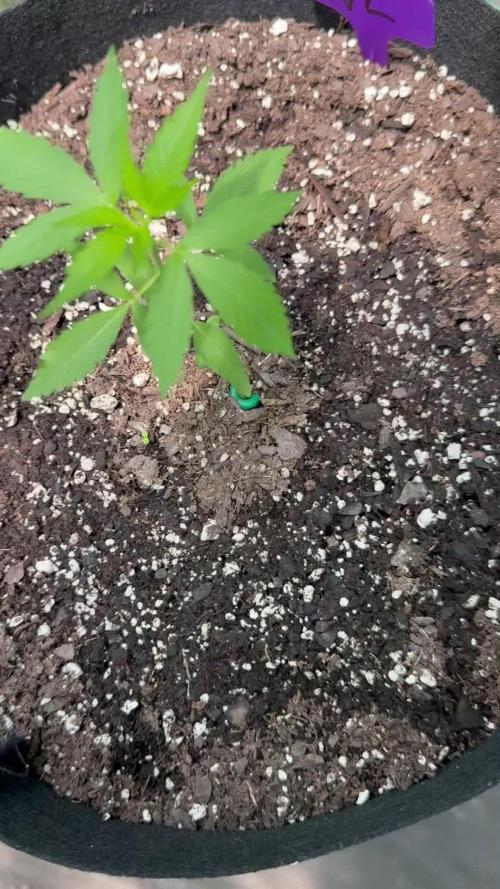
Plants doing well a little delayed due to rainy weather all week with not many sunny days. Temps been good. Possible perfect conditions when plants are going in to flowering phase. Thanks to all who are following along. Accepting any tips on topping autoflowers, thinking about trying one these.

Likes
7
Share


@BIYEI
Follow
Floracion (Tiempo estimado 64 dias)
Segunda Semana de Floracion
15/01/2024 - 5:00hrs y 22hrs: Se verifican parámetros básicos del agua, mantener cuidados específicos.
Agua de osmosis: Ph 6.0, PPm 1000-1250, Ec 2.0-2.5, Temperatura 20°C - 26°C, Humedad 75%
Ambiente: Temperatura 24 °C, Humedad 65%, Ventilación 15%, 12 hrs de luz , 12 hrs de obscuridad.
16/01/2024 - 5:00hrs y 22hrs: Se hace cambio de solucion nutritiva, con los mismos parametros de la semana, Se lavan recipientes, Se verifican parámetros básicos del agua, mantener cuidados específicos.
Agua de osmosis: Ph 6.0, PPm 1000-1250, Ec 2.0-2.5, Temperatura 20°C - 26°C, Humedad 75%
Ambiente: Temperatura 24 °C, Humedad 65%, Ventilación 15%, 12 hrs de luz , 12 hrs de obscuridad.
17/01/2024 - 5:00hrs y 22hrs: Se verifican parámetros básicos del agua, mantener cuidados específicos.
Agua de osmosis: Ph 6.0, PPm 1000-1250, Ec 2.0-2.5, Temperatura 20°C - 26°C, Humedad 75%
Ambiente: Temperatura 24 °C, Humedad 65%, Ventilación 15%, 12 hrs de luz , 12 hrs de obscuridad.
18/01/2024 - 5:00hrs y 22hrs: Se coloca una red extra para separar los tallos secundarios y entre mas la luz entre las ojas, Se verifican parámetros básicos del agua, mantener cuidados específicos.
Agua de osmosis: Ph 6.0, PPm 1000-1250, Ec 2.0-2.5, Temperatura 20°C - 26°C, Humedad 75%
Ambiente: Temperatura 24 °C, Humedad 65%, Ventilación 15%, 12 hrs de luz , 12 hrs de obscuridad.
19/01/2024 - 5:00hrs y 22hrs: Se verifican parámetros básicos del agua, al acomodar bien los tallos secundarios por la red por accidente troce una rama, coloque savila para ver si reconstruia la pared celular rota, queda en observacion, mantener cuidados específicos.
Agua de osmosis: Ph 6.0, PPm 1000-1250, Ec 2.0-2.5, Temperatura 20°C - 26°C, Humedad 75%
Ambiente: Temperatura 24 °C, Humedad 65%, Ventilación 15%, 12 hrs de luz , 12 hrs de obscuridad.
20/01/2024 - 5:00hrs y 22hrs: Se verifican parámetros básicos del agua, no se observa mejoria asi que se procede a cortar ese tallo segundario, mantener cuidados específicos.
Agua de osmosis: Ph 6.0, PPm 1000-1250, Ec 2.0-2.5, Temperatura 20°C - 26°C, Humedad 75%
Ambiente: Temperatura 24 °C, Humedad 65%, Ventilación 15%, 12 hrs de luz , 12 hrs de obscuridad.
21/01/2024 - 5:00hrs y 22hrs: Se verifican parámetros básicos del agua, mantener cuidados específicos.
Agua de osmosis: Ph 6.0, PPm 1000-1250, Ec 2.0-2.5, Temperatura 20°C - 26°C, Humedad 75%
Ambiente: Temperatura 24 °C, Humedad 65%, Ventilación 15%, 12 hrs de luz , 12 hrs de obscuridad.
Likes
7
Share


@eldruida_lamota
Follow
Que pasa familia, vamos con la cosecha de estas GG4 Sherbet Fast Flowering, de FastBuds.
Por dónde empezar, las flores son bien compactas , y van repletas de resina, tienen tonos por dentro muy bonitos, y tiene un aromas dulces y afrutados.
Es muy sencilla de cultivar, es de ciclo corto mdio aunque también si le dais una semana más no pasa nada agradecer se agradece al final.
Mars hydro:
Code discount: EL420
https://www.mars-hydro.com/
Agrobeta:
https://www.agrobeta.com/agrobetatiendaonline/36-abonos-canamo
Hasta aquí todo, Buenos humos 💨💨💨
Processing
Likes
6
Share


@Greenthumbguru
Follow
Boy u can tell it’s close to Christmas cause she. Frosty lmao.
But I’m push her another week before flush.
I really haven’t had any issues with. Her no sickness. No nothing
Processing
Likes
22
Share


@Chucklebrother1
Follow
3 of the same strain 2 are going into flush and the big one is getting another week of overdrive as she seems to be responding well to it I started her off on it much later than the other 2 probably be another 2 weeks before she comes down.
Likes
3
Share

@Olduffybastard88
Follow
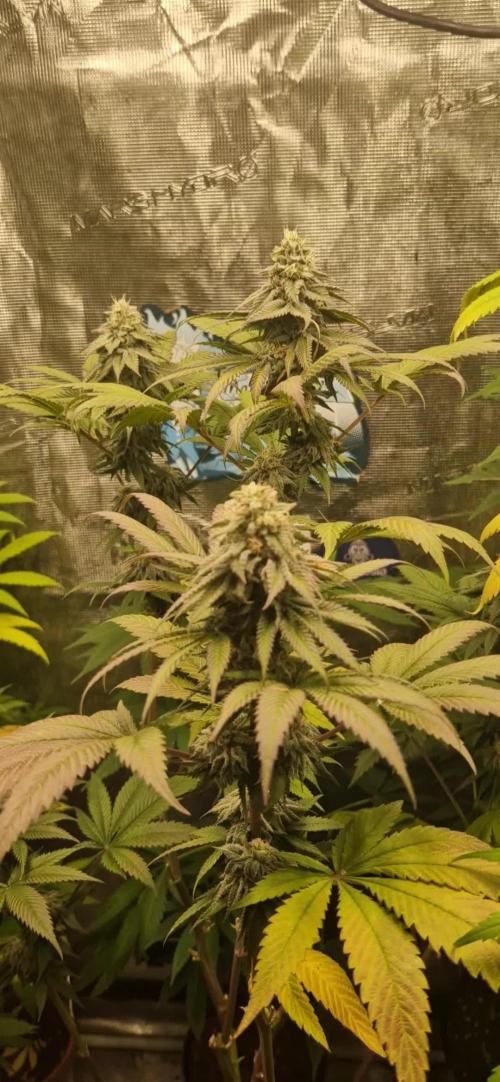
Forgot to add a week and look how much these girls have started packing on weight a few starting to turn purple and hopefully not long up till there chopped used xpertnuiterns for the flower and it made a massive difference

Likes
12
Share


@MicroHidroGrow
Follow
Ya estamos en proceso de formación de la flor. Se ven algunas más grandes que otras. Pero a grandes rasgos estan muy parejas. Me preocupa un poco la cercanía a la luz, dado que estoy en 15cm y cualquier estirón extra, sería una complicación. Vamos a ir viendo como se dan las cosas, pero al momento, no me puedo quejar. Las plantas se ven bien y saludables.
Día 24. Se empieza a notar el engorde. Esperando a que aparezcan las hojas de azúcar, que ya se empiezan a visibilizar las primeras. Voy a ver si puedo conseguir overdrive de advanced para cuando se terminen de formar las flores. Entre tanto solamente tuve un inconveniente de pérdida de agua por una manguera que moví al atar las plantas, pero ya repuse la solución perdida y todo va encaminado. No sé si van a tardar las 6 semanas que dice el catálogo, pero cuanto mucho serán 8. Seguiré actualizando.
Día 26. Las flores empiezan a yomar su forma voluminosa. Estoy en duda sobre si agregar PK la semana próxima o la otra. Quizá empiece a usarlo en el próximo depósito. No quiero tampoco sobrepasarlas y agregar el producto antes porque tengo entendido que puede ser contraproducente. De todos modos me quedan dos días para el cambio de solución, así que voy a ver cuando termine la semana. Entre tanto, ya empiezan las emociones.
Día 28. Hice ina poda de hojas bien fuerte. Ya de esa forma dejo expuesto a la luz todo lo que tiene que terminar de engordar y de paso me esquivo posibles problemas de humedad. Al final voy a usar el PK de greenhouse que tengo, pero voy a subir la dosis. Mañana se viene el cambio de solución, para lo que sería la ante última semana en teoría. Vamos a ver como evoluciona, porque los cambios son muy abruptos de una semana a la otra. Y llegado el momento miraré los tricomas, como para ir haciéndome a la idea.

Likes
5
Share

@Xpie77
Follow
Strain: 24K Kush (Seeds Genetics) – ook bekend als 24K Gold of Kosher Tangie (Kosher Kush x Tangie)
Genetica: 60% Indica / 40% Sativa
Type: Feminized Photoperiod
Aantal planten: 4
Medium: Potgrond (organisch/basic soil)
Potten: 7 liter fabric pots (stofpotten) – uitstekende drainage en wortelbeluchting
Belichting: 415W Bestva LED full-spectrum, 12/12 schema
Setup: Indoor in 120x120 cm tent (1.44 m²) – ruime tent voor stretch en LST, goede spreiding onder de lamp
Week: Week 6 Flowering (zesde week bloei)
Update Week 6 Flowering
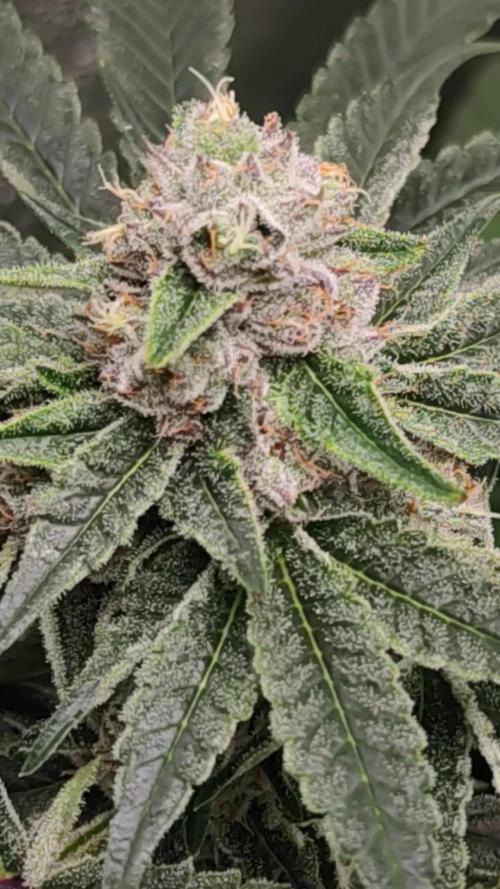
De stretch is grotendeels voorbij en de planten focussen nu volop op bud development! In week 6 bloei staan de 4 planten tussen de 55-85 cm hoog (gemiddeld ~65-75 cm). De Tangie-sativa invloed zorgde voor een duidelijke stretch in de eerste 2-3 weken (tot ~30-40% toename), maar nu stabiliseert de hoogte. De Kosher Kush-kant zorgt voor stevige, compacte structuur met bredere cola's die beginnen te vullen. Pistils (witte haartjes) zijn talrijk en beginnen hier en daar licht te kleuren naar oranje/bruin. De calyxen zwellen mooi op en de buds krijgen meer densiteit en hars – de eerste echte "fatty" look komt eraan.
Hoogte: 55-85 cm (stretch grotendeels gestopt; totale hoogte blijft beheersbaar in de 120x120 cm tent dankzij LST)
Structuur: Canopy nog vlak door eerdere LST, side branches goed gevuld. Bud sites ontwikkelen zich tot compacte, harsrijke clusters. Brede fan leaves beginnen licht te vergelen (normaal in mid-flower als de plant energie naar de buds stuurt).
Gezondheid: Planten zien er sterk en productief uit – diep groen waar het telt, geen grote deficiënties of pests. Fabric pots blijven top presteren met goede drainage tijdens de hogere waterbehoefte.
Belichting afstand: Bestva LED op ~30-45 cm – voldoende intensiteit voor bud swelling zonder burn. Gelijkmatige dekking over alle 4 planten.
Water/voeding: Water elke 1-2 dagen (afhankelijk van potgewicht). pH 6.0-6.5. Volle bloom-voeding (hoog P/K, bijv. NPK 1-3-4 of 2-3-5 op 100% sterkte, plus CalMag). Extra PK-boost (zoals PK 13/14) kan helpen voor dikkere buds. Potgrond buffer is bijna op, dus consistent voeden is key.
Omgeving: Temp 20-24°C (iets lager voor dichtere buds en terpenen), RV 40-45% (laag houden om schimmel te voorkomen bij dichtere cola's). Sterke airflow blijft cruciaal in de tent.
De geur is nu duidelijk aanwezig: zoete citrus (mandarijn/orange van Tangie) met zware, skunky Kush-ondertoon – lekker pungent! Dit is het moment waarop de strain echt laat zien waarom ze geliefd is: harsrijke, dichte buds met potentie voor hoge THC.


