Likes
Comments
Share
Likes
3
Share
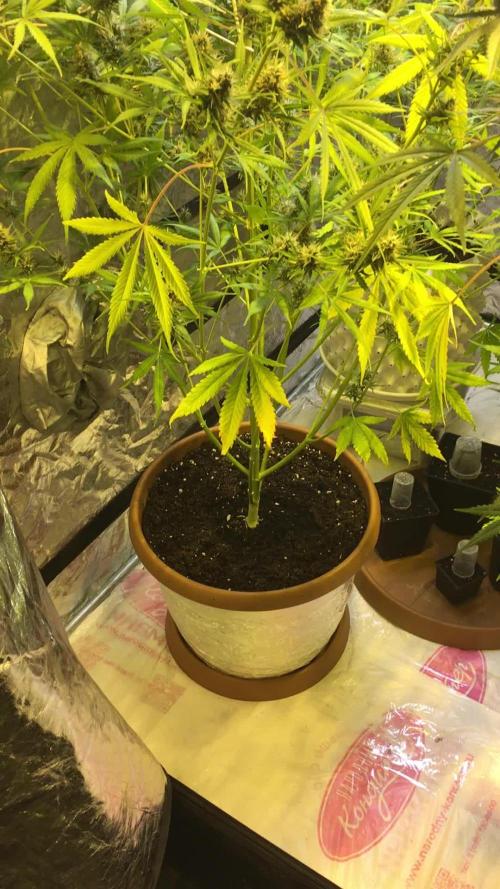
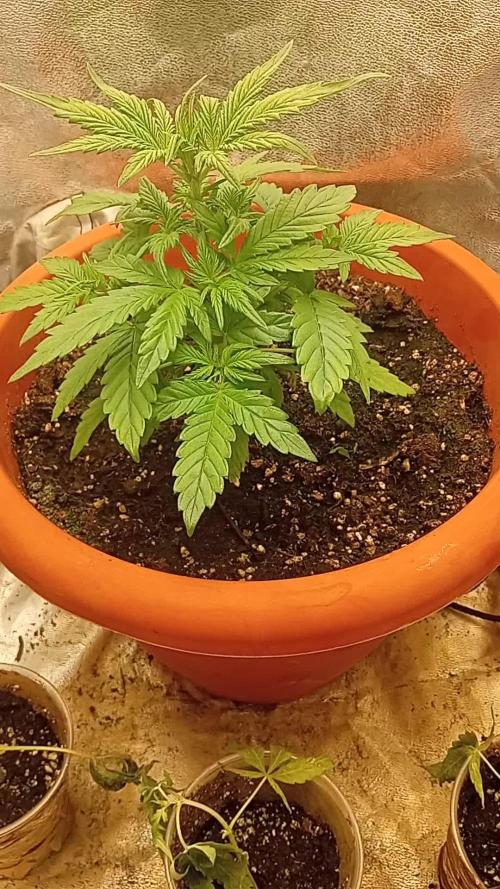
The first week of flowering is here, and things are finally looking much better! Both plants have recovered well and are now growing much healthier.🌱 #1 has already started stretching significantly, really picking up speed. It’s exciting to see how quickly it’s developing! Meanwhile. #2 spent about half the week still in vegetation, but towards the end, I finally spotted the first signs of flowering. Now that both are officially in bloom, I’m looking forward to seeing how they continue to develop over the next weeks. On to the next phase! 😊
Likes
1
Share
@Mrdub
Follow
This girl is stacking nicely looks like she's gonna need another round of defoliating starting to get sweet smell to her trichomes really starting to get heavy even covering fan leaves pistols starting to turn she drinks a gallon of water every other day gonna cut the nutes down in a week running 6.2 pH lights at 100 percent looks like adding the little bit of extra calmag worked cause she has no spots not a lot of burnt tips nice thick stalk and knuckles under canopy lighting is rocking as you can tell by the fat little colas at the bottom really loving this under canopy light so here's to another week of growing lfg
Likes
20
Share
🌱 Nectar Drip Update Week 8 from Seed · Week 2 Flower (12/12 from seed) Quick recap for anyone joining us now: This run is a 12/12 from seed experiment, meaning each plant chose on its own when to enter flower. Because of that, flower timing is not perfectly synchronized — and that’s an important part of this grow and of the decisions we’re making. We’re working with an exclusive collaborative genetic pack, not commercially available anymore, bred for stability, vigor, and resilience. What you see here is a real-world expression of those genetics, grown without chasing trends or hype — just observation, patience, and consistency. ⸻ 🌡️ Environment & Feeding (Why We Changed Nothing) This week, we deliberately changed nothing. • Day temperature: ~28 °C • Relative Humidity: ~65% • EC: 2.4 • pH: 6.5 • Plant height: ~40 cm to ~80 cm • Lighting: LED Many growers would say these temperatures are “too high for flower,” but context matters. Under LED lighting, leaf surface temperature typically runs 2–4 °C cooler than room temperature. Because of that, we focus on leaf VPD, not room VPD. The plant is what matters — not the number on the wall. We are not chasing numbers. We are paying attention to them. The plants are responding perfectly: • Lush, deep green foliage • No signs of stress • Strong internodal structure • Uniform uptake across different phenotypes When the plant is happy, stability beats adjustment. That’s why the nutrient recipe stayed exactly the same. ⸻ ✂️ Defoliation — Why This Week, Why This Way This week marked an important decision. Normally, defoliation would happen around day 21 of flower. But in a 12/12-from-seed run, there is no universal day 21. Each plant entered flower on its own schedule. The room was getting dense. Airflow was being restricted. Light penetration was becoming uneven. So we listened to the plants — not the calendar. We opened the canopy, improved airflow, and allowed the plants to: • Breathe better • Receive more uniform light • Push growth upward instead of inward We’ll be honest: 👉 We went harder than planned. But it was a conscious decision, not an emotional one. Leaves removed were healthy — not sick — which tells us the plant had energy to spare. The remaining structure is strong, clean, and well-shaped. ⸻ 🛠️ Training & Recovery • Structural branches previously damaged were taped last week • All repaired nodes bounced back perfectly • Plastic clips are still being used dynamically — on and off — to guide shape, not force it This tells us everything we need to know about the genetics: stable, resilient, forgiving, and strong. ⸻ 🔮 What We Expect Next After a hard defoliation, plants tell the truth quickly. What we expect: • Fast rebound • Vertical push toward the light • Strong flower site development • Clean airflow through the canopy If they slow down, we listen. If they explode, we let them run. So far, these girls are behaving like champions. ⸻ ❤️ Final Words & Gratitude To everyone reading this — the supporters, the critics, the silent observers: You all have a place here. Growth doesn’t happen without contrast. Learning doesn’t happen without mistakes. And progress doesn’t happen without conversation. Thank you to: • The platform • The OGs • The new followers • The sponsors • The lovers and the haters We treat everyone the same. Criticism is welcome. Questions are encouraged. This is Nectar Drip — honest, detailed, educational, and real. Let’s see what the future shows us 🌱💧 📡 Please stay tuned.we never quit https://www.youtube.com/@DOGDOGTHEDOCTOR NEW 🙏 Thank you for your patience and continued support. FOR DISCOUNT CODES AND MORE JUST FOLLOW THE LINK https://website.beacons.ai/dogdoctorofficial 📲 Don’t forget to Subscribe and follow me on Instagram and YouTube @DogDoctorOfficial for exclusive content, real-time updates, and behind-the-scenes magic. We’ve got so much more coming, including transplanting and all the amazing techniques that go along with it. You won’t want to miss it. GrowDiaries Journal: https://growdiaries.com/grower/dogdoctorofficial Instagram: https://www.instagram.com/dogdoctorofficial/ YouTube: https://www.youtube.com/@dogdoctorofficial Deleted by Youtube Vimeo : https://vimeo.com/dogdoctorofficial Under construction stay tuned ⸻ Explore the Gear that Powers My Grow If you’re curious about the tech I’m using, check out these links: 🔆 Lighting & Environmental Control • Future of Grow — Advanced LED lighting technology https://www.futureofgrow.com/ DISCOUNT CODE: DOG20 • Lumiflora — Under-canopy LED lighting https://lumiflorade.com/ • TrollMaster — Environmental controllers and automation gear (past collaboration) ⸻ Genetics • Zamnesia Seeds — Genetics used in this project https://www.zamnesia.com/ ⸻ 🌱 Soil, Substrates, Boosters & Root Support • Plagron — Substrates, bio mixes, and supportive products https://plagron.com/en/ ⸻ 🎒 Storage, Curing & Preservation • Grove Bags — Curing and storage solutions https://grovebags.com/ ⸻ 📸 Photography Equipment & Tools (Not sponsors, but part of my creative toolkit) • Sony A6700 • Sony full-frame macro lens + few more • Stacking photography workflow - learning • iPhone (for behind-the-scenes shots) We’ve got much more coming as we move through the grow cycles. Trust me, you won’t want to miss the next steps, let’s push the boundaries of indoor horticulture together! As always, this is shared for educational purposes, aiming to spread understanding and appreciation for this plant. Let’s celebrate it responsibly and continue to learn and grow together. With true love comes happiness. Always believe in yourself, and always do things expecting nothing and with an open heart. Be a giver, and the universe will give back in ways you could never imagine. 💚 Growers love to all 💚 📸 P.S. – The Eye Behind the Lens All photos in this diary (for now — except for the ones showing the camera, which I took with an iPhone) are taken with a Sony A6700 paired with a Sony full-frame macro lens and a few more. Photography is part of the story — it’s how we share the fine textures, the glow, and the quiet details that words can’t always capture. I’ve also started experimenting with photo stacking — a technique where multiple images, each taken at a slightly different focus point, are layered together to create one perfectly sharp image from front to back. It’s not digital enhancement or AI; it’s pure photography — a way to reveal the plant’s beauty in microscopic depth, from trichome to petal. You’ll even see a few shots of "ghost me" capturing the shots — camera, lens, setup — because every grow deserves not just to be cultivated, but documented like art. FOR DISCOUNT CODES AND MORE JUST FOLLOW THE LINK https://website.beacons.ai/dogdoctorofficial NEW DISCORD - Official Server Invite Link : https://discord.gg/ksjAkA5T74
Likes
11
Share
@Sejnik
Follow
Všechny Holky vypadají velmi zdravě a spokojeně bez známek přehnojení či nedostatku živin. Mají sytě zelenou barvu listů. V polovině tohoto týdne mám v plánu střihnout každou rostlinu u prvního nodu Světlo jede na 50%[155w] 45cm od vrcholů rostlin D39 Neděle : Nový týden jsem zahájil srovnání rostlin na stejnou výšku za pomocí LST😤💪. Všechny holky jsou nyní 10-12cm vysoké. Zároveň jsem odrtřihl přilehlé listy, které jsem po zastřihnutí ponechal u menších větví. Byl jsem velmi překvapen jak snadno se manipuluje s větvemi při LST u rostlin SHOGUN 😍. Opravdu velmi snadné, stačilo jen lehce promnout větev mezi prsty a mohli jste je vytvarovat do jakéhokoliv tvaru😍 Naopak rostliny Haze Berry jsou přesným opakem. I přes největší opatrnost jsem při ohybání jedné větve uslyšel jemné prasknutí a na větvi se objevila nepatrná prasklina. S rostlinami Haze Berry je trochu těžší manipulace při LST, ale možná to bude i tím, že nemám příliš zkušeností S rostlinou Shining Silver Haze se manipuluje bez problémů 😊. ne tak dobře jako s Shogun ale rozhodně lépe než s Haze Berry. Každá Holka dostala 1L vody s 1ml/l živin RQS: Flowering booster - Bigger Flower D39 Středa: Zastřiženo u prvního nodu na 4 coly Povedlo se mi napůl zlomit celé jedno rameno SHOGUN 1 když jsem se snažil uvolnit dráty které jsem použil k LST protože se zařezávaly do stonků rostlin. Bohužel nesprávně zvolený material k uvazování stonků... Zranění jsem zalepil a modlím se aby nedopadlo jako u HazeBerry 1 kde jsem o celé rameno přišel 😢 D40 Čtvrtek: Holky dostaly 700 ml vody s 0,5ml/l RQS: Flowering booster- Bigger Flowers Dostaly postřik vodou s Biobizz Fishmix 1ml/l D41 Pátek: Rameno Shogun 1 to přežilo😤. . Nové coly ale mají pomalejší růst oproti druhé straně, což není dobré pro main-lining. U Shogun 5 se po zalití objevilo nějaké popálení živinami 😢 Zbytek vypadá skvěle ;)
Processing
Likes
37
Share
@MG2009
Follow
08/29/2018 Been a hot week but the girls don't seem to mind,90s in the day 82° at night and sticky,muggy weather. Their leaves all pointing ☝️,lets me know they are happy ☺️ .watered with plain water they were pretty dry pots weight was very light. Will feed and water in in morning sleep well and medicated😎 08/31/2018 Just a note today #1 is very green compared to the other 4 plants, could be potted plants running low on nitrogen? My soil has plenty according to soil test. I know last year's crop in soil was pale like other 4 plants, maybe biochar is helping soil retain it's nutes better? Year 2 for biochar, first year could have tied up some nutes....hmmm? Ps Last feeding today Fox farms big bloom at heavy feeder dose 1/2 cup per gallon, should see nice gains this week! 🙏🙏🙏. Pss. G GTH #4 loosing her smells, #3 smells of Skunk and coffee ☕,#2 minty chlorophyll orange,#1 menthal,skunky but very lite scent. Should I pollinate a branch of each? Oh my God the pressure! Do I have enough pollen? Oh sorry for rambling on just smoked lemon sour diesel and thoughts very racy😀 Got to garden see you next week 😎😎😎😎😎😎😎😎😎😎😎😎😎
Likes
22
Share
@valiotoro
Follow
I’m in love with the straw gorilla 😍🤩🍓 All the top buds ready✂️ The colors & the smell pouaaah out of this world !! One more week for the lower buds and finito bye bye
Likes
38
Share
Utopia Haze is a rare heavily sativa dominant hybrid (90% sativa/10% indica) strain created through back crossing Brazilian Sativa strains. This tasty little bud took home 1st Place for Best Sativa in the 2008 High Times’ Cannabis Cup and for good reason – with its potent 18-22% average THC level and long lasting cerebral effects, Utopia Haze is one powerhouse smoke. The Utopia Haze high comes on soon after you finish your first toke, hitting you with a strong cerebral lift that infuses you with a sense of hazy relaxation. Type: Feminised/Photoperiod Cultivation: Indoor/Outdoor Flowering Time (days): 70-75 Indoor Yield (g): Up to 650 Feminised Outdoor Harvest Month: October Feminised Outdoor Harvest Month Week: 3rd-4th week Aroma: Citrus, Woody, Pungent, Mint Effect: Cerebral Lift, Hazy Relaxation, Sleepy Welcome Everyone to the Final Entry of my Utopia Haze Grow ! There is so much to discuss ! I have been extremely busy as of late trying to get this Harvest together, but i am happy to have it here for you now ! I Seriously under estimated the amount of time, help from others, and my own necessary skills to pull this off.. and i still kind of screwed it up lol ! But its worth noting i have never actually done this before and trying to document it during....was extremely hard. It is next to impossible to work an iPhone with rubber gloves on ! First I want to discuss everything step by step so before you jump straight into the comments on how the end product is so small in "quantity" Rest assured i am happy with its"quality"...and thats all that matters to me because Life is a journey not a destination! and i have learned so much from this grow that I couldn't be any happy even if i messed some things up :) But at the very least I hope you read through this entry in its entirety with an open mind and focus more on the process, rather than just the outcome! I ran out of Ice & i was only able to wash three times..(normally I've heard you should go sometimes 5-6 washes) Preparation is Key & things will be much better next round :) Photos 1-22 These are pretty self explanatory but for those of you just tuning in now.. this is what happens to a very happy plant when you don't have the necessary tools to monitor key components of growing cannabis.. Ph, as well as EC levels play a very key role in the outcome of your grow lol that being said I was just able to save this plant by purchasing both tools but that doesn't mean the plant didn't suffer because of the prior events.. This was a Huge reason behind me choosing to turn this harvest into what i would consider "Solventless Hash Rosin" from "Ice water extracted Bubble hash". Pictures 23 The idea here is the process of using "fresh Frozen Cannabis" this has been discussed many a time online on such sites as instagram and here on grow diaries as well.. I personally have Never tried the process so i decided to try it out and make a judgement for myself.. Video 24 The Cannabis has now been in the freezer for 72 hours making it very well frozen.. as you can tell i struggled getting it all into the 25u Screen Wash Bag. One thing of note i would do differently is i will de-stem my next batch as i also believe this played a part in the amount of plant matter that escaped through the sieves. Photo/Video's 25-28 The idea here is "ice water Seiving" & especially with the bags that I am using here that are only have screen material on the bottom portion of the bag it is very important to have spaces in-between the screens to allow the water to pass directly through the screens into the bottom bucket with the least amount of resistance.. because the hash is so extremely temperature dependant if it gets warm on the side of the bag.. it will stick there and not make it to the bottom to become use able product.. 29 You do not need to use as much Ice as i used here lol... the idea is to keep everything very cold..i certainly achieved that but at the sacrifice of using so much that i ended up grinding product and producing "contaminants" but in the end they are just plant matter that i would be smoking when i rolled up my joint either way so.. I'm not super disappointed.. But it should be noted that what you want to achieve here is a Layering effect where you have the wash bag between two small layers of ice while the "water current" washes the Trichomes away allowing them to be separated by the screens setup below :) Before Starting the machine you should allow some time (i.e.;10-12minutes pre soak to allow the product to become saturated) before the first cycle. By video 32 I have just ran out of ice lol.. Video 33-34 Here I have a tip for you.. to separate the screens that you sieve through.. cut 5 gallon buckets to stretch them across nice and tight.. it'll make scooping your Bubble that much easier ! i learned this from the many "Frenchy" videos I have watched :) Picture 35 Here in lays the problem for most people.. drying your hash without loosing vast amounts of "Terpenes" whilst also stay ever vigilant against mold ! Thanks to all those videos I've watched on youtube.. id like to think this was one of my most successful parts of this process.. Things to Note; Terpenes start to seriously evaporate at temperatures 68F or 20C you need to stay as cold as possible whilst bringing the Relative Humidity in the space down into the 40-30% to stay away from that nasty mold ! I used my cold storage room in the basement.. with a dehumidifier running to keep the space at 45% RH & staying at a constant 15c. All while spreading the hash as thin as possible across parchment paper, on top of the white screens with a fan moving air across both sides of the paper. Pictures 36-38 These are some macros i took in the middle of my drying session I fell in love with the colour. Yes i know the black spots are plant material but they will get caught when i bag the hash & squish the oil out. Thing to Note; at this stage it is important to ensure you 'micro plane" the hash down as fine as you can whilst staying weary of the temperature... any "chunks" will hold pockets of moisture.. that lead to potential problems..ie; mold ... Picture/Video 39-41 Successfully planed bubble hash ready to be bagged and Squished ! Picture 42 Ive decided to follow Pedro.. from Pedros Grow Room and double bag to be on the safe side so i don't have any blow outs. So thats One 25u bag inside one 160u bag ! :) Pictures 43 This is almost 3 grams of the bubble hash from above, already melting in the bag.. this is where i ran into trouble again lol things started getting to warm in the house and i was only able to get one of the three squish's i did on video :( things started getting sticky. Picture 44 This is basically just a photo of the equipment I'm using; 3x5 LowTemp Cage in the frame I built myself, with a 20Ton bottle jack. Something to note here is this is an older Lowtemp model with only a single heating zone which is which i have it closed here heating Both sides of the press :) As well as the importance of having adequate pressure on your plates.. my rig is very overkill for the size of hash bags..lol Video 45 Here is the lovely press video.. its didn't quite work the way i wanted either lol my directional folding wasn't quite tight enough for a big "drip" :) &the Press was set to 65°c Photo's 46-50 are pretty self explanatory :) I had a blow out.. but still managed to pull an 80% return from the hash once squished...& yes it tasted amazing :) Was it worth it in the end... that could be debated.. for some..i understand..its not your thing, but for those of us that are interested in making our own concentrates.. free from Solvents... I wouldn't make it any other way :) If even ONE of you reading this diary finds it helpful to reference for ANYTHING.....even if its "what not to do" ill consider it a success ! Thanks again for tagging along on this garden adventure.. its been one heck of a journey ! Much Love from B.C. Canada, Until Next time, Cariboo
Processing
Likes
150
Share
I welcome all my like-minded people who are in different parts of the world. I thank everyone who provides moral support to Russian plant growers. 👍 It's me again-an underground Russian grower with some experience with different strains of cannabis. Subscribe to my diary if you want to follow my progress and learn a lot about the life Of Russian growers, and the difficulties they face every day👊 Today my have my plants 62 day life. 9 weeks. today I visited my underground production. As I will have difficulties in financial investments, I had to collect from improvised materials additional ventilation and air filtration. In addition, I installed forced ventilation at the entrance with a computer power supply. Bubblelicious Auto-with the genetics of this cannabis variety I was familiar before, so knew what to expect from these plants. I can say one thing, it is the most delicious and sweetest sort of marijuana I grow. Also, it produces a lot of oils which I think it is suitable for extraction or cooking cannabis food. I look forward to the harvest Neville's Haze Auto - this variety of cannabis shows an unprecedented strength in growth, its flowering only in the early stages, and should take a long time before its full sexual maturity. In addition, I made my girls an intimate haircut, so that their genitals become like full-fledged women. In General, I'm doing well, thanks to this resource and the advice received here, I manage to fight with the stench, I'm free and I'm not going to finish my activities. Until next time. 😉
Processing
Likes
20
Share
She looks very healthy and super super big,I did not expect such a big stretch in her first 2ndbweek of flower,she's such a big bushy girl,can't wait to see her in full flower 😍 💚. Love what I do man.
Likes
Comments
Share
@cowstick
Follow
Defoliation week. Cleaned up under the canopy, and clipped the subpar Bud sites under the canopy. Foliar spray in use until end of week 4. Started to drop the temp to simulate changing of the seasons. 70*f during lights on, about 63*f lights out. Start of the week had an issue with the tent. After watering, the tent humidity went up to 90%. I have my Humidifier set to keep VPD between .8 and 1.2 and the system was trying to balance out between temp and humidity. Got cold one night. 3 days into this week and I haven't watered since last week. Soil still has plenty of water in it.
Likes
12
Share
@NONSENSE
Follow
Good day to everyone! The plants look great. ☀️ The light 18/6 ☀️ 🥛 The PH 5.5 🥛 💎 The EC 800ppm 💎 Growing on Rockwool is a good idea! I see astronomical plant grow -about 2-3 cm every day. ☀️ I water the plants every day in the morning: 2L to each plant tray, then I pump the water out. ☀️ The ladies drink about 1l each every day, eating good for vegetation. ☀️ Please check the pictures- amazing leaf size, the internode is small about few cm. ☀️ I topped the plants to make more bushy forest. ☀️ Also, I installed the screen to start the ScrOG training. ☀️ After topping - I want to wait for about 4 days to lower the stress and then I will do GOOD Defoliation. ☀️ I think from the next week I will switch to 12/12. It's sativa, so I need to hurry up flowering a little to save plant size. ☀️ Good luck to every one! ☀️
Likes
3
Share
@LSchnabel
Follow
Flushed this week with straight water. Bud is smelling like sulfer and orange. Bud structure was good but they don’t seem very dense. Nice color shift the last two weeks of growth. Chopping down and hanging for a two week dry.
Likes
5
Share
03.14.23. Watered the plant with nutrients for the first time. I always wait till the second week to add nutrients. 03.18.23. Plants were ready for another water. This time I watered them 1 gallon per plant. Having the Coco in my pots the medium can handle 1 gallon without over watering the plant. I gave the plants their second dose of nutrients. MID WEEK REVIEW: Plants are looking healthy and are on there second nodes. Will start Low Stress Training (LST) next week. Thanks for tuning in to my grow diary see you Tuesday for end of week review. 03.21.23 END WEEK REVIEW: All 3 plants are growing very fast and are all looking great. I finally gave them all names so it’s easier to tell them apart as they grow and get moved around. Starting LST Tomorrow. Thanks for watching my plants grow. Happy growing everyone
Likes
112
Share
@Dunk_Junk
Follow
So finally the harvest has started. Branches are harvested from the bottom pair upwards. Looking thru the pics again to write this, I remember feeling in awe of this plant. By node 4 they were very nice buds. Massive and dense. Node 6 and above is silly. Never seen anything like it. I had to take these pics because the 9" to 10" circumference on the buds, nobody would believe me 😅 Still got the main cola to do, got sidetracked doing other projects. But it will be done in the next couple of days, then to dry it all!!! Main cola trimmed and drying now...................... Sorry this update has been a while coming, i promise it's worth the wait. Dry weights in now starting from bottom node pairs and working up the plant: 29.72g 45.85g 54.91g 126.28g 82.51g 112.26g 75.24 Total = 526.77g !!!!!!!!! This plant is totally incredible. All lower buds apart from the main colas weighed 9oz... I was thinking another 2+oz main colas and nice buds. Well they was over 9oz too. Over 18oz from a single autoflower plant. Incredible, just incredible.
Likes
13
Share
@Canadian
Follow
On the first day of week 4 I did FIM on the plant at 6 node. Not sure if I overdid it and accidentally top her instead of FIM but we will see how it progresses Up to this point the plant has been growing very strong and healthy almost as fast as Autos I have grow before. Day 22 the plant doesn't seem stressed out at all and in fact is pumping New Growth right away I thought it was going to be sad for a day or two but no way the genetics are very strong the plant is very vigorous . Day 24 I did some minor defoliation to allow the light to penetrate everywhere in the plant. Also looks like the fim was a failed and end up topping instead I will continue to update thank you for reading and have a happy grow.