
Likes
Comments
Share


Likes
14
Share


@Smile_gan
Follow
From website seed stocker they said this BCN need 75 days to harvest. So, at the end of week 11(77days) is very nearly to harvest day. Next trichrome check found almost 75-80% already cloudy. I thing if no any problem should be ready in next 1-2 week.


Likes
16
Share


@NatureSolutions
Follow
Finally the fattening of the nugs has started on my earliest plant, the purple punch. Great exhibition of purple colours, furtermore i harvested vast amounts of nettle for my homemade: Nettles, bonemeal, 300°c baked clay and charcoal mix. Will be used in my next round of 5 plants( organic round).
Happy smoking bros and sistahs
Likes
15
Share


@Chubbs
Follow
420Fastbuds
FBT2313/Week 4
What up everyone. Hope all are well. Weekly update on these two gorgeous girls. This past week has been fun doing a major defoliation taking off most the bigger fan leafs. Hard to tell a few days later I took anything off. Which is amazing they never skipped a beat. No big issue's and since sprouted have grown phenomenal being relatively easy. All in all Happy Growing.
Likes
1
Share

@all_about_420
Follow
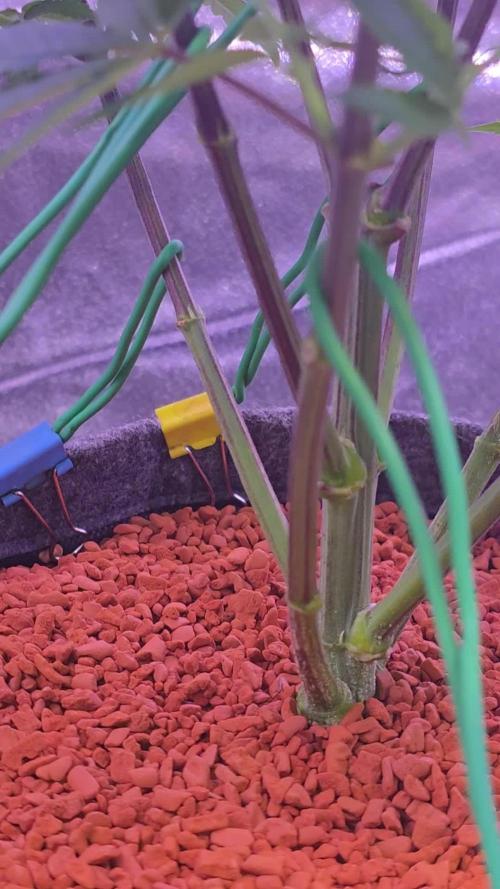
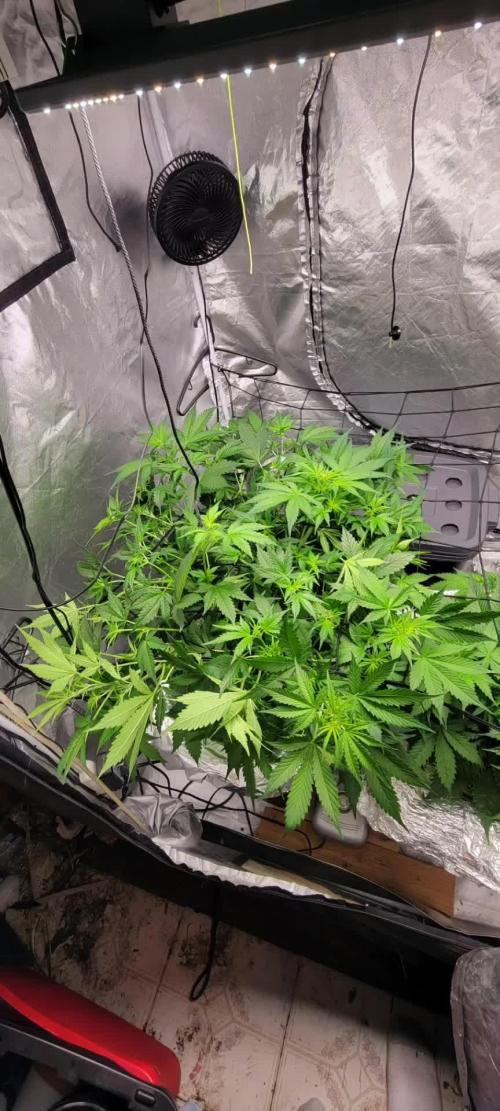
Das gezielte Low Stress Training zeigt bei der Permanent Marker volle Wirkung: Die Verteilung der Triebe trägt Früchte und formt eine wunderschön ausbalancierte, buschige Pflanze. Die Verzweigung hat sich durch das Herunterbinden massiv verstärkt, sodass nun zahlreiche, homogene Triebspitzen im Licht stehen. farblich hat sich die Traphouse Genetics dank des größeren Topfvolumens sichtlich stabilisiert und treibt mit einem kräftigen, vitalen Grün munter weiter aus.
Likes
2
Share


@Ezcashinc
Follow
Can really see the plant getting potent according to what I have read, I really don’t know exactly when to harvest, maybe can get some tips from you guys out there.


Likes
8
Share


@StonedandSteady
Follow
AutoFlowers/Outdoor Vine plants, at 8 weeks of Bloom and Outdoor Flowers Blooming Update!
Everything looks Gorgeously Great and looking Beautifully Grown at their 8th Week of Flower! Outdoors Update! 4th Feed of #HumboldtCountysOwn
#AutoWhiteRussian and #AutoMontreal *Fems* breed by Team #DivineSeeds #DivineSeedsSquad #DivineSeedsBreedingCompany Looking Magnificent and Amazingly Great in thier 8th week of Flowers! Thier Growing under the #Growatt600w and in my #TopoLite 24×24×48 Grow Tent! I'm also using #TNBNaturals #TheEnhancer Co2 Despersal Canister and using thier Ph⬆️⬇️ for my Decolinated Tap Water!
#AutoWhiteRussian breed by Outstandingly Awesome Team #DivineSeeds #DivineSeedsSquad #DivineSeedsBreedingCompany
Yo!!! This Lil Beauty popped open in under between 16-18 hours of Germination using this Wet Papertowel Method, this New Heat Mat, Baked potato ToGo Container and Regular Tap Water Helped Tremendously! Heck Yeah Growmies and Growmets!!! Let's Grow!!!
DivineSeeds:
#AutoWhiteRussian
Origin:Afghanistan
Type:Indica/ Sativa/ Ruderalis
Flowering:65 days
THC:24 %
Harvest:400-600 g/m2
Height:100-150 cm
#AutoMontreal breed by Top of The Line Team #DivineSeeds #DivineSeedsSquad #DivineSeedsBreedingCompany
Yo!!! This Lil Beautiful Bean Popped under between 20 hours of Germination using this Wet Papertowel Method, this New Heat Mat, Baked potato ToGo Container and Regular Tap Water Helped Tremendously! Heck Yeah Growmies and Growmets!!! Let's Grow!!!
DivineSeeds:
#AutoMontreal
Origin:Canada
Type:50% Indica/ 40% Sativa/ 10% Ruderalis
Flowering:65 Days
THC:23%
Harvest:550-750 g/m2
Height:120-160 cm
https://divineseeds.net/
https://instagram.com/divine.seeds?igshid=osxe2v7en33v
HumboldtCounty'sOwn:
Email: [email protected]
Phone: (707) 725-4119
Toll free: (866) 872-9434
Humboldt Bottling
Po Box 429 · Fortuna, CA 95540
HumboldtCounty'sOwn Website Link: https://humboldtcountysown.com/
HumboldtCounty'sOwn Instagram Link: https://instagram.com/humboldtcountysown?igshid=1qj809qkkwych
I love and Appreciate Everyone!!! Thanks Again Teams! Cheers Famz!!! Much Props and Much Topz!💯

Likes
10
Share


@SkunkyDog
Follow
Hallo zusammen 🤙
Habe sie heute geerntet.
Melde mich in 2 Wochen mit dem Erntebericht.


Likes
85
Share


@OrganicNature420
Follow
• In House Genetics
• FlapJacks (Mac1 x Slurricane x Pancakes)
• THC dominant
• Terp %45
Nutrients • GreenBuzzNutrients
(DISCOUNT CODE • GD42025) %25 off
I use the whole product range and this stuff is a game changer. I've not had one bad grow with this company and it hasn't let me down once. Terps and taste are through the roof. No need for run off in coco only during flush week (i use a 0ppm distilled water) Hands down the best nutrients on the market
GREEN BUZZ OUR NOW GIVING YOU GUYS A WHOPPING %25 OFF USING THE NEW CODE ABOVE 💚🌱
LIGHT/TENT • Mars Hydro FC-E6500 5x5 tent
Not impressed with how much is on it and Buds are smallish compared to my other photo grows. Looks more like an auto. Great levels of frost but disappointed with both Plants. Expecting more from its great linage. To be continued....
Bubble hash review : most probably used 2oz of trim and all the sugar leaves. Looks an easy oz and if so that's a banging return. Will update when dry 👍🏻

Likes
241
Share


@Tropicannibis_Todd
Follow
💩Holy Crap We Are Back At It And Loving It💩
Growmies we are at DAY 42 and she's just killing💀it👌
👉We are in full on flowering , gotta say the pink to redish hairs look amazing , not to mention the frost 👈 even the stems and branches are sticky icky 👈
OMG I LOVE THE PINK PISTOLS 👈
So Shit , I gave them just a tad to much nutes on the first few feeding 👈 But I have since fixed it
So I'm still doing some low stress training 🙃 and some defolation 😳
Lights being readjusted and chart updated .........👍rain water to be used entire growth👈
👉I used NutriNPK for nutrients for my grows and welcome anyone to give them a try .👈
👉 www.nutrinpk.com 👈
NutriNPK Cal MAG 14-0-14
NutriNPK Grow 28-14-14
NutriNPK Bloom 8-20-30
NutriNPK Bloom Booster 0-52-34
I GOT MULTIPLE DIARIES ON THE GO 😱 please check them out 😎
👉THANKS FOR TAKING THE TIME TO GO OVER MY DIARIES 👈
Likes
22
Share


@Slobasian
Follow
Love every plant each one is growing differently stacking different even the visual difference of one strain growin two different ways combined smells of diesel, pez candy and lemons


Likes
40
Share


@CampaCavallo
Follow
3ª Settimana di Fioritura 💐
Ecco la BISCOTTI 🍪🗿 che continua a migliorare come aspetto!
Sembra proprio che i suoi bei fiorellini compatti si stiano ingrandendo per bene👍🏻
Ci sono ancora punte di foglie artigliate, ma la piccola non sembra soffrire. 💚

Likes
12
Share


@Growing_Skills
Follow
Chinazes) The nuts have all sprouted, Easy to grow, 70 days have passed from the beginning of the first week to harvest, Incredible, sweet, delicious smell, once you smell this aroma, you can enjoy this smell for hours)) I recommend it to everyone!!)) I will put this variety in the top.
Likes
22
Share


@takecua
Follow
Por fin llego su día, a sido todo un reto
Ahora estara secando entre unos 7 o 10 días mas o menos
Espero sacar calidad ya comentare .. saludos y mucho verde

Likes
18
Share


@TheCannaProphet
Follow
~ FASTBUDS CHEMDAWG AUTOFLOWER~
'The history of the Chemdawg strain starts in the early 90s where a group of cannabis breeders from Colorado were following a band on tour and took some of their weed with them, they had named this weed “chem bud” due to the unique chemical and diesel flavors.
When they got to one of the shows, they sold a couple of grams to a group of friends who quickly realized those were some special buds and, lucky for them, the buds had a couple of Chemdawg seeds (before they actually knew what they were) which they stored.
When one of the friends, who was also a cannabis grower, went back to his home on the East Coast, he germinated some of the seeds and started selecting the best phenotypes to continue developing those genetics even further.
As you may know by now, his effort paid off, and soon enough there were two versions of this strain going around, one was Indica-dominant and the other was a Sativa-leaning hybrid.
Both of these versions quickly spread around and several breeders developed new strains with these genetics, getting known by almost every cannabis consumer, becoming extremely popular and giving birth to a lot of famous strains such as Sour Diesel and OG Kush, although this isn’t confirmed, several old-school growers swear by it.' *content credit to FastBuds
_______________________________________________________________________________________________________________________________________________________________________________________________________________________________________________________________________________________________________________________________________________________________________________________________________________________________________________________
The Spec's:
'These precious genetics were boosted by the Fast Buds team to provide a super tough, potent, and easy-to-grow strain.
This Chemdawg Auto from their 'Originals' line grows around 90cm and is very resilient to diseases and colder climates but watch out because if you’re growing outdoors, your neighbors will be able to smell it easily!
This strain can be cultivated even by beginner growers due to it requiring minimal maintenance and can produce up to 400gr/m2 in 8-9 weeks, this is one of the shortest varieties FastBuds offers and can be the perfect choice for those growing on a balcony or in a limited grow space.
As soon as the trichome production starts, you can expect a terpene profile that resembles a mix of chemicals that is a delicious blend of diesel, gasoline, and petroleum.
With up to 20% THC, you can expect a super potent high that will take you into another world and leave you there, while you relax with a strong corporal high that will leave your whole body melting, a perfect effect to relax after a long day of work or inducing a good night of sleep.' *content credit to FastBuds
~Chemdawg Auto~
Genes: Sativa 20%/Indica 80%
Genetics: Chemdog Autoflowering
Flowering: 8 – 9 weeks
Harvest: 350 – 400 gr/m2
Height: 60 – 90 cm
THC: Up to 20%
CBD: < 1%
Autoflowering: Yes
________________________________________________________________________________________________________________________________________________________________________________________________________________________________________________________________________________________________________________________________________________________________________________________________________________________________________________________
THE SETUP:
~Planted into Jiffy Peat Pellets that were hydrated with de-chlorinated water with SuperThrive added then ph'd to 6.0 @ 80℉
~Grown 100% organic in 10g fabric pots with Mother Earth 70/30 Coco/Perlite medium amended with 2tbs/g of Down To Earth 4-4-4 / 2 cups/g of Earthworm Castings / 1tbs/g of Dr. Earth Flower Girl 3-9-4, 1tbs/g of Dr. Earth Bat Guano, 3/4 cup of Down To Earth Azomite and 1 tsp/g Down To Earth Fish Bone Meal.
~24hr light cycle during Germination / 19/5 light cycle for Vegetation and 12/12 for Flower
~Straight water ph'd @ 6.2-6.8 when needed and weekly Compost Tea's.
________________________________________________________________________________________________________________________________________________________________________________________________________________________________________________________________________________________________________________________________________________________________________________________________________________________________________________________
WEEKLY UPDATES:
9/6- Day 37 of flower and harvest time is fast approaching with her trichomes, which are now checked daily, maturing rapidly being 80% milky now with the remaining being clear.
Daily watering's continue with 1g of straight de-chlorinated water ph'd to 6.7 @74℉ and also I'm turning her pot 1/4 turn daily as well.
9/8- Well, her trichomes are right about where I like them to be and she's ready for 48hrs. in the dark before I chop and hang her to dry for 10-12 days.
I'm watering her with 1g of straight de-chlorinated water ph'd to 6.7 @74℉ and will continue to water her while she's in the dark (cannabis continues to carry on with it's growth processes even while in the dark) so that her medium doesn't completely dry out. Keeping her watered will also help to extend her drying time to that ideal 10-12 day target.
This should be some epic smoke as her buds are absolutely crystalized with trichomes and her smell is AMAZING! 😛💚
9/10- Well she's been in the dark for 24hrs. now with 24 more to go. I'm keeping temperatures in the low to mid 60's℉ and the RH @ 45%. Tomorrow is 'Chop Day'! I'll be taking some pic's of her when she comes out of the dark and during harvest...Stay tuned, this is some 🔥!
I am continuing to water while she's in the dark with 0.5g of straight de-chlorinated water ph'd to 6.8 @67℉ to keep her hydrated.
9/12- Well she's out of the dark where she spent roughly 60 hours. I kept the temp's @ 64℉ and the RH at 45%.
After I brought her out I shot a few pictures of her, then plucked off all of the shade leaves. I then cut her off at her base and hung her whole. I'll keep the RH in the room @ 50% for the first 24hrs., then raise it to 55-60% for the remainder of the drying. I have the temperatures in the Dry Room at a constant 65℉ to help preserve the terpenes.
Hopefully she'll take 10-12 days to dry to the point that she's ready to be trimmed and jarred! Stay tuned for the harvest of this phenomenal cultivar! 💚🔥
~Thanks for stopping in! Things are wrapping up and harvest is right around the corner....Stay lifted and be Blessed! 😎🙏~
Likes
Comments
Share

@Stonerandgrower
Follow
It was a great grow from June 29th to being harvested October 10th I got 25 ounces dry
Likes
6
Share


@Adam22
Follow
Harvest pics.
In the glass jar is pineapple gummy. Same breeder as the lilt. I forgot that I popped one of these seeds it was the last from the pack. The hanging dry pic is the rest of the pineapple gummy it was close to the gavita light and was very hairy. The big top next to it is the top of the lilt plant grown under the mars hydro 150w led light. When the feds choped it all down the lilt was given an extra week than the top which was cut off im absolutely pissed about that I didnt use a carbon filter I think the smell got a bit too strong will be back soon live and learn