


Likes
Comments
Share


@Kitties_and_Colas
Follow
~_~_~_~_~_~_~_~_~_~_~_~_~_~_~_~_~_~_~_~_~_~_~_~_~_~_~_~_~_~_~_~_~_~_~_~_~_~_~_~_~_~_~_~_~_~_~_~_~_~_~_~_~_~_~_~_~_~_~_~_~_~_~_~_~_~_~_~_~_~_~_~_~_~_~_~_~_~_~_~_~_~_
❤️💡🌱😽💨
Week 4!!! Things are going great. We received out long overdue calmag and were sure to give everyone a full dose. We stripped the bottom 1/3 of growth from all plants and removed all large fans around the tops.. they're getting loads of light very deep down inside the plant now.. these we're the largest plants in the tent but have just been overtaken by the Kritikal-K
Temps have been awesome, we've had a few 75F days but this tent remained cool despite having the driver inside..I didn't expect this..Im really impressed by this fixture and we may buy a 2nd when we get out 5th tent..Its crazy how something so small can light up an entire 4x4..its obvious the plants love it, they're praying all the time and node spacing is
⚡Hortibloom/Solux 350⚡
Specifications ⚙️:
Diodes: Samsung LM281 Pro / Osram DR (1,440 total)💡
Driver: Inventronics 350 watt🔌
PPF: 1015 μmol/s ☢️
PPE: 2.9 µmol/j 〰️〰️
Lifespan: 50k+ hrs ⌛
Weight: 14.3lbs lbs (6.5kg)
Veg Coverage: 5 x 5 ft 🌱
Flowering Coverage: 4 x 4 ft 🌼
-Uses an aluminum heatsink (no fan), quiet while operating 👂⬇️
-IP65 waterproof ratings, tolerant to high humidity grow environments 💦
-May be daisy-chained via RJ14 and managed from a single controller 💡~💡~💡~💡~💡
🌎 https://hortibloom.com/products/solux-350-led-grow-light
~_~_~_~_~_~_~_~_~_~_~_~_~_~_~_~_~_~_~_~_~_~_~_~_~_~_~_~_~_~_~_~_~_~_~_~_~_~_~_~_~_~_~_~_~_~_~_~_~_~_~_~_~_~_~_~_~_~_~_~_~_~_~_~_~_~_~_~_~_~_~_~_~_~_~_~_~_~_~_~_~_~_

Likes
3
Share


@LAShugars
Follow
Going to stop giving her nutes. I think she’ll be ready in 2 weeks. She’s been an easy grow. Her smell, colors and bud density are wonder

Likes
2
Share


@Sensiseeker
Follow
These plants are absolutely filling up the 5x5, if they keep it up I may have to remove one. I filled the reservoir with 6 gallons of water at midnight the other night and by noon the next day it was empty. I am putting in 6-7 gallons of water in res at a time and it is typically gone in 12 hours.
Likes
4
Share

@Jabbamo
Follow
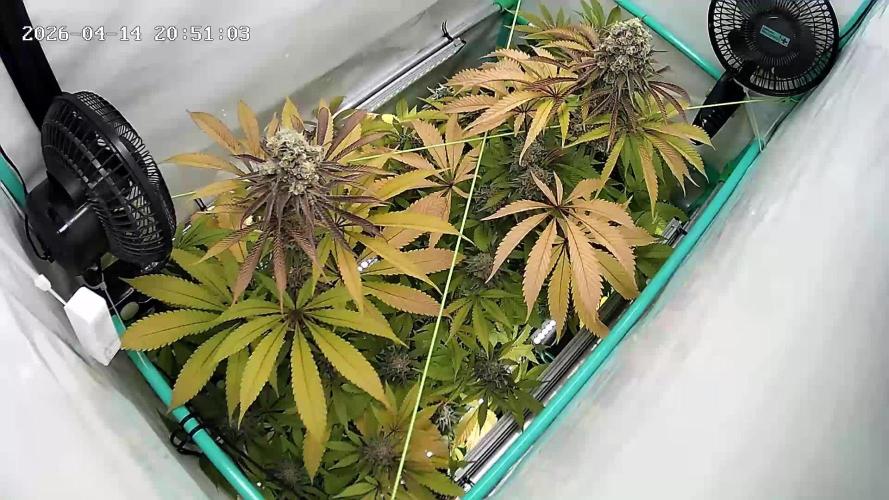
_____________________________________________________
Mo. 6.4.
- 3,2 Liter pro Pflanze gegossen (ca. 50ml Drain)
- 1L Nährlösung per Hand angegossen
- 8L Nährlösung per Gießsystem
- 0,5L klar spülen zur Systemreinigung
1,2 ml / Liter "Calmag"
1,5 ml / Liter "Bio Grow"
4,0 ml / Liter "Bio Bloom"
4,0 ml / Liter "Top Max"
Ph 6,2 / 800 ppm
- Luftentfeuchter auf 35% runter
_______________________________________________________
Sa. 11.4.
- 3,2 Liter pro Pflanze gegossen (minimal Drain)
- 1L Nährlösung per Hand angegossen
- 8L Nährlösung per Gießsystem
- 0,5L klar spülen zur Systemreinigung
1,2 ml / Liter "Calmag"
1,5 ml / Liter "Bio Grow"
4,0 ml / Liter "Bio Bloom"
4,0 ml / Liter "Top Max"
Ph 6,2 / 800 ppm
_______________________________________________________

Likes
Comments
Share


@Godspharmacy
Follow
Starting to fill out in their last few weeks. The purple berry kush has a stand out smell almost like grape fanta she smells awesome cant wait to sample this strain. 5weeks of flower down 4 to go that is them had their 1st week of shooting powder so will continue that for a futher 2more weeks then start the flush fir 2weeks. ✌️

Likes
3
Share

@Highsenberg82
Follow
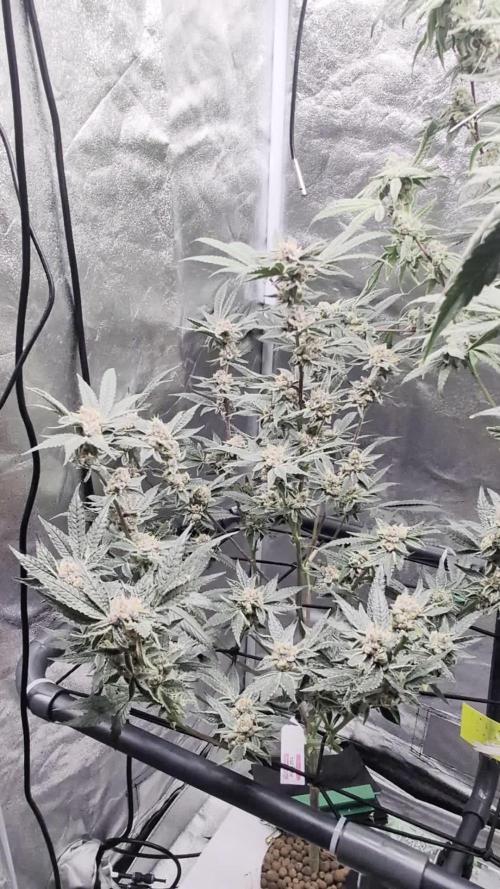
08/06/2026
Flowering week 8
Started with fade for the final two weeks. A few days with flawless finish from AN at the end.
I really like what I see and smell so far. SF has the sweet strawberry scent and ICR is smelling like a real banger.
More defoliation soon. Humidity with around 60% too high now.
Likes
23
Share

@DogDoctorOfficial
Follow
Week 15 From Seed | Lemon Cherry Gelato 🍋🍒 | Drying, Trimming & Curing Begins
Well…
Here we are again 😄
Another chapter of this Lemon Cherry Gelato run officially closes, and honestly, this update feels like the moment where the entire grow finally becomes “real medicine.”
First of all, once again, apologies for dividing the harvest into multiple reports lately. I know the updates have been stretched across several weeks, but honestly… with the amount of documentation, photos, macros, videos, trimming sessions, resin collection, curing observations, and extraction experiments we have been doing lately, trying to compress everything into a single update would almost feel disrespectful to the process itself.
And this run deserves the proper attention.
So for everyone arriving now, quick recap:
These Lemon Cherry Gelato girls were grown entirely under 12/12 from seed.
No traditional vegetative phase.
No massive training sessions.
No giant bush shaping.
Just letting the genetics express themselves naturally while documenting the process from beginning to end.
And what these girls became honestly surprised me.
Compact plants.
Thick trunks.
Heavy branches.
Dense stacking.
Ridiculous resin production.
And some seriously loud terpene expression.
The previous report reflected harvest itself:
- the fade,
- the structure,
- broken branches,
- resin-covered fingers,
- hanging flowers,
- drying environment,
- and all the beautiful chaos surrounding harvest week.
This report becomes the next important stage:
Drying.
Trimming.
Finger hash.
Final flower preparation.
And the beginning of cure.
The girls dried for roughly 10 days under controlled conditions:
- around 18–20°C,
- roughly 60% RH,
- with the first couple of days slightly lower around 45% to help surface moisture leave the flowers safely before stabilizing the room again.
And honestly… the dry came out beautifully.
Dense flowers like these always make growers slightly nervous during drying because chunky buds can trap moisture surprisingly easily. But breaking the plants into branches instead of hanging full plants ended up being absolutely the right decision here.
The branches slowly reached that perfect moment growers wait for:
not snapping aggressively…
not bending softly…
…but that beautiful little “click.”
That tiny sound telling you:
“Okay. It’s time.”
So naturally…
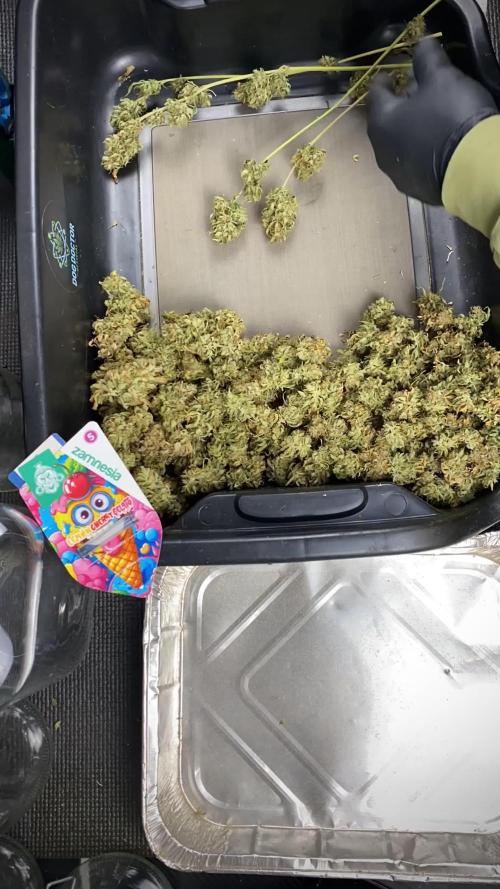
Mr. Baggy joined the trimming session 😄
Studio lights on.
Trim bin ready.
Scissors ready.
Music playing.
Gloves on.
And branch by branch, these girls slowly transformed into jars full of finished medicine.
And honestly?
These plants were absurdly sticky.
Not just frosty visually.
Actually greasy.
The kind of resin that keeps building layer after layer on the gloves until eventually you stop trimming for a moment and realize you accidentally created little hash sculptures on your fingertips again 😄
Which brings us to one of the best parts of this report:
Finger hash.
Or more specifically in this stage:
classic trimming resin collected during dry manicure.
Every session slowly left behind beautiful sticky resin on the gloves and fingers, and instead of wasting it, everything got collected carefully with patience and love.
And wow…
These girls made AMAZING finger hash.
Soft.
Oily.
Extremely workable.
Instantly greasy with just body heat alone.
No aggressive heat needed.
No real pressure needed.
Just the warmth from the hands was enough to start transforming the resin into beautiful little temple balls almost immediately.
That alone already says a lot about resin quality.
We even documented the full process:
- trim collection,
- kief separation,
- resin handling,
- pressing,
- shaping,
- and the final little temple balls.
And honestly, seeing the transformation from loose resin into a perfectly smooth little sphere never gets old. There’s something deeply satisfying and strangely ancient about it.
The final dry numbers honestly made me extremely happy too:
Plant 1:
304.5 grams dry trimmed flower.
Plant 2:
163.5 grams dry trimmed flower.
Total:
468 grams of dry cured manicured medicine.
And for a 12/12-from-seed run?
That’s honestly fantastic.
Especially considering how compact these plants actually were physically.
Small-ish structure…
massive output.
Exactly the kind of run that keeps teaching you not to judge plants purely by height.
The flowers themselves turned out gorgeous:
- dense,
- compact,
- extremely resinous,
- loud aroma,
- beautiful coloration,
- swollen calyxes,
- and surprisingly heavy for their size.
The terpene profile already started evolving beautifully during trimming too.
That loud fresh-harvest sharpness slowly began softening into something deeper and sweeter:
- creamy citrus,
- candy-like fruit,
- gas,
- soft cherry sweetness,
- earthy backend notes,
- and occasional creamy dessert-like moments depending on the jar.
And this is where curing now becomes incredibly important.
Because harvest is not the finish line.
Curing is where flowers slowly begin becoming complete.
For storage and cure, we decided to use both:
- traditional glass jars,
- and Grove Bags.
And honestly, both have their strengths.
Glass jars remain timeless:
simple,
effective,
reliable,
beautiful for long-term observation and burping routines.
Meanwhile Grove Bags bring modern humidity-control technology into the process and honestly make maintaining stable curing conditions dramatically easier when used properly.
The idea is not “one replacing the other.”
It’s more about understanding different tools and seeing how each behaves over time.
And speaking of beautiful details…
Huge thank you to Zamnesia for the gorgeous storage jars with the engraved lid design because honestly… they look incredible 😄
Little details matter.
Especially during cure.
Because curing becomes ritualistic in a strange way:
opening jars,
checking aromas,
observing moisture,
feeling texture changes,
watching flowers slowly mature week after week.
The medicine almost feels alive during this phase.
We also included:
- trimming timelapses,
- resin handling,
- branch breakdowns,
- finger hash photos,
- hanging flower shots,
- studio trimming moments,
- and a bunch of closeups because honestly these girls deserved proper documentation until the very end.
And next week…
Next week becomes the final chapter.
Smoke review.
Full cure review.
Flavor translation from smell to smoke.
Effect profile.
Breakdown texture.
Ash quality.
Terpene evolution.
Final impressions.
And the real question:
How did this Lemon Cherry Gelato actually become as medicine after all this time?
Because now the grow part is mostly over.
What remains is experience.
And honestly…
that’s the most important part.
Huge thank you once again:
- Zamnesia,
- Plagron,
- the LEDs,
- all the gear involved,
- GrowDiaries,
- the community,
- the old followers,
- the silent supporters,
- the curious new visitors,
- and everyone spending even a few minutes following these updates.
And of course…
Thank you Mr. Baggy 😄💙
He survived another trimming session somehow.
See you all in the final chapter 🌱

Likes
17
Share


@Mroizo
Follow
Beginning of week 7.
She looks good, the smell is very good but she s small.
Lets see at the end.

Likes
25
Share


@Behave
Follow
Here is the update for actual week. The summer hits very hard - since almost 10 days in a row, we have 30°C outside and it was the right decision to set the day phase from 6pm to 6am.
cutted down most of the fanleafes today. all trichomes turned opaque so i will start with the first "clear-water-flush" in 2 days and will flush them 4 times on any 3rd day!
Likes
4
Share

@BeskarBuds
Follow
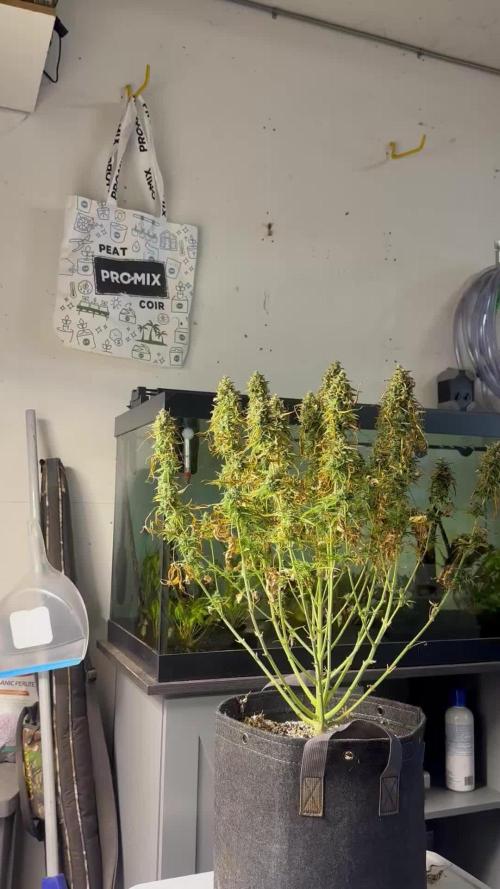
Will update in about 2 weeks for final dry weight but this was a learning grow for sure. Added new toys like the AC Infinity Hydrone 5 which created a lot of heat. Worked wonderfully for the humidity and part of the problem was the summer heat making my garage way warmer than usual with the added heat from the humidifier I definitely stressed these girls out at a crucial flowering time.
That being said they finished strong and I am looking forward to smoking some nice buds.
Hang drying whole plant for about 2 weeks before hand dry trim then into grove bags for curing.
This is the way.

Likes
13
Share


@TrialAndErrorGrows
Follow
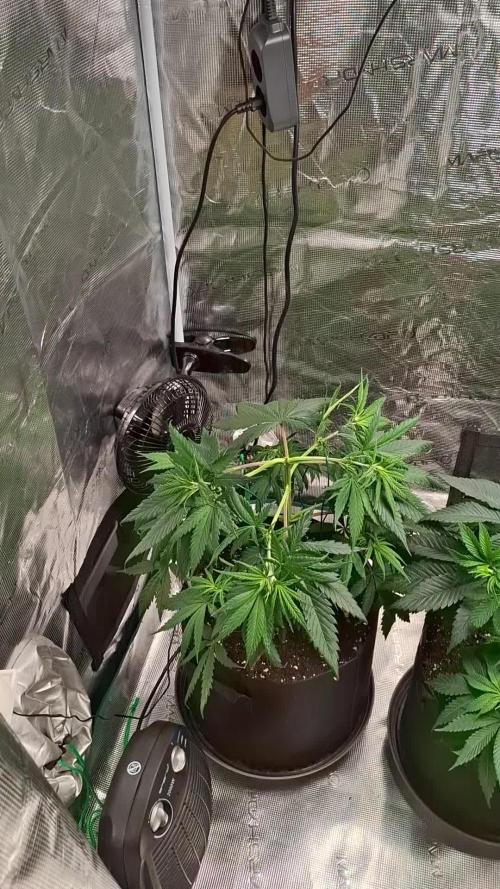
It’s the first day of week 7. The nugs are swelling up nice considering what they have been through. They are starting to smell strong. Both plants smell completely different. Even tho they are the same strain and from the same pack of seeds.
If you have an idea of what’s going on with my fan leaves let me know.

Likes
9
Share

@Chef_LA
Follow
Die Pflanzen wachsen und sehen gut aus. Habe sie heute im unteren Drittel stark entlaubt und LST angewendet. Jetzt dürfen sie sich eine Woche erholen dann leite ich langsam die Blüte ein.
Gedüngt wie immer nach Herstellerangabe.


Likes
7
Share


@starke
Follow
Day 85 - first day of Week 13 and she is going into darkness for 48 hours. Hasn't been watered since 2 days.
Even though she looks the least done of all three, her trichomes are now a good 20-30% amber with the rest milky and some tiny bits of clear. I checked her buds on the calyx all around, from top buds to middle to bottom. She really shows a lot of heavily swolen calyxes, which I have never seen like that. I can now add that to the things I learned/experienced: calyxes swell a lot before the plant is finished. Let's see. My Girl Scout Cookies does not look like she even has calyxes. Funny individuals. Happy wedding cake day, almost 😍
Day 88 - out of darkness. She was in there for 2,5 days. Opening the drying tent she gave off a really strong smell of hash 😍wow. She has some nice looking buds and looks def. more done, but below her dress, she has some light fluffy buds. I have hung all of them now in the dry tent, after I removed some of the bigger fan leaves. One part of it, I think I want to low and slow dry in the fridge. I am interested in finding out about the difference in taste, when a more wholesome profile is retained. For anyone interested, I can highly recommend this forum and this article: https://www.420magazine.com/community/threads/drziggys-low-and-slow-drying-maximizing-your-harvest.366783
Another part I would like to use for fresh cut oil, also from here: https://www.420magazine.com/community/threads/fresh-harvest-infused-cannabis-oil.363371/
As with everything else, I was obsessing about the perfect dry room & conditions. I bought a small tent (40x40cm), a small oszillating fan hung over the buds/on top of the tent. Due to size limitations, I have the filter on the bottom with the duct leaving the tent at the bottom connecting to an exhaust fan. Inside the tent I have a humidity sensor from an Inkbird Humidity regulator. Connected to that is a mini-dehumidifer and a humidifier. I have set it to 20°C (68F) and 50-55% humidity. I'm excited to see how long my dry will last this time. My first grow was drying way too fast in the middle of the heat wave last year with 30% humidity.
The overview added to the pictures, I started making over Christmas. It was when I noticed, that I'm a so impatient, and that something must be wrong, especially in the first weeks. I get so obsessive, that I tend to overcare. Which she showcases beautifully in this overview. I hope this will calm me down the next time. Oh my haha
Let's see what the final dry weight is. My guess is about 25-35g. Any other guesses? Happy Wedding Cake day 😇

Likes
5
Share


@MadeInGermany
Follow
Flowering day 15
since time change
to 12 / 12 h
Hey guys :-)
This week the ladies developed beautifully 👍.
The stretch has started very strongly :-) .
Watering was done twice this week with 1.2 l (see table above for nutrients).
The heating mat does exactly what it is supposed to do, you can see that the ladies are doing perfectly again 😃.
Fresh osmosis water was mixed with tap water in a 100 liter tank so that I would have enough stale water for the coming week 👍.
Otherwise everything was cleaned and checked.
During the check, I noticed that after spraying neem oil 3 times, there were still a few damn trips to see.
I have ordered nematodes for leaf and substrate against tripse.
Then they should finally be gone again 🙏🏻
have fun and stay healthy 💚
👇🏼👇🏼👇🏼👇🏼👇🏼👇🏼👇🏼👇🏼👇🏼👇🏼👇🏼👇🏼
You can buy this Nutrients at :
https://greenbuzzliquids.com/en/shop/
With the discount code: Made_in_Germany you get a discount of 15% on all products from an order value of 100 euros.
👇🏼👇🏼👇🏼👇🏼👇🏼👇🏼👇🏼👇🏼👇🏼👇🏼👇🏼👇🏼
You can buy this strain at :
https://gardenofgreenseedbank.com/candyland/
Water 💧 💧💧
Osmosis water mixed with normal water (24 hours stale that the chlorine evaporates) to 0.2 EC. Add Cal / Mag to 0.4 Ec Ph with Organic Ph - to 5.8 - 6.5
MadeInGermany


Likes
2
Share
@Chrisandweed
Follow
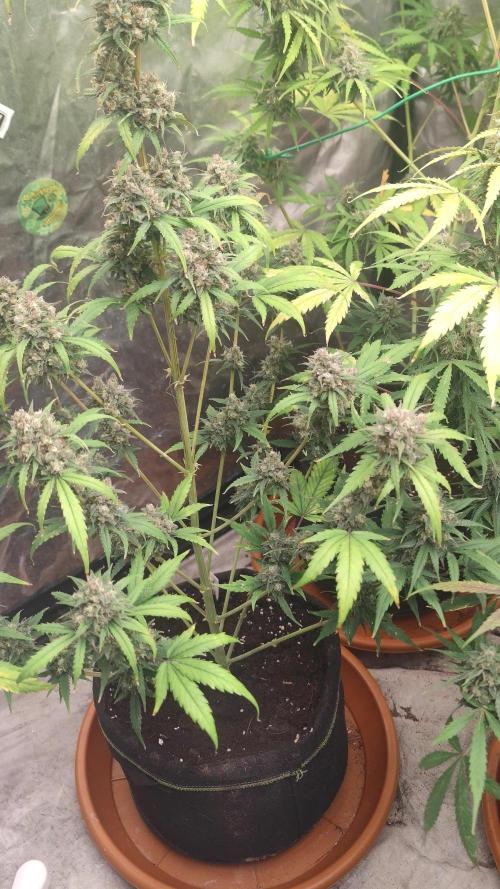
Muuuy bonitos cogollos y colores, y aparentemente cogollos muuy resinosos.. la verdad que esta se ha limpiado muucho mejor del oidio que la otra que lo sufrió la hyperion. Ahora, he de decir que siento facilidad a las plagas o a los problemas, en floración! El vegetativo fue flying pero fue entrar a floración y los problemas del cultivo aparecieron (quizás habré sido yo el culpable de cualquiera de las mil maneras posibles) peero la mención está porque todo surgió desde esta.. si había araña, esta era la primera que la tenia, con el oidio igual que pensaba que era de las diatomeas pero claro, una semana no se queda ahí el polvito e igualmente cuando lo limpias, volvía a salir.. en fin, una planta de sacrificio pero aparentemente con buen final, sus cogollos son duros, muuuy duros, durísimos! De verdad! Y huele suuuper bien, ya veremos que tal cuando se coseche. Respecto a ese punto, cuando corte le haré un bud washing para quitar restos del oidio, de bichos, de productos, de polvo, de todo.


Likes
9
Share


@Siriuz
Follow
Ok guys so she was bushy again and so we did defoliation again.
You can see the difference and then after that started flowering even more
Plus the fact we are increasing the amount of molasses added to the soil plus the floranova bloom nutes.
They are very thirsty girls, taking around 1.5-2lts per 48 hrs
So almost like a 1 liter per 24 hrs
Very good SoG to make them feel even more comfortable
Going to change schedule from 24/0 to 19/5 and see if they evolve!
Thinking about adding some humus to the soil as well, other than that they have been under good conditions
Temp is steady at day time around 24C top and night time is 18-19C minimum
RH around 45-60%
Mostly 45% control environment with AC
Cant wait to see big colas coming soon!
Have fun enjoy the videos!

Likes
2
Share

@Bread_n_Buds
Follow
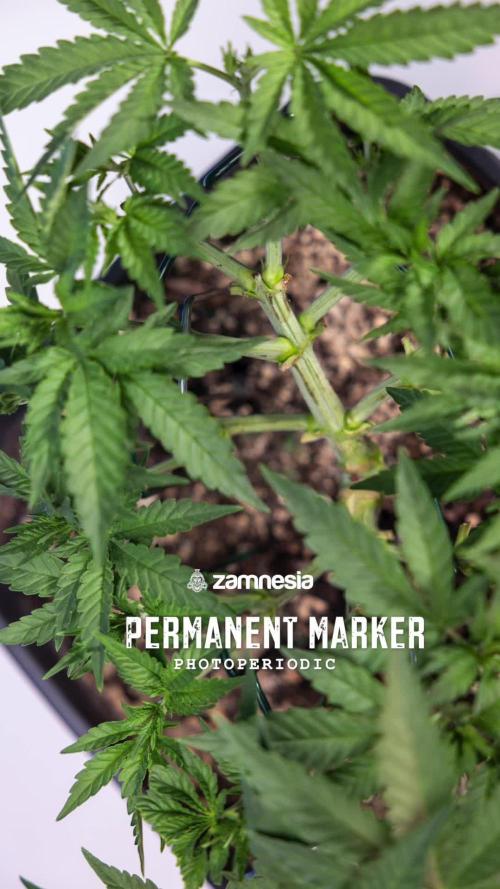
Our White Truffle by Zamnesia is a very interesting plant,
it has slightly irregular internodes, at least this one I got, there is a bit of a need to invent a different main lining than usual, but both Zamnesia and I love to take a gamble and we are sure to bring home a good result.
Remember that we are growing a plant worked with the techniques indicated and one left to grow without pruning to preserve its speed, in the previous/next diary you will find the other plant of the same strain.
In this diary we find the plant worked with Main Lining. We topped the second internode and maybe it was a bit too early, or we simply found a plant with slightly irregular internodes and now we are developing according to irregular brunches, I cut some off, I top some and send it to flower shortly.
Slow down with nitrogen while doing this technique, you may not need everything that is recommended by the manufacturers, so if the leaves become too dark or worse, the tips of the leaves arch downwards and the leaf becomes "crunchy" we are at the moment to lighten or stop the basic grow fertilizer. .
Comparison is the salt of experience, so the plant in the other diary will be worked very differently, go and see it to compare them.
We have started the Plagron fertilization program, we are in 100% organic configuration, the soil is recycled Promix + 1/3 fresh soil + 10% Perlite + RQS Mycorrhizae Mix (4 g in the mix, 1 g under the small fiber pot).
We are feeding // 1 ml/l Power Roots - 1 ml/l Pure Zym - 1 ml/l Sugar Royal - 2 ml/l Alga Grow
We sprayed 3 ml/l Vita Race Foliare once a week.
https://plagron.com/it
We always have the excellent Mycorrhizae from RQS running in the soil
https://www.zamnesia.io/it/5778-mix-micorrize-easy-roots.html
Try this strain, it's an autumnal delicacy ---- // https://www.zamnesia.io/it/11184-zamnesia-white-truffle-semi.html
Zamnesia Brief Description // The result of crossing GG and Peanut Butter Breath, White Truffle boasts a first-class lineage, taking the best of some of the best American cultivars. And as you would expect, she has a lot to offer: a high THC content, an irresistible flavour and a relaxing, carefree effect. Oh, and let's not forget that she's incredibly easy to grow too! Buy your seeds today and enjoy easy harvests of delicious, USA-grown bud.
And as you would expect, she has a lot to offer: a high THC content, an irresistible flavour and a relaxing, carefree effect. Oh, and let's not forget that she's incredibly easy to grow too! Buy your seeds today and enjoy easy harvests of delicious, USA-grown bud.
The whole world of growing and more is here at Zamnesia - just take a look around the site and you'll find "the best that nature has to offer" in all shapes and colours.
The new strains are amazing and the old ones are no exception...
-- // www.zamnesia.com