


Likes
Comments
Share


@Jays_Not_Here_Man
Follow
Put this girl into flower this week! She was getting beastly and my Autoflowers wrapped up so it was time ❤️ I decided to put her into my big tent along with my other grow and continue to flower there. I was going to scrog her in my 2x4 but decided I will need the space to get the summer beans started 🤤
Upped her Bloom nutrients and dialed back the Grow, also increased the Micro’s . Temps have been a little higher than normal, running around 81 degrees of freedom units, and keeping around 55% RH. I did a light defoliation going into flower, and decided to do some LST by tying back a few branches to allow for better light penetration. 🇨🇦👊❤️

Likes
3
Share


@HookahCli
Follow
d39
ya no me caben dentro del Indoor, debajo del foco pequeño que tengo.
Todavía se espera lluvia para la semana que viene, pero no caben y temo que alguna se ponga a florar por estrés, entonces las sacaré al exterior y las aclimataré.
d40
Las he sacado a exterior , no les da mucho el sol, están a media sobra, esperemos que no se pongan a florar debido al cambio de fotoperiodo, son menos horas que en el Indoor, podía pasar, lo bueno es que las hemos sacado y ahora cada día están aumentando las horas de luz, mas o menos cada día tenemos 2 minutos más de sol, uno por la mañana y otro por la noche, amanece antes y se va más tarde poco a poco, si se adaptan bien, van a crecer mucho, pero si se ponen a floración veremos que hacemos, esperemos que no pase.
Se le han puesto unas piedras para que se aguante la maceta, es de 2LT y con que haga viento la maceta se va al suelo y no queremos que pase eso.
También se ha quitado el primer par de nodos LBP(Lower Branch Pruning), que normalmente salen ramas que no llegan a ser gran cosa.
Se han quemado del sol, se ve que les da directo y no lo han soportado y se han secado, la tierra esta bastante seca al igual que muchas hojas, por suerte me he dado cuenta al cabo de unas horas, no esperaba que el sol ya pegase tan fuerte, las he cambiado de sitio y se han puesto donde no da el sol directo en ningún momento del día y están solamente a la sombra.
Se han regado con un poquito de agua para que se recuperen, les he puesto una maceta más grande por fuera para que si diese el sol, que no le de a la maceta de dentro(2L) que es más pequeña y se calientan las raíces.
d42
Se han regado y añadido aminoácidos(más Pro XXL 42% Aminoácidos) ya que eso ayudará a que la planta se recupere, por la tarde-noche les da el sol, no hay otro sitio que le de menos el sol directo, se han secado un pelín más la hojas, pero los brotes nuevos están blanditos y parece que las plantas seguirán creciendo bien.


Likes
121
Share


@DogDoctorOfficial
Follow
In love with this all, they are simply beautiful, and each day that goes by they just get more and more beautiful 🤩 🤩
I believe still have a week or so to go since all trichomes are transparent and only a bunch changed to milky, im waiting for the first ambers in some before shopping this beauty’s down 😆💚
Day 55 Flower and this beauty’s are getting so heavy that they are just not able to stand they’re own weight, i supported as many as a could for the moment and it is what it is, next run on this pheno i will use a third scrog layer, always learning 🙏🙏🙏💚💚💚 as for the res as you guys can see from the pictures this things are just beautiful, the trichomes production keeps rising up and the colors are changing and some purples and pinks are starting to pop out, thank you MARSHYDRO for this amazing TSW 2000 and her amazingly spectrum ⭐️⭐️⭐️⭐️⭐️🙌🙌🙌🙌🙌🙏🙏🙏🙏🙏
As always thank you guys for reading my diaries, I’m humbled and blessed for it all 💚💚💚🙏🙏🙏🙌🙌🙌✊✊✊
And with and enormous honneur and pleasure that i start collaborating with MARSHYDRO, they wore kind enough and send me a 4x4 grow tent and a TSW2000 for me to do tests and reviews, i got to admit the quality on the materials, the easy assembling, the user manual, even the art detail that came with a bunch of cool stickers, are plus things that can not go unnoticed 🙏💚 Thanks Marshydro for so many details 🙌😉 i will try and post them all in here, but you can follow me on my instagram account https://instagram.com/dogdoctorofficial for every day updates , videos giveaways etc, or in my youtube channel- https://youtube.com/channel/UCR7ta4DKLFMg2xxTMr2cpIg keep tuned 💚💚💚
Thank you MARSHYDRO for having faith in my love for growing , lets make magic together 🙏🙏🙏
Genetics - Cookies Fam genetics - 3x SunsetSherbet
Grow tent - MARSHYDRO 4x4
Ligth - MARSHYDRO TSW 2000 @ 100%
Food - HAPTUS HOLLAND
Filter - vanguard hydroponics Falcon Filters
Extraction - 2 x vanguard hydroponics 280m3h
Extraction control - SMSCOM Smart MK2
All i grow is medicine for myself, for me and for my best friend with is me 😆 nothing to sell, so don’t even ask 😅💚💚💚
All info and full product details can be find in can find @
https://www.mars-hydro.com/grow-tent
https://www.mars-hydro.com/led-grow-light/mars-ts-series-led-grow-light/mars-tsw-2000-led-full-spectrum-hydroponic-led-grow-light
https://marshydro.eu/ DISCOUNT CODE - DOGDOCTOR 💚💚💚🙏🙏🙏💚💚💚
https://marshydroau.com/
https://aptus-holland.com/
More info and updates @
https://growdiaries.com/grower/dogdoctor
https://instagram.com/dogdoctorofficial
https://youtube.com/channel/UCR7ta4DKLFMg2xxTMr2cpIg
💚💚💚Growers love to you all 💚💚💚

Likes
52
Share


@Any_Zenin
Follow
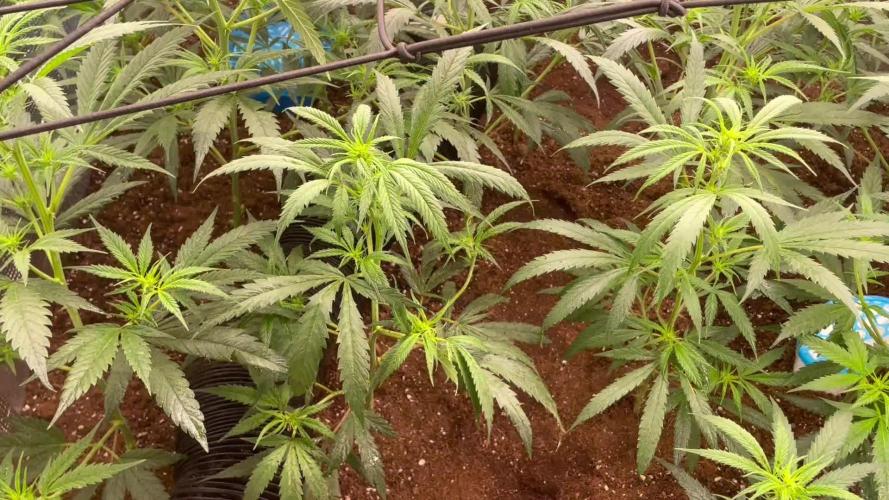
Tag 8 : Das umtopfen in 1l Töpfe hat den Pflanzen gut getan sie entwickeln sich weiterhin gut, auf Lichtintensität 50% umgestellt
Tag 9 : Lichtintensität auf 60% gestellt langsam erhöhen und beobachten, es bilden sich kleine Kugel Trichome auf den Blättern die sehr gut duften wenn man sie leicht reibt.
Gegen 16:00 Uhr das Wasser mit Biobizz CalMag 0.3ml/l versetzt und mit BioBizz Bio Down auf einen PH Wert von 6,4 gebracht, anschließend alle Töpfe befeuchtet und
mit kurzer Wartezeit 150ml Wasser pro Topf gegeben was 15% Topfvolumen der 1l Töpfe entspricht, es entsteht kein Drain.
Tag 10: Den Pflanzen gefallen die größeren Töpfe und anscheinend auch das PH angepasste Wasser sowie das zusätzliche BioBizz CalMag es wird stetig Blattmasse zugelegt.
Tag 11: Die Entwicklung schreitet gut voran, heute um 09:45 Uhr habe ich die Lichtintensität auf 70% erhöht und beobachte wie die Pflanzen reagieren, ich denke morgen wird wieder gegossen, das Gewicht der Töpfe kontrolliere ich mit einer Waage.
Tag 12: Heute morgen um 7:30 Uhr jeden Topf gewogen, anschließend befeuchtet und nach einigen Minuten warten Wasser mit einem PH Wert von 6,5 und 0,3ml BioBizz CalMag gegossen. Die Erhöhung der Lichtintensität von 70 % vertragen sie ganz gut aber ich kriege meinen VPD Wert nicht niedriger durch die hohen Temperaturen und geringe Luftfeuchtigkeit die durchs Fenster kommen evtl. muss ich nochmal einen Luftbefeuchter dazu stellen.
Tag 13: Alles sieht gut aus, mit dem Luftbefeuchter kann ich den VPD besser regulieren, morgen wird umgetopft und gegossen, beim wiegen der Töpfe waren die Wurzeln schon unten am Topf zu sehen, heute gibt es nichts weiter zu tun.
Tag 14: Die Töpfe sind sehr gut durchwurzelt ich denke der Shrooms Wurzelstimulator hat auch dazu beigetragen, eigentlich wollte ich heute in 5,7L Töpfe umtopfen schaffe dies leider nicht aus Zeitmangel. Deswegen ist der Plan die Pflanzen bis morgen weiter durchtrocknen zu lassen und sie ein bisschen mehr zu stressen. Morgen werden dann alle in 5,7L Töpfe gesetzt und ordentlich angegossen. Das ist das Ende der zweiten Woche.
Mein Fazit: Es lief bisher alles gut eine Pflanze zeigt an den unteren Blättern einen Nährstoffmangel vielleicht kommt das weil ich sie am Anfang evtl. überwässert habe, trotz der schlechten Temperatur und Luftfeuchtigkeitsverhältnissen die ich durch den Luftbefeuchter seit einigen Tagen besser im Griff habe, haben sich meiner Einschätzung nach alle Pflanzen ganz gut entwickelt.
Falls jemand diesen Bericht lesen sollte bin ich gerne froh Tipps und Hinweise zu hören da dies mein erster Grow ist.
Morgen nach dem umtopfen gibt es wieder ein Update ;)




Likes
1
Share


@lemoncake420
Follow
The living soil I’m using is a bit strong, so I made a cup size hole and filled with just soil and worm castings to plant the seed
Likes
44
Share


@Bretwalda
Follow
Thinking a week more growing, my microscope is too powerful i think pain to use saw a couple ambers but i think most are still cloudy if not see through. Should i lay off nutes this week or?

Likes
6
Share


@CannaHorse
Follow
EN: Week 6, lemon cherry cookies is the furthest. The super lemon haze plants, along with the gorilla cookies, take the longest
DE: Woche 6, lemon cherry cookies ist am weitesten. Die super lemon haze Pflanzen brauchen zusammen mit der gorilla cookies am längsten

Likes
18
Share


@Motaybongs
Follow
Pretty good week for the stretching. Even thou my tank had some problems (I believe biobizz is not meant for tanks), the ladies are thriving. Changed to my trusted brand of base nutrients, green planet nutrients. This time trying medi one. Hope my grow shop will continue bringing green planet, it is a bummer they might stop importing it. Plant 4 accidental mainlining after breaking the two main tops training before switching to flower.
I can see the how awesome is Sanlight led evo for this tent, ladies are all even and love the overall environment of the budbox and the lights. Noticing a huge difference in nutrient consumption compared with hps. Drinking way less.
Overall excited and happy of this grow, couple of little problems trying organic base nutrients, but that’s how we learn, right?

Likes
7
Share


@JamrockGrows
Follow
23/08 - In week 5 of flower now, the buds continue to fatten and smell is getting stronger. I increased the nutes but overall the plants are looking green and are happy. I water them every 2-3 days. I watered them 1L with nutes today.
27/08 - watered today with 1L water at ph 7. The smell is starting to get very intense.
Likes
29
Share

@GERGrowDesigns
Follow
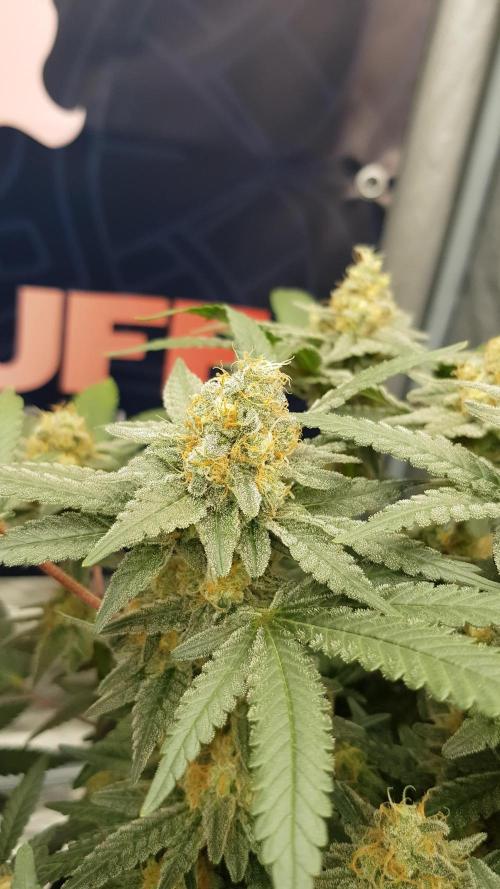
Welcome to Flower Week 6 of SuperStrains OreoZ
I'm excited to share my grow journey with you from my
SuperStrains Project . It's going to be an incredible ride, full of learning, growing, and connecting with fellow growers from all around the world!
For this Project , I’ve chosen the Feminized Photo Strain OreoZ:
Here’s what I’m working with:
• 🌱 Tent: 225x150x150
• 🧑🌾 Breeder Company: SuperStrains
• 💧 Humidity Range: 45
• ⏳ Flowering Time: 8-9 Weeks
• Strain Info: 22%THC
• 🌡️ Temperature: 26
• 🍵 Pot Size: 20
• Nutrient Brand: Hy-Pro
• ⚡ Lights : 600W x 2
A huge thank you to SuperStrains for allowing me to try my Best with this amazing collection from Photo Strains they managed to Sponsore side by side with theyre Hy-Pro Nutriets . Big thanks for supporting the grower community worldwide! Your genetics and passion speak for themselves!
I would truly appreciate every bit of feedback, help, questions, or discussions – and of course, your likes and interactions mean the world to me as I try to stand out in this exciting competition!
Let’s grow together – and don’t forget to stop by again to see the latest updates!
Happy growing!
Stay lifted and stay curious!
Peace & Buds!
Likes
120
Share


@Kitties_and_Colas
Follow
~_~_~_~_~_~_~_~_~_~_~_~_~_~_~_~_~_~_~_~_~_~_~_~_~_~_~_~_~_~_~_~_~_~_~_~_~_~_~_~_~_~_~_~_~_~_~_~_~_~_~_~_~_~_~_~_~_~_~_~_~_~_~_~_~_~_~_~_~_~_~_~_~_~_~_~_~_~_~_~_~_~_~_
*Glass of water AND paper towel*
~_~_~_~_~_~_~_~_~_~_~_~_~_~_~_~_~_~_~_~_~_~_~_~_~_~_~_~_~_~_~_~_~_~_~_~_~_~_~_~_~_~_~_~_~_~_~_~_~_~_~_~_~_~_~_~_~_~_~_~_~_~_~_~_~_~_~_~_~_~_~_~_~_~_~_~_~_~_~_~_~_~_~_
10/31/21
😻We're beyond impressed with Seedsman Seeds, this makes our 3rd strains, a total of 15 seeds with a perfect, 100% germination ..Seedsman genetics REALLY want to grow, we couldn't be happier! Thanks for dropping by growmies, we'll update again midweek..happy harvests everyone!!! ❤️💡🌱😽💨
PS: we picked up a 2gallon garden sprayer, best 10$ i've ever spent..i honestly don't know how i lived without one for so long, its been great for seedlings
~_~_~_~_~_~_~_~_~_~_~_~_~_~_~_~_~_~_~_~_~_~_~_~_~_~_~_~_~_~_~_~_~_~_~_~_~_~_~_~_~_~_~_~_~_~_~_~_~_~_~_~_~_~_~_~_~_~_~_~_~_~_~_~_~_~_~_~_~_~_~_~_~_~_~_~_~_~_~_~_~_~_~_

Likes
120
Share


@NugLife420
Follow
Well I had been running my dehumidifier, which blows hot air out the top. The fan then blew that hot air over the canopy resulting in some heat stress on the front plants 😭. I think I caught it in time and made appropriate adjustments. One a good note, the Red Hot Cookies in the back are so heavy with buds, the branches are almost touching the ground (gotta string 'em up). Lol


Likes
1
Share

@Doncuero
Follow
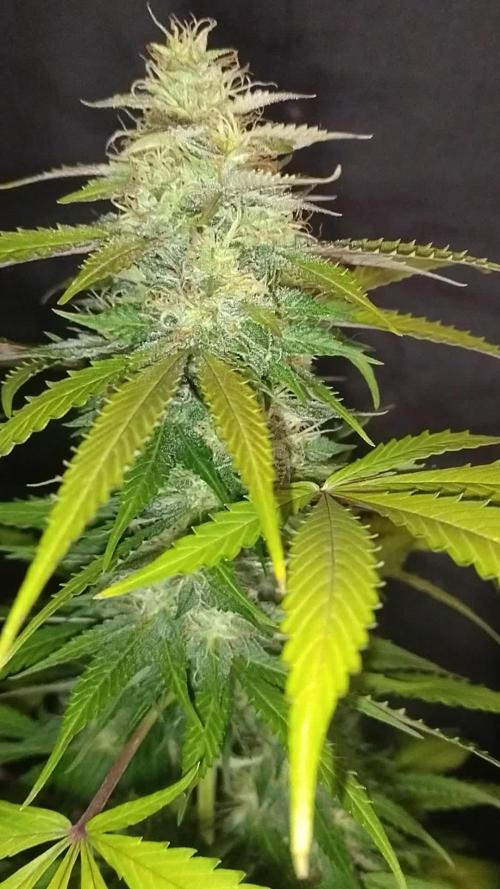
Semana 10- Ahora las mas avanzadas solamente agua y a dos mas AK ULTRA le dimos una ultima solución de sales elevando a 6ml x L.
Likes
11
Share


@Yellabeard
Follow
Here we are start of week 6 and the girls have burst into flower .
No problems yet everything seems to be as I would expect .
The #AutoPots make my growing experience so much easier and the plants seem to thrive in this system .
Likes
21
Share


@BB_UK
Follow
Was supposed to update my diaries yesterday but literally forgot lol #edibles but they’re flowering nicely and stretching as they go! They’re truly loving life under the ts1000 can’t wait to see what the next week brings!
Likes
119
Share


@PEAKYPLANTERS
Follow
Hello, fellow growers
I thank you for having dedicated your attention to my garden and I hope that the contents are to your liking and help for your growth.
The white mykoriza powder is like cocaine for my roots.... they shoot like crazy 😄😎


Likes
22
Share


@Janerussel
Follow
Flowering week 2. Everything is fine at this point. I made a light defoliation for the girl so the light will penetrate better for the growing flowers. I blended ec down to 1.55 with ph-balanced ro water. Ph & Ec are stable.