
Likes
Comments
Share


@DrJekyll_MrKush
Follow
I've moved the two healthiest in new 25L (6 Gal) net pot, it's going to be easier to apply the LST, without damage the plant.
Anyway, LST is working well, main branches are getting "fatter", leaves are big and they show a nice healthy green color.
I start to give some NPK, I still have some Advanced Nutrients to use. Using for now at 1 ml/L , resulting in a EC of 0.8.
I still have nutes inside the soil, I have to go little by little for now.
I will keep you updated folks!
Have a wonderful week!

Likes
12
Share


@KenZo0
Follow
It was a great and enjoyable experience.
Although my light was low, I got a good result.
My light was 120 watts.
In the first week of growth, my plant was uprooted
It stopped growing for a week and then
Powerful continued to grow

Likes
44
Share


@Cogollo_eu
Follow
**Encontrarás la traducción a español al final de la descripción**
From/Desde: 10/05/19 || To/Hasta: 16/05/19
From day/Desde día: 78 || To day/Hasta día: 84
You can find the Money Maker Diary here:
** Podéis encontrar el diario de las Money Maker aquí:**
https://growdiaries.com/diaries/25667-gorillamakingmoney-gorilla-vs-money-m
-----IMAGES & VIDEOS-----
5 - HomeMade Organic & Cheap CO2 generator (more info in week summary)
9, 10, 11 & 12: The bud on the right is a Gorilla one, the buds in the left or/and in the middle are Money Maker ones.
15 - Same Gorilla plant buds, one affected by CO2 in the roots and the other not.
-----WEEK SUMMARY-----
The smell is more sweet and intense every day, friends that came home turned them eyes into crystals when they see this little babys. The size isn't awesome, but the high ammount of buds full of crystals plus the strong sweet aroma makes them awesome. Buds are growing and fattenning very very well.
This week i added a boost of HomeMade CO2, i never measured the results of this invention so i can't give CO2 measurements. This method is widely used in home aquariums and there is where it comes from. For those interested i'm going to write here more detailed instructions. The 4 liters i've made will last for about 2 weeks.
---NEEDINGS---
- 250 ml Bottle
- 6~10 l Bottle
- 400 g Sugar / l water
- 1 Envelope of organic baker's yeast / l water (CHEMICAL WILL NOT WORK)
- 3 mid plastic tubes 40~50 cm
- 1 short plastic tube 5~6 cm
- 4 tube adapters
- Hot glue to seal adapters
The process of creating CO2 is simple, mix water, organic yeast and sugar in a bottle, and the sugar will free CO2 in the process of fermenting to alcohol due to the yeast.
1. Make a hole in the center of the big bottle cap, insert an adapter and secure it with hot glue
2. Make 3 holes in the small bottle cap and glue the other 3 adapters
3. Link both caps with one of the mid tubes and insert the other tubes on free adapters
4. Insert a short tube in the bottom of the small cap in the adapter that came from the big cap
5. Watch the Video!!
-----WATERING CALENDAR-----
Plants are beginning to drain the pots a bit faster so from now on i will raise the water ammount on each watering day 0.25 l.
11/05/19 - 1,5 l with All week nutrients -(Nirvana & Blombastic) also Big Bud half dosed @ PH6.4 & 2 E.C.
14/05/19 - 1,5 l with Bud Candy, Big Bud, Nirvana, B52, Bud Factor-X, Sensizym & Blombastic @ PH6.4 & 1.5 E.C.
*****ESPAÑOL*****
-----IMÁGENES Y VÍDEOS-----
5: Generador de CO2 casero, barato y orgánico (más info en el sumario semanal)
9, 10, 11 & 12: El cogollo que sale a la derecha es de una Gorila, el de la izquierda y/o el de en medio son de una Money Maker
15: Dos cogollos de la misma planta, uno afectado por CO2 en las raíces y el otro no
-----SUMARIO SEMANAL-----
El olor es más dulce e intenso día a día, los amigos que vienen a casa a verlas se quedan ojipláticos al verlas. El tamaño no es una maravilla, pero la gran cantidad de cogollos llenos de cristales añadido al aroma que entra por las fosas nasales las hacen increíbles. Los cogollos crecen y engordan de maravilla.
Esta semana he añadido un boost de CO2 casero, nunca he hecho mediciones de los resultados por lo que no puedo darlas. Este método es ampliamente usado en peceras caseras y de ahí saqué la idea. Para aquellos interesados dejo aquí instrucciones más detalladas. Con los 4 litros de agua que he preparado yo da para unas 2 semanas.
---NECESITAMOS---
- Botella de 250 ml
- Botella de 5 a 10 litros
- 400 g de azúcar por litro de agua
- 1 sobre de levadura de postre orgánica (LA QUÍMICA NO FUNCIONARÁ)
- 3 tubos de plástico de tamaño medio 40~50 cm
- 1 tubo de plástico de tamaño pequeño 5~6 cm
- 4 adaptadores para los tubos
- Cola caliente para pegar y sellar los adaptadores
El proceso de generar CO2 es simple, mezcla agua, levadura orgánica y azúcar en una botella, y el azúcar liberará CO2 en el proceso de fermentación a alcohol.
1. Haz un agujero en la tapa de la botella grande, inserta un adaptador y séllalo con cola caliente
2. Haz 3 agujeros en el tapón pequeño y haz lo mismo con los otros 3 adaptadores
3. Conecta los 2 tapones con uno de los tubos y conecta los otros 2 tubos a los adaptadores restantes
4. Conecta el tubo pequeño en la parte libre del adaptador del tapón pequeño que viene del tapón grande
5. Mira el vídeo
-----CALENDARIO DE RIEGO-----
Las platas comienzan a secar los tiestos un poco más rápido, asi que de ahora en adelante incrementaré 250 ml de agua adicionales en cada riego.
11/05/19 - 1,5 l con todos los nutrientes semanales -(Nirvana & Blombastic) BigBud mitad de dosis @ PH6,4 & 2 E.C.
14/05/19 - 1,5 l con Bud Candy, Big Bud, Nirvana, B52, Bud Factor-X, Sensizym y Blombastic @ PH6,4 & 1,5 E.C.


Processing
Likes
18
Share


@TheItalianGrower
Follow
Hi guys, this week has been great for plant growth..they are 85cm tall and I think they will grow a little longer. You can see the future buds that will be covered with flowers.
From this growth I am learning that the FIM technique is better because the buds will all be at the same height and look much more (as you can see in plant number 4). Pistils begin to appear and in the next week I hope to see more pistils.
Stay Tuned 🦍

Likes
7
Share


@eldruida_lamota
Follow
Que pasa familia, vamos con la quinta semana de floración de estas Black muffin F1 de Sweetseeds.
Vamos al lío, me quede con 3 por espacio, siempre pongo alguna semilla de más por si no abriese alguna por no perder ese hueco del indoor.
También se trasplantaron a su maceta definitiva, en este caso de 7 litros y el trasplante se realizó correctamente.
El ph se controla en 6.2 , la temperatura la tenemos entre 20/22 grados y la humedad ronda el 50%.
Las jodidas han estirado bastante, ya veremos que ocurre como va todo.
Hasta aquí todo, Buenos humos 💨💨💨
Processing
Likes
31
Share


@MadeInGermany
Follow
Hey everyone ☺️.
This week the food was increased to 4 ml per liter of water, as they can still tolerate a little more.
I'm curious how it will develop this week.
Otherwise there is not really anything to tell this week ☺️.
Stay healthy 🙏🏻 and let it grow 🌱
You can buy this Strain at
https://www.barneysfarm.com/blue-cheese-34
You can buy the fertilizer at
https://www.greenbuzzliquids.com/
Type:
Blue Cheese
☝️🏼
Genetics:
Blueberry
X
Original Cheese
👍
Vega lamp:
2 x Todogrow Led
Quantum Board 100 W
💡
Bloom Lamp :
2 x Todogrow Led
Cxb 3590 COB 3500 K 205W
💡💡☝️🏼
Soil :
Canna Coco Professional +
☝️🏼
Fertilizer:
Green Buzz Liquids :
Organic Grow Liquid
Organic Bloom Liquid
Organic more PK
More Roots
Fast Buds
Humic Acid Plus
Growzyme Big Fruits
Clean Fruits
Cal / Mag
Organic Ph - Pulver
☝️🏼🌱
Water:
Osmosis water mixed with normal water (24 hours stale that the chlorine evaporates) to 0.2 - 0.4 EC. Add Cal / Mag 2 ml per l water every 2 waterings . Ph with Organic Ph - Pulver to 5.8 .

Likes
10
Share


@TheSTRAFF
Follow
Grow them out a little.
topped, tied down. defoliated.
Plant now has 8 colas.
feeding low PPM / EC as a flush from Veg - PreFlower

Likes
37
Share


@RFarm21
Follow
Ola growmies!
O gráfico dos nutrientes corresponde à alimentação do gorila real # 1 (a mais desenvolvida) foram misturados em 2,5L de água. (25/07/2021).
Alimentação Royal Cheese 1 e 2 (4L): E.C 0.63 /pH 6.3
BioGrow - 3ml; BioBloom - 1.5ml; TopMax - 4 ml ; BioHeaven - 3 ml; Activera - 3ml; CalMag - 0.5 ml
---------------------------------------------------------------------------------------------------------------
Alimentação Royal Gorilla 2 (adicionei pela primeira vez o BioBloom) (2L): E.C 0,60 /pH 6.3
BioGrow - 1.5 ml; BioBloom - 0.5 ml; TopMax - 0.8ml; BioHeaven - 1.5 ml; Activera - 1.5 ml; CalMag - 1.5ml - meti mais que nas outras por causa da sua aparencia estranha, não sei o que fazer para melhora-la..
27/07/2021 - Quebrei outro ramo sem querer da RGorilla #2, o ramo era fraco mas tinha uma folha grande.
27/07/2021 - Retirei algumas folhas secas e amarelas, especialmente na Royal Gorilla 1 e na Royal Cheese 2
---------------------------------------------------------------------------------------------------------------------
29/07/2021 - Alimentação Royal Gorilla #1 (2,5L): E.C = 1,02 ; pH - 6.3
- BioGrow - 2,8ml ; BioBloom - 2ml; TopMax - 2,5ml; BioHeaven - 3ml; Activera - 2ml; Calmag - 0,6ml
Alimentação Royal Cheese 1 e 2 (4L): E.C = 0,84; pH = 6,2 :
BioGrow - 4ml; BioBloom - 2,5ml; Topmax - 5ml; BioHeaven - 4ml; Activera - 4ml; calmag - 0,7ml
Alimentação Royal Gorilla #2 (2L): E.C = 0,80; pH = 6,2
BioGrow - 1,8ml; BioBloom - 1ml; TMax - 1,5ml; BioHeaven - 2ml; Activera - 2ml; Calmag - 1,5ml
-------------------------------------------------------------------------------------------------------------
31/07/2021 - Tirei algumas cabeças pequenas que nao iam desenvolver e tirei mais umas folhas amarelas das quatro. (as mais secas)


Processing
Likes
33
Share


@Ferenc
Follow
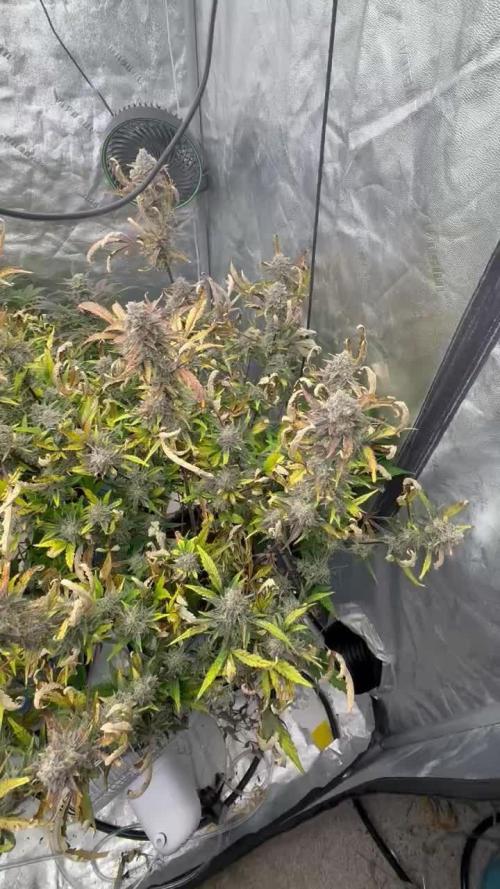
Day 65: All good they are stinky and getting ready soon. BlackBerry Kush and LSD-25 will be harvested in 2 weeks so I started flushing them. Rest of them need more time at least 3 weeks or 4.
Water intake 200 ml a day no more fertilization for Balckberry Kush and LSD-25. 600W LED, 18 hours on 6 hours off humidity is low approx 35 percent.


Likes
19
Share


@adam_pawloski87
Follow
Another fun strain to run from Fastbuds, Bruce banner was amazing at a total of 83 days , came out with some thick dense resiny coated buds , an very sweet smell! Has very tight buds with tight stems so it would def be better to tie her down an open her up for some LST ! I highly recommend y’all trying Bruce Banner out , you won’t be disappointed!!

Likes
20
Share

@eldruida_lamota
Follow
Variedad con una floración corta, entre 8/9 semanas.
Procedente del original Exodus Clon (UK).
Predominancia indica con un nivel de thc superior al 16% .
Es muy fácil de cultivar y la alimentación la acepta muy bien en general .
Cada etapa cumplió con mis expectativas y por ello aparte del sabor el colocon ... en cuanto a todas sus etapas le doy 9/10 .
CEPA BRUTAL enserio.

Likes
24
Share


@Finniegrow
Follow
NOTES:
I've flowered my babies for 42 days at the beginning of this week. Keeping EC at 1,4-1,5 / pH at 6,0-6,2 and nutrients as before. I'm propably starting to flush after this week.
Day92 (16.1.)
Took some pictures/videos for the diary and refilled the tanks with 40l of fresh nutrient solution.
Day93 (17.1.)
Day94 (18.1.)
Day95 (19.1.)
Day96 (20.1.)
Day97 (21.1.)
Day98 (22.1.)


Likes
17
Share


@GERGrowDesigns
Follow
Welcome to Flower Week 5 of SuperStrains OreoZ
I'm excited to share my grow journey with you from my
SuperStrains Project . It's going to be an incredible ride, full of learning, growing, and connecting with fellow growers from all around the world!
For this Project , I’ve chosen the Feminized Photo Strain OreoZ:
Here’s what I’m working with:
• 🌱 Tent: 225x150x150
• 🧑🌾 Breeder Company: SuperStrains
• 💧 Humidity Range: 50
• ⏳ Flowering Time: 8-9 Weeks
• Strain Info: 22%THC
• 🌡️ Temperature: 26
• 🍵 Pot Size: 20
• Nutrient Brand: Hy-Pro
• ⚡ Lights : 600W x 2
A huge thank you to SuperStrains for allowing me to try my Best with this amazing collection from Photo Strains they managed to Sponsore side by side with theyre Hy-Pro Nutriets . Big thanks for supporting the grower community worldwide! Your genetics and passion speak for themselves!
I would truly appreciate every bit of feedback, help, questions, or discussions – and of course, your likes and interactions mean the world to me as I try to stand out in this exciting competition!
Let’s grow together – and don’t forget to stop by again to see the latest updates!
Happy growing!
Stay lifted and stay curious!
Peace & Buds!
Likes
22
Share


@DadGrowsTomatoes
Follow
Started harvesting the lower limbs to sample and consolidate any remaining nutes.
The primary buds are turning well. Too large still need a week or so.

Likes
10
Share


@Chitown_grower
Follow
Starting to see some pretty nasty mag deficiency on the top of the canopy so I fed them some Mag Amped today! Will be watching the tops this week.
Otherwise, they are exploding with weight!

Likes
2
Share


Likes
Comments
Share

@Raul2021
Follow
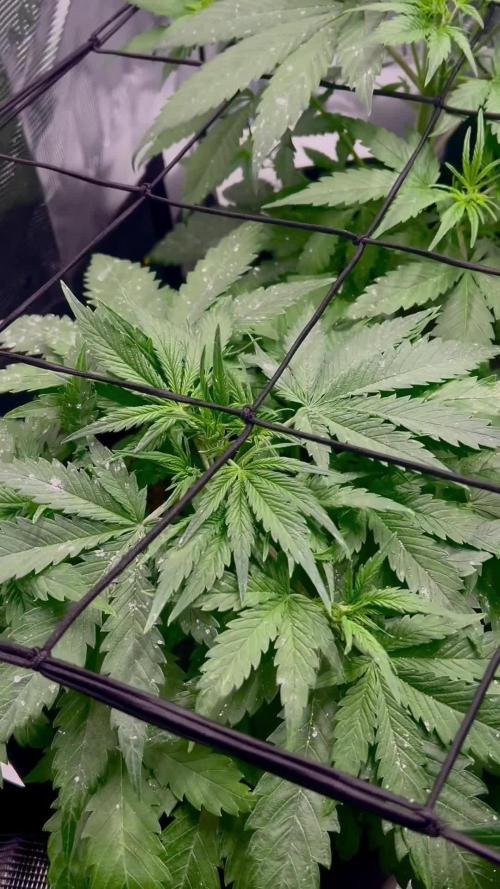
Día 34 de vida de las plantas, con un crecimiento optimo, mas o menos se han mantenido las condiciones de cultivo, se ha regado con agua unos 0,5 litros por planta con un PH de 6,1 y una EC de 0,4. Como preventivo de plagas he polvoreado las hojas con tierra de diatomeas, he aplicado un poco de LST y he colocado la malla SCROG para ir colocando las hojas según vayan creciendo. 2 de las plantas van mas avanzadas entrando en la floración mientras que las otras 2 se siguen desarrollando, la más pequeña de todas tiene un calzo en la maceta para que este a la misma altura de las demás, su tallo no se ha estirado y los nudos entre hojas están muy compactos.
Estas son las condiciones de esta semana:
Ventilación: nivel 50% oscilación 90 grados
Extractor: 45%
Humidificador: Off
Luz: 76% con altura de 40 cm
Ppfd: 550 umol/m2/s
Periodo: 18-6
Humedad: 65% a 70%
Temperatura: Día 23 C - Noche 20 C
Vpd: 0,62 a 0,92 kpa
Co2: 314 a 818 ppm
Temperatura del sustrato: mínima 19,4 C máxima 21,9 C
Humedad del sustrato: mínima 7% máxima 22%
Productos y Marcas usadas:
Indoor: MARSHYDRO 80x80x160
Led: MARSHYDRO FC 1500 EVO SAMSUNG
Ventilacion y extracción: MARSHYDRO
Controlador: IHUB PRO MARSHYDRO + Kit Sensores
Medidor PH: Milwaukee PH 600
Medidor EC: Milwaukee C66
Sustrato: COMPOSANA Semilleros / LIGHT MIX BIOBIZZ
Ph: BIOBIZZ UP / DOWN
-Fertilizantes-
BAC: GROW, BLOOM, PK, CALMAG
ADVANCED NUTRIENTS: VODOO JUICE, BUD CANDY, TASTY TERPENES, BIG BUD, OVERDRIVE, BUD IGNITOR.