
Likes
Comments
Share


@growerfromnc
Follow
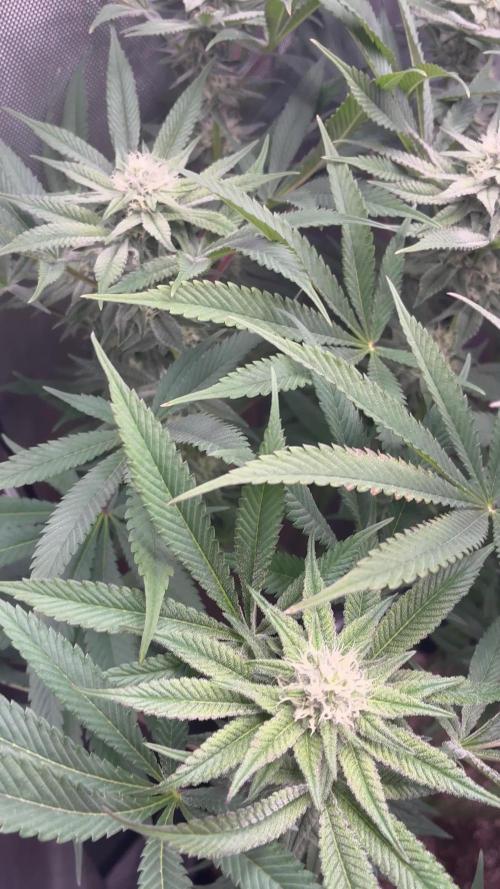
She reeks ooh my God if you haven't grown this strain you gotta she smells horrible rotten fruit jet fuel sweet she looks wonderfull
All she is getting is water from here on out
Gallons on gallons start the Flushing
11/26/23


Likes
4
Share


@Grow_of_Leisch
Follow
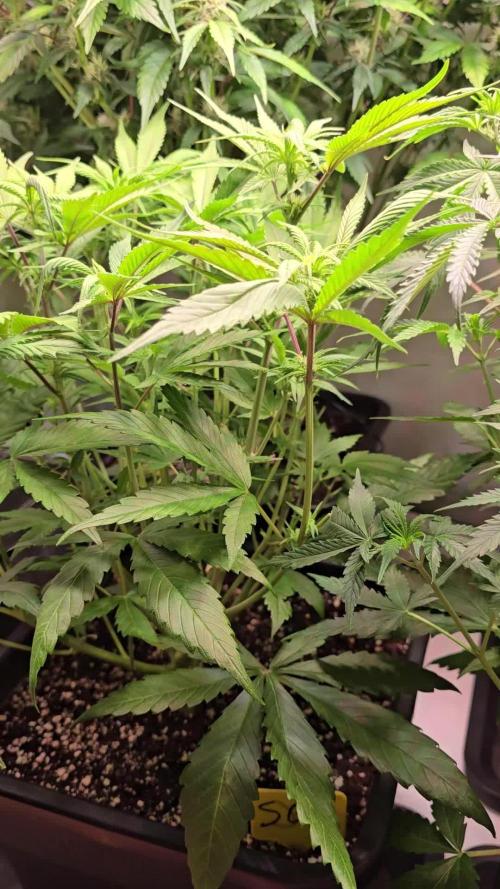
-Bagseed from Breeder (Friend)-
•Cherry Cream
Genetics:
•Ice Cream Man (mother)
x
•Cherry Wine (CBD) (father)
Ratio 1:1
Likes
4
Share

@NyBushDr
Follow
Good morning, today is day 22 flower ! Nothing much to be reported as everything is on cruise control and there’s basically nothing for me to do anymore but water ! The permafrost buds are getting frosty, stacking amazingly and chucking up while the jungle cookies smell very strong but aren’t stacking as tightly! I’m super happy with how they look! Just continuing to water a gallon every couple days rotating fish shit and silica as usual! Nothing else to report and I’ll see you all next week
Likes
12
Share


@Sativagrad
Follow
Hi, I have a little problem with powdery mildew after the rain, so I removed a lot of leaves for better ventilation and easier handling, the smell is amazing, while removing the leaves my hands were all in resin.

Likes
33
Share


@MadeInGermany
Follow
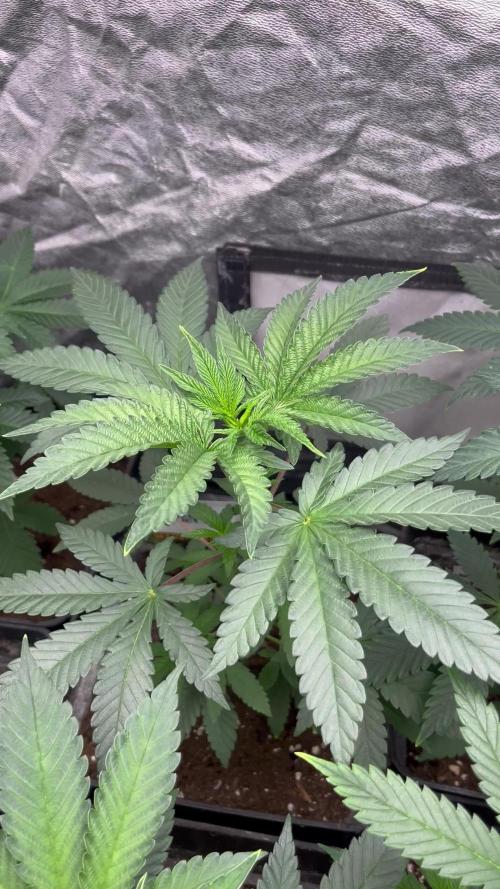
Hey guys :-)
She is growing great and will be ready for the flowering tent in the coming days :-)
A few cuttings are taken beforehand.
Was poured 2 times with 1 l each.
I'm looking forward to the start of flowering :-)
have fun and stay healthy 🙏🏻
👇🏼👇🏼👇🏼👇🏼👇🏼👇🏼👇🏼👇🏼👇🏼👇🏼👇🏼👇🏼
You can buy this Nutrients at :
https://shop.greenhousefeeding.com/us/
👇🏼👇🏼👇🏼👇🏼👇🏼👇🏼👇🏼👇🏼👇🏼👇🏼👇🏼👇🏼
You can buy this strain at :
https://www.amsterdamgenetics.com/product/choco-cheesecake/
Water 💧 💧💧
Osmosis water mixed with normal water (24 hours stale that the chlorine evaporates) to 0.2 EC. Add Cal / Mag to 0.4 Ec Ph with Organic Ph - to 5.8 - 6.4
MadeInGermany

Likes
28
Share


@J_diaz420
Follow
A partir de la próxima semana se empieza a fertilizar, mientras tanto, enrraizante, microorganismos y mucha humedad 👍👨🌾🍀


Likes
7
Share


@Madman2020
Follow
28APR 4May
5day flush
Started Trim 1day before Chop
Didnt add co2 because i think it was to late to care
Trichimes were mostly amber at start of week. I started harvest to late
Week8


Likes
19
Share


@UKLEEDSGROWER
Follow
So we are 8 weeks +1 day here now, around 8 days into flush and 6 days away from chop. I’m guna cut these at 9weeks so they will probably get another 2/3 heavy waters and then 48hours of darkness. Really starting to pack on weight now I had to support all branches as much as I could with bamboo and garden ties. I sampled a bud I took when I first started flush at around 7 weeks and it was so smooth and creamy. Real nice fruity and zesty taste to it. Smelled of fresh lemons with a hint of grapefruit. High wasn’t heavy as expected being so early but certainly felt a relaxation effect 1 hour after smoke so really excited for finished product. Just counting down the days now!!

Likes
12
Share


@valiotoro
Follow
One with a topping the other one just LST both huge yield!🦖
For the smell its cookie dough,lemon & diesel🍪🍋⛽️
Super sticky buds 🤩


Likes
5
Share

@ThatsmyGrow
Follow
She's actually not using as much water as I'm used to with other plants. I went a good week without watering her, and she didn't show any signs of needing more. So, after almost 10 days, I fertilized her again.
Likes
2
Share

@eldruida_lamota
Follow
Que pasa familia, vamos con la quinta semana de vida de estas Mandarin Panties feminizadas de Seedstockers.
Vamos al lío, las plantas se trasplantaron a macetas de 7 litros.
El ph se controla en 6.5, la temperatura la tenemos entre 24/22 grados y la humedad ronda el 70%.
El ciclo de crecimiento puse 20h de luz, el foco está al 50% de potencia.
Me gustaría estar más encima este cultivo pero la salud me está impidiendo un poco este 100% con el proyecto. Con suerte la semana que viene andaré mejor.
- os dejo por aquí un CÓDIGO: Eldruida
Descuento para la tienda de MARS HYDRO.
https://www.mars-hydro.com
Hasta aquí todo, Buenos humos 💨💨💨
Likes
3
Share

@Pheno_Minds
Follow
Die Pflanze bleibt sehr kompakt - Indica Wuchs kombiniert mit Light Mainlining / LST. Ich habe beschlossen, kein Lollipopping zu betreiben und nehme nur gezielt Fächerblätter weg, welche über den unteren Buds hängen.

Likes
2
Share


@CuriosityWebster
Follow
Went away for seven days had a friend come by and water the garden
Absolutely exploded since I’ve seen them last very pleased with all of the plants except for mystery auto number one. It is disappointing me some but hopefully the top will bring more growth.
Can’t wait to see these continued to develop!!!


Likes
26
Share


@PatriciaGant
Follow
Dane, We all should help one another.
Human beings are like that.
We should live by each other’s happiness - not by each other’s misery.
We don’t want to hate and despise one another, share the Joint.
And mother earth is rich and can provide for everyone.
We can Grow enough Happiness, In this paradise, there is room for everyone.
We only exist to bring joy into the world and The way of life can be free and beautiful,
but we have lost the way.
Grow High and Give the world A smile.
At the end we own nothing more then all our memories, lets make them amazing for everyone,
nothing to loose only everything to win.
A last kiss goodby, a second one, softer and long as a sign, that you are woth it.
That Everyone worth who loved and give.
Enought Hippie Talk, now have a nice day and an even better grow, thx for watching by.
((From Seed 🌱
week report:
(42 starting green sensation adding (refill 10L)
(46 big day hope not overdone

Likes
149
Share


@CBD_Sweden
Follow
Hi all the happy people here in GrowDiaries.
This is my second cultivation ever and it will be fun to try a bigger space than my closet grow.
First, I'm just going to say I'm done with the construction of my new growroom.
I put some pictures on the construction here in week one.
The room is 2.14 meters by 1.7 meters and has a ceiling height of 2 meters.
It provides a floor area of 3.6 square meters.
I use a 54 Watt Lightwawe T5 for germination and 2 Pcs 400 Watt HPS lamps.
I have a channel fan that replaces the room air about 40 times an hour to get a comfortable theme in the room, the air enters a fresh air intake from the outside.
The air is purified through a carbon filter to then leave the room to the rest of the basement.
Then I use that heat to heat the rest of the basement.
I will use 8 pcs 15 liter Autopots to grow with and a 100 liter water tank that supplies the pots of water and nutrition.
I will grow completely organically in soil and will watercure my buds to get the best possible medicine for me.
But there are no cultivation rooms to be displayed here, so I continue with what is most important.
Today I have put my seeds in my moisture dome and hope the seeds have germinated within a few days.
I am very excited to see how the new growroom will work and how this Blue cheese Auto from Royal queen seeds will turn out.
Blue Cheese automatic cannabis seeds are a cross of Blueberry Automatic and Cheese Automatic that has been perfected over five years of breeding and careful selection. The result is a feminized, autoflowering strain with superior yield, flavor, and effects to either of its distinguished parent strains.
THC: 16%
CBD: Low
Yield Indoor : 325 - 375 gr/m2
Yield Outdoor: 60 - 110 gr/plant
Height Indoor: 40 - 70 cm
Height Outdoor: 60 - 110 cm
Flowering: 7 - 8 weeks
Harvest month: 9-10 weeks after planting
Genetic Background: Blueberry x Cheese x Ruderalis
Type: Sa 35% In 40% Ru 25%
Effect: Cerebral and uplifting
Climate: Mild
..............................................................................................................................................................................................................................................................................................................................................
Update 2017-08-15. All 4 seeds have germinated and planted in small pots inside the humidity dome.
I'm so glad it worked so well and now it's just hoping they'll start growing and become 4 big healthy girls :)
...............................................................................................................................................................................................................................................................................................................................................
Update 2017-08-16. I have mixed my own soil today. Its 40% sieved peat harrow H2-H4 0-30 mm, 45% sieved peat harrow H4-H6 0-30 mm. 5% sand and 10% of compost soil. And i use 15% of perilite and mix it all together.
................................................................................................................................................................................................................................................................................................................................................
Update 2017-08.20. Nr1 and 2 grow and thrive.
Number 3 just got rid of the seedpod and is folding out the sheets.
Number 4 is a bit shy and can only be seen if you look carefully into the soil.
.........................................................................................................................................................................................................................................................................................................................................
Update 2017-08-21. Nr 1 and 2 is doing well. Nr3 is trying to catch up and Nr4 is still shy.