The Grow Awards 2026 🏆 


Likes
Comments
Share
@Bluemels
Follow
Tag 24: Umgetopft in einen 15L Topf.
Tag 25: getoppt bei 4 Nodien.
Tag 27: Ich beginne die Seitenarme runterzubiegen, dazu drücke ich Diese 1× täglich runter.
Tag 28: Leider ist beim runterbiegen 1 oberer Seitenarm fast durchgebrochen, ich versuche i mit Klebeband und Draht zu retten.


Processing
Likes
16
Share
@Gelato93weed
Follow
Per ora solo haze berry auto in fioritura in questi giorni monto un secondo box per le troppe piante. E i diversi tempi di semina e crescita per fare il diario in modo piu coretto per ora mi fermo per 1 settimana pepreparare il tutto

Likes
11
Share
@Budking420
Follow
I'm thinking about starting lst soon although I may do a small amount of HST first and prune a few fan leaves. I am VERY amazed and impressed at the speed that these are growing. Check back next week to see just how fast she grows! & remember its 4:20 somewhere!!!!
Likes
Comments
Share
@Elron_mc_Bong
Follow
Netz entfernt
Entlaubt
Pflanze unter dem Netz neu positioniert.

Likes
3
Share
@Unculti_responsable
Follow
Bueno esta semana se amoldaron muy bien las ramas a la malla ya se levantaron y están engordando muy bien tiraron bastante resina y bienes muy bien, esta va a ser la última semana se fertilizantes después de esta semana vamos a empezar con el lavado de raíces, esperemos que sigan así de bien !

Processing
Likes
54
Share
@RastaGrow
Follow
Ужэ 17 день активнова цветения , 2 недели без изменения всё идёт нормально жду середины 3 недели чтоб провести лёгкую дефоляцию . С удовольствием жду вашы коментарии , советы , вапросы и дажэ критику ;)

Likes
49
Share
@smzzz
Follow
That's it !
Plant #1 :45.52 G
Plant #2 : 32.68 G
Plant #3 : 43.12 G
Sample before harvest : 4.16 G
Total 125,48 G
I'm happy with the quantity, i know it's not a lot for 250W, but with my setup, and my knowledge, i'm pretty happy with that, i am especially happy cause of the quality, it's dope !
the plant #2 gave me a bad yield. Buds was a but aery, not compact like the 2 others. I don't think it's a genetic problem, i've made mistake on her, and she was the one with the less light, a bit late since the beginning, etc etc.. but she is good ! she is like the #3 but not compact.
For the cut i removed big leaves and big sugar leaves, and head down. It was ready to cure after 8 days, i'd like it to be slower but they are already wonderfull after almost 1 week into curing, so it's great 😎
I'm pretty lucky to have 2 realy differents phenotypes, this is so good !
Pheno #1 is realy like a concentrate of lemon, and realy sweet, sugary. She is strong ! Like a 50% High / Stone, totaly stunted.
Pheno #2 smells like strawberry, like a strawberry yogurt. She taste more like sugary / fruits and earthy. She is my favorite, best looking, best smoking, best smell, best everything !
This is a plant to try, for sure !
Thanks to anyone who helped me !
Gonna enjoy now 😎0000

Processing
Likes
23
Share
@GrowGuy97
Follow
Wish the buds would have got a little bigger but feel like that’s particularly my fault for a short Veg but overall I am blow away by the outcome for all the seeds to just be random bag seeds! 2 of the plants are drying now 3rd one will be cut tomorrow & the other 2 got probably 2 more weeks! Will do a taste & smoke report and also give a weight as soon as they dry & cure a little bit but honestly couldn’t be happier with my first grow! Thanks for all the support & help along the way & happy growing friends!🤙🏼✌️🏼🌱
Update on 1st plant - dry weight 42g, still smelled pretty Earthy when I put it in the jar but the smell is definitely coming out now, extremely sticky & frosty buds❄️: 1:🏼🙏🏼
Update - plant 2 Dry weight was 40 grams! Extremely happy with the out come this is honestly some of the best bud I have ever smoked! Amazing to me this came from a random bag seed, it has a very citrusy flavor, smells & smokes amazing! Honestly a 10/10 in my book, wish I could knew what strain this was so I could grow it again!😫❄️✌️🏼🌱
Update - plant 3 Dry weight 34g, smells & look phenomenal, the buds are much smaller & had the smallest yield so far but this is by far the best smelling so far! Will have a smoke update on this one soon, stay tuned friends & happy growing!✌️🏼🌱
Update - plant 5 dry weight was 52g it dried a little faster than plant 4 which I will probably jar tomorrow! Will update again with a smoke report soon, this plant brought my total so far up to 168 off 4 plants👍🏼 Thanks for following friends & happy growing! Also the butter I made from the trim was 🔥🔥
Likes
8
Share
@KCduzit
Follow
Flushed once and light defoliation this week as it’s one on the last times to do so before trellis net goes on. Also one of my last applications of organic insecticidal soaps (preventative) and Magnifical applied as a foliar spray. Low stress training for very last time and released by the end of the week. Girls are looking healthy with a few clearly showing sex. New intake fan and exhaust next week for when heating comes on in the house.

Likes
67
Share
@AsNoriu
Follow
Day 63. She is going down, my fastest ever big healthy plant. Looking at first waves 3 numbers, I think it's not even 2 ounces plant, it's f@cking THREE !!! ;))))))))))))
Day 71. One to jars another for trim jail. Busy day ...
Day 72. After small delay, she went down ;)
Day 82. Straight to vacuum sacs, but she was really great !
Happy Growing !!!
Likes
14
Share
@Bncgrower
Follow
Great harvest, I was impressed with the quality of this strain. After the drying and curing process, I'll give my feedback! 💪


Likes
65
Share
@bypado_farm
Follow
Day 65:
Watered the plants 0.5L with nuts
722 ppm, 1534 us/cm, PH 6.4
Day 67:
Did some defoliation
Day 68:
Watered the plants 0.5L with nuts
802 ppm, 1676 us/cm, PH 6.4
One plant showing signs of P and K deficiency (Gorilla Cookies)
Likes
7
Share
@Ton_Trichomen
Follow
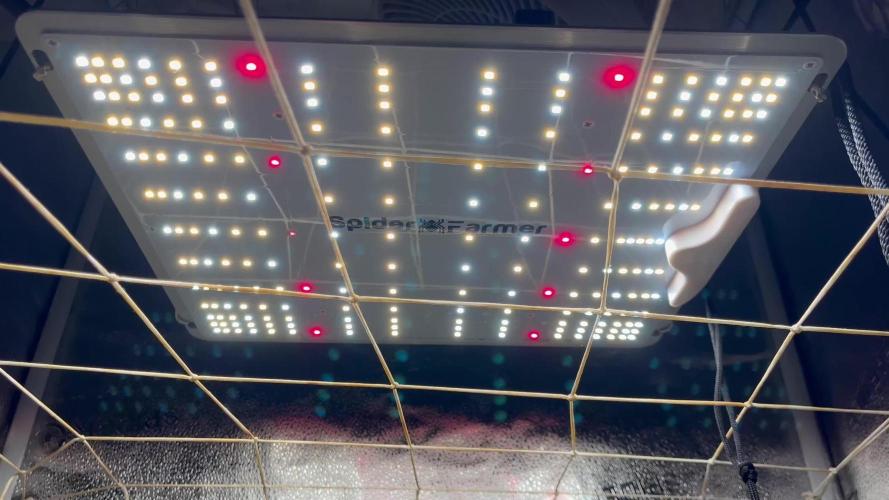
Day 14 🤩 vegi is starting
Piccas from this morning 8.30 and 17.00 after LST
So today was the first time I had Terra, Generator & Root Stimulator, only ¼ of the specified amount of everything and of course Hy Pro Fertilizers, my fertilizer barrel is finally ready, is being supplied with oxygen and the fertilizer is in motion, which means that as I am lazy I make 50l and leave it in the corner 😉 but always ready to use...
Then today was the first light LST, I will leave it alone for 4 days and then see where and how I pull it out, it doesn't really matter because I want to put up a net and lay it flat underneath
The Frosted Agave from Original Sensible Seeds has also seen the light of day
This grow is sponsored by:
Zamnesia Seeds
Hy-Pro Fertilizers
Mars Hydro LED
Start 26.4.024
Germination date 30.4 024
Germination 6v6
From Zamnesia
Do Si Dos f1 Auto.2x
Green Crack f1 Auto 2x
Pineapple Express f1 Auto 2x
Growing method
L.S.T with the help of a scrog net..🙈
Light led 1x fc 4800 from mars hydro
Exhaust air, I replaced the heavy pk 150 with my Mars Hydro 6 inch fan
Filter Rhino pro 900m³
Inlet air 305 m³ with filter 160mm
Soil:
Atami Light Mix &
5 mm pumice stone &
16 mm expanded clay on the floor
In 15 l. Factory pot
Temperature inside: 26.50°C 79 Fahrenheit
Outside temperature 21°C
R/H 64%
Light: 19/5 dimmed to 75% distance 70cm
Roots 21.00°C
Ph medium 7.0
Ph water 6.3 1.5 liters today
Ec 0.8
Nutes Hy-Pro Fertilizers Terra ml to 1l
Terra Veg & Bloom 0.6ml
Roots Stimulator 2.0 ml
Spraymix 5 ml
Generator 0.3 ml
Epic Boost 0 ml
Enhancer by Greenhouse
0 g
😉🤜🤛
#marshydroreview
#HyProFertilizers
#zamnesia
#originalsensibleseeds

Likes
4
Share
@I_Identify_As_A_Dan
Follow
Week 4 for the indoor black Lebanon by SSSC
Phenos 4 & 1 are for sure the ones packing on the size of buds first. Hoping the other 2 catch up. They were only feed plain water next week ill probably give them a feeding of greenhouse feeding bio enhancer for some extra boost. They are all smelling of a strong nutmeg type spice atm.

Likes
6
Share
@DrShotzUK
Follow
Banana purple punch - 420 fast buds
Week 6 had some issues with heat stress but seems to be pulling threw ok
Smells banging
DRSHOTZUK
Likes
34
Share
@AshBrand
Follow
11/3/21 - Looking really good today! All plants are crazy perky with big flowers that are begging for 12/12. We will flip after the aphids are gone. We will be repeating week 3 of nutrients this week.
11/4/21 - They look amazing. We got Fox Farm Force Of Nature because we have aphids :/ We will spray this evening and look each day and spray as needed. Major defoliation is going to be done throughout the week as well. We got 2 more scrog nets going in. The plants need them pretty bad. We will put one more up, mash the tops down, defoliate and add the second scrog in early flower.
11/5/21 - We didn’t have time to put the scrog up or defoliate. Also, the spray for the aphids never showed up 😡. But on the plus side, the plants looks amazing!
11/6/21 - We did some major defoliation and sprayed the aphids with an organic pesticide soap. We also added the second scrog net.
11/7/21 - We only found a couple live aphids so sprayed again. They should all be gone by now. Light needs to be bumped to 60% and also raise it a bit. They look so much smaller after some defoliation.
11/8/21 - Aphids are gone :) We will do one more week of veg then add a 3rd scrog mid flower to support the buds when they start to form.
11/9/21 - First day of flower will be 11/17. Pretty excited for them to flower up. This veg has been frustrating and challenging with 6 plants. Overwhelming at times. Next one is going to be 4 plants MAX. They look great today!

Likes
35
Share
@ThatoneAKguy
Follow
Not sure what the GD glitch was last week but after I updated in showed I was a week behind. I digress. This week they are still blowing up. I have never personally had an auto stretch like this and I love it! #1 is a total candy stripe stalk and the flowers are bulking early. #2 is a little lankier and continued to stretch another 7” taller to 34” but has thousand of white pistils and looks to be about to stack on some weight now. Over all the colas look to be between 7-12”. #3 is a bushy little sucker and if you remember or this is your forest read the other blackberry x2 never germinated so I threw another stardawg In and it’s about 12 days behind so it should do its thing soon. I have a couple other dark devils I decided to start later than that in the back too.
The tent is consuming about 4 -5 gallons per day and I think I’ll run a straight water batch for a day when I clean it on Saturday.
Let me know what you think or if you have grown it before. I’m always looking for data like how long their flower period was or what you did that made them better.
Thanks for lookin’.
Likes
5
Share
@Aleks555
Follow
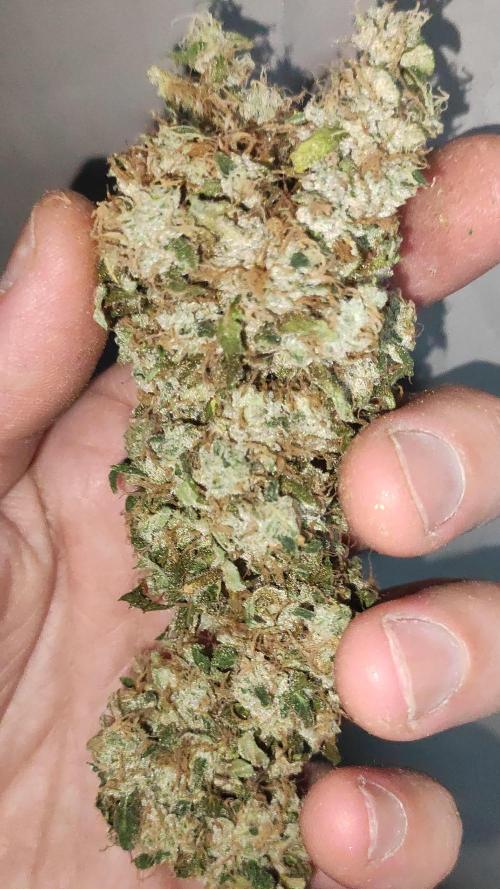
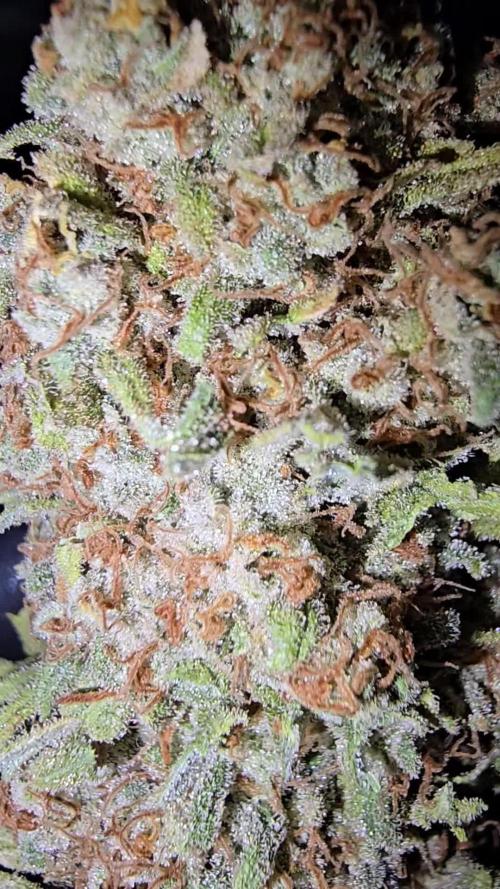
Harvest — Amnesia X3 Turbo Feminized by Seeds Mafia
After 117 days from seed, our Amnesia X3 Turbo Feminized has reached harvest — and what a journey it has been! The plant matured into a stunning structure, with dense, resin-soaked buds and that unmistakable Amnesia aroma: citrusy, spicy, and uplifting.
We trained her under a SCRoG net, which helped to maximize light penetration and support the heavy colas. She responded beautifully, growing strong and full of energy.
🌡️ Day temp: 25–26°C
🌙 Night temp: 20–21°C
💧 Humidity: ~45%
💡 Light schedule: 12/12
💨 CO₂ supplementation
🌱 Nutrients: Xpert Nutrients (full cycle)
We couldn’t wait — and tried a quick sample dried in the microwave. The effect was intense, fast-hitting, and long-lasting — a true turbo Amnesia experience! Easily one of the most powerful sativa-dominant strains we've grown.
Huge thanks to Seeds Mafia for the top-tier genetics, and to Xpert Nutrients for the professional-quality fertilizers that helped bring this beauty to her full potential. We’re beyond satisfied with the results and can’t wait to enjoy the full cure!