The Grow Awards 2026 🏆 


Likes
Comments
Share
@FlowerPower559
Follow
I think she's about ready to be bent over and trained.. I'll definitely do a video. Wish me luck because I've never done this before so it should be interesting to say the least. Lol
Likes
18
Share
@Onlygrow99
Follow
Empecé la germinación el 23/01/23 en un vaso de agua durante 12 horas, después al taper con servilleta húmeda 24 horas más.
Radícula de 2cm y las planto en maceta de 1L
Actualización estado de germinación 03/02/23:
Meto fotos ya con las macetas rellenas al 10º día y fotos del 7º día comparando las macetas y los tallos.
En cuanto el 2º par de hojas sea mas que evidente empezamos las semanas de crecimiento. Dentro de 2 o 3 semanas quizás, trasplantamos a maceta definitiva de 7Litros. Lo veremos.
Actualización 06/02/23:
Meto unas fotos de las plantas mas grandes, 3 días después para que se vea la diferencia de crecimiento.
Además un video mostrando el cultivo entero, la luminaria y la extracción. Llevamos 13 días desde la germinación.
Actualización 08/02/23:
A partir de aquí voy a empezara a contar ya las semanas de crecimiento. Hemos tenido 15 días desde la germinación.
Venga va, día 10/02/23 meto unas fotos mas, llevamos 17 días desde la germinación

Likes
34
Share
@AsNoriu
Follow
Approx day 111. All is still good. White powdery mildew not progressing, i see no new spots, so only few leaves taken by it, great escape !
On bud rot side all is quite too, just first two OGs were infected, third growing well and in colours. AKs looks like very resilient strain, till now avoided everything, despite having fattest top colas.
Think its last week for smallest AK , remaining OG will be chopped too.
Will try to drag biggest two AKs for two more weeks since today.
3 weeks of rain already and predictions shows at least two more ...
Happy Growing !!!

Likes
15
Share
@ExterminatorX
Follow
I was out of the tent and forgot to update the HARVEST.
M.1- 14g
M.2- 14g
M.3- 20g
M.4- 16g
M.1.2- GREEN AND SWEET, VALUED AS ONE MY BEST CURED.
M.3.4- FROSTY, SWEET, NOT MUCH THC.
Done

Likes
2
Share
@High_Grade_Dadli
Follow
Missed last week update but did some cutting girls have to live up to the mission 73 between the 5 plant....added one more which was a cutting from a seed plant harvested previous...didn't look like I did anything so cut dem a few day later 85 between the same plants... only cut the lower half of G4 n smaller inside branches( going to stop they dont hold up well)

Likes
6
Share
@Viridios
Follow
Wow...these plants are just monsters, i have never grown anything like it. I you do not control the growth or defoliant enough you in trouble. Th flowers are growing at a phenomenal rate, looking at the structure, it's going to be dense bud. I have treated the plants again against mildew, it's very crowded in there and is getting more so every day.
So far I'm very happy with the strain although not the easiest to grow.
If things are going this well at this point...another 4 weeks...😀..its going to be amazing.
Stay tuned.
😁

Processing
Likes
93
Share
@MadeInGermany
Follow
Welcome to the Zamnesia Spring Cup 🏆
Hello everyone :-)
A lot has happened this week 🤗.
It has developed very nicely and its roots have exploded properly 😍.
It is also slowly becoming lighter, since it has obviously been slowly consuming its nutrients from the soil :-)
That is why it was repotted today, mixing 3 layers with a total of 60-75 g Monster Bud Mix between the soil.
Then everything was mixed and distributed well, and the plant used.
Unfortunately I noticed too late that I didn't take any pictures of the root ball while repotting 🤦♂️🏻.
I look forward to seeing how it evolves this week. Above all, I am excited to see how she is doing with the Monster Bud Mix, as I have been used to mixing everything for each wash separately 😊.
During the course of this week I will also spontaneously decide whether I will give her an LST, topping fimming, etc., since I have to see how I am in the vegi phase, because the Spring Cup has a limited time 😁.
I wish you all a lot of fun watching, have a nice week, stay healthy 🙏🏻 and let it grow ☘️👍 .
Zamnesia Spring Cup 🏆
Type:
Runtz
☝️🏼
☝️🏼
Genetics:
Zkittlez x Gelato
👍
😍
Vega lamp: 2 x Todogrow Led
Quantum Board 100 W
💡
Bloom Lamp : 2 x Todogrow Led
Cxb 3590 COB 3500 K 220 W
💡💡☝️🏼
Soil : Canna Bio
☝️🏼
Nutrients : Monster Bud Mix
☝️🏼🌱💪🏻
Water: Osmosis water mixed with normal water (24 hours stale that the chlorine evaporates) to 0.2 EC. Add Cal / Mag to 0.4 Ec Ph with Organic Ph - to 6.0 - 6.3
💦💧

Likes
8
Share
@Alex_mir_doch
Follow
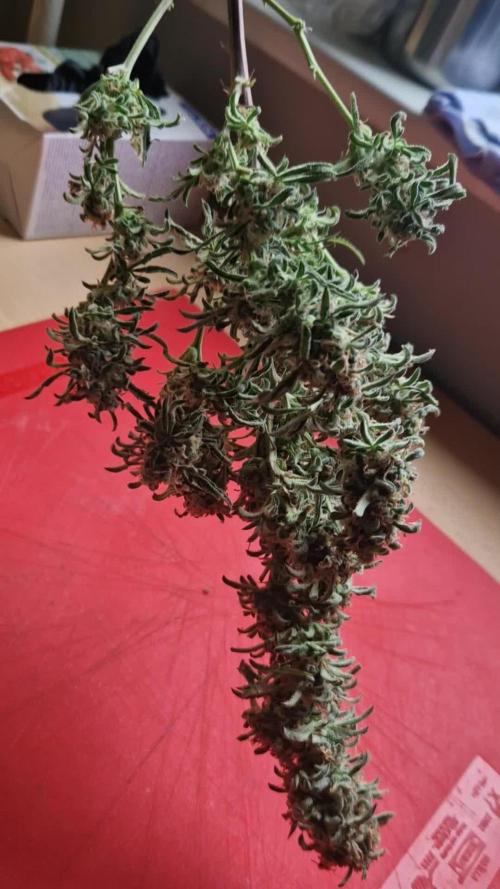
viel hat sich nicht mehr getan seit dem letzten eintrag. so richtig bernsteinig wollten die trichome nicht werden obwohl ich den pflanzen zwei wochen mehr zeit als geplant eingeräumt habe.
zum trocknen hab ich die nur grob getrimmt. die feinarbeit kommt nach dem trocknen.
da im zelt noch die white truffle stehen hängen die freaks erstmal im schrank.
die bedingungen zum trocknen sind wetterbedingt gerade sehr schlecht. bei 70% raumluftfeuchtigkeit wird so schnell nix trocknen.
vielleicht wird es ja doch noch sommer in den nächsten tagen.


Likes
8
Share
@trichomhunter
Follow
Day 71 (Dimmed LED now running at 80%)
Day 74 Last time clear water for the Ladys
Likes
6
Share
@Eldorado_ed
Follow
Really struggled with temps this week it’s has been way to hot managed to get down a little but tbh it was a hard week never thought I would get this in Scotland with the majority of time being wet windy and cold. Tried everything to get temps down but the heat was everywhere😩 sooooooo what do ye all think ready or not

Likes
1
Share
@HumboldtHomegrown
Follow
Bottomed the plants on day 22
Over three weeks into flower and they’re still stretching but starting to slow down
nice pistils forming
I like the way she is stacking up
Likes
422
Share
@Crashoverite
Follow
Hi all,
Welcome to my🍌💜👊 week update
Thank you so much for all support on this bananas journey. Much appreciate all your likes, follows and comments. 🙏💚❤️💜
Week 14
Jan 15- Jan 21
Flushing and preparation for harvest 😁 on Jan 15 feed girls for the last time with nutrients. It was reduced dose by 60% 5ltr no runoff. Following morning topped up with 6ltr of ph down and only fish shit. Runoffs PH 6.2. Second watering Jan 18 6tr and 7ltr on Jan 21. It was last watering. Week went very well. No white pistils hairs on Athena for a good while and barely few left on Xena. Many buds have different shapes and colours but all of them are equally hard as rocks, sticky and smelling so deliciously. This week trichomes development was just like I wish for. Just milky and amber in play Status on Jan 22. Mostly of buds 20-50% amber. It's just perfect for my needs🤤 On Jan 21 lights were on for the last time and girls will be harvested after 48 or 72h of darkness.
Stay tuned for the final week update!
Peace and love brothers and sisters ✌️💚👨🌾
Links
https://2fast4buds.com/seeds/banana-purple-punch-auto
https://plagron.com
https://www.biobizz.com/
https://fishheadfarms.com/
Processing
Likes
17
Share
@Ashbash
Follow
Made a big error this week and forgot to water these guys for about 5 days.
They did not enjoy it and dried up a lot, but theyre not dead yet! The Zkittlez shouldnt have been affected too badly cos it was nearly done, i hope the lemon ak will revover tho and keep bulking up. I am going to cut down the Zkittlez this week, and leave the lemon a couple more. It looks much bulkier just not dense so gonna leave it a little longer.


Likes
216
Share
@CRiSPrGrow
Follow
Week 2 : Colorado Cookies in Biotabs
Biotabs are drying much quicker than the other pots because they're closer to the fan, so i'll tune the air control in by having the fan pointing upwards instead. They got watered with micro from my very own specialized micro , one tablespoon per L, aloe gel from my kitchen plant, and (regretfully) a bit of lemon juice to pH it. didnt realise the organic would be no match for the aloe pH wise, so i'm spraying 1ml of my very own amino concentrate directly on the soil , not on the plant. i do one spray in the morning one spray at night, for 10 days to try to get the pH normalised to 6 , the night time is just enough to mix one spray can of 250 ml with 1/4 ml of amino concentrate, and have some left over. i added maybe 160 ppm of aloe to the watering. I sprayed the leaves once or twice max with 1ml/L spray and 120 cal mag on day 5. VPD went from week one 0.6 to 0.8 to pretty stable at 1.0. got my laser thermometer in the mail, so that really helps ! very even phenos across the colorado cookies so far, three nodes, very straight, very hungry. they seem to be enjoying having the roots a bit too cold more than the others. in soil ppm went from 340 in week one to 420 in week 2 🚀


Likes
9
Share
@SimpleDiaries
Follow
They all are getting close to harvest except Gorilla Glue which decided to out grow tent. Had to open vent and add light for top cola. Ugh


Likes
9
Share
@CBDezz
Follow
It was a rough week for the girl. We had bad weather this past week very high humidity and lots of rain. I also dealt with some powdery white mold which I was able to get under control by using baking soda and water and removing lots of leaves. The buds are much more dense and the trichomes are starting to turn milky. Ideally I would have liked to keep this plant in the ground one more week but we have more nasty weather coming so I will be most likely be pulling this girl in the next three days. It has been about 11 days since I have given her any nutrients and she has received a lot of rain water. I pulled some of the lower branch when I found the PWM just in-case and I have those dry right now.

Likes
37
Share
@masterofsmeagol
Follow
8/19 Rained again last night. No damage but medium is drenched. The 9lb kush I've been struggling with seems to be improving. I spent a lot of time on her yesterday and at least an hour this morning defoliating and pruning her. New growth and flowers look promising. I'm cautiously optimistic. I defoliated what needed it. I needcto qpplyvorganocide again. I can see random signs of septoria leaf spot. I really have been off my fame lately. I'm back on it now. This week the garden will be rearranged and I'll pull that big GDP back and better support the blueberry for flower. That NYCSA is a beast. It's resilient as all hell and just continues getting bigger and fuller. Despite pr9blems in the garden this girl seems absolutely fine. At least I don't have that defeated feeling anymore. I've got flowers on a few different plants. I'll try to get a couple pictures. I may take rapacaps advice and add a cheap plastic roof for later flower. I'm not sure if the explosive flower growth is due to the liquid kool bloom but I think I'm going to switch back to tiger bloom as it works better with the other nutes. I'll jeep this updated but I've got work to do.
8/20 Well it Rained again last night. This is getting discouraging. Now my other 9lb kush has the bottom branch all droopy like there's a borer or something. Realistically with the temp swings and the weather I think it's a firm of root rot or pythiym damage which isn't good. I posted pictures of the stalks and would be grateful if anyone has any advice. I'm go8ng back down to look again for a borer hole but i didn't see one. What it looks like to me is that the petroleum jelly I put on the stalks (to battle ear wigs) seems to keep them moist or something inviting mold or fungus. I'm kind of at a loss. I don't really know where to go from here. I don't know if I should just replant the severely damaged plant away from the rest of the grow, bag it and get rid of it or leave it be and hope for the best. I certainly don't want anything spreading. I'm getting tigerbloom today as my plants still need to eat and I'm nervous about the liquid kool bloom. It's probably fine but still. I'll update after I put in more work and research more today. Any advice helps. UPDATE: No borer holes. The stalk looks fucking horrible. It's supposed to rain today. I'm going to give it one more day then I'll amputate that branch and get rid of the other plant if I don't see an improvement. Perhaps I'll plant it in the ground. Don't really know what to do. Family bar b que today so my options are limited.
8/21 FED TWO GALLONS TO THE GARDEN. ONLY USED .5TSP/GAL OF LIQUID KOOL BLOOM. Did not feed dieing plant. Back to super hot weather 80° at 9am. Did a lot of research last night. I also went to several commercial growers and asked advice. What I came up with was a fusarium infection of pythiym infection
(Crown rot). I looked at all my stalks and they all have bark and are darker where I applied the petroleum jelly. I'm also NEVER using DE again. It fucking ridiculous amounts of water. Everyone swears by it bit it's not going in my garden again. Since use I can just watch water sit right on the GD soil. I tried to get some examples of what I'm talking about with the stems. I amputated that lowest bottom branch I trained (which was huge). I didn't have time to dispose of the other plant before my wife's doctor's appointment. I'll update when I go back over. I'm sure this won't help and may hurt but I used Bee Safe 3 in 1 on the wound and around the stalks of the plants I saw discoloration on. I didn't touch the NYCSA even though I see some discoloration. I may just be seeing things. That plant I'd super healthy and I don't want to risk losing it. It doesn't seem to have the stem rot like the others. At least I'm not the only one having problems. I hears some pretty bad stories. Still. I'm heart broken. I'll keep this updated after I go back over. FUCK. I MAY just go back to indoor. UPDATE: Got back from the appointment and the rest of the plant was all droopy just like the other 9lb kush (and the branch amputated). I wondered about that because other branches looked worse. I got the totally dead 9lb kush out and found some root rot. AFTER wheeling the bag out I found earwigs and other insects where the bag had been. Awesome. I used h202 to try to wipe down anything that looked Fingal in the stem. It sucks because it seems like that liquid kool bloom pushed them over the edge into flower. Cotton balls where there was nothing. So that's both my 9lb kush plants and the largest plant of the year the GDP that have all bit the dust. If you grow cannabis you know how I'm feeling. I KEEP TRY8NGVTO UPLOAD THE MINUTE VIDEO I TOOK BUT I CLICK ON SOMETHING ELSE AND IT DISAPPEARS. WIFI SLOW. HAVE TO WAIT FOR 5G
8/22 What do I say? Fusarium? Pythium? Stem rot? I'm going to have to get a tent to do some indoor to get the medicine I need for me and my wife. I took the last 9lb kush out and disposed of it. Well it's still in the bag. I'm hoping maybe it might come out of it (beyond hope and far away from the others (but I'm going to toss it today). This blows so hard. Flowers are just starting to develop. I like the liquid kool bloom. It seems to make flowers explode when there was none before. At least on the plants I have left. Actually even the dieing ones started flowering. I'm really concerned considering that one plant (at least) has septoria and every plant has that petroleum jelly on it. Cautio to people that use that. It seems thats where the rot started or is. In spots I spread the petroleum jelly. Anyway my NYCSA has the smallest amount of "funky looking stuff on the stem" so I'm hoping it will make it. Cotton balls starting to appear. If I lose the whole fucking crop I'm gonna go ape shit. UPDATE: Spoke with a few others and did more research. I removed my braces on the bottom of all the plants. It looks like the pjelly and the brace allowed for some type of contaminate. Other growers think I'm being too bleak. They think things will turn out okay. They are more knowledgeable about cannabis than me but I'm with these particular plants everyday. They're probably right and my anxiety is just getting g to me. It's scary seeing a healthy plant completely die in such a short time. After removing the other 9lb kush I could easily see extreme rootbound roots still too the size of the 1 gallon they came in. The bag was PACKED FULL of tight roots so they definitely made it down. The plant however just fell over when I pushed it. I had roughed it up a big before. Anyway I'm praying to the cannabis gods to not take what I have left.
8/23 Fucking pouring again. This sucks. I've gotten loads of advice and made another friend on here. I forgot my phone so I couldn't take pictures this morning. My spirits are up a little seeing that others are at least attempting to help. I'm headed to the grow shop after a night of research to grab supplies to battle this. I'll update later. EDIT: I picked up plant doctor at the grow shop. It was 50% off and I couldn't find anything with trichodermia. However, I've heard good things about this plant doctor. It's systemic and can be used as a root drench and a foliar spray. BIGGEST selling point for me is that it SPECIFICALLY lists fusarium, grey mold. Pythiym crown rot, black mold and all kinds of other shit. The thing that sucks is it's raining and it's not supposed to stop for a few days. That's going to make application more difficult. Oh well. I think I may do a root drench on the one plant that has a wilted bottom branch. I'll keep this updated. Thank you everyone who reached out. Especially growing grannies and my commercial buddy who is always here for me. However he has no experience with this so I'm kinda on my own here. EDIT: I couldn't find trichodermia and I don't have time to wait around and order. I found plant doctor which literally lists it treats all the possibly pathogens my issue could be. Even has a section for medical Marijuana. I did a root drench on the plant up front in the middle AND I did a foliar spray. Might as well get the septoria too. It's systemic but it gets in faster through the leaves I guess. It started sprinkling and I want to test this stuff out before I go ham with it. I did give some to the to other plants bit left my best AND THE TWO SMALLER ONES alone for now. I'm not seeing those issues on the NYCSA and I don't want to risk damaging it. I chose tge root drench as it's raining and the instructions for fusarium WAS a root drench. Thank you all for your help. I will close out tge question once I know it's figured out. Wish me luck. DID A SHORT VIDEO BUT WIFI IS SUPER SLOW SO I NEED TO WAIT TO UPLOAD IT. Went back over. Finished foliar spraying the other two and left the NYCSA and two Littles alone. Hopefully this works. I did I short video. Who knows if it uploads. UPDATE: Went back over and finished foliar spraying. Took a bunch of pictures and did a video but it didn't upload. I'm hoping this will do it. Plants actually look good. And they're flowering nicely! It's too bad I had to do a foliar bug this us supposed to combat PM and septoria as well.
8/24 It Rained last night but hasn't Rained today yet. It's supposed to and uts overcast. I'm really considering putting a roof on my grow (like rapacap suggested) for flower to decrease mold chances. Plants looked happy. I saw no negative effects from the Plant Doctor. I even sprayed a branch of the NYCSA and the stem and a little around tge roots. I finally feel like I can take a breath. I've been working so hard and worrying about losing g everything. I may have been able to save that 9lbkush but I don't think bit was worth taking the chance. The sun is peaking out now. My buddy at the grow shop called and set a side general hydroponics armor si 0-0-4 silica supplement cause it was 90% off. I pad like a buck sixty lol. I'll incorporate that next feed or water. Whatever comes first but it will be good to get it in the regimen. I was worried plant doctor might hurt but the girls seemed to kike it and I went ham on the worst plant. I mixed according to medical Marijuana guidelines on the label
(Theres another label on the internet, it's not on this one, it's at the very bottom and just recommdations from commercial growers. I hope this stuff works. Things look better already though. That liquid kool bloom is the bees knees. That's making flowers pop up like crazy! I think I'll stick with it. I was going to use beastie bloom and cha ching later on (and still might) but I hate the lockout bullshit. I've done a bunch of videos but most don't get uploaded as i forget to upload when I leave and wifi is slow here. Anyway at least I've got a few good ones left and pleating the words of my commercial poll buddy, "barring anything catastrophic you should be fine. I know your anxiety gets the better of you sometimes." Couldn't be a truer statement. I'm still getting a tent and doing indoor though. I'm going to need to.
8/25 Did some slight defoliation. I think today I'm going to reorganize my grow space. Things are looking better though. Plants look healthier. Flower is on and they are going to beat hell. I'm glad I took a cutting from NY 9lb kush. I also took one from the NYCSA. THose are tge little ones. The 9lb kush is flowering pretty good. Too bad it's just on a 3 gal. The NYCSA us in a 10 gal grow bag though and is doing amazing. I still see septoria on the leaves. I'm sure I'll need to reapply plant doctor but thus far I'm impressed. Things LOOK better. I don't even remember the last time I watered. It Rained last night. Looks sunny today. I'm going to feed tomorrow. I want the soil to dry out though. We usually don't get consistent rain like this. It's a first for me. I'll update later if I get stuff done.still wondering if I should amputate that wilted branch or give it a bit. It's still attached right now. I'll get some sealant and do some more research.


Likes
4
Share
@Coolbeanism
Follow
They popped up, I fed them some Iguana Juice grow, and am making sure they stay wet here at first. YouTube Grow Show Fast Buds Episode
https://youtu.be/jj7ZvAQepHM


