Likes
4
Share
@QixxGrows
Follow
Using 2 seeds in a luke warm water shotglass. Placing in cupboard to germinate. Day1: Nothing yet Day2: One of the seeds started to sprout. Showing it's sexy little tail. I'll monitor the growth in the next 24hrs and then decide whether she's ready for the sproutling pot or not. Day3: Tails were looking pretty good - forgot to take a photo :/ roughly 1cm for one of them, which is the one that I decided to plant. It really hurt when I chucked the other seed, but I really only need one plant. Soil mix for the sproutling: Coco Coir - 70%, Vermiculite - 15%, Perlite - 15%. I also added Greenhouse Feeding "BioGrow" and Mycorrhiza. The picture was taken from my RPi + Cam setup that will be taking 2 photos/min. I'll post the timelapse at the end of the day. Day4: Running the whole day in the tent with ventilation running minimally. Light only at 20%. No action, so I deleted all the pictures except for the last one taken before the lights went out. Day5: No activity above the soil level. Probably spent the whole day focusing on root growth. Day6: At around 09:20 I watered again and with this uncovered the first signs of life! The rest of the day was mostly uneventful - until the evening. Roughly 2hrs before lights-out she started to move. Day7: Things starting to look really good :)
Likes
4
Share
Son esquejes en hidroponía. Solamente agua con un poco de abonos, no añado aditivos. Después de 2 semanas en el Rainforest hago la transferencia hacia el sistema dwc. Es un sistema muy básico y muy eficaz.
Likes
2
Share
Likes
5
Share
Likes
201
Share
Very satisfying very Sticky as heck. Smells already only few wk into flower.. She is going to be very strong.. Love it
Likes
7
Share
@TightNugs
Follow
Had to abandon stardawg as room wasnt available under flowering light. RQS purple queen back from issues hoping to pull her back.Changed nutrients to Megacrop,responding well. Happy growing Nugz 🤞🏴󠁧󠁢󠁷󠁬󠁳󠁿🍁 🍁🍁🍁 Breeder-Royal queen seeds purple queen auto x1 🍁🍁🍁 Light-Voost VST 120 veg,VST 240 flowering https://voost.com/ 🍁🍁🍁 Seedbanks-garden of green,Expert seeds,Royal queen seeds https://gardenofgreenseedbank.com/ https://www.royalqueenseeds.com/
Processing
Likes
2
Share
**Encontrarás la traducción a español al final de la descripción** From/Desde: 23/09/19 || To/Hasta: 29/09/19 From day/Desde día: 22 || To day/Hasta día: 28 BlueBerry Cookies Diary / Diario de las BlueBerry Cookies: https://growdiaries.com/diaries/38769-dinafem-039-s-blueberry-cookies-at-the-ocean If you like this week, please hit a like, it costs you nothing! 👊. Thanks in advance 😉! -----IMAGES & VIDEOS----- I'm so sorry about the quantity of contents for this week and the following ones, as I've been telling I was under hard work pressure, and this week and the next one where the worst of them. In fact this week has some more images, but I decided to move them to next week or otherways next week is empty of contents. V1: Timelapse week video that covers 4 days. At about sec 25 I performed the topping on the babies, as I told before abobe 5th node, and one of them abobe the 6th. V2: This night I tried to make some videos of all the Cookies, but suddenly at 2:00 a.m my telephone ringed, I had to end up with the session, not a single BlueBerry capture and start to work 😲💻 (Server migration stuff... Damn unexpected boss calls!!) P1: BlueBerry Cookies Left <--•--> Ocean Grown Cookies Right -----WEEK SUMMARY----- This week the growing was georgeous, the Ocean Growns have almost doubled in size, the went from 15 to 29 cm even topping them. I'm loving the branch distribution os this plants is very beautiful. The leaves of this Strain are specially Beauty -----WATERING CALENDAR----- 28/09/19 DAY 27 - 1 l with all week nutrients @ (1.2 EC | PH 6.2 | 25.1ºc) *****ESPAÑOL***** Por favor, si te gusta esta semana dale un like, no te cuesta nada 👊. ¡Gracias por adelantado 😉! -----IMÁGENES & VÍDEOS----- Siento mucho la carencia de contenidos de esta semana y las que vienen, como he estado comentando he estado bajo muchísima presión de trabajo y esta semana y la siguiente han sido las peores de todas. De hecho esta semana tenía alguna imágenes más, pero he decidido pasarlas a la que viene, si no la semana que viene estaría sin contenidos. V1: Un video Timelapse de 4 días. En el segundo 25 les realizo la poda apical a las pequeñas. V2: Esta noche intenté hacer algunos vídeos de todas las Cookies, pero en mitad de la sesión, a las 2:00 a.m llamada del jefe, y a terminar la sesión sin una sola foto de las blueberries y aponerme a currar 😲💻 (Migración de servidores... Maldigo las llamadas inesperadas de los jefes!!) P1: Ocean Grown Cookies Dere <--•--> BlueBerry Cookies Izqui -----SUMARIO SEMANAL----- El crecimiento de esta semana ha sido brutal, las Ocean Grown casi han doblado su tamaño, han pasado de los 15 a los 29 y eso que les he realizado la poda apical. -----CALENDARIO DE RIEGO----- 28/09/19 DAY 27 - 1 l con todos los nutrientes semanales @ (1,2 EC | PH 6,2 | 25,1ºc)
Likes
88
Share
🌾 Harvest Day — The Grand Finale of the Eternity Grow Cup 🌾 Days 72–73 | Trimmed on May 25 | Posted May 27 What a journey this has been — and what a finish. These five incredible Runtz phenos have now completed their cycle, and today, we celebrate the final stage of their flowering life: the Harvest. We sent the girls into darkness on Day 70, allowing them a full 48+ hours of rest and reset. The dark period was just a bit longer, truth be told, because time… it flows as it must. This extended dark time helps increase resin production, allowing the trichomes to mature just that final bit more. On Days 72 and 73, we harvested them with care and reverence. Each plant was hung upside down, whole, in a perfectly controlled 60% humidity environment for 13 full days. Before hanging, we gently removed only the fan leaves, leaving all trichome-rich sugar leaves in place — a natural armor for the delicate resin glands during drying. Why do we do this? Because those sugar leaves help protect the essential oils and terpenes, preserving potency, flavor, and aroma for the smoothest experience later on. 🌿 The Dry Room & The Trichome Guardians Throughout the drying, we used a moisture meter to monitor the moisture content in the stems. Once it dropped to around 12–13%, we knew it was time. This tool is a simple but game-changing ally in ensuring a perfect dry — not too fast, not too slow. We then trimmed everything by hand over a 6.5-hour focused session. Armed with trim bins and good energy, we collected an abundance of glistening trichome heads in the process — a golden bonus from these resin-packed beauties. The leaves themselves told a story: deep purples, near-black shades, autumn fades and metallic tones — just stunning. Each girl was trimmed in order: #5 → #4 → #3 → #2 → #1, revealing dense, chunky buds all the way from top to bottom. Not a single pop-corn bud among them — only rock-solid nugs, heavyweight champions in every sense. 📦 Cure Begins – Grove Bags & Glass Jars Once trimmed, the buds were tucked carefully into Grove Bags and glass jars, each stabilized at around 61% RH. The Grove Bags handle the microclimate beautifully, keeping humidity between 58–61%, perfect for preserving all that hard-earned quality. We’re now opening the jars daily, monitoring aroma and feel. This part of the process — the cure — is where the soul of the flower truly comes to life. ☀️ UV, Reds & The Perfect Run Part of what made this run so special was the precision in light spectrum. 40% whites, full reds, UV and IR, and the girls responded like royalty. The UV pushed trichome development to the max. The deep reds gave us thickness, color, and weight. All of it under ThinkGrow Model Ones powered through the Trolmaster ecosystem — everything syncing in harmony. This run was stable, lush, expressive — a grower’s dream. To my eyes, this was a perfect run. ⚖️ Final Yield: 1,302 Grams (1.3 kg) In a 4x4 tent — that’s just 1.2m x 1.2m for metric friends — we pulled in 1,302 grams of flower, not even counting the buds that were taken for filming, photos, or “quality control testing” along the way. 😉 Dense. Loud. Sticky. Resinous. 🌿 The Hidden Half: A Tribute to the Roots In every grow, there’s a part we don’t always see — a part that lives underground, quietly holding everything together. The roots. And this time, I wanted to honor them too. When we unpotted the plants after harvest, we were met with massive, dense root systems, completely filling the Autopot trays. These roots were vibrant, white and healthy, looking like noodles in a thick herbal soup — a true sign of vitality. The Autopots system, combined with the Aptus Holland Clean Program and Plagron Green Sensation, made sure they had the perfect environment to expand, absorb, and thrive. The PRO-MIX soil was the perfect foundation — light, fluffy, with excellent aeration. It all worked in harmony. After unpotting, I carefully washed every root system, removing all soil to prepare them for the next chapter of their story. Now, they’re hanging and drying — and will be left to cure for at least one month, possibly more, in a dry, dark, and well-ventilated space. But why keep the roots? Because cannabis roots hold ancient value — both medicinal and ritualistic. Though they don’t contain cannabinoids like THC or CBD, they are rich in alkaloids, triterpenoids, sterols, and other therapeutic compounds that can be anti-inflammatory, analgesic, antifungal, and calming. Medicinal Benefits of Cannabis Roots: • Friedelin – known for liver protection and anti-inflammatory effects • Pentacyclic triterpenoids – believed to support immune and anti-tumor functions • Alkaloids – some studies suggest pain-relief and muscle-soothing properties • High levels of fiber and tannins – excellent for digestive and skin applications 🍵 Root Medicine — Ways to Use Dried Roots: Once fully dried (they should snap like twigs, not bend), they can be gently crushed, powdered, or infused: 🌿 Cannabis Root Tea Soothing & Detoxifying • 1 tablespoon of dried, ground roots • 3 cups of filtered water • Simmer gently (do not boil) for 20–30 minutes • Add a bit of ginger or lemon for taste • Sip warm, especially good for menstrual discomfort, inflammation, and general relaxation 🍲 Healing Root Soup Base Brothy & Nourishing • Add a handful of dried roots into a veggie broth or bone broth • Simmer for 2+ hours • Strain before serving • This adds a subtle earthy tone and allows the healing properties to infuse your meal Topical Root Cream or Balm Great for sore muscles or irritated skin • Infuse roots in olive oil or coconut oil (low heat, 2–3 hours) • Strain and mix with beeswax to form a balm • Add essential oils like lavender or eucalyptus • Apply to temples, joints, or sore areas 🛁 Root Soak Bath Perfect for grounding and full-body relief • Bundle dried roots in muslin or cheesecloth • Steep in hot bathwater for 15 minutes before entering • Let the soak draw out toxins and ease tension ⸻ The roots are more than just the anchor of the plant. They are its memory, its foundation, its quiet miracle. By using them, we honor the entire lifecycle — nothing is wasted, and everything has a purpose. This part of the process is new for many growers, and I truly encourage anyone reading this to try saving and reusing the roots. Dry them, process them gently, and let them offer you one final gift. Much love to Aptus Holland, Plagron, Autopots, and PRO-MIX — this wouldn’t have been possible without their harmony working underground while the beauty bloomed above. 🌱 The Gift That Keeps Giving: Reusing the Soil As we say goodbye to one incredible season, we begin quietly preparing for the next. But not everything gets thrown away. In this garden, nothing is wasted. Just like the roots, the soil gets another life. After each harvest, I carefully remove the remaining roots and break up the soil. I inspect it, rejuvenate it with compost and beneficial microbes when needed, and most importantly, I repurpose it — giving it a second life in my outdoor veggie garden. Why do I do it? Because this soil has already done something extraordinary. It has supported life, held moisture, breathed air, balanced nutrients, and fed plants that became medicine. It’s not just dirt — it’s a living ecosystem. And to throw it away would be to ignore its potential. In my veggie garden, this recycled soil now nurtures cucumbers, tomatoes, courgettes, and so many other little miracles waiting to unfold. It’s a beautiful way of continuing the cycle, taking all the energy and intention that was once used to grow cannabis and transferring it into growing food. 🌞🍅🥒 🌾 The Benefits of Reusing Soil: • Sustainability — less waste, less environmental impact • Cost-effective — no need to constantly buy fresh medium • Soil memory — rich in organic material, microbial life, and structure • Nutrient potential — amended soil still holds value for many plants • A deeper connection — a way to honor the entire cycle of growth When we reuse our soil, we’re not just being resourceful — we’re believing in tomorrow. We’re trusting that what we’ve built can be rebuilt. That what has been used can become useful again. That from what seems like an ending, something new can always emerge. And maybe that’s the most powerful message of all in this journey: Planting is believing in tomorrow. 🌍🌱 Every seed in the ground is a little act of faith. So as this season comes to a close, the first tomatoes have been planted. The cucumbers are reaching for the sun. The courgettes are settling in. And the same soil that once gave us dense, resinous flowers is now feeding the vegetables that will grace the table. From harvest to hope — the cycle continues. And it’s beautiful. 🎉 The Final Touches Fun fact: • Trimmed on May 25 • Photo shoot on May 26 • This report: May 27 • Dry Bud Exclusive Photo Set: Coming soon Stay tuned — the next upload will be something special, just in time before the Eternity Grow Cup closes on May 31st. ⸻ 💚 Thank You To Zamnesia — your genetics were nothing short of extraordinary. To GrowDiaries, for hosting such a powerful space for community. To everyone following this journey, your support, love, and kind words fuel this project and keep the spirit alive. Let’s keep pushing boundaries, together. With roots deep in the earth and eyes on the stars — the next chapter begins soon. Much Growers love always, 🌱 Dog Doctor Official 🌱 Genetics - Runtz https://www.zamnesia.com/6000-zamnesia-seeds-runtz-feminized.html Nutrients - Plagron https://plagron.com/en/hobby - Aptus Holland https://aptus-holland.com/ Controls - Trol Master https://www.trolmaster.eu/ LED - https://www.futureofgrow.com/en LED - https://www.thinkgrowled.com Soil - https://www.promixgardening.com/en Germination - Cannakan https://cannakan.com/?srsltid=AfmBOopXr-inLXajXu3QFgKXCXXos4F1oEvScjMKIB5MR5dk8-GJ-F49 DOGDOCTOR 15% off Smoking Papers - https://ziggioriginal.com/ Terpene saver - https://grovebags.com/ As always thank you all for stopping by, for the love and for it all , this journey of mine wold just not be the same without you guys, the love and support is very much appreciloved and i fell honored with you all in my life With true love comes happiness Always believe in your self and always do things expecting nothing and with an open heart , be a giver and the universe will give back to you in ways you could not even imagine so As always, this is shared for educational purposes, aiming to spread understanding and appreciation for this plant. The journey with nature is one of discovery, creativity, and respect. Let’s celebrate it responsibly and continue to learn and grow together! Growers Love To you All 💚 #EternityGrowCup #RuntzHunt #GrowersLove #CannabisCommunity #AptusHolland #ProMixSoil #TrolMaster #Zamnesia #Plagron #ZiggiPapers #Grovebags
Likes
20
Share
@DrGanj
Follow
This strain has smelled dank from the moment her first crystals arrived, just like having a few oz GSC laying around. She's currently drying and there has been no grassy hay smell to cure off like usual. My dry room just stinks like Girl Scout Cookies
Processing
Likes
3
Share
@mr_smooke
Follow
we pass 6 weeks of flowers. buds are getting fulled and the smell is so so beautiful. Here on pics is day 35 of flowering. On feeding menu is again Iguana Juice Bloom, I spend all Mother earth. it is awesome nutrients. will buy it again.
Likes
6
Share
Germinated pretty well. It's now been 2 weeks since it's erupted from the soil and uh looks good for now. I haven't given them any nutrients yet might start on the third week so 14/12/2020.
Likes
6
Share
Soma somando tudo por aqui! Cresceu e está na engorda!sem muito a declarar! Falta uma semana para a cabine de cultivo ser so delas e de mais 2 critical purpler que esta a 2 semanas de flora!aguardando ansioso para apreciar essas somango!
Likes
10
Share
Woche 1 für die Kleinen hat begonnen. Heute habe ich sie in die Endtöpfe gepflanzt und da bleiben sie bis zur Ernte. Wie IMMER haben die Samen von Fastbuds eine 100 % Keimrate und Super Qualität 💪 bleibt dran... es gibt Woche für Woche neue Updates😎 Week 1 for the little ones has begun. Today I planted them in their final pots, and they'll stay there until harvest. As ALWAYS, Fastbuds seeds have a 100% germination rate and superb quality 💪 Stay tuned... there will be new updates every week 😎
Likes
4
Share
2/18: 4 weeks since we planted them. Some of the new nodes since topping are starting to come in. Also finally got to doing some lst. First time, so I didn't rlly know what I was doing all that much, but my main goal was to pull branches outward and have more light reaching all the nodes. I should definitely have topped and done LST earlier, but oh well, now I know for next time. I also removed some of the new fan leaves that were covering the new nodes. My roommate wanted to experiment with the smallest one so removed some of its big fan leaves. I don't really think that was the right call, but whatever we'll see what happens. Would also have loved to try mainlining but its also pretty late for that. It would have slowed down veg quite a bit too, and since we have to go home from college in early may, they have to be harvested by then. Gonna water later this afternoon as well. 2/19: Watered them last night. 0.75 gallons each. 4 tsp grow big, 6 tsp big bloom, 1.5 tsp calimagic per 2 gallons. I'm not sure why I didn't realize earlier I can just partially tuck the higher fan leaves under the lower nodes coming in. It makes the plant look droopy since big leaves are tucked, but I feel like it helps the lower nodes receive light and catch up, while being able to keep the fan leaves without cutting them. The small plant has 10 main nodes, and the rest have between 12-14, with many smaller additional nodes coming in under. I'm not sure how much I should try to grow these smaller nodes on the lower branches, or if I should just snip them off. Main focus right now is to get the nodes at similar hight and horizontal grow. 2/23: Watered this morning. Should have watered last night but my roommates were asleep and I was a bit too lazy to do it myself (took me an hour last time to do it all myself). I think I'm gonna start filling up a 5 gallon bucket instead of the 2 gallon one I was using, since I won't have to spend as much time refilling the water, nutrients, and get correct ph. Nutes doseage was 3 tsp grow big, 6 tsp big bloom, 2 tsp calimagic per 2 gallons. Roughly 0.8 gallons each plant. Ran out of big bloom for a few of the plants, but I don't think that should cause any big issues. Me and my roommate were debating if we should feed them nutes this water, or do straight water and calmag. Ended up feeding them since I didn't think we already have much salt buildup, but I think we will do a straight water and calmag flush next time. I also remembered we have a TDS meter, so I used it for the first time. Water in was about 750 or so ppm, and runoff was about 1350. I think thats kinda high for runoff, but like I said we will flush next time, and plants look healthy for the most part. Will definitely look more into that starting now. Also, the ph meter I had previously bought is complete garbage, so I had only been setting ph to around 6.2-6.5 with one of those visual mixing solution kit. I'd been doing this before mixing nutrients, and hoping that they don't throw the ph values off too much. I know this is pretty reckless and stupid, but it seems to somehow be working for now. I think it's probably a better idea we get a working ph meter so we can make sure levels are good after mixing in nutrients, but I'm feeling a bit lazy and frugal to buy a meter, so we'll see. Overall, plants look fairly healthy. They were a bit droopy today because I think I waited a bit too long before watering them, but oh well. One of the two plants that is a leggier and less bushy phenotype is turning pretty yellow however. I'm assuming it's a nitrogen deficiency but I'm not certain. Seems to have gotten a bit worse the last few days, but I'm hoping things will sort themselves out. Might also just up the doseage for grow big, which contains more nitrogen than big bloom. On a few of the other plants, the older and lower fan leaves also seemed to have some spotting resulting from calcium deficiency. Newer leaves all seem fine, and with the recentish addition of calmagic, I'm hoping this won't be an issue going forward. Have also been snipping very small nodes that are coming in on the lower branches. Not snipping them all, just trying to predict which ones have a chance at reaching quality light and developing into good colas. Anything I think will turn into larf im just snipping. Looking back on the last few weeks, there are a lot of things I have learned that I hope to carry over to our next grow next year. I should have started lst and topping sooner, I understand how much and often to water them much better now, and there are a plethora of other small things that I have learned. I wish I didn't cut corners on some small things and overall was a bit more attentive to details, but for how well it seems to be going, I really can't complain. I'm incredibly stoked about how this is going, and I still can't believe I'm growing these plants with my roommates in our garage as a college student.
Processing
Likes
14
Share
The Pineapple Express is growing very well, it was in the critical moment, the first "topping" took a minimum but it performed very well and the new brunches are ready together with some beautiful solar panel leaves.
Likes
16
Share
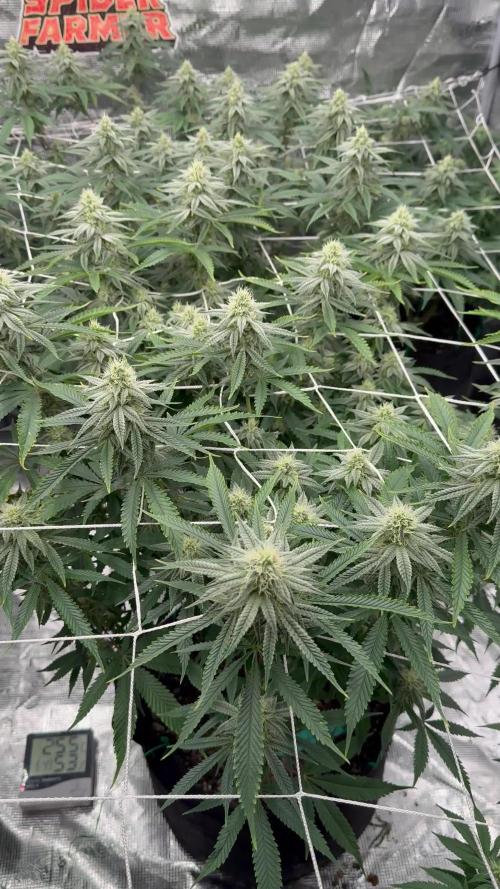
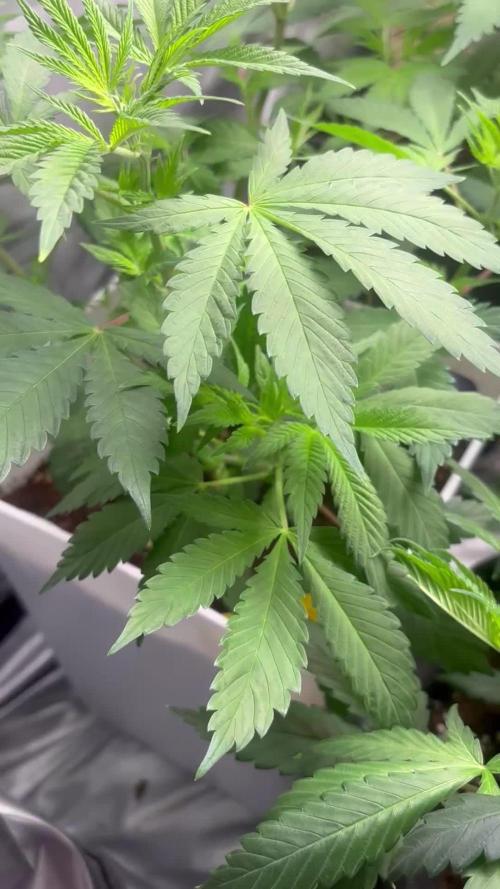
I'm using a 2x2x5 spider farmer tent and technically I start germination on 1/17/23 at 9pm and in the picture I'm using Rockwool but also a small pot with fox farm soil to hold it upright
Likes
22
Share
@TechDCo
Follow
Week 3 15/06/2024 Lights On! Switching to flower next week; maybe sooner! 16/06/2024 Lights On! Time to get on the skateboard June 16, 2024 The defoliated fan leaves. I'll just leave these here! 17/06/2024 Lights On! I can't go any higher than 300watts in this small tent. I packed the sativa tent away.
Processing
Likes
28
Share
@No_Clout
Follow
27/02/19 - This one is great, I popped the seed 24hrs after the gelato and this one seems to be developing its leaves a lot faster than the rest, so far really happy with DNA and with mills nutrients, it’s a lot easier to mix and I no longer have to use ph down because once all mixed it’s at a 5.8/5.9. 👌🏻 02/03/19 - Just transplanted all into their final pot, just in time I think as it looked like the roots were starting to circle at the bottoms of the pot, sprinkled half a tea spoon of Mykos on each hole prior to the transplant & fed them 2.5 litres each. I was going to saturate the whole pot but I’ll do that next feeding.