The Grow Awards 2026 🏆 


Likes
Comments
Share
@potcommunication
Follow
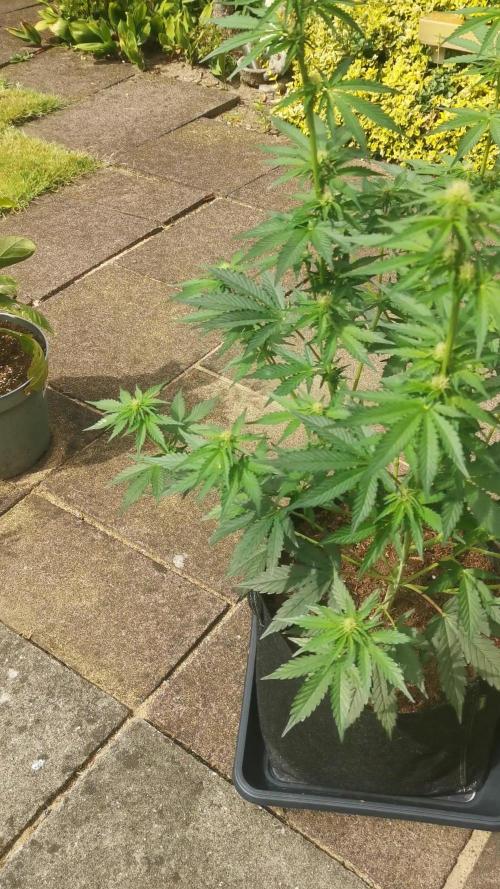
All good in the neighborhood
2 of 3 moved to the brand NEW FRIDGEGROW 2.0 system.
the orange one lost... ;)
just after a few days in the new home they grew like mad

Likes
1
Share
@Chubbs
Follow
420Fastbuds-Greenhouse Grow 2025
The feminized strains RainbowMelon, GorillaMelon, LemonPaya, PapayaSherbet, LemonMandarin, the FastFlowering GG4/Sherbet from Fastbuds are doing amazing for there first full week in the greenhouse. The heat in SoCal is warming up with temps in the low 90's in the daytime and 60's for nighttime. Over all they're starting to reach for the stars after being topped. Besides a couple of yellow leafs I snipped at the soil level, I'm seeing growth almost daily. I'll start feeding this week Grow A & B as well as Calmag from AthenaBlendedLine. Since being transplanted into the 5gal fabric pots they've only got well water.
Happy Growing.

Likes
18
Share
@Canadian
Follow
Unfortunately I don't have any better pictures because once I remove the net that was giving support to the buds and they were so big that the plant could barely hold the weight anymore so taking pictures holding everything with one hand using the device in the other was it a little bit of a challenge oh well I guess it's a good problem to have I will update when they are completely dry and cure.
I have cut down in jar everything the wait was 105 grams please consider that when they comes to my scale weight i wait until the main stem breaks with a loud crunch and the buds are really dry to the touch reason for it I have a very busy life and at the end of the day this is just a hobby so I cannot be opening those jars many times a day at most one in the morning and one in night so I want to avoid mold on them.so I push in a Boveda pack to keep them nice.
After two weeks in jars the send hose cheese has incremented a lot and the scent of Barry as well it has a very powerful High but Pleasant very nice strain to grow incredibly vigorous and with a high yield capability another win for Dinafem
Thank you for reading have a happy grow.

Likes
13
Share
@Hashy
Follow
This week has gone well. 6 plants in such a small space is playing havoc with the humidity but I feel I'm just about on it enough not to cause any rot.
The Cherry Cola is really developing quickly, the Hst where I snapped the main cola seems to have repaired itself.
******competition time******
I have an extra pack of 3 seeds of this strain that I'm willing to give away to UK growers. To win this pack all you have to do is guess the dry weight and put your guess in the comments. Closest guess wins the seeds.
Notes.
Extractor settings.
Temp 28c step 2c
Humidity 50% steps 2%
Max speed 8
Min speed 1
Day 43 Saturday 15/10/22
Feed= autofeed 2hrs
Volume= 10L, Ec= 1.51, PH=6.2
Left= 4L, Used= 6L = 1L each
Runoff= 0L, Ec= , PH=
Lifted light 4cm
Day 44 Sunday 16/10/22
#4 H=CM, D=CM, DLI=43.1, PPFD=599
Day 45 Monday 17/10/22
Feed=autofeed 2.5hrs
Volume= 10L, Ec= 1.5, PH=6.2
Left= 2.5L, Used= 7.5L =1.25L each
Runoff= 0.7L, Ec= 2.3, PH=6.1
Big defol on all 6. Humidity to high really.
Day 46 Tuesday 18/10/22
Extractor settings.
Temp 26c step 2c
Humidity 55% steps 2%
Max speed 10
Min speed 1
#4 H=CM, D=CM, DLI=40.1, PPFD=557
Day 47 Wednesday 19/10/22
Feed=autofeed water 3hrs
Volume= 10L, Ec= 0.2, PH=6.2
Left= 1L, Used= 9L = 1.5L each
Runoff= 1.8L, Ec= 2.2, PH=6.1
Day 48 Thursday 20/10/22
Day 49 Friday 21/10/22
Neutral 0.1ml/L
Silicon 0.75ml/L
Calmag 0.25ml/L
Bloom 3.0ml/L
Boost 2.0ml/L
Pk boost 1ml/L
Ec 1.85
Ph 6.6
Feed=autofeed 3hrs
Volume= 10L, Ec= 1.85, PH= 6.6
Left= 1L, Used= 9L = 1.5L each
Runoff= 1.8L, Ec= 2.12, PH=6.1
#4 H=60CM, D=40CM, DLI=36.2, PPFD=502
Viparspectra xs2000
75% power 7 days
£0.30 /Kwh = £7.56 for the week.
Thanks for stopping by.
Take it easy.
Likes
26
Share
@Hydro_Bins
Follow
Excellent quality and quantity with this harvest! Will look to to control the stretching phase of flowering next grow.
Processing
Likes
39
Share
@Weird_Jimmy
Follow
👉The plant was 11" tall. it probably would have been 12 or more if not FIM'd. It almost doubled in its overall size and total vegetation. The FIM has all the secondary branches poking out from under the large fan leaves. I do a little tucking to help them soak up the rays. I may not have FIM'd low enough or something because the leaves that were the outside of the growth node I snipped have gotten big. They just look like they have no tips. I think I ended up with the desired FIM goal of 4 new growth tips that will be cola's.
👉I will assist the branches get maximum access to light by rotating the pot frequently, I will also either support or direct them with bamboo steaks that I will attach to the metal spikes that are attached to the hoop ground the base of the pot. Its just the top of a tomato cage turned upside down with the top hoop around the base of the pot. It fits it snugly and doesn't slip. This allows me to attach the support steaks to the outside of the pot instead of inside in the media. I didn't like having the plant inside a cage or with sticks in the way when its small. It allows me easy access to the plant, and an easy way to add the support when the plant needs it as it get bigger.
👉I switched to week 4 nutrients this week and will probably be a week behind the timeline of the nutrient chart from GH because the plant had a slow start. The pH is always targeted to 5.9, the EC for a batch is 1.54. I have learned enough in the short time Im growing to understand what each nutrient week batch can do for the plant and am fairly confident I can judge the plants growing stage to match it. The 4th week is called transition and I believe thats accurate for my plant. it hasn't declared as of today, but I am anticipating that this coming week some time.
👉The runoff has been very consistent and I only added the low EC rinse of 1.5 liter one time. I always immediately follow a low ec feeding with a regular batch of nutrient. The last two days the run-off volume has started to lessen and the EC staying only 20EC above the inflow. Ive been averaging .75l for total run-off volume following a 1.5l fertigation. Tonight's run-off was .5l and 1.74EC. The lower run-off is due to the plant having more roots and being able to drink more of the moisture. when the run-off drops below 20% of the inflow volume I will increase the total volume in 1/4l increments.

Likes
19
Share
@Poleeg1986
Follow
Hi friends!) I expecting more than 200 - 250 gramms in this grow) Not less))


Likes
2
Share
@BudBeezy
Follow
Welcome to week 6 of my grow diary. The plant has grown considerably again. It's definitely going to be a beautiful bush. Lots of pistils are currently forming. I removed some more leaves this week and lollipopped the lower shoots. The plant is now also getting a full dose of Sugar Royal, Power Buds, and Green Sensation once a week and only water on the other days.
See you next week!
Likes
5
Share
@Enki_Weed
Follow
..... Rückblick der letzten zwei Wochen –Turbulenter Start und wichtige Lektionen
Die letzten zwei Wochen waren alles andere als ein Spaziergang, aber meine Pflanzen haben sich tapfer geschlagen, und ich habe eine Menge dabei gelernt. Der Start war holprig, hauptsächlich wegen einer defekten Luftpumpe, meiner langen Arbeitszeiten und der notwendigen Grundreinigung der Anlage.
Die erste Woche: Der Kampf ums Überleben und die große Reinigung
Die erste Woche war echt kritisch. Ich war viel in der Arbeit, und genau da ist meine Luftpumpe ausgefallen. Diese Pumpe ist eigentlich dafür da, meine Nährlösung mit Sauerstoff zu versorgen – lebenswichtig für die Wurzeln! Ohne sie bestand die Gefahr von Wurzelfäule. Die Pflanzen sahen gestresst aus, ein paar Blätter waren welk oder leicht gelblich. Das war ein klarer Hinweis auf den Sauerstoffmangel.
Aufgrund dieser Probleme und um sicherzustellen, dass keine weiteren Komplikationen auftreten, habe ich die gesamte Bewässerungsanlage grundgereinigt. Das war zwar zeitaufwendig, aber absolut notwendig, um alte Nährstoffreste oder Ablagerungen zu entfernen, die die Funktion beeinträchtigen könnten. Das hat mir gezeigt, wie wichtig es ist, die Technik immer im Blick zu haben und regelmäßig zu warten.
Dazu kam, dass ich durch die Arbeit kaum Zeit hatte, die Beleuchtung optimal einzustellen. Das hat anfangs auch zu etwas ungleichmäßigem Wachstum geführt.
Die zweite Woche: Erholung und Stabilisierung – mit Klimaanlage!
In der zweiten Woche konnte ich endlich eingreifen. Nachdem die Luftpumpe repariert und die Lichtverhältnisse angepasst waren, haben sich die Pflanzen sichtbar erholt. Das Wachstum nahm wieder Fahrt auf, und die Blätter wurden wieder kräftig grün. Es war eine Erleichterung zu sehen, wie widerstandsfähig sie sind!
Aufgrund der aktuellen Hitze verwende ich jetzt zusätzlich eine Klimaanlage. Damit halte ich die Raumtemperatur konstant bei etwa 27 Grad Celsius, was für die Pflanzen im Moment optimal ist. Das hilft enorm, ein stabiles Klima zu gewährleisten und Stress durch hohe Temperaturen zu vermeiden.
Ich habe gelernt, dass man auch bei Zeitdruck die wichtigsten Kontrollen nicht vernachlässigen darf und schnell auf Probleme reagieren muss. Die gründliche Reinigung war hier ein entscheidender Schritt.
Trotz des holprigen Starts bin ich optimistisch für die Zukunft. Die Pflanzen haben sich trotz der Widrigkeiten gut erholt und entwickeln sich jetzt stabil. Die anfänglichen Schwierigkeiten haben mich definitiv aufmerksamer und proaktiver gemacht.

Likes
20
Share
@eldruida_lamota
Follow
Que pasa familia, actualizamos la semana de la farm cheese, la trasplantamos a su maceta definitiva, utilizamos sustrato Plagron.
Ph controlado en 6,5 humedad algo baja pero pronto pasaremos a floración, temperatura ideal, el led hace si función y aparte no da calor.
Los nutrientes los seguimos echando en dosis muy bajas para que no sobre fertilize.
Hasta la semana que viene fumetillas.

Likes
36
Share
@rhodes68
Follow
9/14 Week 3 - She is looking fine, bit lighter in color than we are used to seeing but solid genetics here folks
Feed staying as is twice a day 10% runoff
Still have not decided on training yet she is growing very indica so not a big concern yet
9/16
Bulking up
Decided we will be pony tailing this plant soon she seems to have the build for it and being the lowest of stress training appeals to us
9/17
Gave her a little Recharge Kangaroots and Fish Shit with her feed just on principle
9/18 Training is already bringing the six secondary branches up, will continue for a couple of days of so till they fully up.
Ponytail on for 5-6 hours a day


Processing
Likes
20
Share
@LockDownGrow
Follow
Sadly none of my 3 gorilla glue cookies did not germinate so I planted a 2nd lemon pie witch came straight up in just 2 days
Likes
6
Share
@carlitoshaze44
Follow
Así es como empezamos la tercera semana,seguimos con humedad alta pero la vamos controlando..
Estos días da buen tiempo la humedad en la calle será mucho más baja así podré meter aire sin tanta humedad..
De momento todo bien en el cultivo ningún problema hasta la fecha.
Ya podéis ver,y comentar sobre algo que veáis que yo no!
Como dicen! Ven veinte ojos mejor que dos!
🖖
Día 12
Último fungicida prevención mutritis,hongos
humedad.
Primer riego foliar hormonas producción de flores.
🌹
Día 13
Nada en especial solo observar si veo algún cambio tras las hormonas,aún no veo grandes observaciones fuera de lo natural del paso de los días.
En el día de mañana por lo que me recomendó el fabricante se verán los resultados a la vista!
Comentar que seguimos con la iluminación al 100x100 de capacidad
Marshydro sp3000 x2
Hero led Ignator t720
Yxo led 60w ir+un espectro completo
En la siguiente semana me llega el nuevo driver de philips para poder conectar la lámpara de IR que pude adquirir a Yxo nuevamente! Lampara led espectro completo + IR 70w .
Me vendrá muy bien para el pequeño espacio de la puerta que necesita más iluminación para poder desarrollar bien esas dos plantas,de la entrada.
La humedad fue cosa del pasado.
Evite el uso de desumificador eléctrico añadiendo varios de sales,deciros que funcionan muy bien no dan un control exacto pero mantienen una humedad interior estable para todo el periodo de floración!
50% de humedad lo demuestra!
Hoy añadi un poco más de sustrato. 110 litros exactamente sobre la cama de cultivo que tenía de topcrop con humus de lombriz,tierra diatomeas y alimentada con npk.
Después de eso tengo en mi cama de cultivo 810 litros de sustrato para mis 44haze. 💐
Saludos
Día 14
Anulado el intractor,ya que el propio extractor mete aire fresco por las rendijas de ventilación..
En lo largo de la noche iré viendo el resultado en datos..
Ya coloque los soportes para la nueva iluminación que en estos días llega su driver de sustitución
E visto que algunas plantas en estos dos días están en 67-70cm..
Ya colocado el sistema de riego para evitar más pisadas en el cultivo ya que algunas se realentizaron por pisar encima de sus raíces..
Le e metido una pequeña poda de bajos para airear más la zonas bajas del cultivo.
Pequeño riego de folacion con remedio de agua azúcar para dos que estaban más estresadas.
Día 15
Hoy era día de regar pero el sustrato aún parece húmedo en gran proporción aplazare el riego.
Día 16
Hoy me acerqué a ver las niñas en caso de que necesitaran algo..
Se ve todo correcto parece que no tienen mucha sed.. llevamos todo el día de alta humedad y lluvia en el exterior..
Las dejaré hoy sin riego también.
El sustrato está bien alimentado.
Mañana seguramente se presente el armario con una plantación pidiendo agua a gritos!! Jejeje.. así comerán con más ganas!,veremos qué tal..

Likes
32
Share
@WhiteWidow
Follow
All good so far, will post some divided pics later on when flowers start forming..
Orinoco and critical plus are close to being double in size since i flipped lights to 12 12, they are gonna be huge :)


Likes
2
Share
@Edibleplant
Follow
5 X Caramelo EV in 40 gallon fabric pot
3 X Sugar Black Rose EV in 50 gallon fabric pot
2 X Eleven Roses EV in 100 gallon fabric pot

Likes
19
Share
@ButterfliesLittleFarm
Follow
Hello Diary,
Cherry Pie has finished its last week, I harvested it two days after taking the photo.
73 days since I put the seeds in the ground.
65 days since the start of the vegetation.
Really very fast.
But the result is impressive as you can see in the photos.
The flowers are large and dense, the branches bend slightly under their weight.
The main cola is especially large and full of large flowers covered in trichomes.
The flowers are very hard to the touch and sticky under the fingers, especially the flowers on the main cola.
The leaves have started to turn autumn yellow which is also an indicator of its maturity.
The smell is very intense at this stage, the whole room smells like plants when I open the grow box.
Watering was standard, every three days.
This week I stopped adding nutrients, I just lowered the p.H. to 6.0 and water the plants with clean water.
After taking the photos, I left it in the grow box for two more days to drink all the water from the soil to make it easier to dry.
Before cutting, I removed all the leaves from the plant to also make drying faster and have less work to trim the dried flowers.
After cutting, I left it upside down in the grow box to dry.
Now all that remains is to see how much it has really rewarded me. See you when that happens.
Here's what the last week looked like.
19/09/2024 - Day 57.
Watering.
I prepared 9 liters of water, lowered the pH to 6.0 and used that amount to water all three plants on the farm.
22/09/2024 - Day 60.
Watering.
I repeated the same procedure as three days earlier.
24/09/2024 - Day 62.
I watered them all with 1.5 liters of water each plant so that they were fresh for the photo shoot.
25/09/2024 - Day 63.
End of the last, 9th week since Cherry Pie began its journey. Photo shoot.
27/09/2024 - Day 65.
Cherry Pie has been harvested.
That's almost all from me for this diary, there is still the final report that follows after drying and testing. Thank you all once again for your support and comments.


Likes
43
Share
@valiotoro
Follow
Hello everyone 😎
Week 2 for my girl
She is doing very well,growing at fast pace and with a beautiful green colour on the leaves.
Have a nice day 😎
Likes
4
Share
@brosef_b_baggin
Follow
All the Pheno’s are green and healthy, Indoors was overwatered or the substrate got too cold. I started seeing what looked like Iron lock out(pale yellow/whitish color on the new growth’s basal leaflet). I reduced the frequency of the added Coconut water powder and Aloe Vera powder and allowed the substrate to heat up to above 72 degrees Fahrenheit(was 68F) and now the new growth is turning a vibrant green again. #1 and #4 are my favorite out of the outdoor and indoor sisters. The indoor plants started showing sex on April 18th 2022, still waiting on outdoors to show sex.