
Likes
Comments
Share


@Bread_n_Buds
Follow
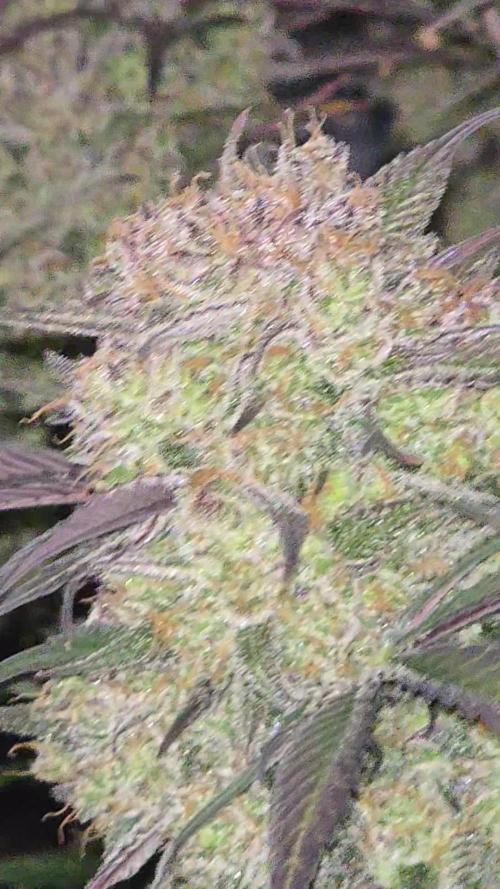
Here we are, ready, after a week of truly profitable germination we have 20 beautiful seedlings all marked with the Z of Zamnesia.
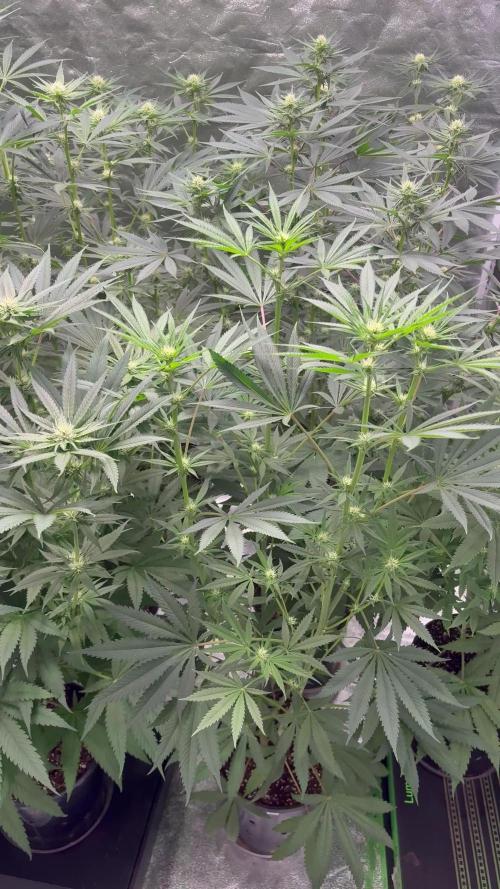
She is Cosmic Noodles, a brand new strain with almost no previous cultivation, Zamnesia guarantees us that it will be a bomb and the parents confirm it when we read the sheet we are certain that all the conditions to do well are there, now let's get to work with the best known skills and the best suppliers of growth material.
The two seedlings are in perfect condition and very large for being on day 9 and we are ready to see them break through now that they are taking the feeding program.
---- New Home - The young ladies have almost all been transplanted into 11-liter pots which is my favorite size to get the best ratio of presence of plants in the grow box / yield. Especially if you don't have to do exaggerated topping or you have to grow the plants straight with main cola as I do for catalog needs as I do, 11 liters guarantees you to make excellent plants. Topping with 11 pots is recommended up to a maximum of 16 tops (4 main crops) - The pots are square plastic and canvas pots branded Zamnesia - The soil used is Plagron Promix with peat and worm castings but not fertilized -
--- Start feeding program - A very serious feeding program branded Plagron has begun. We made our own custom table based on the chosen soil (Plagron Promix 100% organic) that you can all do at the link https://plagron.com/en/tools/grow-schedule-calculator and I started giving:
- Power Roots - 1ml/l
- Alga Grow - 2 ml/l
- Pure Zym - 1 ml/l
- Sugar Royal - 1ml/l
- Vita Race - 1 ml/l
- The 100% Organic pack by Plagron can be found on Zamnesia at the link:
https://www.zamnesia.io/it/11457-plagron-easy-pack-natural.html
We are giving a lot of humidity with a humidifier and we oscillate between 65% and 70%.
// Strain Description //cross of Alien OG and Rollercoaster Haze, Cosmic Noodles offers excellent yields and extraordinary aromas. This variety is very powerful, contains 25% THC and produces intense and long-lasting effects. Stimulating and relaxing at the same time, Cosmic Noodles causes an energizing cerebral effect that fades over time becoming soothing at a physical level.
- Get a seed of this fantastic strain --- https://www.zamnesia.io/it/10777-zamnesia-seeds-cosmic-noodles.html
- Soil and Fertilizers entirely organic --- https://plagron.com/en buy on www.zamnesia.io
- Growbox and air sistem --- https://www.secretjardin.com/
- Light - Sp3000 - https://marshydro.eu/
- Music and sound --- I made my girls listen to 432hz frequencies and music from www.radionula.com
- Z --- You can find these seeds, much more from the world of cannabis, mushrooms and an incredible series of accessories and gadgets on the reference site not only mine but of many growers ---- https://www.zamnesia.io


Processing
Likes
5
Share


@Zulu77
Follow
Lots of bud sights, starting to smell strong now, plants healthy and drinking plenty,

Likes
11
Share


@VagueReaper
Follow
I'm very happy with how my plants turned out and can't wait to get going again. They're now hanging in my tent so hopefully dried and ready to trim by Christmas day at the latest.
I will update on weight when dried and on the smoke when cured.

Processing
Likes
6
Share


@BigGGrows
Follow
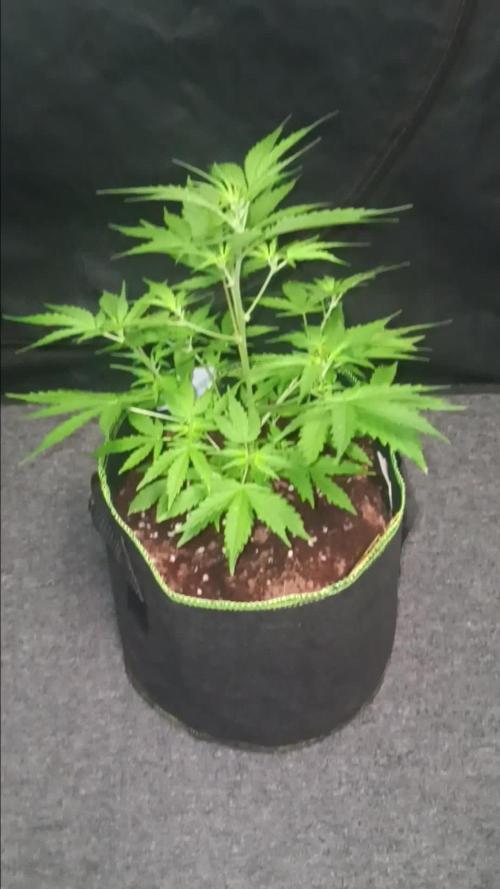
This week was a big week for the candy cush. I noticed upon watering her to run off, that in the same day the pot would go super dry and light weight. I also noticed stress in the leaves and roots poking out the bottom of the pot. It was time for a transplant. So far so good! Upon transplanting i performed more LST to help her fill in the pot. She went from a 1 gallon to a 5 gallon. She was also defoliated thia week.

Likes
12
Share


@PacoMendoza420
Follow
At the second day of week 2 the first two leaves of each Mimosa look a little crinkled, but the environment is ok and the Peyote in the same tent looks good so i think it is characteristic of this particular strain.
At the fourth day of week 2 the plants show signs of explosive growth

Likes
2
Share

@Ninjabuds
Follow
Week three of flower is off to an amazing start! At day 22, the ladies are looking incredibly healthy. They're praying like crazy, reaching for the light, and stacking nodes like it's their job. The buds are starting to plump up, and the trichome production is getting intense. I'm so excited to see how they develop over the next few weeks!
Likes
4
Share

@RevvshiWoW
Follow
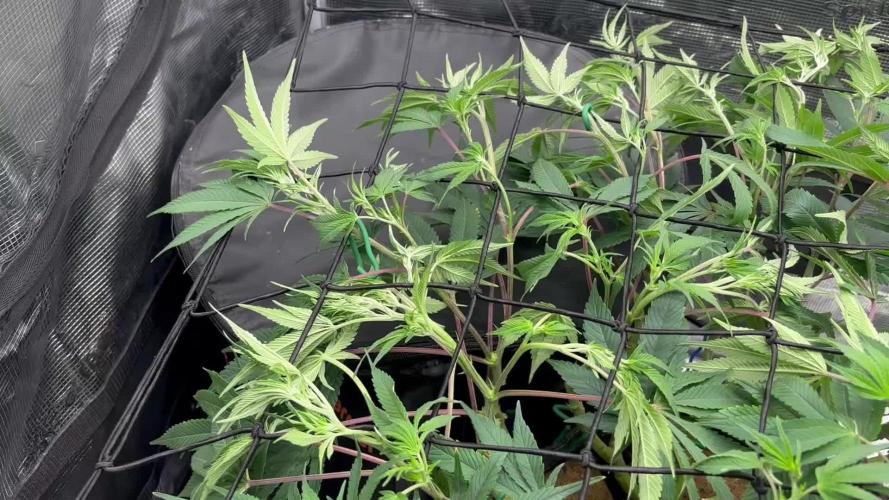
Starting today, I’m uploading the photos one day earlier because I’ll be away again for a few days. I hope my first SCROG turns out well.
I’m not sure how much stretch to expect in the coming week, but it has already grown about 10 cm, which concerns me.
That’s why I set up the SCROG net now. It looks a bit strange, but still better than before.
By the way, I measured the pH of the water I’ve been using for the past three months—it’s at 7.5.
However, the soil looks like it can handle it.

Likes
Comments
Share

@in_a_few_weeks
Follow
I Revegged my mother Plant and the results are still amazing! I cut clones and put them 3 weeks in light soil for rooting. When the rooting was i done i switched to 12/12 lighting. The plants are tiny but the buds are crazy frosty and the smell is brutal. One is ready, two needs a bit more time. I kept all 3 Plants tiny, i didnt wanted them
bigger 🦑

Likes
12
Share


@Tmasm
Follow
Saudações
Iniciar diários fast buds
Encomenda chegou dentro do prazo, muito discreto.
Dia 17/11/2023
Selecção de 5 sepas, colocando em papel toalha
Dia 18/11/2023
Colocando em vaso final, com um cúpula para manter umidade alta.
Agora é esperar que corra tudo bem
Não se esqueça de ver novidades em https://2fast4buds.com
Likes
11
Share


@Hix57
Follow
La LSD 25 auto évolue avec brio malgré son démarrage un peu trop "gourmand" en azote. Les premières feuilles ont fait un clin d'œil jaune, mais rien de comparable à la banane purple punch qui a décidé de prendre un virage jaune express. Est-ce la sénescence ou un petit coup de mou en azote ? L'avenir nous le dira, mais croisons les doigts pour que notre traitement porte ses fruits et atténue ces petits caprices.
J'ai opté pour un rééquilibrage en donnant un quart de la dose recommandée d'azote, pour finalement arriver à la moitié. Les têtes sont déjà en pleine maturation, certaines ont même déjà fini leur course en seulement 47 jours. Imaginez-vous, une plante de cannabis qui nous offre des têtes en un mois et deux semaines ! C'est tout simplement impressionnant.
Je prévois de patienter encore deux ou trois semaines, histoire de laisser la magie opérer un peu plus. Restez branchés pour la suite de cette aventure végétale pleine de surprises !
Likes
9
Share


@shabazz411
Follow
This was a mild start to the week one plant is bursting in growth and the other plants are on a medium to slow growth increased ppm on the other slow growers to catch up other then that were pest free and very healthy.

Processing
Likes
15
Share


@DudeGrowsWeed
Follow
July 13, 2020 update.
The outdoor girls are smaller, but starting to put out much more trichome development. The indoor girls are larger and have more nodes and bud sites, but not as much trichome development, although the bud sites look super healthy. You will also notice some bug damage on the outdoor ladies. I posted a question here on GD and liked the advice I received from @Nor_Cal_Kannabliss and have ordered some Doctor Zymes Eliminator to see if that helps. I did previously spray with Safer End-All and do notice the damage getting worse since then. By the way, Doctor Zymes Eliminator is supposed to be effective against spider mites and spider mite eggs (wish I knew about this stuff a few months ago).
Still feeding at 75% strength from the Fox Farm schedule. Also, I defoliated this week to allow better light penetration.


Likes
6
Share


@Roller
Follow
Semi Jealousy-Zamnesia, messi ieri nel bicchiere, si aspetta che germini, intanto sto preparando il box e la lampada, per quando saranno pronti per la vegetazione
Likes
1
Share

@JVKdopegrow
Follow
Love this strain. Tall and well shaped. She stretched to the light so I lowered it a bit for better horizontal growth. Stepped up the nutes as she is taking more of everything.
Likes
2
Share


@GrowChico
Follow
She is looking really good. I transplanted her to my springpot autopot system.
The pot is a nature's living soil and fox farms ocean forest.


Likes
2
Share

@Smev1337
Follow
Starting off strong this week 💪😎 the left plant is looking so good and also the buds on the left plant are so nice and big 😋 the right plant is showing yellowing but that is fine because she will be turned into bubblehash anyways 😏 happy growing all!😎💚✌️
Likes
58
Share


@Mrs_Larimar
Follow
May, 1st.
Up to 10 week of Floweing sounds long to me
Iam not that Patient Person^^... but I try.
To me the Plant looks ready, and i see no big Change from last week on
Trichomes are mily/ amber,
well the other Singns are not so clear like discoloring and Piistils,,,,
But i see adense Mass of long Trichomes
We will see
I go on watering and Feeding and keep her Happy

Likes
11
Share


@millerman543
Follow
Finally have the gnats under control!!! Using a combination of beneficial bacteria, neem oil, and organic pesticides. They’re still there but only a couple so I will continue use.
Skywalker og is still double the size of all the others and drinks double the water so that is crazy idk how to deal with that I might just start watering it in between watering the other ones idk it’s crazy. Also don’t know how long we’re gonna go with this veg I want to do a pound which is ambitious for a second grow with a 300w light in a 2 x 4 but that would be cool.
Looking good tho next grow I’m only gonna do 3 strains instead of 4 or even 2 but we’ll see.
Went a little too heavy on the nitrogen I think i dialed it back a bit but plants are healthy and strong I think the silica helps a lot.