


Likes
Comments
Share


@nonick123
Follow
Día 101 (09/09) Riego con 500 / 1000 ml H2O pH 6,5
Parece que se ha parado un poco el amarilleamiento que subía tan rápidamente por las plantas!
Día 102 (10/09) Riego con 500 / 1000 ml H2O pH 6,5
Excepto LemonPaya, todas las plantas empiezan a llenarse de tricomas! 😍
Día 103 (11/09) Riego con 500 / 1000 ml H2O pH 6,5
Estoy emparanoiado con que la floración va lenta...
Día 104 (12/09) Los cogollos no se están formado correctamente... Algo pasa... Los pistilos tienen un extraño color verde y no engordan...
OnionOG #1 es la única que tiene un ritmo normal...
Riego con 250 / 500 ml porque las temperaturas empiezan a bajar a 25 ºC diurnos / 22 ºC nocturnos y está bajando el consumo de agua...
Día 105 (13/09) La deficiencia empeora... Solo se salvan OnionOG #1 y KS1 #2...
Día 106 (14/09) La deficiencia sigue empeorando... Solo se salvan OnionOG #1 y KS1 #2...
Día 107 (15/09) La floración se ha ido al traste! (Excepto OnionOG #1 y KS1 #2)
Tras preguntar a Lurpe, GD e IG concluyo que el super soil tiene un bloqueo de nutrientes
Debido al bloqueo, se ha detenido la floración en 4 de las 6 plantas
Siguiendo las recomendaciones de Lurpe, hago flush hasta que el agua de escorrentía tiene una EC 2,5 (1250 PPMs)
A ver si les da tiempo a recuperarse...
💦Nutrients by Lurpe Solutions - www.lurpenaturalsolutions.com
🌱Substrate PRO-MIX HP BACILLUS + MYCORRHIZAE - www.pthorticulture.com/en/products/pro-mix-hp-biostimulant-plus-mycorrhizae

Likes
31
Share


@CrazyHorse
Follow
This smell ... sweet, very sweet, like sweets, lemon smell slightly noticeable at the very beginning, but when you touched her... on your fingers start to appear sticky and rich smell of juicy lemon. It is unbelievable that my babie can smell and look so great. I just can't wait... :D

Likes
78
Share


@BrediniGreeny
Follow
1/20/25
Start of the week
She got 3,5 l water with CalMag 3,5ml;Activera 8ml;Algamic 8ml; BioHeave 8ml; BioBloom 5ml; TopMax 4ml.
Ph of water going in the soil at Ph 5,3 ppm 344. Soil PH aprox 7 ; Runoff at 6,35 ppm 655.
I gotta monitor my purple queen. A off shoot branch is a little loose fro m the main stem.
No signs of death of such. Put a rock underneath to stabilize.😁
Gotta keep an eye on her.😃
1/22/25
Another day, she didn't want any water so it's ok. New Pics 😁
1/24/25
So still not want some water? Ok, no problem 😁
She is still fattening the flowers up so i think i will water just tomorrow. Soil has just a tiny bit of moisture.😊
I fixed, or so i think, the broken offshoot branch with wax.😁 Hope it is ok with the wax and the rock to support her😌
New pics , also some videos with microscope because why not 😆 and because 😍purple😍
1/25/25
She got 3,5 l water with: CalMag 3,5 ml ; Activera 8 ml; Algamic 8ml; BioHeaven 8ml; BioBloom 6ml; TopMax 5ml.
Going in PH 5,1 ppm 328
Soil PH 6,9
Runoff PH 6,0 ppm 482
1/26/25
She is fattening her buds💚
Beautiful and purple

Likes
15
Share


@Dico29
Follow
week 6, i removed all the Internodes on the 5.5(I will mark the photos which is which) and lst on the 3 gallon pot(now four main colas).
Temperature is the current temp outside, I do it by day just cause.
There was a big storm and my plants loved it surprisingly, so tomorrow I’m going to drench the 3 gallon,which is dry again, in water to see if any more surge in growth happens.
3 gallon shows heavy prefñower I guess with pistils and the 5 gallon is alright

Likes
11
Share


@gse314
Follow
I harvest the Fuel D. OG a few days early to speed up the fast bud plant growth 1 more week she will be ready also

Likes
22
Share


@Slobasian
Follow
Love every plant each one is growing differently stacking different even the visual difference of one strain growin two different ways combined smells of diesel, pez candy and lemons

Likes
30
Share


@Konkookush
Follow
Flushing, harvest in the end of week 13
Adding some organic nano for my girl
Processing
Likes
1
Share


@TheNotoriousWeed
Follow
Esta es la segunda semana cambiamos a bases de floración y las chicas se vienen comportante exelente ya han sexado todas. Saludos y buena semana colegas


Likes
10
Share

@Naujas
Follow
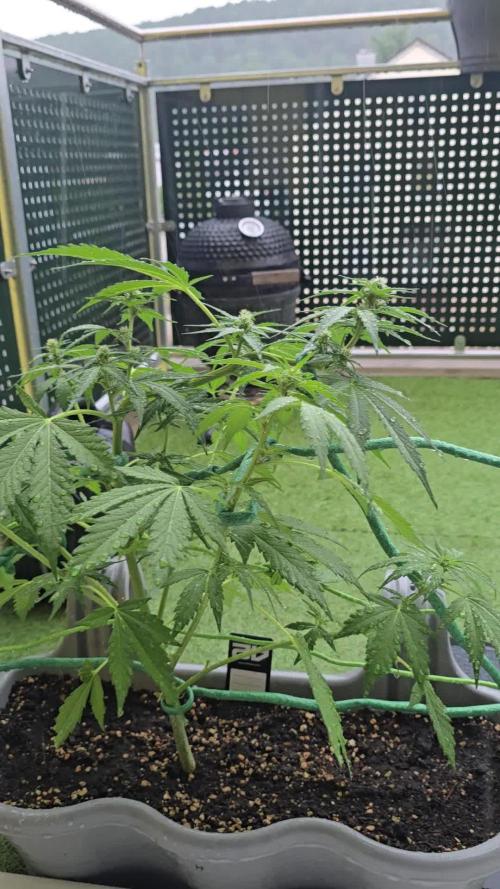
49 dienos!!! Šią savaitę, Megina, orai buvo labai įvairūs: ir saulė, ir lietus, buvo daug vėjo ir šaltų naktų, bet viskas atrodo gerai ir ji laiminga:) ji jau pradėjo savo žydėjimo fazę, šią savaitę palaistiau ją 6,3 pH su @Plagron maistinėmis medžiagomis ;) sėkmės visiems :).
Likes
21
Share


@Siriuz
Follow
Started week 8
Day 52
We are excited to announce new growing light setup coming soon for the ladies, we want to make them grow big a better so we gonna be adding 600 watts soon!
In the meantime, we continue outdoors
From 6. 30AM til weather gets too hot
Once it reaches hot temperature and low humidity we bring them back indoors for CFL lights and Air conditioner plus fan
Since it's so hot in where we live it's tropical weather, we always have to keep an eye to the hygrometer and the weather in general.
So far so good, they're flowering and taking their time but day after day new buds are coming up, we've done some defoliation as well to get rid of those old leaves and the other ones that are too low and not gonna make it so the plant can return that energy into several buds that are already developing.
Thank you so much for your support, we continue to upload content and update daily if possible, sometimes we busy and can't do it at the same time but have no fear we got you cover, not gonna miss a thing tho!
Day 53
Ended up feeding them1710ppm per gal
So 300ml/3.79lts
Each plant plus 900ml of water
PH 6.2
Looking neat
Day 53
Felt like recording some videos today also the girls were looking good so why not
Great Weather great day today
They're happy and comfortable
Growing good :)
Day 54
Hey guys what's up?
We've upgraded to a new set of lights
Yeah dude they rock!
Day 55
All day indoors since we've got those new baby's we running them on 700 watts
VEG ON + BLOOM ON
Day 56
Now please take a look at those thricomes they are very good looking and we still have 5 weeks left behind til harvest day
Hell yeah :)
Likes
16
Share


@GreeneScene
Follow
This week was a good one . Stellar initial growth this round after upgrading lights & using homemade super soil. My 3 day old plants looked like 9 day old plants of my last run to give an idea . I watered for the first time since planting on 5/17 .
I had to itch to test the runoff since it’d only take a sec right? All the ph’s came out almost 2 points lower than when they went in so I decided on a flush even though I’m using Dry amendments.
Honestly I didn’t have the problem of fluctuating ph’s before I added that Peat Moss to my supersoil in hindsight I wish I would have just ordered 1 more 11lb brick of CoCo Coir .
I had the idea that I may need to flush a day or two prior to watering when I noticed all my stems purple.
I get it could be genetics but ALL of them where purple . Here today it is 1 full day since I flushed & all of the stems are now Green with the exception of my Runtz seedling.
3/17 will make day 7 for Runtz & #1 of the GDP
3/18 will make day 7 for Zkittlez & the 3 remaining GDP.
I intended to transplant these ladies day 13 preferably into their forever homes of 3g fabric pots . Fingers crossed day 14 they’ll be ready to start some LST.

Likes
8
Share


@Hawkbo
Follow
Sorry for the delay was in a wedding this weekend came home and been trimmin like a dog the past few days but I gotta feed everything in this tent tmm so I'm gunna get some pics. If your interested in the pics come back tmm night.
The only 3 autos in 1 gal bags are the mexican airlines, pineapple express and blue dreamatic. Theyll stay pretty small and dry out quick so they are tough to keep up with cuz I only feed when I'm feeding the big ones. I dont mix up separate batches for these I just dilute the big batch which is usually 10-13 gal at a time
Likes
67
Share


@CommanderCannabis
Follow
I had a busy week. I updated my 4" exhaust fan to a Cloudline 6" booster exhaust fan and a bigger carbon filter. I also added another mini-fan that can oscillate and I had to add a heater. Why you ask? Because I got a CO2 tank from a friend and it is recommended to have temps in between 85-95 degrees. Granted I could have used it three weeks ago but better late than never. I have a nice CO2 monitor inside the chamber and I use the internal video camera to watch the readings. I have also added some HydroGuard to help the roots. They are slightly brown and another grower recommended it. Daphni continues to grow well and has maintained her dark green color. She has also started to make pistils and they are starting to form into buds just three days after first pistil sighting. I can smell her now too. latest readings are Air Temp = 79F, Humidity = 42%, PPM = 1810, pH = 5.9. Concerning my roots, I put a black trash bag over the top of the reservoir to keep as much light out as possible. The reservoir is tan and white and I think light was getting thru.

Likes
13
Share


@Bryankush
Follow
Settimana di lavaggio probabilmente la sua ultima. Le cime al tatto sono appiccicose ma più che altro farinose , emanano un aroma tropicale favoloso😋
Giorno 3 viene annaffiata con 1L di acqua a 0 ppm
Giorno 7 oggi pomeriggio verrà tagliata
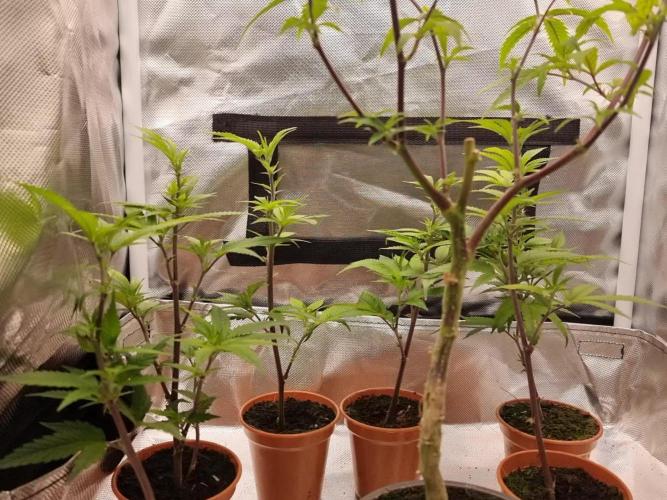
Le cime sono veramente compatte e piene di resina come vedete nel video. Nel vassoio sottostante ci sono a sinistra la cima centrale e a destra l'altra apicale simmetrica.



Likes
1
Share

@Dendegrow
Follow
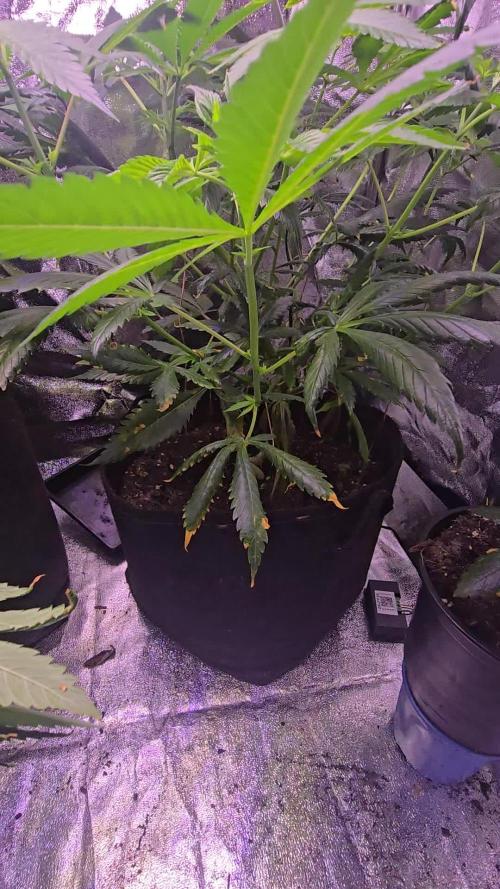
🍬 Sweet Mandarine Skittles – Week 6 Update 🌿
This beauty is really starting to shine! ✨ The Sweet Mandarine Skittles has filled out nicely over the last days, with strong branching and a sweet citrus aroma already in the air 🍊🌸.
She’s showing her candy side now – colorful vibes and a really healthy look 🌈💚. Week 6 feels like the turning point where everything comes together beautifully.
Can’t wait to see those buds fatten up in the coming weeks 🔥🌱.
Follow along if you want to catch the sweetest rainbow in the garden 🌈🍬.
---
🍬 Sweet Mandarine Skittles – Woche 6 Update 🌿
Diese Schönheit fängt jetzt richtig an zu glänzen! ✨ Die Sweet Mandarine Skittles hat sich in den letzten Tagen super entwickelt – kräftige Verzweigungen und schon ein zarter Citrusduft in der Luft 🍊🌸.
Man sieht jetzt schon ihren „Candy-Charakter“ – bunte Vibes und ein rundum gesunder Look 🌈💚. Woche 6 ist echt ein Wendepunkt, wo alles perfekt zusammenkommt.
Ich freue mich riesig auf die nächsten Wochen, wenn die Buds anfangen richtig aufzublühen 🔥🌱.
Bleibt dabei, wenn ihr das süßeste Rainbow im Garten erleben wollt 🌈🍬.

Likes
1
Share


@KannaGrowing
Follow
Estamos en la primera semana de vegetativo, ya que a la anterior se la conoce como semana de germinación.
Las plantas empiezan a mostrar las primeras hojas reales por encima de los cotiledones.
Cuidado con que la humedad relativa del aire, no sea demasiado baja, lo ideal sería alrededor de un 65%.
En esta etapa solo regamos suavemente con agua cada 5 días aprox.

Likes
7
Share

@DogDoctorOfficial
Follow
LSD — Week 13 From Seed | 12/12 From Seed, No Veg
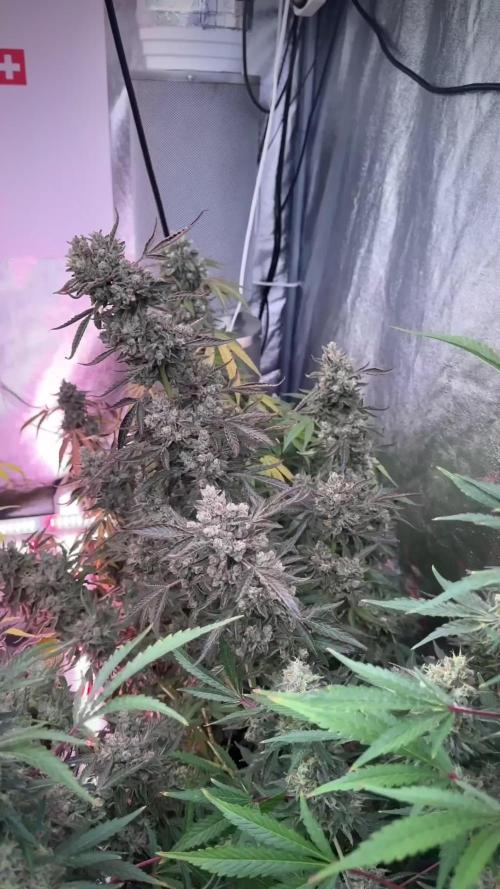
Week 13 from seed, and this room is fully alive.
What started as a true 12/12 from seed run—no veg, no transplant games, no extended shaping, just straight into flower from the beginning—has now matured into exactly what this style is meant to show: natural structure, honest expression, and plants allowed to speak for themselves.
From day one, these LSD were asked to do one thing only: grow with intent.
No long vegetative period.
No oversized training sessions.
No forced bush structure.
No attempt to make them become something they were never meant to be.
Just seed, root, stretch, stack, mature.
And that is exactly why this room looks the way it does now.
⸻
Why They Look Like This
One of the most beautiful things about 12/12 from seed is that it reveals plant character early and honestly.
Without a long vegetative period, these plants never had the time—or the pressure—to build wide, heavily manipulated frameworks. Instead, they followed a more natural vertical rhythm: apical dominance stayed intact, main tops remained leading, and side branching developed in support rather than competition.
That is why this room carries that classic spear-shaped structure:
strong central leaders, supporting side branches, elegant vertical stacking, and that clean “natural Christmas tree” silhouette from top to bottom.
For many growers, this shape reads visually “sativa.”
Not because the cultivar suddenly became sativa-dominant, but because the growth pattern expresses more like one under this method: taller posture, longer frame, more pronounced central cola, cleaner lateral support, and less squat horizontal bulk.
Genetically, that is not the full story.
Structurally, though?
That is exactly what they are showing.
And they are showing it beautifully.
⸻
The Room Is Alive
At this stage, the room has changed.
This is no longer a room pushing for biomass.
This is no longer a room chasing stretch.
This is no longer a room trying to build flowers.
This is now a room finishing them.
And there is a difference.
Everything still breathes.
Everything still drinks.
Everything still moves.
But the energy has shifted.
The room feels quieter now. Heavier. More deliberate.
The metabolism has slowed, but it has not stopped. The plants are still active, still processing, still ripening, still making decisions. They are simply no longer spending energy on building mass the way they were before.
Now the focus is density.
Oil.
Maturation.
Expression.
Completion.
And you can see it everywhere.
In the fading leaves.
In the shifting greens.
In the swelling calyx.
In the resin weight.
In the smell.
In the silence.
This room is not slowing down.
It is finishing.
⸻
Why We Are No Longer Feeding Nutrients
At this stage, we are no longer feeding for growth.
The heavy work is done.
The plant has already built the frame.
It has already stacked the flowers.
It has already done the bulk of nutrient-driven expansion.
Now the goal is not to keep pushing.
Now the goal is to let the plant finish clean.
That is why we have moved away from active nutrient feeding and into a much softer finish: water, balance, and enzymes.
Not because the plant needs nothing.
Because the plant needs less.
Late flower is not the moment to keep forcing nitrogen, forcing bulk, or trying to squeeze one more week of artificial push into a plant that is already trying to mature.
At this point, more food often does not mean more flower.
It usually means more delay.
So now we reduce input, reduce excess, reduce waste, and let the plant focus on what matters most:
ripening what it already built.
⸻
Why Enzymes Still Matter
This late, enzymes are not here to “feed the plant.”
They are here to support the system around it.
That matters.
Enzymes help break down dead root material, leftover organic residue, and unused matter in the medium into simpler compounds the microbial life can continue processing.
That keeps the rhizosphere cleaner.
More stable.
More oxygenated.
Less stagnant.
In simple terms: enzymes help the root zone age gracefully.
And in late flower, that matters more than force-feeding ever will.
Especially in a run like this, where the medium is still alive, still active, and still worth preserving after harvest.
Because the goal is not just to finish the plant well.
The goal is to finish the soil well too.
What remains after harvest still matters.
That living medium still has value.
That biology still has work to do.
That soil still has another life ahead of it.
So we are not just finishing flowers.
We are finishing the cycle properly.
⸻
Trichomes, Calyx, and What Maturity Actually Looks Like
This is the stage where people often mistake “more pistils” for “more time” or “fading leaves” for “finished.”
Neither one tells the full story on its own.
Late flower maturity is not judged by one signal.
It is judged by the conversation between all of them.
And right now, that conversation is getting very interesting.
The calyx are swelling.
The flowers are tightening.
The resin heads are becoming heavier.
The pistils are changing, receding, darkening, and curling back.
The leaves are beginning to fade with purpose.
That does not mean they are done.
It means they are transitioning.
This is the window where the plant stops looking like it is building flowers and starts looking like it is sealing them.
That is a very different phase.
Calyx swelling means the flower is maturing inward.
Pistil change means reproductive signaling is slowing.
Trichome development means chemistry is shifting.
Fade means mobile reserves are being reallocated.
None of these alone call harvest.
Together, they begin the conversation.
And that conversation is clearly underway now.
⸻
PPFD, Light, and the Final Adjustment
This late, the job of light changes too.
Earlier, high PPFD was there to drive growth, stacking, and metabolic demand.
Now that demand is lower.
So light intensity comes down with it.
Not dramatically.
Not suddenly.
Just intelligently.
As plants approach the end, reducing PPFD helps lower unnecessary stress, reduce excess transpiration, and let the plant focus on ripening instead of defending itself from intensity it no longer needs.
Late flower is not about maximum push.
It is about controlled finish.
And just like nutrients, light now becomes less about force and more about guidance.
⸻
What to Expect Next
From here, do not expect explosive growth.
That part is over.
Do not expect dramatic new stacking.
Do not expect sudden weight jumps.
Do not expect fresh white explosions everywhere.
What to expect now is subtler.
Denser flowers.
Heavier resin.
Slower drinking.
More fade.
More aroma.
Less urgency.
More definition.
The next stage is not louder.
It is deeper.
This is where the plant sharpens.
This is where the room gets quieter.
This is where harvest starts introducing itself before it arrives.
Whether this is the final update before chop or simply the one that stands right beside it, one thing is certain:
we are close now.
And they know it.
⸻
Final Thoughts
This room has been a pleasure to walk through.
To the team at Zamnesia for the genetics.
To Plagron for helping feed the cycle.
To GrowDiaries for the platform.
To the old heads who have been here since day one.
To the new eyes just arriving.
To the growers, the learners, the lovers, the skeptics, the silent ones watching, the ones who support loudly, and the ones who just happened to land here by accident—
thank you.
For the time.
For the energy.
For the presence.
To everyone watching this room evolve in real time:
thank you for walking it with us.
More soon.📡 DELETED @ 1K Please stay tuned.we never quit https://www.youtube.com/@TheDogDoctorOfficial NEW 🙏 Thank you for your patience and continued support.
FOR DISCOUNT CODES AND MORE JUST FOLLOW THE LINK https://website.beacons.ai/dogdoctorofficial
📲 Don’t forget to Subscribe and follow me on Instagram and YouTube @DogDoctorOfficial for exclusive content, real-time updates, and behind-the-scenes magic. We’ve got so much more coming, including transplanting and all the amazing techniques that go along with it. You won’t want to miss it.
GrowDiaries Journal: https://growdiaries.com/grower/dogdoctorofficial
Instagram: https://www.instagram.com/dogdoctorofficial/
YouTube: https://www.youtube.com/@dogdoctorofficial Deleted by Youtube - https://www.youtube.com/@TheDogDoctorOfficial NEW
Vimeo : https://vimeo.com/dogdoctorofficial Under construction stay tuned ⸻
Explore the Gear that Powers My Grow
If you’re curious about the tech I’m using, check out these links:
🔆 Lighting & Environmental Control
• Future of Grow — Advanced LED lighting technology
https://www.futureofgrow.com/
DISCOUNT CODE: DOG20
• Lumiflora — Under-canopy LED lighting
https://lumiflorade.com/
• TrollMaster — Environmental controllers and automation gear (past collaboration)
⸻
Genetics
• Zamnesia Seeds — Genetics used in this project
https://www.zamnesia.com/
⸻
🌱 Soil, Substrates, Boosters & Root Support
• Plagron — Substrates, bio mixes, and supportive products
https://plagron.com/en/
⸻
🎒 Storage, Curing & Preservation
• Grove Bags — Curing and storage solutions
https://grovebags.com/
⸻
📸 Photography Equipment & Tools
(Not sponsors, but part of my creative toolkit)
• Sony A6700
• Sony full-frame macro lens + few more
• Stacking photography workflow - learning
• iPhone (for behind-the-scenes shots)
We’ve got much more coming as we move through the grow cycles. Trust me, you won’t want to miss the next steps, let’s push the boundaries of indoor horticulture together!
As always, this is shared for educational purposes, aiming to spread understanding and appreciation for this plant. Let’s celebrate it responsibly and continue to learn and grow together.
With true love comes happiness. Always believe in yourself, and always do things expecting nothing and with an open heart. Be a giver, and the universe will give back in ways you could never imagine.
💚 Growers love to all 💚
📸 P.S. – The Eye Behind the Lens
All photos in this diary (for now — except for the ones showing the camera, which I took with an iPhone) are taken with a Sony A6700 paired with a Sony full-frame macro lens and a few more.
Photography is part of the story — it’s how we share the fine textures, the glow, and the quiet details that words can’t always capture.
I’ve also started experimenting with photo stacking — a technique where multiple images, each taken at a slightly different focus point, are layered together to create one perfectly sharp image from front to back.
It’s not digital enhancement or AI; it’s pure photography — a way to reveal the plant’s beauty in microscopic depth, from trichome to petal.
You’ll even see a few shots of "ghost me" capturing the shots — camera, lens, setup — because every grow deserves not just to be cultivated, but documented like art.
FOR DISCOUNT CODES AND MORE JUST FOLLOW THE LINK https://website.beacons.ai/dogdoctorofficial
NEW DISCORD - Official Server Invite Link : https://discord.gg/ksjAkA5T74

Likes
Comments
Share

@Albinius
Follow
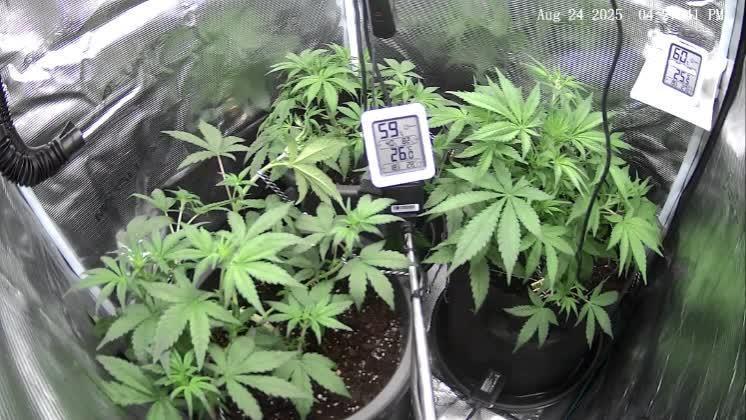
🌱 GROW LOG: Gorilla Cookies Auto (x3)
╭────────────────────────────────────╮
🗓️ MONDAY 18/08/25 - DAY 26
╰────────────────────────────────────╯
→ All stats in range, no attention needed
→ Picture data gone so only webcam pictures this week
🌡️Temp (Day/Night): 24°C / 23°C
💦 Humidity (RH): 63%
🔁 VPD (Vapor Pressure Deficit):1.1
⚡ Soil EC mS/cm: 0.3
💧 Soil Water Content (WC): 21%
💡 Light: 40% @ 25cm from canopy
🔆 PPFD (μmol/m²/s): 490
🌬️ CO₂ (ppm): 580
╭────────────────────────────────────╮
🗓️ TUESDAY 19/08/25 - 💧BATCH & WATERING - DAY 27
╰────────────────────────────────────╯
→ WC Dropped to 20%
→ Prepared batch 10L (3L Deminiralized + 7L tap feeding: 1.2 EC / 590PPM / 6.6 PH / 24C
→ Stats within range
→ Fed plant with fabric pot 3L: Runoff: 4.2 EC / 2140 PPM / 6.0 PH -- High Again
→ 2 plastic pot plants WC still in range, no watering
→ 2 plants in fabric pot seem a bit behind
🌡️Temp (Day/Night): 27°C / 25°C
💦 Humidity (RH): 68%
🔁 VPD (Vapor Pressure Deficit):1.2
⚡ Soil EC mS/cm: 0.5
💧 Soil Water Content (WC): 28%
💡 Light: 45% @ 30cm from canopy
🔆 PPFD (μmol/m²/s): 480
🌬️ CO₂ (ppm): 700
╭────────────────────────────────────╮
🗓️ WEDNESDAY 20/08/25 - DAY 28
╰────────────────────────────────────╯
→ No Action Taken
🌡️Temp (Day/Night): 23°C / 20°C
💦 Humidity (RH): 55%
🔁 VPD (Vapor Pressure Deficit):1.4
⚡ Soil EC mS/cm: 0.4
💧 Soil Water Content (WC): 26%
💡 Light: 65% @ 30cm from canopy
🔆 PPFD (μmol/m²/s): 480
🌬️ CO₂ (ppm): 500
╭────────────────────────────────────╮
🗓️ THURSDAY 21/08/25 - DAY 29
╰────────────────────────────────────╯
→ No Action Taken
🌡️Temp (Day/Night): 23°C / 20°C
💦 Humidity (RH): 55%
🔁 VPD (Vapor Pressure Deficit):1.4
⚡ Soil EC mS/cm: 0.4
💧 Soil Water Content (WC): 22%
💡 Light: 65% @ 30cm from canopy
🔆 PPFD (μmol/m²/s): 480
🌬️ CO₂ (ppm): 500
╭────────────────────────────────────╮
🗓️ FRIDAY 22/08/25 - DAY 30
╰────────────────────────────────────╯
→ No Action Taken
🌡️Temp (Day/Night): 23°C / 20°C
💦 Humidity (RH): 60%
🔁 VPD (Vapor Pressure Deficit):1.3
⚡ Soil EC mS/cm: 0.4
💧 Soil Water Content (WC): 20%
💡 Light: 65% @ 30cm from canopy
🔆 PPFD (μmol/m²/s): 480
🌬️ CO₂ (ppm): 500
╭────────────────────────────────────╮
🗓️ SATURDAY 23/08/25 - DAY 31
╰────────────────────────────────────╯
→ No Action Taken
→ Got back after a few days, plants seem to halted growing due lack of attention.
🌡️Temp (Day/Night): 23°C / 20°C
💦 Humidity (RH): 60%
🔁 VPD (Vapor Pressure Deficit):1.3
⚡ Soil EC mS/cm: 0.4
💧 Soil Water Content (WC): 16%
💡 Light: 65% @ 30cm from canopy
🔆 PPFD (μmol/m²/s): 480
🌬️ CO₂ (ppm): 500
╭────────────────────────────────────╮
🗓️ SUNDAY 24/08/25 - DAY 32 💧WATERING
╰────────────────────────────────────╯
→ Prepared batch 10L (3L Deminiralized + 7L tap feeding: 1.6 EC / 800PPM / 6.5 PH / 23C
→ Stats within range
→ Fed plants 3L: Runoff: 1.5 EC / 800 PPM / 6.5 PH -- Much better
🌡️ Temp (Day/Night): 27°C / 26°C
💦 Humidity (RH): 68%
🔁 VPD (Vapor Pressure Deficit):1.2
⚡ Soil EC mS/cm: 0.5
💧 Soil Water Content (WC): 28%
💡 Light: 50% @ 30cm from canopy
🔆 PPFD (μmol/m²/s): 480
🌬️ CO₂ (ppm): 550
╭────────────────────────────────────╮
🌿 OVERVIEW
╰────────────────────────────────────╯
The Gorilla Cookies Auto trio hit a rough patch but pulled through! 🌿 Monday was smooth sailing, but Tuesday’s 3L feed to the fabric pot plant went overboard—runoff screamed 4.2 EC / 2140 PPM, way too spicy! 🔥 Plastic pot plants chilled, no water needed. Fabric pot plants still trailed their plastic pals. Midweek (Wed–Sat) was a ghost town, and by Saturday, growth stalled hard—soil water crashed to 16%. Sunday’s 3L feed (1.6 EC) saved the day, with runoff at a happy 1.5 EC / 800 PPM. Conditions stayed decent, but a high VPD (1.4) midweek and low CO₂ (500 ppm) didn’t help. Light bumped to 65% but dropped to 50% Sunday. 😅
Lessons:
→Nutrient Alert: Overfeeding keeps haunting the fabric pot—use lighter feeds (1.0–1.2 EC) for autos.
→Don’t Ghost: Midweek neglect killed momentum. Set reminders or automate watering to avoid stalling. ⏰
→VPD Matters: High VPD (1.4) stressed plants. Boost humidity to keep it 1.0–1.2. 💨
Fabric Pot Woes: Dries faster than plastic—check soil daily to keep it consistent. 👀
Takeaway: Overfeeding and a hands-off midweek slowed things down, but Sunday’s fix got ‘em back on track. Stay on top of feeds and water! 🚀😉
Likes
14
Share

@carlitospiratahaze
Follow
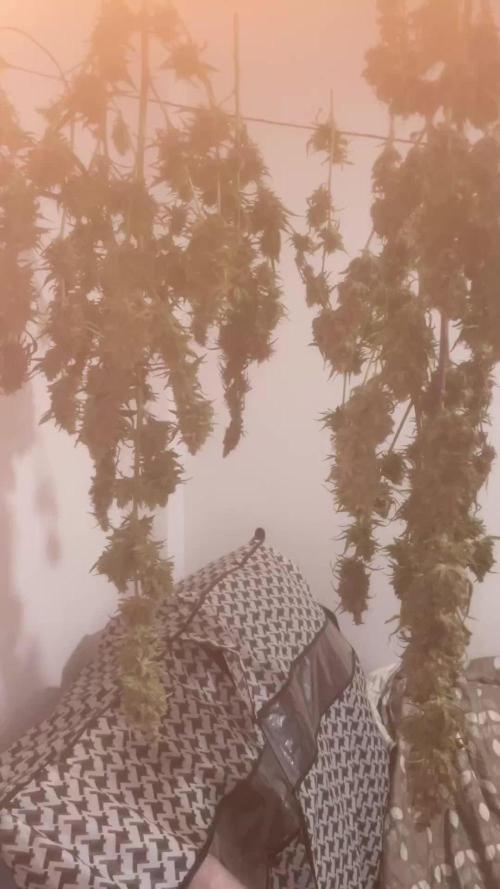
Todo llegó al fin de los finales con un bosque de gran aroma a madera envejecida!
Realmente delicioso el sabor a madera con fondo incienso que hace salibar en tu fondo paladar y que cuando acabas el join te deja sequedad en el paladar.
Las plantas respondieron muy bien a los últimos días de calor sofocante y la gran cantidad de fertilizante que acabaron siendo sofocadas al gran lavado de raíces de 14 días
Las plantas acabaron llegando casi todas en un 90% al final dos quedaron muy atacadas por las arañas y viendo los días restantes las retiré del armario quedando estas fuera en exterior en la que también. Sacaré provecho con extracciones .
Buenos resultados con los que acabamos este cultivo .
Likes
19
Share


@blady1989sqn
Follow
Hi all, I chopped some leafs, watered with plain water. Lamp lowered by 5cm. That's all for today. Njoy weekend.