
Likes
Comments
Share


@PEAKYPLANTERS
Follow
😎Happy day to all, my brothers!😎
We have reached the end of a wonderful journey...that of MY FIRST HYDROPONIC GROWING!!! I have obtained fantastic results from everything that accompanied me on this wonderful journey! starting from the bucket and the pump to finish with a wonderful AUTOFLOWERING genetics, each single component has played a fundamental role in the game, managing to give me extraordinary results....(let's hope it wasn't beginner's luck : )😁😁😁
on this special day, I send a greeting to all the people who unfortunately are no longer among us, but always live in our hearts!😇
LET ME KNOW IF YOU LIKED THE DIARY IN THE COMMENTS

Likes
11
Share


@Skull
Follow
This week I'm flipping to flower I tried to hold the diesel glue up as much as possible but not knowing the amount of preflower stretch of either plant I didn't want to sacrifice quality over quantity. Trying to produce some conniser quality cannaibis
Likes
36
Share


@TaterheadJohnson
Follow
7/7: Transplanted plant to final pot! Roots showed out of tray. Accidentally pulled a root off during transplant 😢.
After transplant I top feed/watered medium with a half gallon of treated water. I mixed 2ml of Rapid Start in 1 gallon water hub. Poured half in half gallon jug then poured half gallon over medium. Added 2 gallons of water into reservoir (1st white line) to promote root growth to bottom and to begin capillary reaction.
7/8: Bumped light intensity dimmer to 30%.
7/9: Left for Vacation.... Praying for my baby!🙏🏿 Going to be gone for 4 days. 😅
***** For this Grow******
“Day Air Temperature” will be the max temp of tent for the week.
“Substrate Temperature” will be the average temp of tent for the week.
“Night Air Temperature” will be the lowest temp of the tent for the week.

Processing
Likes
58
Share


@Dahoola
Follow
-----------------------
Update start week 4:
-----------------------
We entered the first week of bloom for MBAP. Have had a perfect run-up and you notice that. She is ready to bloom abundantly. Besides the usual leaftucking, I also did some defoliation of the lower leaves and shoots. I have reduced the humidity in the room and we are now around 60%. New update later this week!
--------------
End week 4 :
--------------
End of the first week of flowering behind us. Everything is going well, good growth and budsites continue to develop. I further removed the lower shoots and did some leaftucking where necessary. She has developed into a beautiful, large and open plant. Ideal for her future bud development. On to the 2nd week of flowering. Until next week everyone!

Likes
8
Share


@Carai_grow
Follow
Très bonne croissance très rapide avec de belles ramifications, le stretch ×2


Likes
34
Share


@Roberts
Follow
FBT 2308 is doing great so far. He roots have hit the solution. She is growing in Agrogardens nutrition under a Medic Grow mini sun 2. Everything is looking great at the moment. Thank you Agrogardens, Medic Grow, and Fast Buds. 🤜🏻🤛🏻🌱🌱🌱🌱
Thank you grow diaries community for the 👇likes👇, follows, comments, and subscriptions on my YouTube channel👇. ❄️🌱🍻
Happy Growing 🌱🌱🌱
https://youtube.com/channel/UCAhN7yRzWLpcaRHhMIQ7X4g
Processing
Likes
3
Share


@cmstacker01
Follow
Week 3 flowering.
Buds are
slowly forming, plants still going good, cold weather is hitting my area now, hope it won't last long, might extend flowering period by a couple days if it stays this cold.


Likes
17
Share


@420DeepGrow
Follow
Gracias al equipo de Kannabia Seed, Marshydro, XpertNutrients y Trolmaster sin ellos esto no sería posible.
💐🍁 Moby Dick 🐋:
Criada a partir de dos parentales icónicos, como es el cruce de White Widow y una Haze pura G13, este choque de titanes provoca un híbrido que golpea a las puertas de las sativas más fuertes disponibles en el mercado.
Estamos ante una criatura impresionante en todos los sentidos, con ejemplares que florecen en solo 9-10 semanas en interior y arrojan un peso en lonja de 550 gr./m²
Al igual que su padre Haze, nuestra Moby Dick ofrece agradables notas cítricas, pero con efluvios de vainilla y eucalipto, una mezcla de aromas que genera una combinación intrigante, que puede llenar cualquier habitación con una fragancia inolvidable.
El sabor es muy parecido a su olor, con toques de limón agrio que harán que tu lengua cosquillee al inhalar, convirtiéndose lentamente en un humo dulce y terroso, con pinceladas de madera e incienso que se adhieren al interior de la boca al exhalar.
💡TS-3000 + TS-1000: se usaran dos de las lámparas de la serie TS de Marshydro, para cubrir todas las necesidades de las plantas durante el ciclo de cultivo, uso las dos lámparas en floracion para llegar a toda la carpa de 1.50 x 1.50 x 1.80.
https://marshydro.eu/products/mars-hydro-ts-3000-led-grow-light/
🏠 : Marshydro 1.50 x 1.50 x 1.80, carpa 100% estanca con ventanas laterales para llegar a todos los lugares durante el grow
https://marshydro.eu/products/diy-150x150x200cm-grow-tent-kit
🌬️💨 Marshydro 6inch + filtro carbon para evitar olores indeseables.
https://marshydro.eu/products/ifresh-smart-6inch-filter-kits/
💻 Trolmaster Tent-X TCS-1 como controlador de luz, optimiza tu cultivo con la última tecnología del mercado, desde donde puedes controlar todos los parametros.
https://www.trolmaster.com/Products/Details/TCS-1
🍣🍦🌴 Xpert Nutrients es una empresa especializada en la producción y comercialización de fertilizantes líquidos y tierras, que garantizan excelentes cosechas y un crecimiento activo para sus plantas durante todas las fases de cultivo.
Consigue aqui tus Nutrientes:
https://xpertnutrients.com/es/shop/
📆 Semana 3:
Muy buena semana, he aplicado un riego solamente con agua de manantial para reducir la cantidad de sales acumuladas en el sustrato y se ha notado una mejoria .
Creo que le quedan unas dos semanas por estirar, parece que va a ser una buena cosecha.
Se mantiene un buen control del cuarto de cultivo gracias a @marshydro y @trolmaster.
Mantengo las dosis de 1/3 de nutrientes recomendados por el fabricante.
Potencia del foco 80%

Likes
37
Share


@XperencdGmanXG
Follow
well as you can see she is slowly crawling out of her previous issues. This is just not growing like the Thunderfuck genetics I have heard of. Amended for extra veg time. Gonna just leave her and feed only fish shit and humic and fulvic acids

Likes
11
Share


@Organic473
Follow
This girl is strictly for seed I guess however she smells really sweet for a skunk I’m guessing is the blueberry traits. I look forward to seeds.
Likes
Comments
Share
@aldewo
Follow
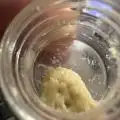
Mega Strain bin super happy 😊. Es läuft alles sehr gut ohne irgendwelche Probleme, muss so gut wie nichts machen 🤗. Die ersten Trichome sind auch schon Bernstein geworden und nach der Mary Jane wird auch geerntet und gewaschen. Leider habe ich es nicht mehr vorher geschafft.

Likes
4
Share

@Webacca
Follow
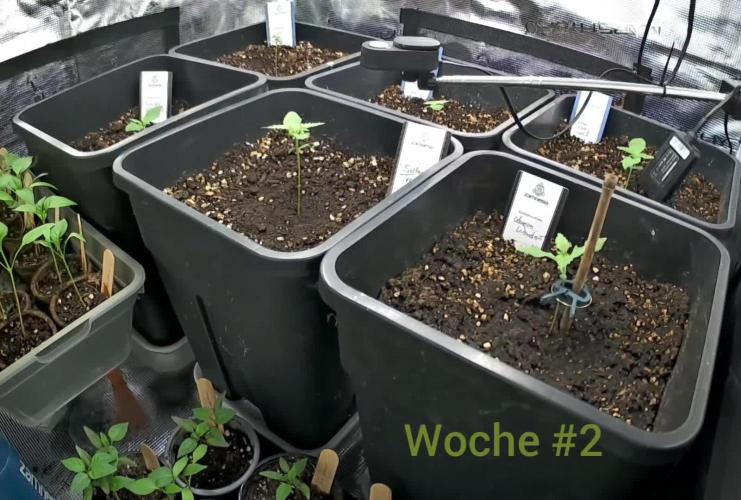
Start in Woche drei.
Mittlerweile sehen die 3 auch aus, wie kleine Canna Ladies.
Keine besonderen Schübe, keine Probleme, alles gut.
Darf gern so weiter gehen.
Beleuchtung erhöht (von 17 auf 20 mol/m²/d DLI bei max. 480 μmol/m2/s PPFD)
Am Ende der Bilder kommt der Zeitraffer für w2.
Uodate: S. Sherbet hat etwas sehr strange aussehende Blätter entwickelt, aber mal abwarten ob sich das rauswächst

Likes
11
Share


@russrahl
Follow
Had a cold, slow growing week this week. Night temps dropped down pretty low a few nights before I noticed, had a cold snap and I recently took my heating vent out of the tent, so I rerouted one of my AC exhausts trough this tent to heat it up again. I also had a bit to much nitrogen in my water mixture so this also slowed them down a bit, I diluted the nutrients in half but removing half of the water and adding strait water. There coming around now a few days later. Gonna be moving them to the big 4’x8’ tent soon(week or so prob till the tent is empty) with the RDWC 5gal bucket system and 1000w HPS for flowering. Gonna let them grow up a bit still before be start there LST, don’t wanna stress them yet after last week and there still staying low and bushy, not quite long enough shouts to pull over yet. Well that’s it for this week, cheers💨 #trusttheplant🌱

Likes
12
Share


@Mr_Automatic99
Follow
If you ever read the grow description. Its true in every aspect. Very very resilient. Had ph issues humidity issue. Even gnat issues and she faught it 😂. Just expect the growth spurs she grows fast and tall if not lst


Likes
51
Share


@eldruida_lamota
Follow
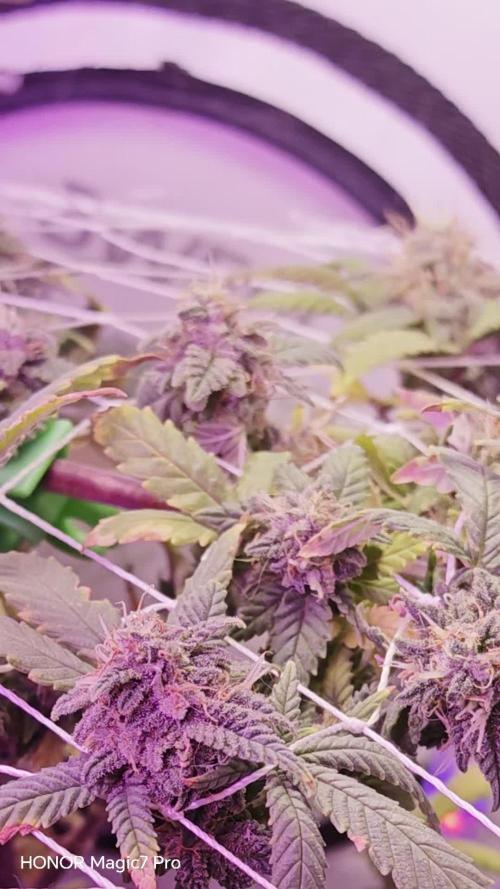
Bueno resumiendo cookies gelato es una variedad híbrida muy fácil de cultivar pero ojo, cuidado con los últimos riegos si no queréis perder cosecha por moho. Lo demás de 10 pegada heavy sabor increíble, cogollos duros como rocas y bañados de una gran capa de polen.
El ambiente del secado se mantuvo en 23 grados de media y la humedad estuvo por debajo de los 45% en todo momento.
Poco más la verdad estuve encantado de poder cultivar una genética tan potente .
Un saludazo que paséis un final de año increíble y por supuesto buenos humazooos💨💨💨.
Likes
18
Share


@DreamIT
Follow
-Sponsored by:
🌴SPLIFF SEEDS🌴-💡VIPARSPECTRA💡-💐GREEN BUZZ LIQUIDS💐-🛠️WEDRYER🛠️
🏁18/6 hello growerz, with today I start the resumption of diaries on GD. I have 13 new genetics in germination and as many diaries. I start by putting the seeds in water for 24 hours, after a day I will put the two seeds in two different jiffies, one with humic acid from greenhouseseeds and the other with just plain water. Get comfortable and follow the updates 😉👋🦄
19/6 The seeds were divided and placed in two different jiffies, one with humic acid and one with water only.
21/6 after another 24 hours in the dark the jiffies were moved under the lamp. let's start the dances!
23/6 nothing to report
24/6 ready to say hello to the world ( only the one in humic acid at the moment )
25/6 I wait for the seed to appear in the water
30/6 finally even the second seed has opened! yeeee, I had lost hope and instead there he is looking at me 😀
__________________________________________
Personal advertising (contains affiliate links)
__________________________________________
🦄 Are you new to the world of cultivation and don't know where to safely buy your seeds?
Fast and anonymous shipping. Check out their hilarious graphics. (no affiliate links)
✅https: //bit.ly/spliffseeds_
__________________________________________
Did you know that Green Buzz Liquids fertilizers are 100% vegan? A complete line of products ready to give the best to each of your plants! Visit the site and see my journals to see how they work 🦄
🤯 And with the code "dreamit" you will immediately receive a 15% discount on your purchases
✅https: //bit.ly/GreenBuzzLiquidsPro
__________________________________________
👀 Are you looking for a good lamp to start with? 👀
🌞Viparspectra has something more than the others, take a look at their site.
⏩ Use "GDVIP" for an extra discount or "DREAMIT3" for an extra 5 %% discount
👀 Search for it on Amazon
✅Amazon USA: https://amzn.to/30xSTVq
✅Amazon Canada: https://amzn.to/38udUVe
✅Viparspectra UE: bit.ly/ViparspectraUE
✅Viparspectra USA: bit.ly/ViparspectraUS
______________________________________________
🌈 Tired of blowing on your weed hoping it dries quickly? Check out the Wedryer website! You will find a well-made accessory that will help your weed dry in just 8-10 days without the annoying risk of finding mold or other annoyances! (no affiliate links)
✅https: //bit.ly/Wedryer_
______________________________________________
📷🥇Follow the best photos on Instagram 🥇📷
https://www.instagram.com/dreamit420/
Backup
https://www.instagram.com/dreamit4200/
🔻🔻Leave a comment with your opinion if you pass by here🔻🔻
🤟🦄💚 Thank you and good growth 💚🦄🤟

Likes
20
Share


@Blosmk57
Follow
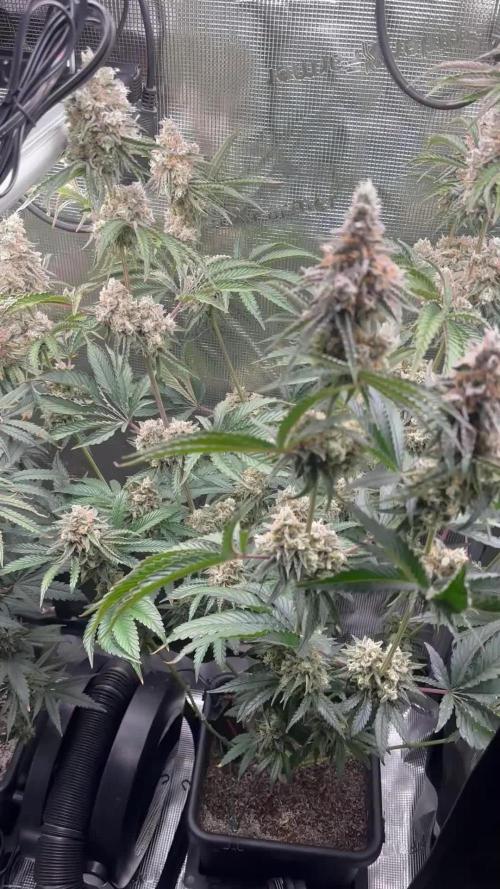
Buds are really swelling and smell has come on strong ! Really shaping up to be nice plants and good looking buds. The trichomes are starting to stack on and hopefully will get better as the buds begin to bulk up here in last few weeks ! But really a beautiful plant and has great structure! Many main colas instead of just a Christmas tree shaped plant with 1 , so far that’s a bonus !
Beginning week 8 and things have come along great. After a slow start I’m really impressed with how these are looking. 1 of the 2 has quite a bit more color starting to appear on some leaves and in the new buds but both are turning into beautiful plants. Not a lot of smell coming from them yet but just starting to notice a few trichomes on some sugar leaves near the highest forming buds. Excited to see how things progress!
@blimburm thanks for the genetics! Starting to really get excited about this Grizzly Purple Auto !

Likes
18
Share


@Ageddd
Follow
Another cold week, we are having around 2ºC Minimum temperature, and its really cold at night( I mean, for Spain, because if some Nortern people hear this may be laughting at me hahaha)
But there is a range of hours when then sun hits directly the plant if its not cloudy, like 6h-8h, this if i dont have to roll out the awning, so the plant is protected when raining.
Did not feed the plant until past the middle of the week, because i ovserbed that the flowers were developing slowly as im accostummed, probably because of the low temperatures, so i decided to give her the last feeding and start the flush at the end of this week, because i felt the plant was like at least 2 weeks from proper harvest, and still developing the flowers with white hairs... Im looking for something narcotic with a nice Therpenoid Profile so the later the better in my opinion, but without passing he Ripper Line hahaha :)
So last feeding was like a fattening one... Higher Dose of nutrients for the plant, and later added some Micro Vita to the soil, 3grams, and until the end with water and some carbs in 1/2 irrigations ...
What amazed me is the strenght of this plant, surviving these really low temperatures, growing a little slowlier, but without problems or buds, amazing plant, as amazing as beautiful, im in love with the colours..
So i hope you enjoyed reading this week Growmmies :)
Have a nice week and dont forget to roll one ^^
Good vibezz.
