
Likes
Comments
Share


@jayizrollin
Follow
Pictures are from Day 91.
Top Gun 2 is coming to the finish line, the whole tent reeks and starting to see good amounts of amber, although the buds aren’t as solid as I was hoping for.
I could harvest as soon as today.
This grow has been another great experience of learning about these awesome plants. Please also check out my gorilla cookies grow that went alongside these two topguns. Thanks!


Likes
2
Share


@eldruida_lamota
Follow
Que pasa familia, vamos con la cosecha de estas Gorilla Melon de FastBuds.
Por dónde empezar, las flores son bien compactas y van repletas de resina son muy pegajosas, tienen tonos verdes bonitos, y tiene unos aromas dulces y exóticos bastante marcados con toques terrosos.
Es muy sencilla de cultivar, es de ciclo de 2 meses y medio, pero bien agradecida, tiene buenos satélites, de las que plante de fastbuds, podría decir que mi favorita hasta el momento.
Hasta aquí todo, Buenos humos 💨💨💨
Likes
141
Share


@GERGrowDesigns
Follow
Harvest Time of Fast Version B Strain and Welcome to :
-Designers Club -
Special Thanks to John for hopping through my Messages to Join The SSSC/DP Photo C8ntest
The Project was Supported by Narcos Seeds to give the Strain the Perfect lifespan it could Deserve .
Light used for The Contest Grow :
Tenty Pro x4 200w in a space of
60x60 Homebox Ambiente Tent.
Preparation Before Harvest :
5 Days without Feeding / 2 Days of them Complete in the Dark .
Enough Talk from me , just Enjoy youre Seats and be a part of The Designers Club .
Good Luck to Everybody and Keep up Growing !


Likes
8
Share


@Alkaline_Water
Follow
Nute burn on older growth. Slight yellowing of new growths’ tips;
Larry OG originally started in a rock wool cube and was then transplanted into soil. The Larry og is very small and yellow with major bleaching;
Raised light height by 3in. (15in. -> 18in.)


Likes
92
Share


@DogDoctorOfficial
Follow
🌸 Week 4 Flower Report: Growth, Challenges & Big Changes! 🌸
Hey, Grow Diaries Fam! ✨
We’re here at Week 4 of Flower, and what a week it’s been—packed with challenges, adjustments, and exciting progress! Before diving into the details, let’s start with a note on my flowering timeline. While this is Week 4, I don’t start counting flower days the moment I flip to 12/12. Instead, I wait for the plants to show true signs of bloom. It’s a small but significant distinction that keeps things accurate and aligned with the plants’ development. 🌱
Defoliation: Timing is Everything!
Defoliation is a critical part of the flowering stage, and I typically wait until Day 21. However, this week, I tackled it earlier on Day 17 because:
1️⃣ The room was simply too full.
2️⃣ And most importantly—the Papaya Zoap had other plans!
She’s a fighter—determined, defiant, and constantly reaching for the moon. Despite intense training like super cropping, she’s still pushing upward, nearly outpacing the LED lights. Challenges like this remind us of a simple truth: gardening mirrors life. It’s about resilience, adaptation, and unwavering determination. 💪
This week, I added a second SCROG layer. While this net will support the flowering colas, it’s also there to strategically manage the Papaya Zoap. Why? Because experience has taught me that if she grows out of the LED’s range, she won’t finish properly—and that could disrupt the balance for every other plant in the tent. It’s all about teamwork, even in the garden. 🌟
Defoliation was intense, removing nearly all the leaves with stems to clear space and boost airflow. The tent now looks dramatically different! For the full before-and-after transformation, be sure to check out my YouTube channel—trust me, you’ll want to see this process up close! 🎥✨
Switching to Aptus Holland Minerals
A major milestone this week: I’ve transitioned entirely to Aptus Holland Minerals. 🌊 From now on, it’s just minerals—no more organic inputs. This marks the start of a new chapter, and I’m incredibly curious to see how the plants react to these changes. Here’s the current nutrient mix:
• System Clean: 0.5 ml/L
• Regulator: 0.15 ml/L
• RO Water Conditioner: 0.8 ml/L
• All-in-One Liquid: 2.1 ml/L
I’m keeping the pH at 6.1 and TDS at 556 ppm, and so far, the plants are thriving. This week also included a thorough system clean, ensuring everything runs smoothly as we enter the final flowering stages. 🌿
Bud Development: Pure Magic!
The bud formation across all the genetics is nothing short of incredible. Every plant is thriving, and the canopy is lush, vibrant, and full of potential. I’ve raised the PPFD to 750 for this stage, with temps steady at 25°C and RH at 63%—keeping the VPD dialed in at 1.11. The TrolMaster ecosystem, paired with the AutoPots, makes managing these precise conditions seamless. With more time to focus on the plants, I can give them the daily care they deserve. 💚
Shoutouts & Gratitude
A huge thank you to my sponsors and supporters: TrolMaster, Aptus Holland, Pro-Mix, Cannakan, and the amazing seed banks. Your incredible products and technology make this journey possible. 🌟
To the Grow Diaries community and all my followers—thank you for your energy, love, and even the challenges from the haters. It all fuels this incredible process, and I apprecilove every bit of it.
Special shoutout to Brother Daggadna—check him out on Instagram and show some love! 💚
The plants are heading into the next phase of bloom, and I can’t wait to share how this story unfolds. 🌸✨
As always, stay tuned, stay positive, and let’s keep growing strong together! 🙌
Growers’ love to all 💚
#TrolMaster #AptusHolland #GrowLife #CannabisCommunity #FlowerWeek4 #NeverGiveUp #GrowWithLove #IndoorHorticulture #Defoliation #PPFD #ControlledEnvironment #SCROGNet #DogDoctorOfficial
Discount Codes so you can save big on your next check out 💚💚💚
Kannabia - DOGDOCTOR 30% off
SeedsmanSeeds - DOGDOCTOR 10% off
CannaKan- DOGDOCTOR 15% off
terpyz.eu - DOCTOR 15% off
The Neutralizer - PORKIT5-DOG 15% off
As always thank you all for stopping by, for the love and for it all , this journey of mine wold just not be the same without you guys, the love and support is very much appreciated and i fell honored and so joyful with you all in my life 🙏
With true love comes happiness 💚🙏 Always believe in your self and always do things expecting nothing and with an open heart , be a giver and the universe will give back to you in ways you could not even imagine so 💚
Friendly reminder all you see here is pure research and for educational purposes only
Growers Love to you all 💚💚💚
P.S. – A Deep Dive into the ICL-300: Revolutionizing Under-Canopy Lighting
The ICL-300 isn’t just another LED—it’s a game-changer for under-canopy lighting. Unlike traditional LED systems that project light in a single direction, the ICL-300’s 300-degree design ensures even light distribution beneath the canopy. 🌟 This unique feature means that no part of your plant is left in shadow, creating a balanced environment for lower buds to thrive.
Key Tech Specs & Benefits:
• 300-Degree Light Distribution: This design fills the under-canopy space with optimal light, enhancing photosynthesis where it often gets neglected. 🌱
• Full Spectrum Output: Tailored to meet the specific needs of plants at every stage, ensuring quality growth from base to apex.
• Energy Efficiency: Advanced LED technology delivers maximum output with minimal energy usage, keeping costs down and sustainability up. 💡
• Durability & Heat Management: Built with high-quality materials, the ICL-300 stays cool and reliable, even in intense growing environments.
Why It Matters:
Under-canopy lighting is a game-changer for growers aiming to maximize yield and quality. Typically, lower buds receive less light, resulting in larfy or underdeveloped flowers. The ICL-300 changes that dynamic entirely by turning shadows into opportunity. 🌟 With light evenly dispersed across the entire plant, you’re not just growing; you’re sculpting a masterpiece.
For me, the ICL-300 is more than a tool—it’s a partner in innovation. It ensures that every plant in my grow room has equal opportunity to shine, from the top colas to the smallest buds at the base. When paired with a carefully managed ecosystem, like the one powered by TrolMaster, the potential for consistent, top-quality harvests reaches new heights.
This isn’t just about adding light—it’s about adding value, efficiency, and balance to the grow process. I’m beyond excited to see how the ICL-300 transforms the game in my tent, and I can’t wait to share the results with you all! 💚


Likes
39
Share


@Esoteric_growing
Follow
Harvested top half of the canopy 6 days ago and harvested the bottom half today day 66

Likes
2
Share


@Mr_nugs_lover_David
Follow
Very high quality strain. No joke, I'm glad I have discovered such a fruity and sweet sativa strain. This m8 by gea seeds is a pleasure to smell, I'm so sad about growing her in that little 11l pot, hope next year I can make a very big bush full of fruity big colas 👨🌾🤤🍭🍓🍓🍏🍉🍉🍊 Loving the fragrance. Very recomended guys. Peace ✌️💚❤️💛

Likes
2
Share


@Chi_K24
Follow
Hey folks. No new updates really. still on cruise control. Plants are crazy thirsty. Using 10 gal every 2 days or so. So that ends up at 1.2 gal per plant per day! Insane. These air pots do thoer job as advertised. Next update we are going to amend these babies with the power bloom mix!
Likes
20
Share


@CanadianFillmore
Follow
Flush week, straight water flush and I expect to chop and harvest this coming Sunday, maybe Saturday depending on trichomes and how dry the promix HP is. Overall I'm happy with this plants growth, she survived a heat stress issue and has developed lots of bud. While not huge buds, compared to my last grow of this strain, I'm still super pumped with this strain/plant. Updates will come after harvest and after drying for final weight total.

Likes
16
Share


@morganfreeman420
Follow
Creo que el filtro esta roto o dañado ya que el extractor larga todo hacia afuera todo el olor de la tienda


Likes
5
Share


@RumplePuffskins
Follow
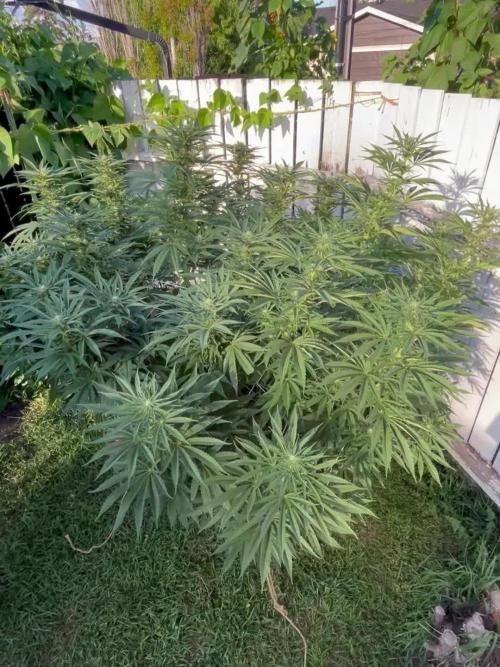
It’s getting cold and damp. Fingers crossed for a couple warm weeks into croptober


Likes
5
Share


Likes
18
Share

@Northern_Ent
Follow
Aug 2: Sunday Punch EV continues to be a great plant. Third week of 12 h darkness is now done and lots of nice buds are starting to form. The buds even have their first bit of frosting showing this morning. Quite hot today but it will cool off a bit tomorrow.
Aug 3: started leaving plant outside again so back up to 15.5 h of daylight here now. Continuing to use far red light at dusk as a bloom booster.
