


Likes
Comments
Share

@OS_Farmz
Follow
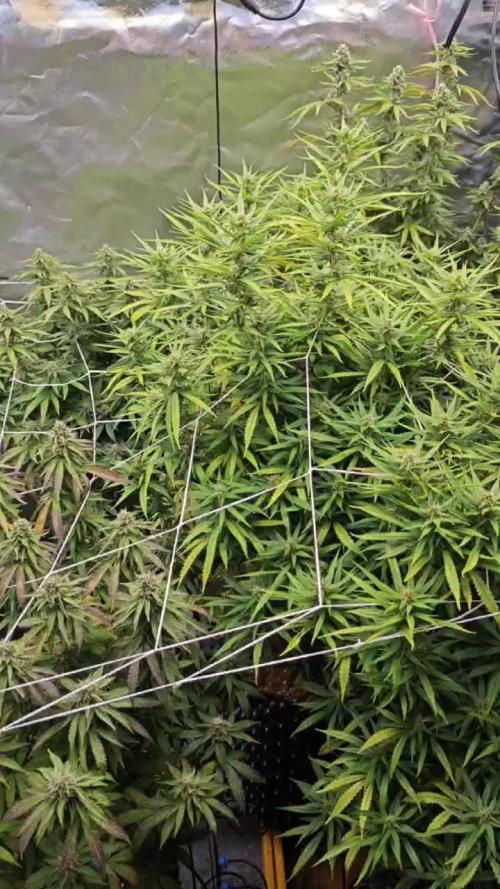
Look at those freaking towers on the right side;) and on these concrete jungle in the middle! Very satisfied with the ongoing process.


Likes
Comments
Share


Likes
3
Share


@MicroHidroGrow
Follow
Día 08 las plantas no están estirándose tanto cómo esperaba. La temperatura tampoco ayuda ya que hace mucho frío donde está el indoor. Pero tengo fé. Recién se empieza a notar el estiramiento.
Likes
4
Share

@HeizraumGrower
Follow
Week 6 is wrapped up and the plant is showing great vitality. Although the light intensity has stayed nearly the same, water consumption has increased massively and is now over 1.3 liters per day. I watered three times in total. I reduced the pH of the nutrient solution from 5.9 to 5.8 with an EC of 1.8 to counteract the slightly higher runoff pH of 6.3 and keep the medium stable.
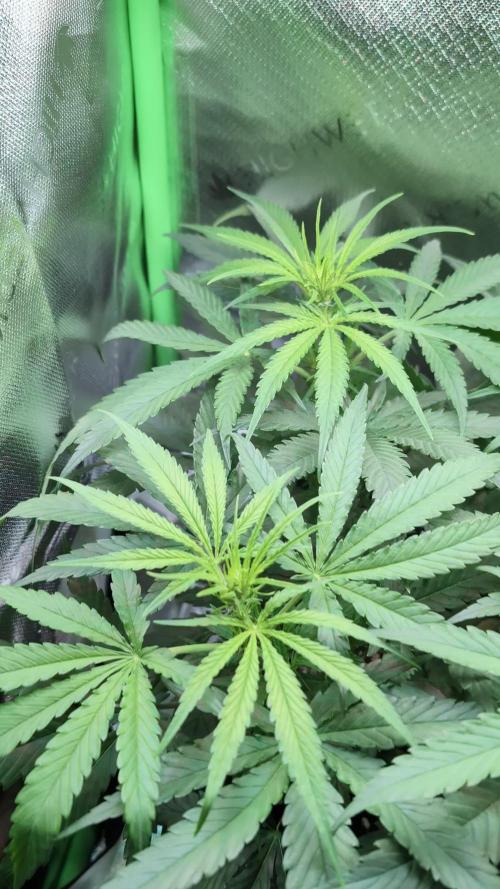
The Wedding Cheesecake is now in full stretch and is growing about 2 cm taller every day. She currently stands at just over 30 cm from the soil level. Flowering has progressed significantly and white hairs are visible everywhere.
Since the plant is now growing as close as 20 cm to the lamp, the PPFD value at 90 percent power is currently between 600 and 700.
It is starting to get very crowded in the tent as the foliage is quite expansive and already touching the walls. To avoid stressing the plant unnecessarily during the stretch, I have only selectively removed small side shoots to ensure energy is directed to the main buds. A more thorough thinning to optimize air circulation is planned once the stretch is over.
Despite the strong growth, there is still plenty of vertical room in the tent. I am very curious to see the final height.

Likes
15
Share

@AestheticGenetix
Follow
So I made a totally noob mistake. I can't believe I didn't think about how fast the males would spread pollen.
I was still trying to figure out which male I wanted to use for selective pollination on a specific branch.
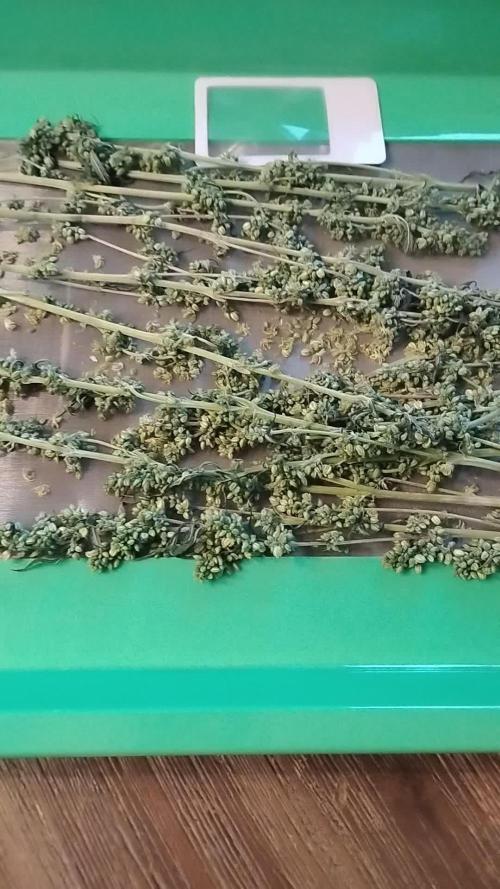
So I pulled the males and I'm attempting to collect pollen using a trim tray screen.
Its working quite well and I'll make a video with that as well.
I'm not even sure if it's viable or if my attempt and mistake of leaving the males too long will work.
So anyways I realize now how delicate it is to have males. They start popping fairly quickly.
The gelato female is praying hard. Super happy it seems
Come check out my YouTube y'all
Processing
Likes
67
Share


@Ageddd
Follow
Whats up GD !!!
------------- GROWTH-------------
Topped both plants, the bigger one, it is 3 days younger than the other, and seems to have faster development, more vigorous.. I think the reasons could be the pheno or the level of root development, i ll explain it :
C#1 was in a yogurth as seen on photos and having all the sun.
C#2 was in a wider recipient, lower in height, and in a room with poor light.
I watered both plants at the same time, C#2 got curvy leaves when watered, i think maybe she likes near dry soil, or cant handle that level of humidity in the roots ... in my opinion she has less developed roots and the pot hadnt enought holes to let the air come in, the oposite of C#1, that seems to handle better humidity and is eating all she can, getting fluorescent green below sunlight.
Both plants have same feeding and soil composition.
------------- IRRIGATION-------------
Watered both ladies, around 0.2-0.3l each one with Deeper Underground.
------------- NUTRIENTS-------------
Tall cheese C#1 : Deeper underground 1ml/l
Short cheese C#2 : Deeper underground 1ml/l + Micro Vita (it only had Canna Pro soil )
---------------------------------------
Good vibes !!
_12/04/2018_


Likes
18
Share


@HonneyHouse
Follow
week 4.. amazing blooming.
The rain has stopped. The Dry season has come! Maybe one or two rain storm, but nothing to wory...


Likes
49
Share


@Endriu
Follow
It's been a while, I know, but been too busy during this festives to keep the diary up...
As you can see, my ladies suffered from plague. Damn spidermites! I've try to control them every day but they were too long in bloom to do something for this little creepers!
So, after 11 week of bloom I've decided to cut them and wash the buds as in a video made by Mr.Cervantes seen on youtube, and made a video so that it can be useful.
I've mix 120ml of H2O2 in 10Lts of water, washed the buds for a couple of minute, rinse'em and then hanging for a couple of hours with a fan that gently blowin on them. The result is in the photo.
So, mates, this journey has ended, I've learned a lot of things during this real first indoor grow, and this also thanks to you and your hint.
Thank you, see you soon (more beans are waiting to born) and most of all CIAO!


Likes
62
Share


@balansa
Follow
i think mexican airlines is ready for flushing. i will flush her next week smell and aroma is wonderful nore like skunky. moby dick has 2-3 weeks left i think she has more sweet smell. i wanna tell you the smth i know that its unwrighten rule that u should not touch the plant before harvest but i smoked both and they are impressive ))))

Likes
25
Share


@XperencdGmanXG
Follow
finally they are in flower! Yay final foliar spray applied. They are still smelling like chocolate and peanut butter. Did not get 1 drop of rain this week. It is getting so frustrating plants are 1/4 what they should be this year.

Likes
16
Share


@ZzTooRightOGzZ
Follow
Started just for fun not sure if it's mail or female but it's going well so far .
Likes
8
Share


@FlaverGave
Follow
I SOAKED THE SEEDS IN A CUP OF WATER, WITH A DASH OF HYDROGEN PEROXIDE, FOR 24 HRS.
I THEN DUMPED THEM ON A PLATE BETWEEN PAPERTOWLS, AND ANOTHER PLATE(NOT TOO SOAKED-MAKE ROOM FOR AIR)
UNDERNEATH I PLACED A HEATING PAD UNDER THE PLATE, FOR 24 HRS, TIIL THEY POP AND ROOT TAIL IS QUARTER TO HALF AN INCH
FROM THERE I PLACED THEM IN PRE-SOAKED JIFFY PELLETS, AND PLACED THEM IN A GERMINATION KIT/WITH LID DOME.
I DEFINETLY MESSED UP BY KEEPING THEM TOO MOIST. AND HAD TO TREAT THEM WITH A HYDROGEN PEROXIDE(3%)DELUTED WITH WATER, UNDER AND TOPPED.
THEY ARE 10 DAYS NOW, I BEEN TRYNA HARDEN THEM OFF, PLAN ON TRASNFERING THEM TO THE SYSTEM. WISH ME LUCK
Likes
237
Share


@1Right_Angle
Follow
Sept 19 2022
- chopped the Russian this morning and is she ever ready.
- 85 cm tall and 2lbs 8oz wet weight
- target is 14 days hanging min.
20th
- LSD does Not get chopped today… we’ll leave that for the weekend.
25th
- LSD gets harvested tomorrow afternoon
- Honduras x Panama and Panama Red get fed today
30th
- day 12 of hanging and the Tzar Bomba is Not brittle yet
Oct 1st
- day 13 hanging, only 1 branch objected, we’ll get a few more days out of her


Likes
37
Share


@Organic_G
Follow
Haben zum Glück aufgehört zu strecken, seit Tag 10 auch die Under Cannopy dazu geschaltet…
Perfekter Strech, bin auf die Blüten gespannt 💪🏽


Likes
33
Share


@FlavoursUk
Follow
So far, so good. Little defoliation, nothing major. As stated before, most likely not topping this run as I'd like to see the natural growth structure. I'd also like a more chilled grow this round too. Not too ling till i flip as they get big in hydro.
Day 33 - girls are looking good, just ashame about the 4th girl not making it, but all dependant on genetics 3/4 still good. Most the environment is now dialled in. Will be flipping the next few days. Nutrient dose is currently under what is recommended as less is more when in hydro.
Day 34 - All healthy enough and ready for some flower production. Will hopefully flip these girls tomorrow.

Likes
36
Share


@Cannabeast40
Follow
Welcome back 🤗
Another week has passed and I’ve started adding a small amount of Grow nutrients to the mix🌱
Cranking up the light a bit again this week trying to maintain about 400PPFD.
See you next week 😎🤙🏻💚
------------------------------------------------------------------------------------------
Light source:
Medicgrow SpectrumX
880W LED
Build in PPFD
4 controllable spectrums V1, F1, VS, FS
Visit https://medicgrow.com/ for more informaton.
Light measurement:
Apogee MQ-610 & Apogee DLI-600.
Fertiliser:
Organics Nutrients
https://www.organicsnutrients.com/en/
Green Buzz Nutrients
Discount Code: GD42025
Grants 25% with a minimum Order value at 75 Euro.
https://greenbuzzliquids.com/en/shop/


