


Likes
Comments
Share


@Bread_n_Buds
Follow
Even in the version worked with main lining and sent into flowering a little later, Zamnesia's Tangerine Dream remains one of the fastest plants to flower and is surprising because it is the most solid flower of all, it is a boulder, stone, pure marble.
** We remind all users that we grow two plants per variety, one worked with techniques and the other left to grow freely and beautifully to preserve its speed and the classic Christmas tree shape in height. Below in this diary we have the Main lining plant.
Description // This plant had a fast flowering like its sister left to go without techniques. The phenotype is practically identical, solid flower, excellent resin production even in the great heat, structure of the super thick ones that drive me crazy. The smell is always that of mandarin while it is peeled perfectly in line with that declared I imagine the magnificent taste. Why? I tasted the hash that remained on my gloves and I was going crazy. For citrus lovers who are a bit tired of the forced lemon scent.
Trichomes and maturation // We looked carefully under the 10x microscope (and 10x x 1.6) and noticed a good percentage of milky/clumpy trichomes, still many transparent but also many golden amber. It is mainly sativa, but only 60/40, so guys, if we want to maintain a more sativa effect, we need to harvest with a majority of cloudy/milky trichomes if we want a more indica effect, remembering that THC oxidizes too much, amber is the right color. I use it during the day and therefore I look for a more sativa effect when the plant is sativa.
Fertilizers and soil // We used the Plagron range of organic nutrients the whole time, all the recommended additives and the Pro Mix soil, unfertilized and organic. Calculate the dosage that best suits your needs on the website ------ https://plagron.com/
Nutrients are available in convenient packs on the Zamnesia website
--------- https://www.zamnesia.io/en/11457-plagron-easy-pack-natural.html
I love this strain, I love its mandarin scent and its hard, potent flowers ----
https://www.zamnesia.io/en/10966-zamnesia-seeds-tangerine-dream.html
Zamnesia Short Description // Whether you're new to the fascinating world of cannabis cultivation or an expert, Tangerine Dream by Zamnesia Seeds will give you great satisfaction both in growing and smoking. Carefully selected from G13, Afghan and Neville's A5 Haze clones, this strain boasts a slight sativa dominance of 60% and offers a relaxing yet uplifting effect. She’s also easy to grow and is suitable for both indoor and outdoor growers. As we’ve just seen, Tangerine Dream is a pleasure to grow, but she’s even more enjoyable to smoke. With 25% THC and a pungent blend of exotic terpenes, Tangerine Dream smells incredible, tastes delicious, and delivers a balanced, long-lasting effect. When you open a jar full of these dense, resinous buds, you’ll be hit with a delicious citrus aroma reminiscent of freshly peeled mandarins and grapefruits. With hints of citrus, spice, and incense, each hit is a sensory delight reminiscent of sipping a refreshing juice on a sunny porch. Finally, as the effects kick in, you’ll be treated to a long-lasting, balanced, positive cerebral buzz, followed by a gentle physical relaxation. Perfect for weekends away or social gatherings. Order your Tangerine Dream seeds today and grow this invigorating hybrid.
The whole world of growing and much more is on Zamnesia: take a look at the site and you will find "the best that nature has to offer" in various shapes and colors.
---------------
www.zamnesia.com

Likes
15
Share


@bobtheblob
Follow
Seeing burned tips makes me feed it differently, 2 days with fulls set of nutrients, 2 days with Cannazym only.
I pruned them a bit more, not sure if it was a good idea but those little branches didn't develop a lot during this time.
On day 4 of the week, after HSO's comment on a weekly report, I've measured runoff and it was insane! 3k-5k ppm
Flushed them all so that runoff was around 800 ppm, and watered them with Cannazym only (PH around 6.1, EC 440 ppm).
Also moved them around a bit
Most likely the reason for conductivity going so high was that I removed the pots from platforms at some point and old runoff was probably soaking in.


Likes
24
Share


@Zurban_Poison
Follow
Hello everyone!
my ideal girl has become even more perfect))
look at the development of the buds! they are in perfect shape! beautiful and fluffy like a dandelion))
I can watch her for hours ..

Likes
14
Share


@Weedbadk
Follow
Día 1 y todas geminaron vamos a usar lst a todas y algunas lst y poda apical
Día 5 desde puesta en sustrato
Solo pulverizó

Likes
Comments
Share

@Northern_Ent
Follow
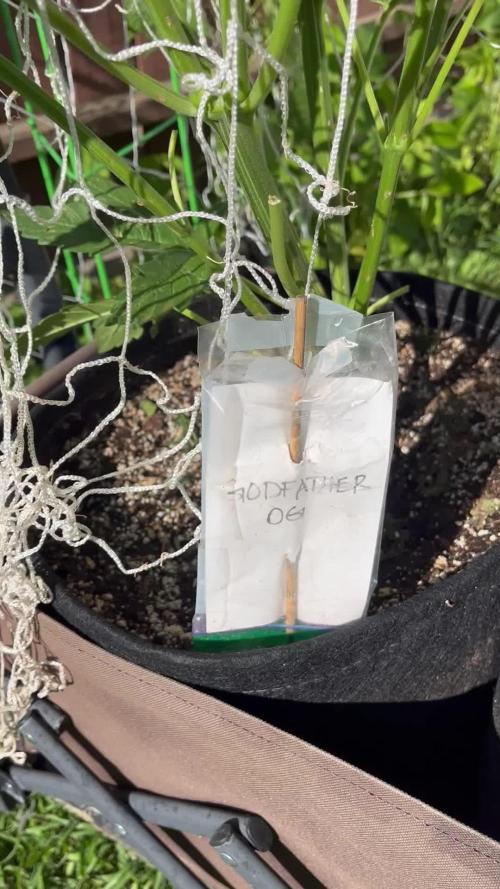
July 11: hail storm went through and did some damage. She will recover but it is a setback. Big fan leaves were shedded but the small leaves and growth tips are fine.
July 13: watered with molasses and Monster Maxx. Did foliar spray in morning with kelp extract and Extreme Blend and some Epsom salts all to help with recovery after the nasty hail storm.
July 15: removed some more of the damaged fan leaves after a few days of recovery.

Likes
20
Share


@color
Follow
Se non fosse stato per la cima ammuffita, avrei fatto un bel risultato però per essere la prima esperienza d’oro, me ne ritengo soddisfatto, anche se so che ho un estremo potenziale

Processing
Likes
28
Share


@TrueNorth
Follow
-Strain: Purple Lemonade - Fast Buds
-Tent: 5x5 Gorilla Grow Tent
-Lights: Budget LED Grow Lights 2 x 250 Watt
LED Full Spec/Red Spec mixed boards
-Light Cycle: 18/6
-Soil: Fox Farm
-Air Circulation: AC Infinity Cloudline T6 Inline Duct Fan
WECLOME BACK GROWMIES! Week 10 here with our PURPLE LEMONADE by Fast Buds!
January 29, 2020 (DAY 67) - Hey there growmies we can clearly see the big bud getting to work, they are thickening out well and colour and smell is phenomenal. they are such hungry beast i love seeing the daily change!
Likes
35
Share


@GODSGIFT_2005_JM
Follow
🍼Greenhouse Feeding BioGrow & Bio Bloom
⛺️MARSHYDRO
The ⛺️ has a small door 🚪 on the sides which is useful for mid section groom room work. 🤩
☀️ by VIPARSPECTRA (models: P2000 & XS 2000)

Processing
Likes
14
Share


@Toughpuff
Follow
Care Bears was an awesome plant to grow, it grew fairly smaller but massive colas on the whole plants. The fruity smells that come off this plant is amazing but also has a hint of that good old dank smell, awesome purple/pinkish colours off of it . Highly recommend growing this strain is you haven’t already.
Breed by: firebuds genetics


Likes
2
Share


@IbeBryBry
Follow
Starring to put on some weight. Dealing with a calcium problem most likely due to me only learning this week I should be buffering my coco with a calmag bath for 8+ hours atleast twice lol live and learn.


Likes
24
Share


@Leeyum
Follow
My apologies on never giving a smoke report. I ran into a situation where I had 2 weeks to move across country. I don't like to include untrue data to my expectation/ perceptions.
Likes
5
Share


@Mr_nugs_lover_David
Follow
Very happy with how this lady has performed, amazing quality buds, very sticky and dense flower with a concrete smell that I love so much, which is that kind of fruity sweet flavor that this lady is able to produce, it's been a beautiful journey, I'm gonna enjoy a lot this flowers. Very recomended guys!

Likes
34
Share

@sellem
Follow
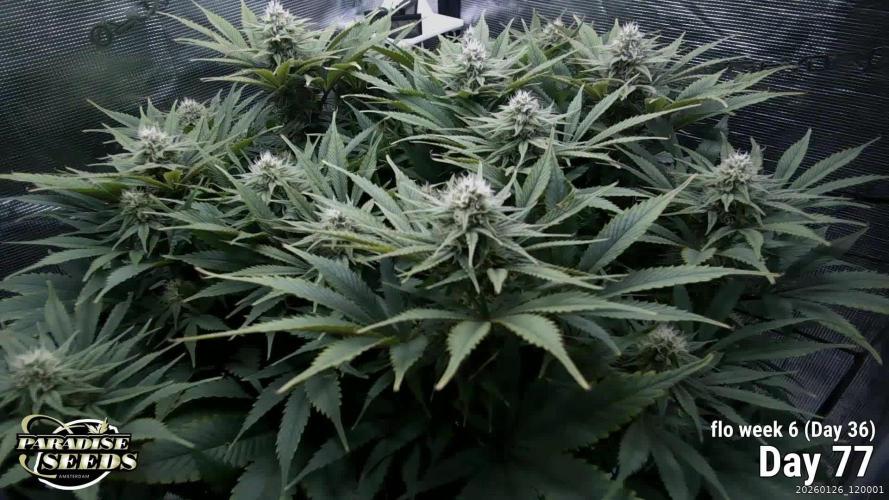
Shes a stinker and a stunner. 👻👽💀
My watering schedule got a bit out of whack so she began eating herself a bit, but nothing a good dose of some nutes and ye old reliable, calmag, shouldnt be able to fix
Watering is still 6L, 6PH, 5ml/L bloom, introduced her to green sensation this week, and a healthy dose of calmag to repair my inconsistent schedule (its magic, dont ask)
did some minor defoliation of the worst evidence of my neglect that sprung to my eye. but other than that, ill just call it fade 😎😎😎
Jokes aside, she IS developting some nice colors. 😍

Likes
6
Share


@Arcadium
Follow
Warming up nicely, 22c days, 10c nights, finally some more rapid growth. Final top of all 16 leading nodes this week, of which I've left the first nodes (removed second, topped third) after the last top as secondary branches.
This should give a total of 64 primary nodes. You'll notice the right side gets a little less sun, and there's a few pesky nodes that just refuse to grow, Ohh well, there's enough as is, but the symmetry won't be perfect haha.
Will measure and order a proper scrog net this week, generally won't put it on until shortly after final flower stretch. I'll be using bud clips for simple LST to try and keep an even canopy. I've been bending some nodes towards the middle to help it fill in.
Nothing but drip irrigation 2hrs and a spray of Lost Coast Plant Therapy this week.
Likes
62
Share


@masterofsmeagol
Follow
Hey guys Ive had technical difficulties but I've kept pretty good paper notes and pictures. I will try to transfer things here later. These clones were started March 20th
I'll start a new week tomorrow and post weekly conditions and methods. These plants have been through 30mph wind gusts, freezing temps and other extreme environmental problems as well as pests. I'm very happy with the progress they've made this far.


Likes
1
Share

@Grapes
Follow
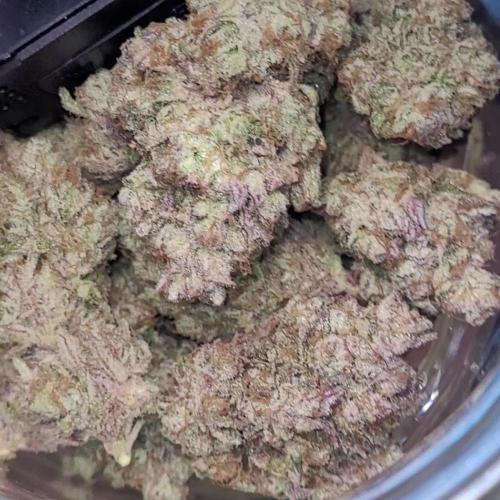
I dried it in the grow tent for about a week at 57% humidity and 62f. I then hand trimmed all the buds and it ended up being just short of 4oz total. I then cured it in 3 quart sized jars. After curing the buds smelled a bit more floral and pine scented but the blueberry terps were still super strong. Me and my friends smoked through this stuff super fast, it was pretty good.
Processing
Likes
7
Share

@Mr_nugs_lover_David
Follow
Beautiful pair of phenos of Badaz og cheese very excited about what strain is gonna offer me in terms of quality buds, so excited to see what is every of this 2 phenos gonna be like, I really hope that both of them have the exact terpenes profile and the same potency! Let's keep on working! We'll the ladies have been Transplanted on February 2nd after 17 days since planted, they were very big and the pot was completely conquered by strong roots as you can see, now both of them are in their new 11l pot home let's see how they keep developing! 💛❤️💚🔝💎

