The Grow Awards 2026 🏆 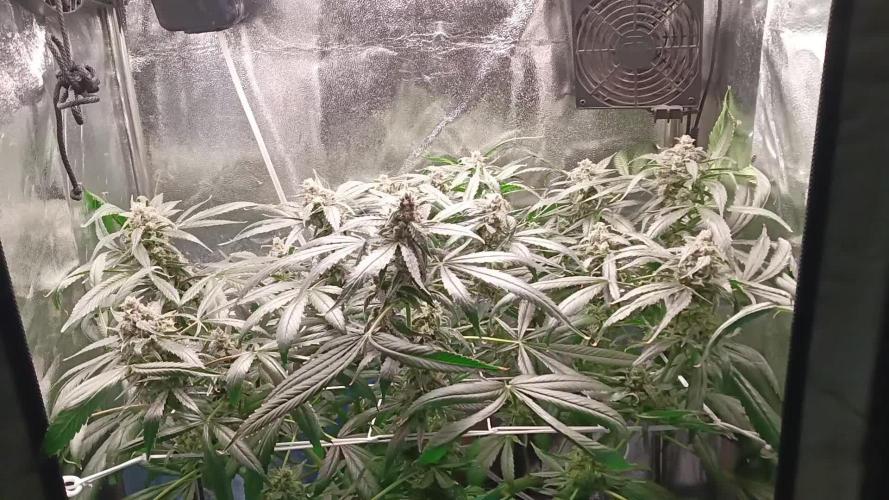


Likes
Comments
Share
@PEAKYPLANTERS
Follow
We have reached the end of another journey full of lessons learned along the way!

Processing
Likes
11
Share
@MemesBeforeDreams
Follow
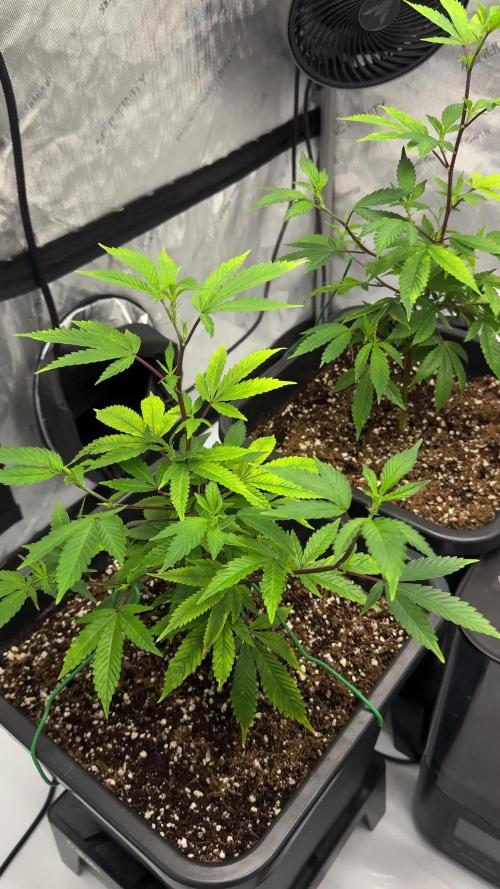
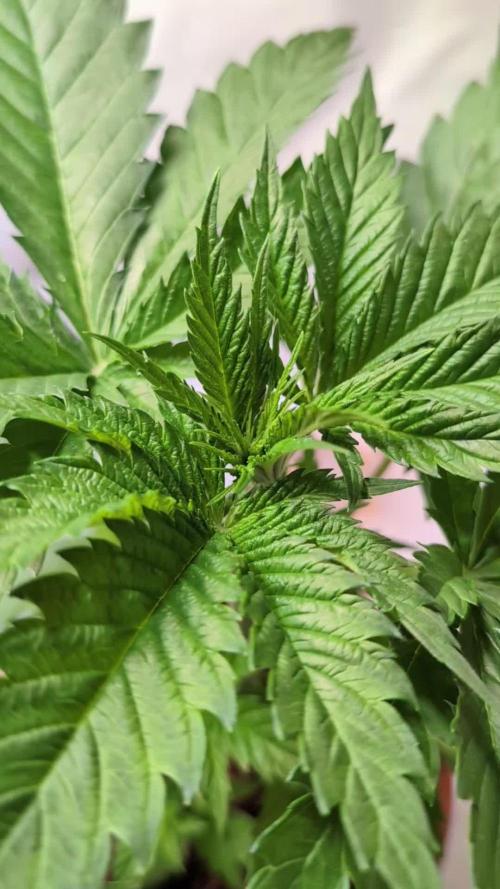
Plants just won’t stop growing, seems like I get up everyday and they’re just exponentially bigger, looking back at the yellow crusted half dead plants I had in earlier weeks they definitely look healthier although I see some nute or light burn on the tops of some leaves.
I welcome any advice from growers to help me along the way


Likes
109
Share
@Prototype0181
Follow
I'm happy with what i'm seeing :)
The cookies are stacking up like crazy, gonna have some serious cola's. The stretchy Cookie is back on track since i started making her own feed @ 70% strength of the others, she seems to like it.
Aficionado French Connection Rossa Corsa
Beautyfull plant all around, tight noding and big *ss leaves Def a indica dominant pheno. I'll be keeping a close eye on her deu to lot of reviews talking about Herm issue's.
Gorilla breath.
She took of like crazy from Day 1, she sprouted a week later than the rest and now she is the biggest among the bunch. She's a verry easy to grow strain, even though she,'s not as stacked as the Cookies. I'm expecting a decent return from her, curious to the outcome of her
Wel that's it Growmies
Rock on💚


Likes
Comments
Share
@TheDohppeGrow
Follow
Week 2
During Week 2, the plants continued their transition out of the post-transplant phase but began to clearly express a higher nutritional demand. While root development was progressing, all plants showed visible deficiency symptoms, mainly lighter foliage and chlorosis affecting leaves.
The 1st feeding of the week was maintained at EC 1.1, which quickly proved to be insufficient for the plants’ current growth rate. In response, the EC was gradually increased to 1.6 for the last feeding of the week. Over the course of the week in order to better support vegetative development and address the observed deficiencies. This adjustment led to partial improvement, although the issue is not yet fully resolved at the end of Week 2.
Apical growth remains active and responsive, new growth appears healthier and more vigorous, internodal spacing stays under control, but stems are still relatively thin. This confirms that the plants are still in a catch-up phase following an initial underfeeding, rather than experiencing nutrient lockout or stress. The contrast between older pale leaves and fresher top growth supports this interpretation.
Close monitoring of leaf color, stem thickness, and overall vigor will be key going into the next stage, with further adjustments made only if the plants clearly request it.

Processing
Likes
5
Share
@CampgroundCannabis
Follow
After our initial week with small issues keeping temperature and humidity consistent; we added a fan, hung our carbon filter and fixed the ducting to lower ambient temperature. We have also polyed off the entire closet to better control the environment. Our humidity and temperature have become dialed! Plants are both growing well and stretching nicely. Noticing on plant number one that it is now growing new fan leaves below where they had skipped previously. We did top it earlier in the week. Number two is growing strong, still has some browning from the heat with lack of humidity in the first week but still growing strong! Number 3 is growing strong now that the shell has fallen off. It is standing tall! Cannot wait to see how week 3 looks!
Likes
14
Share
@Terp_Derp
Follow
I am late this week because on the girls' 8 week birthday, they both started looking HORRIBLE, and I was scrambling for a couple days.
Looking back, documenting those moments is probably more helpful than just showing pictures of everything going smoothly.
I think it might have been a Zinc deficiency, but it all boiled down to poor nutrient, pH, and watering practices.
This is my first grow, so the more I learn the better!
New leaves were forming brown tips, growth was stunted overall, and the veins on the leaves were becoming very prominent and white. After a day or so, the tips and edges of leaves started to curl up or "taco".
So I flushed the plants for the first time.
One recovered really well in 24 hours while the other improved a bit, but was still looking sad. I ended up flushing her a second time the next day.
Soil for both plants is still pretty damp but should be flushed well, and once it completely dries out, I can amend my feeding practices and give them another ~week before flowering.
I'm going to cut the nutrient amounts in 1/2, only feed nutrients with every other watering, and also give the plants more water to allow the proper amount of run-off.
I guess this is very important in preventing a build up of nutrients in the soil.
Hey, you live and you learn!
Also started trying some super cropping because I want to try it all, haha.


Likes
4
Share
@Ensign420
Follow
|»» LOG DISCLAIMER: Not intended as a grow guide. Grow log entries are usually posted 3 weeks later and are for my learning reference. ««|
Introduction - Week 16 Summary -
Ensign's log, stardate 17547.8,
Wow what a great week in the garden!
By the end of the week, the main tent has pretty much doubled in size! Upgraded the scrog frame and now have a second layer of netting about 14in above the original netting which is already filling in and looking incredible! The tent’s floor slightly flooded, but fixed it. Also trying Stash Blend for the first time!
As for the veg tent. To preserve the genetics, started the mother plant cycling process and took more clone cuttings (which were rooting in Coco Coins by the end of the week). To make more room, also bonsaied all mother plants.
The stretch is starting to slowing down and next week begins the first week of bloom!
Ca-Caw! Let’s go! Onwards Ensign!
[START OF WEEK 16]
==========================================================
---------- [ 4x4 MAIN TENT ] ----------
Heady OG BX1 #1 [Round4 ~Wk9] - WEEK 16 - Pre-Bloom [Stretch Wk2]
TKO [Round2 ~Wk14] - WEEK 16 - Pre-Bloom [Stretch Wk2]
----------- [ 3x3 VEG TENT ] ------------
Garlic Budder OG#1 - WEEK 09 - Full Veg
Garlic Budder OG#2 - WEEK 09 - Full Veg
Gorilla Goat #1 - WEEK 09 - Full Veg
Gorilla Goat #2 - WEEK 09 - Full Veg
08/04/25 → 08/10/25
This Week's Estimated Goals
----------------------------------------------------------------------------------------------
DLI: ~13 mol/m²/d
PPFD: ~300 μmol/m²/s
VPD: ~1.0 kPa
This Week's Meter Readings & Averages
----------------------------------------------------------------------------------------------
Light On/Off: 19:00 - 07:00 | Wattage: ~326.5W [LV04]
Distance From Canopy: ~31”, 27”
DLI: ~15.60 mol/m²/d
PPFD: ~361 μmol/m²/s
VPD: ~0.69 kPa
Soil %: [40.7, 47.0, 38.1, 56.6, 41.9, 42.7, 42.9, 43.9]
==========================================================
Day 01 - Monday - 08/04/25 - Total Days: 113
-----------------------------------
Daily Averages ~[+01:00]
- Temps: 83.6°F [28.7°C]
- Humidity: 83.6%
- VPD: 0.66 kPa
- Soil %: [49, 37, 45, 60, 44, 43, 43, 45]
-----------------------------------
- [+00:14]: Night check on the 4x4 tent.
--- Holy Cannoli! Wow! These girls are in full stretch!
--- Both cultivars have grown beyond the netting and have stretched beyond the (green) Vivosun’s CFM bars! Heady is a bit low on the left, but the canopy is pretty even and perky!
--- Ca-Caw! Let’s go cuddies!
--- Heady OG (BX1 #1) is starting off shorter than TKO, but am pretty confident that she’ll catch up.
--- TKO is looking incredibly healthy! She’s the larger plant, but also in the smaller 20-gallon pot. Well she is 5 weeks older than Heady OG so makes sense. Regardless of the growth difference, absolutely stoked for this grow cycle!!
- [+12:19]: Checked the Ecowitt soil moisture sensor data:
------------------ [ 4x4 MAIN TENT ] ---------------
------ 46% - [CH01 FT » G30 - Heady OG BX1 #1]
------ 37% - [CH02 FB » G30 - Heady OG BX1 #1]
------ 48% - [CH03 BT » G20 - TKO]
------ 62% - [CH04 BB » G20 - TKO]
------------------ [ 3x3 VEG TENT ] ----------------
------ 41% - [CH05 BL » GR7 - Garlic Budder OG#1]
------ 44% - [CH06 BR » GR7 - Garlic Budder OG#2]
------ 40% - [CH07 FL » GR7 - Gorilla Goat #1]
------ 50% - [CH08 FR » GR7 - Gorilla Goat #2]
--------- Veg: 38% - 45% | Flower: 45% - 55%
--------- General: 30% [Dry] «| 45 - 60% [Moist] |» 70% [Wet]
- [+00:14]: Checked the 3x3 veg tent.
--- Ooo yea! The veg garden is looking incredible!
--- All mamma plants are looking bushed out and beautiful!
- [+00:37]: Super-cropped and bend the canopy down a bit.
--- Lowered the canopy down a few inches. Really need to defoliate soon. The top growth is bushing out and getting really thick!
--- Clones are also looking incredible and both are rotting along beautifully! Heady is going to make it and she is looking great!
- [+00:38]: The cuttings are looking good for the most part. One is looking pretty droopy (damnit Ensign).
--- Misted the cups with RO water.
--- Think the RH may not be consistent enough and the cups might be drying out too quickly.
- [+00:41]: Checked the humidifiers.
--- Tanks are still full and no leaks found.
--- Another day done!
--- Okay! Since growth is raging upwards, decided to upgrade the scrog frame and plan to add a second layer tomorrow.
--- Ahh yea! This grow is turning out to be an epic one!
Day 02 - Tuesday - 08/05/25 - Total Days: 114
-----------------------------------
Daily Averages ~[+01:00]
- Temps: 83.3°F [28.5°C]
- Humidity: 83.3%
- VPD: 0.67 kPa
- Soil %: [49, 38, 47, 62, 41, 43, 43, 45]
-----------------------------------
- [16:25]: Evening check on the 3x3 veg tent.
--- Ooo yea! The clones are looking incredible!
--- The cuttings still seem to be struggling.
--- Hmm.
- [16:27]: Misted the cups with RO water.
--- Made a slight modification and wrapped the top of both cups with plastic wrap.
--- Cut a slit from the middle to the edge. Misted the cup through the slit with RO water (2-3 sprays each).
--- Then gently slipped the cups over each cutting.
--- Also slightly misted each Coco Coin with RO water.
--- Great! This should hopefully make a better seal and will keep the RH higher. I think.
--- Anyways!
--- The mother garden is vegging along beautifully!
--- Growth is getting really bushy and need to do a heavy defoliation soon.
- [16:56]: Checked the Ecowitt soil moisture sensor data:
------------------ [ 4x4 MAIN TENT ] ---------------
------ 48% - [CH01 FT » G30 - Heady OG BX1 #1]
------ 36% - [CH02 FB » G30 - Heady OG BX1 #1]
------ 47% - [CH03 BT » G20 - TKO]
------ 61% - [CH04 BB » G20 - TKO]
------------------ [ 3x3 VEG TENT ] ----------------
------ 41% - [CH05 BL » GR7 - Garlic Budder OG#1]
------ 43% - [CH06 BR » GR7 - Garlic Budder OG#2]
------ 41% - [CH07 FL » GR7 - Gorilla Goat #1]
------ 49% - [CH08 FR » GR7 - Gorilla Goat #2]
--------- Veg: 38% - 45% | Flower: 45% - 55%
--------- General: 30% [Dry] «| 45 - 60% [Moist] |» 70% [Wet]
- [19:03]: Night check on the 4x4 tent.
--- Ooo yea! Wow these girls are stretching!
--- Growth has clearly grown since the last checkup and getting taller!
--- Ca-Caw! Let’s go ladies!
- [19:14]: Wait. Uh-Oh!
--- The tent seemed to have flooded slightly.. DAMNIT ENSIGN!
------ [» A FEW HOURS LATER.. «]
--- Okay! Think I figured out why the tent flooded and how to fix it.
--- The main reason was the new soil sensor which was probably not in proper contact with the soil.
--- Fixed this by re-seating the unit. Also adjusted the drip ring a bit.
--- Also poured about a cup of water straight onto new sensor. This should make the surrounding soil wetter and will hopefully fix the dry pocket. I think.
--- For added redundancy, added additional trigger conditions to both Ecowitt WittFlows (TKO and Heady OG).
- [23:45]: Adjusted the watering triggers for the auto-watering system for TKO.
--- Changed the ON trigger from:
--------- When CH3 soil moisture is under 45%
------------ Updated to:
--------------- When CH3 soil moisture is UNDER 45%
--------------- AND When CH4 soil moisture is UNDER 50%
--- Changed the OFF trigger from:
--------- When CH3 soil moisture is OVER 50%
------------ Updated to:
--------------- When CH3 soil moisture is OVER 50%
--------------- OR When CH3 soil moisture is OVER 50%
--- Applied similar watering triggers for Heady OG.
--- Changed the ON trigger from:
--------- When CH1 soil moisture is under 45%
------------ Updated to:
--------------- When CH1 soil moisture is UNDER 45%
--------------- AND When CH2 soil moisture is UNDER 50%
--- Changed the OFF trigger from:
--------- When CH1 soil moisture is OVER 50%
------------ Updated to:
--------------- When CH1 soil moisture is OVER 50%
--------------- OR When CH2 soil moisture is OVER 50%
--- Will check back daily to make sure the flooding has completely stopped.
--- Well that pushed everything back a bit.
--- Okay! Anyways,
- [23:57]: Time to both build and install the second frame and netting. Let’s go!
--- Got four 1in PVC corner fittings (local Lowes) along with four 1in PVC pipes (10ft long each). Also got more self-tapping screws.
--- For the netting, using mason string. Usually use the braided nylon, but the twisted variant is a lot cheaper.
--- To build the frame, I cut the 1in PVC pipes down to two different lengths:
------ [» x2 @ 42.5in «] – Front / Back
------ [» x2 @ 44in «] – Left / Right
--- This makes the frame slightly thinner from left to right.
--- Saving the extra piping for future projects.
- [+04:04]: Okay! The new frame is built and looking sturdy!
--- Did not use any glue and simply dry fitted each component.
--- For easier fitting, smoothed the ends of each pipe with sand paper.
--- Also marked each pipe to indicate the front, back, left, and right sides.
--- For the fittings, used corner fittings and have open slot facing downwards. This way I can add the legs.
--- After the frame was built, marked and drilled screws about 3in apart (self-tapping). Made sure to mirror the screw spacing on the opposite side.
--- Time to weave the netting!
- [+04:06]: Using some mason string,
--- Started at one corner and strung all the horizontal lines.
--- Double-wrapped each screw.
--- After the horizontal lines were strung, continued and wrapped the vertical lines.
- [+04:44]: Now that the frame is built and the netting fully weaved, time to install the frame!
--- First the support poles. Cut and sanded more 1in PVC piping.
------ [» x4 @ 14in «] – Vertical Support
- [17:56]: Installed the back support poles before the front ones.
--- Temporarily removed the front CFM bar and had to raise the fan up a bit (was not easy, but got it done).
--- Once the support poles were installed, gently set the new frame on top.
- [+06:07]: Done and wow she’s a beauty!
--- Well that took a bit longer than anticipated (also the flooding did not help), but glad the frame fit perfectly and the netting looks great!
- [+06:12]: Checked the humidifiers.
--- Tanks are still full and no leaks found.
--- Ooo yea! What a day!
Day 03 - Wednesday - 08/06/25 - Total Days: 115
-----------------------------------
Daily Averages ~[+01:00]
- Temps: 83.9°F [28.8°C]
- Humidity: 83.1%
- VPD: 0.69 kPa
- Soil %: [42, 54, 43, 60, 42, 43, 43, 45]
-----------------------------------
- [+00:17]: Night check on the 4x4 tent.
--- Ca-Caw!! Let’s go cuddies! Growth is looking beautiful and green!
--- The second layer of scrog netting was not the easiest to install, but wow the garden is looking incredible!
--- Both Heady OG and TKO are still stretching upwards with new nodes branching out everywhere!
--- The canopy hasn’t reached the top net yet but hoping a few will make it.
--- Regardless, absolutely hyped for this flower cycle!
- [+00:23]: Checked the 3x3 veg tent.
--- Looking beautiful in the veg garden!
--- Wow the mothers have bushed out and have reached the grow light!
- [+00:32]: Super-cropped and lowered the canopy
--- The canopy is getting really thick! Plan to do a pretty heavy defoliation tomorrow.
--- Clones look great and stoked that both Heady OG and TKO seem to be rooting along in the cups. Need to check the weights. Let’s go!
- [+00:37]: Here are the starting initial watering ranges:
------ Heady OG BX1 » 261.4g → 301.2g
------ TKO » 240.9g → 301.4g
--------- General Solo Range: [Dry] «| [Initial Cup Weight] + ~55-100g |» [Wet]
--- All cups were last watered 5 days ago.
- [+00:37]: Took the starting weight of both clones before watering,
------ Heady OG BX1 weighed 250.4g
------ TKO weighed 240.9g
--- Oops! Probably should have watered earlier, sorry ladies!
--- Stoked that Heady OG is clearly going to make it! Also good to know the soil dryback can be at least 10g from the initial pre-saturated weight.
--- Anyways!
--- While on a scale,
--- Gently misted the straw mulch of both cups with RO water.
--- Focused on the straw and sprayed as evenly as possible.
--- Misted 10-20 sprays. Waited a moment, then misted again.
--- Made sure to reference the watering weights.
--- Repeated this process for both cups.
--- There was no runoff.
- [+01:08]: Took the saturated weight of both clones after watering,
------ Heady OG BX1 » 335.5g
------ TKO » 345.1g
--- Marked the final wet weight on the back of each cup. Also marked the watering date on the front.
--- Placed both phenos back into the tent.
--- Cuttings are looking better!
--- Glad that the slight modification to the cups helped to keep the moisture in (covered both with plastic wrap).
--- Gently removed both cups and re-misted each with RO water (~2 mists).
--- Carefully placed the cups back onto the cuttings.
- [+01:21]: Checked the Ecowitt soil moisture sensor data:
------------------ [ 4x4 MAIN TENT ] ---------------
------ 34% - [CH01 FT » G30 - Heady OG BX1 #1]
------ 52% - [CH02 FB » G30 - Heady OG BX1 #1]
------ 39% - [CH03 BT » G20 - TKO]
------ 58% - [CH04 BB » G20 - TKO]
------------------ [ 3x3 VEG TENT ] ----------------
------ 44% - [CH05 BL » GR7 - Garlic Budder OG#1]
------ 47% - [CH06 BR » GR7 - Garlic Budder OG#2]
------ 41% - [CH07 FL » GR7 - Gorilla Goat #1]
------ 46% - [CH08 FR » GR7 - Gorilla Goat #2]
--------- Veg: 38% - 45% | Flower: 45% - 55%
--------- General: 30% [Dry] «| 45 - 60% [Moist] |» 70% [Wet]
- [+01:23]: Checked the humidifiers.
--- Tanks are still full and no leaks found.
Day 04 - Thursday - 08/07/25 - Total Days: 116
-----------------------------------
Daily Averages ~[+01:00]
- Temps: 84.9°F [29.4°C]
- Humidity: 82.0%
- VPD: 0.75 kPa
- Soil %: [32, 51, 37, 57, 42, 43, 43, 45]
-----------------------------------
- [09:42]: Quickly checked on the propagation dome (in the 3x3 veg tent).
--- Nice! Clones are both looking great!
--- Heady OG is clearly recovering and looking better!
--- Wow! TKO is looking incredibly healthy! Top growth has perky leaves with a few nodal growth sites starting to stretch. As far as cloning, she has been healthiest with no issues the entire way!
--- Both Heady OG cuttings are looking beautiful and should be rooting. Plan to check for roots in a few days.
--- Plan to do a pretty heave defoliation today.
--- Also going to start the mother plant cloning process.
- [17:12]: Evening check on the 3x3 veg tent.
--- Mother garden is looking beautiful and the canopy is bushy with growth!
--- Both Heady OG and TKO clones also look green and healthy!
--- My main focus for today is the veg garden and the preservation of the genetics .
--- Lots of work to do and time to also start the mother cycling process!
--- This time, going to do a pretty heavy defoliation!
--- Going to pretty much bonsai each mother while taking a few clones to preserve the genetics.
--- Let’s go Ensign!
- [17:58]: Filled a measuring cup with 1.5 cups of RO water.
------ Added 1/8tsp of Horticultural Aloe
--- Mixed the solution and poured it straight into a clear solo cup.
--- Repeated this process until 4 cups were filled.
- [18:05]: Also marked each cup with the corresponding mother plant name.
--- Time to defoliate and take the clone cuttings!
- [18:07]: Using a pair of trimmers (AC Infinity),
--- Bonsaied each mother plant. Removed over 75% of overall growth leaving several branches and nodes.
- [19:44]: Done and wow what a difference!
--- Pretty much removed all growth leaving a few nodal growth sites to heal.
--- This is my first time going this heavy and am hoping that they recover.
--- If this bonsai defoliation heals up with healthy growth, this can also be an alternative to a full plant cycling.
--- Anyways!
- [19:46]: To preserve the genetics, made sure to cut clone cuttings from each mother plant.
--- To ensure successful rooting, took several cuttings.
--- Made sure to clean each cutting by trimming most of the branches off leaving the top one or two nodes.
--- Did not cut any leaf fingers and made sure to cut the tip of the stalk (about 45°) before placing into the cup of aloe solution.
- [19:55]: Placed the fresh cuttings into the 3x3 veg tent.
--- Have each cup resting on top of the corresponding mother plant.
--- Okay! Let the two-day soak begin!
- [20:00]: Mulched the trimmings in a paper bag.
--- Since the bottom of the paper bags tend to decompose, have the bag in a used BuildASoil soil bag which should not decompose (these are meant for soil).
--- Also added a bit of Kashi Blend and worm castings to the bottom of the bag.
--- Back to the Heady OG cuttings!
--- Gently removed the cups and misted the inside of each with RO water (~2 mists each).
- [20:02]: Carefully placed the new cups onto the cuttings.
--- Great! Plan to check for roots soon.
- [20:08]: Checked the Ecowitt soil moisture sensor data:
------------------ [ 4x4 MAIN TENT ] ---------------
------ 31% - [CH01 FT » G30 - Heady OG BX1 #1]
------ 51% - [CH02 FB » G30 - Heady OG BX1 #1]
------ 35% - [CH03 BT » G20 - TKO]
------ 56% - [CH04 BB » G20 - TKO]
------------------ [ 3x3 VEG TENT ] ----------------
------ 41% - [CH05 BL » GR7 - Garlic Budder OG#1]
------ 40% - [CH06 BR » GR7 - Garlic Budder OG#2]
------ 42% - [CH07 FL » GR7 - Gorilla Goat #1]
------ 44% - [CH08 FR » GR7 - Gorilla Goat #2]
--------- Veg: 38% - 45% | Flower: 45% - 55%
--------- General: 30% [Dry] «| 45 - 60% [Moist] |» 70% [Wet]
- [20:12]: Checked the 4x4 tent.
--- Ca-Caw! Ah yea! The garden is looking incredible and wow growth is raging!
--- The tallest growth is just barely under the netting!
--- Not much to do in the main tent now but to wait until the stretch slows down.
--- Time to relax and let the grass grow! Let’s go!
- [21:34]: Have an extra stainless steel rack and thought of a better way to hold the solo cups in the veg tent.
--- The cups are balancing on the edge of the pots am concerned that they may tip over.
--- Carefully too each cup out of the tent.
- [21:36]: Placed the rack upside-down in the middle of the tent.
--- Have the rack positioned on top of all 4 pots just above the center floor fan.
- [21:39]: Gently placed each cutting cup onto the rack.
--- The floor fan can easily still blow through the grid of the rack. Great!
--- This should be way more stable while still allowing decent airflow.
- [21:40]: Checked the humidifiers.
--- Tanks are still full and no leaks found.
Day 05 - Friday - 08/08/25 - Total Days: 117
-----------------------------------
Daily Averages ~[+01:00]
- Temps: 84.5°F [29.2°C]
- Humidity: 82.5%
- VPD: 0.72 kPa
- Soil %: [32, 50, 30, 53, 40, 42, 41, 42]
-----------------------------------
- [23:02]: Night check on the 4x4 tent.
--- Ahh yea! The garden is thriving!
--- Both Heady OG and TKO are still stretching upwards and the canopy is getting dense!
--- Wow! TKO has reached the top netting! Heady OG is just under the top netting.
--- Ca-Caw! Let’s go ladies!
- [23:11]: Checked the 3x3 veg tent.
--- The veg garden is looking great!
--- The bonsaied mother plants are still recovering from the heavy defoliation. But growth is looking a lot better than I would expect from such a large biomass reduction. Nice!
--- Cuttings are looking great as well!
- [23:13]: Time to swap the aloe water out!
--- Replaced each solo cup with a clean one filled with fresh RO water (1.5cups).
--- Plan to start using the propagation dome soon!
--- Going to let these soak for another day before transplanting into Coco Coins for rooting.
- [+02:05]: Quickly checked on the auto-watering system.
--- System is still charged and no leaks or kinks found in the tubing.
- [+02:08]: Checked the humidifiers.
--- Tanks are still full and no leaks found.
Day 06 - Saturday - 08/09/25 - Total Days: 118
-----------------------------------
Daily Averages ~[+01:00]
- Temps: 83.4°F [28.6°C]
- Humidity: 83.3%
- VPD: 0.67 kPa
- Soil %: [32, 50, 35, 52, 41, 40, 41, 41]
-----------------------------------
- [07:55]: Quickly checked on the 3x3 veg tent.
--- Looking great in the veg garden!
--- Mothers are all recovering nicely from the bonsai defoliation. Great!
--- Cuttings also look healthy and ready for transplanting!
--- Both Heady OG and TKO clones are looking perky and getting bigger!
--- Heady OG cuttings also looking green and rooting! I think. Will check for roots in a few days.
- [20:58]: Night check on the 4x4 tent.
--- Ca-Caw! This is why we grow! Wow!
--- Also hyped that the canopy is getting dense with nodal growth!
--- TKO has more tops stretching through the top scrog netting! Heady OG has not reached the net yet.
--- Stoked the 14in space in between the netting is filling quite nicely and just going to let everything grow!
- [21:01]: Checked the Ecowitt soil moisture sensor data:
------------------ [ 4x4 MAIN TENT ] ---------------
------ 29% - [CH01 FT » G30 - Heady OG BX1 #1]
------ 50% - [CH02 FB » G30 - Heady OG BX1 #1]
------ 34% - [CH03 BT » G20 - TKO]
------ 53% - [CH04 BB » G20 - TKO]
------------------ [ 3x3 VEG TENT ] ----------------
------ 40% - [CH05 BL » GR7 - Garlic Budder OG#1]
------ 40% - [CH06 BR » GR7 - Garlic Budder OG#2]
------ 40% - [CH07 FL » GR7 - Gorilla Goat #1]
------ 40% - [CH08 FR » GR7 - Gorilla Goat #2]
--------- Veg: 38% - 45% | Flower: 45% - 55%
--------- General: 30% [Dry] «| 45 - 60% [Moist] |» 70% [Wet]
- [21:05]: Checked the 3x3 veg tent.
--- Growth is still recovering quite nicely! This may be my solution to maintain mother plants longer between cycles.
--- Mother clone cuttings are also looking healthy and ready to be rooted!
--- Was originally planning on rooting all of the cuttings, but since the mother plants are recovering better than anticipated, just going to plant one of each pheno.
--- Let’s go!
- [21:23]: Filled a measuring cup with 1.5 cups of RO water.
------ Added a pinch of Quillaja Saponaria Extract [60]
------ Added 1/64tsp of Horticultural Aloe
------ Added 1/32tsp of Mycrobe Complete
--- Mixed the solution thoroughly.
- [21:26]: Dropped 4 Coco Coins into the measuring cup.
--- The coins immediately started to expand.
------ [» ~10 MINUTES LATER «]
--- Placed each fully saturated Coco Coin into half-cut solo cups.
- [21:41]: Using a squeeze bottle filled with Clonex,
--- Gently filled each pre-made hole with Clonex rooting gel.
- [21:43]: Time to plant the cuttings!
--- Using a pair of clean trimmers, made a final 45° cut.
--- Also stripped and scrapped some of the stem’s outer membrane.
--- To help with planting, gave each Coco Coin a squeeze to loosen the coco.
--- Made sure to insert each stem straight and snug with the tip about a 1/4 inch from the bottom of the Coco Coin.
--- Also secured the stem by pinching and pressing in the top of the Coco Coin.
--- Once each cutting was planted,
- [22:11]: Placed each pheno into the propagation dome’s tray.
--- Made sure to keep each clone properly tagged.
--- Added 1/4 cup of RO water to the bottom of the tray.
--- Placed the side extensions onto the tray.
- [22:15]: Misted the top of the propagation dome before covering the cuttings.
--- Vents are fully closed.
--- Also lowered the intensity from 5 to 1.
--- At the current light intensity (LV1), the PPFD is around 110 μmol/m²/s which gives a DLI of 7.13 mol/m²/d under an 18/6 light cycle
--- Will check back daily to cycle the air under the dome.
- [22:17]: Placed the extra mother cuttings back on the rack. Will try to keep these cuttings alive until the planted ones root.
--- Will need to change the water every day or two.
--- Also need to water the Heady OG and TKO clones.
--- Ca-Caw! Let’s go!
- [11:33]: Here are the starting initial watering ranges:
------ Heady OG BX1 » 261.4g → 301.2g
------ TKO » 240.9g → 301.4g
--------- General Solo Range: [Dry] «| [Initial Cup Weight] + ~55-100g |» [Wet]
--- All cups were last watered 3 days ago.
--- Took the starting weight of both clones before watering,
------ Heady OG BX1 weighed 257.0g
------ TKO weighed 259.7g
--- While on a scale,
--- Gently misted the straw mulch of both cups with RO water.
--- Focused on the straw and sprayed as evenly as possible.
--- Misted 10-20 sprays. Waited a moment, then misted again.
--- Made sure to reference the watering weights.
--- Repeated this process for both cups.
--- There was no runoff.
--- Also defoliated and removed the lowest growth on both clones.
- [23:03]: Took the saturated weight of both clones after watering,
------ Heady OG BX1 » 345.3g
------ TKO » 355.4g
--- Marked the final wet weight on the back of each cup. Also marked the watering date on the front.
--- Placed both phenos back into the tent. Have them now resting on the rack (on drip trays).
- [23:14]: Checked the humidifiers.
--- Tanks are still full and no leaks found.
Day 07 - Sunday - 08/10/25 - Total Days: 119
-----------------------------------
Daily Averages ~[+01:00]
- Temps: 83.9°F [28.8°C]
- Humidity: 83.6%
- VPD: 0.66 kPa
- Soil %: [49, 49, 30, 52, 43, 45, 46, 44]
-----------------------------------
- [08:02]: Quickly checked on the 3x3 veg tent.
--- Ooo yea! Looking great in the veg garden!
--- All mothers are still green and recovering. New growth is starting to develop and growth is looking healthy!
--- Quickly checked on the propagation dome.
--- All clone cuttings are looking green and healthy!
- [19:04]: Night check on the 4x4 tent.
--- Ca-Caw! Ah yea! Heady OG has reached the top scrog net!
--- TKO has several tops above the netting and she is raging with healthy!
--- Canopy is also showing more signs of pistil crowning and vertical growth seems to be slowing down. I think.
- [19:07]: Checked the Ecowitt soil moisture sensor data:
------------------ [ 4x4 MAIN TENT ] ---------------
------ 48% - [CH01 FT » G30 - Heady OG BX1 #1]
------ 49% - [CH02 FB » G30 - Heady OG BX1 #1]
------ 36% - [CH03 BT » G20 - TKO]
------ 55% - [CH04 BB » G20 - TKO]
------------------ [ 3x3 VEG TENT ] ----------------
------ 41% - [CH05 BL » GR7 - Garlic Budder OG#1]
------ 43% - [CH06 BR » GR7 - Garlic Budder OG#2]
------ 43% - [CH07 FL » GR7 - Gorilla Goat #1]
------ 43% - [CH08 FR » GR7 - Gorilla Goat #2]
--------- Veg: 38% - 45% | Flower: 45% - 55%
--------- General: 30% [Dry] «| 45 - 60% [Moist] |» 70% [Wet]
- [19:10]: Checked the 3x3 veg tent.
--- The veg garden is recovering beautifully!
--- Since the stretch seems to be slowing down in the main tent, going to give these ladies a little extra.
- [19:17]: Going to feed some Stash Blend for the first time.
--- This blend of beneficial microbes and mycorrhizal fungi also includes a bit of silica which should help during the bloom phase.
--- Also shout out to Mr. Grow It, Rob (from CLTV), and Pigeons420! Stay lifted!
- [19:19]: Filled a pitcher with 16 cups (1gal) of RO water.
------ Added 1/8tsp of Quillaja Saponaria Extract [60]
------ Added 1tsp of Stash Blend
--- Mixed the solution before pouring 6 cups straight into a pump sprayer.
--- Gave the sprayer a good shake before spraying the entire solution onto Heady OG’s straw mulch.
- [19:52]: Repeated this process again for TKO.
--- Depending on how growth develops, may start feeding these ladies weekly.
--- From personal experience, the veg phase can easily be grown with straight RO water.
--- Flower is probably the most important time to feed because there are more roots and the plants are trying to produce more biomass. I think.
--- Anyways!
- [20:10]: In the veg tent, repeated the watering process for all mothers (1 cup + 1 cup RO each).
--- Focused mainly on the straw (2 cups each).
- [20:13]: Checked the humidifiers.
--- Tanks are still full and no leaks found.
--- Wow what a grow week!
--- The difference in growth from Monday until now has been incredible!
[END OF WEEK 16]
Likes
16
Share
@420DeepGrow
Follow
Gracias al equipo de Sweet Seeds, Marshydro, XpertNutrients y Trolmaster, sin ellos esto no sería posible.
💐🍁: Big Devil Fast Version:
Atendiendo a las peticiones de nuestros amigos y clientes, presentamos la versión feminizada y fotodependiente de nuestra apreciada variedad Big Devil Auto (SWS15).
Para el desarrollo de esta variedad utilizamos nuestras mejores cepas seleccionadas de Big Devil Auto. Hemos eliminado el carácter autofloreciente de la Big Devil Auto hibridando estas cepas seleccionadas con un clon élite de características muy semejantes a la Big Devil Auto original.
El resultado es una planta muy vigorosa, de gran porte y de muy alta producción, con cogollos muy densos y repletos de resina. Desarrolla un fuerte tallo principal y largas ramas laterales. Conserva el aroma y sabor de nuestra Big Devil Auto original, muy dulce e inciensado.
💡TS-3000 + TS-1000: se usaran dos de las lámparas de la serie TS de Marshydro, para cubrir todas las necesidades de las plantas durante el ciclo de cultivo, uso las dos lámparas en floracion para llegar a toda la carpa de 1.50 x 1.50 x 1.80.
https://marshydro.eu/products/mars-hydro-ts-3000-led-grow-light/
🏠 : Marshydro 1.50 x 1.50 x 1.80, carpa 100% estanca con ventanas laterales para llegar a todos los lugares durante el grow
https://marshydro.eu/products/diy-150x150x200cm-grow-tent-kit
🌬️💨 Marshydro 6inch + filtro carbon para evitar olores indeseables.
https://marshydro.eu/products/ifresh-smart-6inch-filter-kits/
💻 Trolmaster Tent-X TCS-1 como controlador de luz, optimiza tu cultivo con la última tecnología del mercado, desde donde puedes controlar todos los parametros.
https://www.trolmaster.com/Products/Details/TCS-1
🍣🍦🌴 Xpert Nutrients es una empresa especializada en la producción y comercialización de fertilizantes líquidos y tierras, que garantizan excelentes cosechas y un crecimiento activo para sus plantas durante todas las fases de cultivo.
Consigue aqui tus Nutrientes:
https://xpertnutrients.com/es/shop/
📆 Semana 1:
Ha sido una buena semana, ella ha dado otro gran cambio en su lugar definitivo 😎.
La carpa está ocupada al 75% y comienza una floracion explosiva gracias a @Marshydro y @Xpertnutrients y @Trolmaster con esta gran genética 💪.
A partir de ahora se riega manualmente con las dosis recomendadas por el fabricante.

Likes
42
Share
@Ganjagrandaddy
Follow
DAY 7: Hi all. A nice steady week for the girls finding their feet in the pots and without their domes. I have the pota a good soaking to start them off on the right foot and get those roots busy too. The Girl scout cookies are both doing really good with their 3rd nodes happily springing to life. I managed to start l.s.t as soon as the 5th node is workable on them. Plan is to hold the 5th nodes horizontal while the other nodes reach an even canopy height. Then I will let the 5th node continue vertical to join the party as an equal to the others.
The Amnesia Haze are also very happy looking in their new homes and domeless. Not as developed as the Gsc but looking a nice shade of green. They are about 1.5 inches and on 3rd node growth too.
So far so good. Let's see what another 7 days can add.
Be well growmies.

Likes
32
Share
@DogDoctorOfficial
Follow
🌿 Permanent Marker – Pheno #2 | Harvest Report (Week 13 From Seed / Week 9 Flower)
A special chapter, done in a special way.
🌟 A Little Apology First…
My dear GrowDiaries family — before anything else, let me start with a small but sincere apology.
Because of the new file upload limitations, I had to divide the harvest + trim + drying reports into separate entries. I wish I could show everything in one flow, but I didn’t want to risk losing photos, videos, or important details.
So today’s update is fully dedicated to Pheno #2, and next week we’ll honor Pheno #1 with the same love and detail.
Thank you for your understanding — and thank you to @GrowDiaries for constantly improving the platform. 💚
🌸 HARVEST – Permanent Marker Pheno #2
(The compact queen who surprised us all.)
Where do I start?
This girl… wow. She stayed compact, she stayed green, she stayed loyal to her structure — and yet she exploded with floral terpenes and resin in a way I did not expect.
She was also, in the end, the fluffier of the two phenos — but fluffy in a good way.
Fluffy with volume, aroma, and resin. Not weak — not airy — just beautifully textured.
The Reality Check — Bud Rot
We did find one single bud showing a small spot of rot.
This was expected considering the heat and humidity battles of the room. Others in the room showed more issues — but she held incredibly strong.
Nothing major — nothing that affected quality.
One bud tossed away, the rest? Absolutely perfect.
Just honesty and transparency here, as always.
Drying Process
We dried her whole plant, hung upside down, untouched for 14 days in a stable environment.
Two weeks later, she was crispy on the outside, perfectly cured inside — exactly how I love it.
✂️ Hand Trim – The Love Work
Every leaf removed by hand.
Scissors, fingers, patience, and care — nothing machine-handled, only craft.
She trimmed beautifully, leaving behind full, round, fragrant buds.
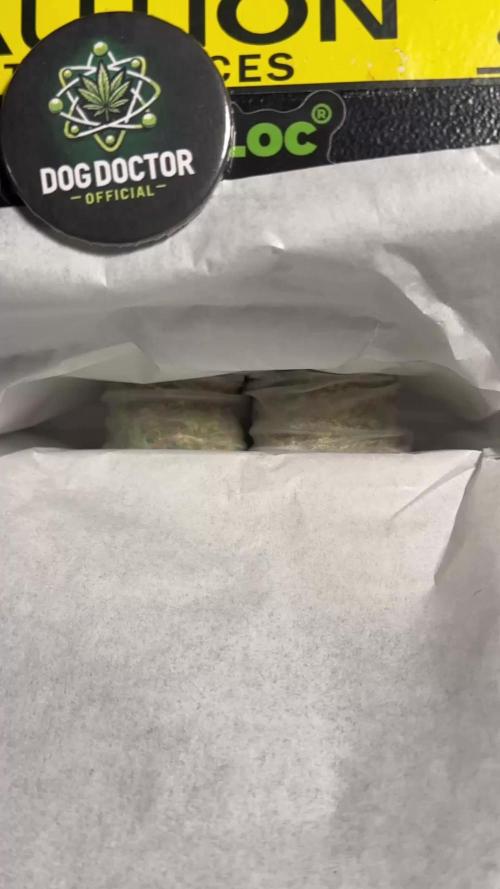
Final Weight & Cure
After trimming and preparing:
➡️ 212 grams dry & cured
Official, stable, clean weight.
A fantastic result for a compact plant.
Everything went into Grove Bags, sealed, labeled with Zamnesia strain tags to keep everything organized for the long cure.
She cured for 2.5 months, and my love…
She became magic.
🌈 Flavors, Aromatics & Smoke
The floral terps are loud, bright, elegant.
She gave me beautiful finger-ash, smooth smoke, and on the press — oh my god…
Low-temp extraction with a mix of her and a blueberry strain produced an incredible rosin, clean and shimmering.
This pheno is no joke in the press.
🌱 A Quick Recap From Seed → Harvest
For everyone just joining:
Germination — fast and healthy
Veg — strong structure, compact frame
Flower — she stayed short but exploded in resin
Heat-resistant, even in tough conditions
Organic super soil + Aptus program → she LOVED it
ICL inner-canopy lighting boosted depth and resin
Stable genetics from start to end
Next week we will honor Pheno #1, our tall queen reaching for the moon.
🏆 DOGNABIS CUP — A Gentle Push to Everyone
The Cup is now officially moving.
Boxes have arrived.
Seeds are sprouting.
Diaries are appearing.
Magic is happening.
Deadline:
⏳ January 31st — plenty of time to grow peacefully, without rushing.
I invite everyone to:
visit each other’s diaries,
learn from each other,
help each other,
celebrate each other.
This Cup is not about competition —
it’s about community, growth, and joy.
💚 Thank You, From the Heart
A massive thank you to:
Zamnesia Seeds
Ocogenectica Seeds
Aptus Holland
ThinkGrow
Future of Grow
Skunk Magazine
FOG
Grove Bags
DaggaDNA
Popeyes Passion
Imperial Seeds
TrolMaster
And of course — to the community.
To the growers, the watchers, the learners, the lovers, and yes — even the haters.
You’re all part of the story.
You make the journey richer.
Come join me on Instagram, and visit the Cup diaries — the links are already attached there for you.
Dognabis#09P - https://growdiaries.com/diaries/285981-grow-journal-by-sadhus
dognabis #15 Dognabiscup Permanent Maker- https://growdiaries.com/diaries/288896-grow-journal-by-crazystrahle
Dognabis#16P - https://growdiaries.com/diaries/285519-grow-journal-by-fabisfinest
Dognabis#017P - https://growdiaries.com/diaries/285851-grow-journal-by-highgrower0711
DOGNABISCUP #18 P. - https://growdiaries.com/diaries/265751-grow-journal-by-develgrow
DOGNABISCUP #18 A. -https://growdiaries.com/diaries/285549-grow-journal-by-develgrow
🐺 Dognabis#19A 🐺 - https://growdiaries.com/diaries/289566-grow-journal-by-marijuanaut?lnk=2066296
Dognabis Cup (#21) P- Photoperiodic - https://growdiaries.com/diaries/285531-grow-journal-by-mrs-larimar
Dognabis#22A https://growdiaries.com/diaries/287996-grow-journal-by-daves-garden710
Dognabis #22P https://growdiaries.com/diaries/287990-grow-journal-by-daves-garden710
Dognabis 035 Permanent Marker (Zamnesia) - https://growdiaries.com/diaries/278319-grow-journal-by-dogdoctorofficial example diary not entering
Dognabis #811A Jealousy Diesel Auto https://growdiaries.com/diaries/287216-grow-journal-by-philhsy
📲 Don’t forget to Subscribe and follow me on Instagram and YouTube @DogDoctorOfficial for exclusive content, real-time updates, and behind-the-scenes magic. We’ve got so much more coming, including transplanting and all the amazing techniques that go along with it. You won’t want to miss it.
• GrowDiaries Journal: https://growdiaries.com/grower/dogdoctorofficial
• Instagram: https://www.instagram.com/dogdoctorofficial/
• YouTube: https://www.youtube.com/@dogdoctorofficial
⸻
Explore the Gear that Powers My Grow
If you’re curious about the tech I’m using, check out these links:
• Genetics, gear, nutrients, and more – Zamnesia: https://www.zamnesia.com/
• Environmental control & automation – TrolMaster: https://www.trolmaster.eu/
• Advanced LED lighting – Future of Grow: https://www.futureofgrow.com/
• Root and growth nutrition – Aptus Holland: https://aptus-holland.com/
• Soil & substrate excellence – PRO-MIX BX: https://www.pthorticulture.com/en-us/products/pro-mix-bx-mycorrhizae
• Curing and storage – Grove Bags: https://grovebags.com/
⸻
We’ve got much more coming as we move through the grow cycles. Trust me, you won’t want to miss the next steps, let’s push the boundaries of indoor horticulture together!
As always, this is shared for educational purposes, aiming to spread understanding and appreciation for this plant. Let’s celebrate it responsibly and continue to learn and grow together.
With true love comes happiness. Always believe in yourself, and always do things expecting nothing and with an open heart. Be a giver, and the universe will give back in ways you could never imagine.
💚 Growers love to all 💚
Likes
8
Share
@KannaKullektiv
Follow
arvest Report – Orange Apricot Glue XL Auto
The grow is finished. The Orange Apricot Glue XL Auto had a tough spot right from the start. Growing in the shadow of the large Black Muffin photoperiod plant and getting only 12 hours of light instead of the usual 18–20 hours for an automatic, she couldn’t fully unfold her potential.
Still, she pushed through and developed a nice layer of trichomes. The buds smell and taste great, offering a smooth mix of citrus notes and sweetness.
Considering the conditions, I’m happy with the result.


Likes
17
Share
@GWSD82
Follow
Well, it's been another busy week in the garden, and things are getting interesting. The coolest thing about a mixed run is seeing all the differences between the strains, all growing at different speeds, having different structures, different shapes..... It's gonna look awesome when the tents are in full flower. And with them all at slightly different stages, it's kept me with things to do every day.
Some highlights from the week:
MBAP #1 - Fimmed, LST'd and defoliated on day 16
MBAP #2 - Fimmed, LST'd and defoliated on day 17
Walter White - I normally fim my autos, but given that this plant had the 3-way node mutation, I decided to top and see if we can get some nice 3-way main cola action going. Topped on day 18.
SOH #1 & #2 - Haven't even started training these yet due to size, and they are already throwing pistils!! Both first started to show signs of sex around day 16. #1 had clearly defined pistils by day 18, and #2 had them the next day. I think these may be some fast finishers, never seen them go into pre-flower this early. Will raise a grow question to see if anyone else has any experience of this.
BGS - Fimmed, LST'd and defoliated on day 20
All the plants have started some form of training except the PP and 2 x SOH. The SOH have already begun sign of going into pre-flower. Given their small stature I'm inclined to simply stick to LST and avoid high stress techniques, so I don't think I'll be fimming or topping these ones. All plants are still on the same feeding schedule for now, but I think I'm going to have to start independent schedules this week, as they are clearly developing at different rates and will have different nutrient requirements. But for now, the current feeding looks like this:
Nutrients
~~~~~~
CalMag: 0.95ml / gallon (0.25ml / liter)
MegaCrop: 3g / gallon (0.79g / liter)
Total EC: 1050
PH: 5.7
Tasks for the week ahead - get the MBAP and SOH onto autopots. This will cut my manual watering by more than half, saving time, sanity and my marriage :)
Happy days. Catch you all in a week....

Likes
2
Share
@GoodTimesOrganics
Follow
Hi liebe Community and Welcome Back! 💚🌱 We proud to present the second Strain from Good Times Genetics!
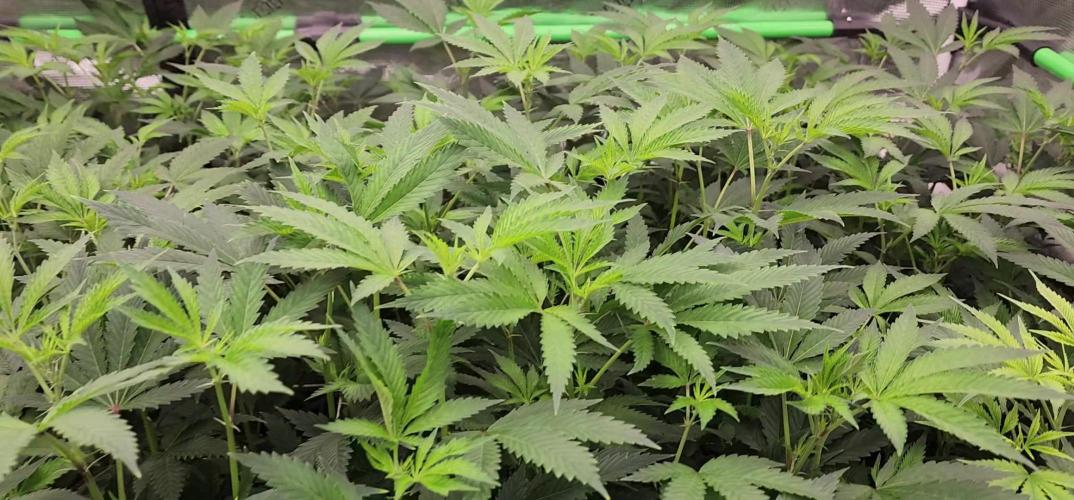
Die Wuchsform der Pflanzen wirkt bis jetzt sehr homogen, es ist zu beachten, dass natürlich die einen etwas schneller wachsen, wie die anderen.
Auch die Stielbreite unterscheidet sich etwas.
Insgesamt wirken die Jungpflanzen allerdings sehr kompakt, was eine gewisse Indica Dominanz vermuten lässt.
Das ist auch so gewollt.
Ich werde immer wieder verschiedene Pflanzen der gleichen Zucht dokumentieren und nach der Geschlechtsbestimmung dann Herausfiltern, welche zwei Pflanzen für die Fertigstellung des Diaries in Frage kommen.
Die Wachstumsbedingungen im Growzelt sind weiterhin am Optimum und Stabil:
———————
🌞 Temp: 23°C
🌚 Temp: 20 °C
💨 RH: 58%
VPD: 0,86 kPa
😎PPFD: 330 mqm
———————
Stay Tuned! 💚


Likes
6
Share
@Dengued
Follow
Day 63...buds fattening up nicely...currently experiencing worst pollution on the planet with AQI of 300+ for most of the week which i fear is affecting growth..,..the buds look a lot browner in the pics, than i reality.. due to the post-apocalyptical tinge to the sky as the sun sets, though the smog


Likes
18
Share
@valiotoro
Follow
Hello everyone, all good for this week 😎
They grow fast and with a beautiful green colour on the leaves!
In this grow i will be testing out Plagron Nutrients and Mars Hydro FC-E6500
Vanilla Latte from Humboldt Seed 🥛

Likes
8
Share


Likes
34
Share
@marihoochi
Follow
Now In Week 3 of Bloom and are getting the pom pom's😍. First time giving them bloom food although my Runoff EC was too low in most pots; I'm thinking this is cause I've previously leached the medium? I hope I soon get this EC Runoff closer to 1800 to 2000. I have 2 plants that I stunted that are now 18" tall they are the shortest, and the most tortured😣 with high salts; most plants are 33" high now. The colour is much more natural and not so leathery looking to me. I had to adjust the Bloom food & add more in order to get me at 1800. I'm going to feed more frequently and hope this helps to bring up the EC runoff on the pots which are low while not overdosing the others.
OCT 2nd & 3rd- Inputs: 6.3PH - 20.3 & 19.8 Temp - 1.8EC
Runoffs:
Pot 1 PH 5.5 Temp 20.6 EC 2.1
Pot 2 PH 5.9 Temp 20.6 EC 1.7
Pot 3 PH 6.0 Temp 20.4 EC 1.7
Pot 4 PH 5.5 Temp 20.8 EC 1.6
Pot 5 PH 5.4 Temp 20.2 EC 1.7
Pot 6 PH5.9 Temp 20.8 EC 1.8
Pot 7 PH 5.8 Temp 20.3 EC 1,9
Pot 8 PH 5.3 Temp 20.9 EC 1.5
Pot 9 PH 5.8 Temp 21.7 EC 1.4
Pot 10 PH 5.3 Temp 20.7 EC 1.9
Pot 11 PH 5.7 Temp 21.2 EC 1.7
Pot 12 PH 5.8 Temp 21.5 EC 1.4
Pot 13 PH 5.8 Temp 22.4 EC 1.5
Pot 14 PH 5.5 Temp 21.8 EC 1.6
Pot 15 PH 5.6 Temp 22.6 EC 1.7
Pot 16 PH 5.9 Temp 21.8 EC 1.5
Because of my trays I can water 5 Plants at a time so this monitoring takes awhile but I'm getting better at it😄
OCT 8 Inputs PH 6.3 Temp 20.8 EC 1.8 -- Run off was 1.7, 1.8, 1.9, 2.0
*EC of well water is 0.9 EC or 450 PPM.
