


Likes
Comments
Share



Likes
34
Share


@Ashbash
Follow
Just water the past week to save on nutes.
I think this is the final week for the two Green Gelato plants. I will post trichomes later but I see at least 5 percent amber but I'll have to make sure it's not sugar leaves.
Royal Gorilla is still waaaaaay behind, I'm gonna chuck a couple of autos in while that finishes since they don't mind the different lights too much. Not sure what I'm gonna grow next proper tho lol. Thinking something from Barney's again.

Likes
25
Share

@BettyFlores
Follow
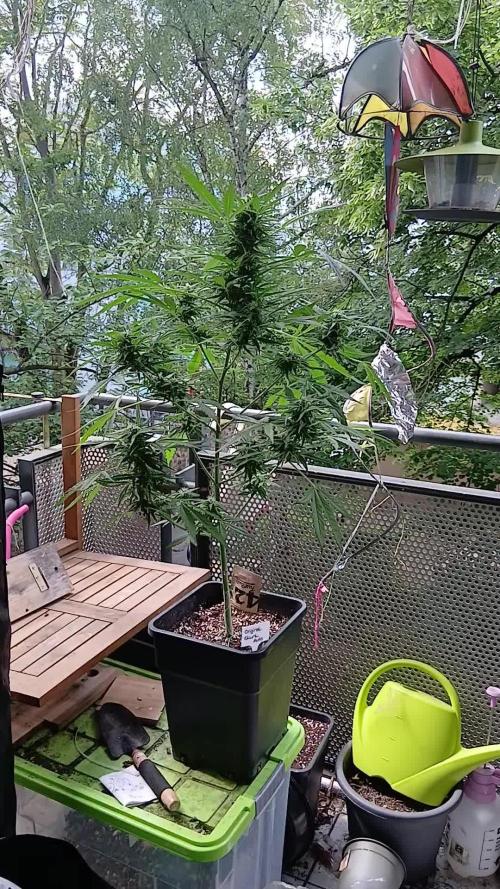
14.05.2026 Trotz der wirklich niedrigen Temperaturen (wir haben hier fast Wintereinbruch und das Mitte Mai 😅), macht sich die Original Skunk von FastBuds wirklich prima! Nicht mehr lang und ich werde sie ernten können. Vorausgesetzt es kommt nichts dazwischen wie Sturm, Hagel und eisige Temperaturen. Sie riecht mittlerweile sehr stark und man kann sie im Ambiente wahrnehmen 😅. Ich freue mich auf die baldige Ernte.
Happy growing 🌸💜

Likes
10
Share

@therealgrowmie
Follow
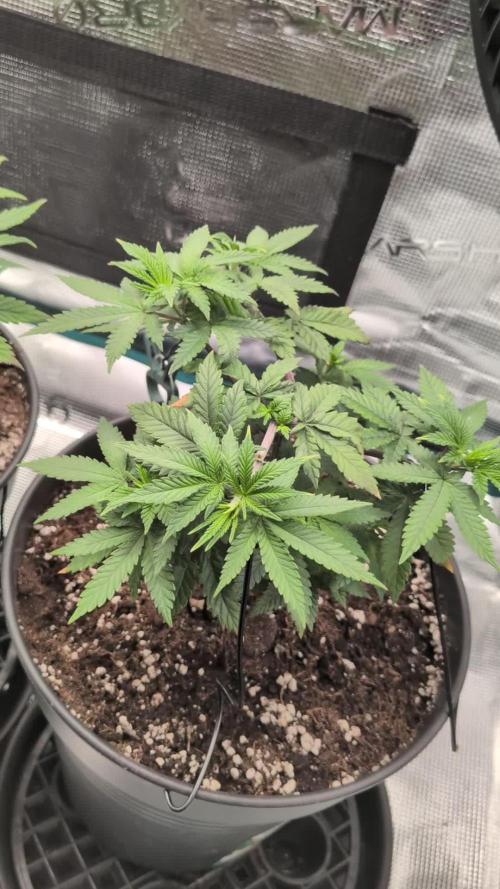
We’re very much back with three relatively healthy plants, even though they’re a bit stunted. I clipped a few leaves here and there, applied some LST (because I just can’t help myself 😅 probably not really necessary), and have now topped them for a second time.
At this point it’s all about keeping conditions stable and letting them grow out. Onwards and upwards, keep on growing. 🌱
Stats so far:
💧 Watering: Every third day
🌡️ Temp: 26–28°C
💦 Humidity: 70% RH
📈 VPD: ~1.13 kPa
💡 Light: ~600 PPFD
Likes
8
Share




Likes
35
Share


@Paulolo03
Follow
DAY 27, most of the plants are flowering, LST works so well. I'm worried because some of them seems to have advance, I don't think the buds should be that big for their age, maybe the heat stress made them flowering faster ?
Moreover, some plants have their lower leaves turning yellow, I don't know what it is, give them nutrients once every 2 watering and I'm being very light with the amount of nutrients.
Ordered 2 cooltubes, one for each light, it will help to cool down the room, gotta pick them up at the store and use them today.
DAY 33, I followed your advices guys and added a bit of each nutrients for their deficiencies, don't know exactly if it was Ca, Mg or N deficiency but I can tell how better they are ! Water pH between 6,2 and 6,5 with 3acid down, hygro 55%.
Because of the lower hygro for flowering stage, temp is going higher, I'll try my best to take care of them because another heat wave is coming... Thinking about reducing the light time to 12/12


Likes
38
Share


@Cariboo_OG
Follow
Utopia Haze is a rare heavily sativa dominant hybrid (90% sativa/10% indica) strain created through back crossing Brazilian Sativa strains. This tasty little bud took home 1st Place for Best Sativa in the 2008 High Times’ Cannabis Cup and for good reason – with its potent 18-22% average THC level and long lasting cerebral effects, Utopia Haze is one powerhouse smoke. The Utopia Haze high comes on soon after you finish your first toke, hitting you with a strong cerebral lift that infuses you with a sense of hazy relaxation.
Type: Feminised/Photoperiod
Cultivation: Indoor/Outdoor
Flowering Time (days): 70-75
Indoor Yield (g): Up to 650
Feminised Outdoor Harvest Month: October
Feminised Outdoor Harvest Month Week: 3rd-4th week
Aroma: Citrus, Woody, Pungent, Mint
Effect: Cerebral Lift, Hazy Relaxation, Sleepy
Welcome Everyone to the Final Entry of my Utopia Haze Grow !
There is so much to discuss ! I have been extremely busy as of late trying to get this Harvest together, but i am happy to have it here for you now !
I Seriously under estimated the amount of time, help from others, and my own necessary skills to pull this off.. and i still kind of screwed it up lol !
But its worth noting i have never actually done this before and trying to document it during....was extremely hard.
It is next to impossible to work an iPhone with rubber gloves on !
First I want to discuss everything step by step so before you jump straight into the comments on how the end product is so small in "quantity"
Rest assured i am happy with its"quality"...and thats all that matters to me because Life is a journey not a destination! and i have learned so much from this grow that I couldn't be any happy even if i messed some things up :)
But at the very least I hope you read through this entry in its entirety with an open mind and focus more on the process, rather than just the outcome!
I ran out of Ice & i was only able to wash three times..(normally I've heard you should go sometimes 5-6 washes)
Preparation is Key & things will be much better next round :)
Photos 1-22
These are pretty self explanatory but for those of you just tuning in now.. this is what happens to a very happy plant when you don't have the necessary tools to monitor key components of growing cannabis.. Ph, as well as EC levels play a very key role in the outcome of your grow lol that being said I was just able to save this plant by purchasing both tools but that doesn't mean the plant didn't suffer because of the prior events.. This was a Huge reason behind me choosing to turn this harvest into what i would consider
"Solventless Hash Rosin" from "Ice water extracted Bubble hash".
Pictures 23
The idea here is the process of using "fresh Frozen Cannabis" this has been discussed many a time online on such sites as instagram and here on grow diaries as well.. I personally have Never tried the process so i decided to try it out and make a judgement for myself..
Video 24
The Cannabis has now been in the freezer for 72 hours making it very well frozen.. as you can tell i struggled getting it all into the 25u Screen Wash Bag. One thing of note i would do differently is i will de-stem my next batch as i also believe this played a part in the amount of plant matter that escaped through the sieves.
Photo/Video's 25-28
The idea here is "ice water Seiving" & especially with the bags that I am using here that are only have screen material on the bottom portion of the bag it is very important to have spaces in-between the screens to allow the water to pass directly through the screens into the bottom bucket with the least amount of resistance.. because the hash is so extremely temperature dependant if it gets warm on the side of the bag.. it will stick there and not make it to the bottom to become use able product..
29
You do not need to use as much Ice as i used here lol... the idea is to keep everything very cold..i certainly achieved that but at the sacrifice of using so much that i ended up grinding product and producing "contaminants" but in the end they are just plant matter that i would be smoking when i rolled up my joint either way so.. I'm not super disappointed..
But it should be noted that what you want to achieve here is a Layering effect where you have the wash bag between two small layers of ice while the "water current" washes the Trichomes away allowing them to be separated by the screens setup below :)
Before Starting the machine you should allow some time (i.e.;10-12minutes pre soak to allow the product to become saturated) before the first cycle.
By video 32 I have just ran out of ice lol..
Video 33-34
Here I have a tip for you.. to separate the screens that you sieve through.. cut 5 gallon buckets to stretch them across nice and tight.. it'll make scooping your Bubble that much easier ! i learned this from the many "Frenchy" videos I have watched :)
Picture 35
Here in lays the problem for most people.. drying your hash without loosing vast amounts of "Terpenes" whilst also stay ever vigilant against mold !
Thanks to all those videos I've watched on youtube.. id like to think this was one of my most successful parts of this process..
Things to Note; Terpenes start to seriously evaporate at temperatures 68F or 20C
you need to stay as cold as possible whilst bringing the Relative Humidity in the space down into the 40-30% to stay away from that nasty mold !
I used my cold storage room in the basement.. with a dehumidifier running to keep the space at 45% RH & staying at a constant 15c.
All while spreading the hash as thin as possible across parchment paper, on top of the white screens with a fan moving air across both sides of the paper.
Pictures 36-38
These are some macros i took in the middle of my drying session I fell in love with the colour.
Yes i know the black spots are plant material but they will get caught when i bag the hash & squish the oil out.
Thing to Note; at this stage it is important to ensure you 'micro plane" the hash down as fine as you can whilst staying weary of the temperature... any "chunks" will hold pockets of moisture.. that lead to potential problems..ie; mold ...
Picture/Video 39-41
Successfully planed bubble hash ready to be bagged and Squished !
Picture 42
Ive decided to follow Pedro.. from Pedros Grow Room and double bag to be on the safe side so i don't have any blow outs.
So thats One 25u bag inside one 160u bag ! :)
Pictures 43
This is almost 3 grams of the bubble hash from above, already melting in the bag.. this is where i ran into trouble again lol things started getting to warm in the house and i was only able to get one of the three squish's i did on video :( things started getting sticky.
Picture 44
This is basically just a photo of the equipment I'm using; 3x5 LowTemp Cage in the frame I built myself, with a 20Ton bottle jack.
Something to note here is this is an older Lowtemp model with only a single heating zone which is which i have it closed here heating Both sides of the press :)
As well as the importance of having adequate pressure on your plates.. my rig is very overkill for the size of hash bags..lol
Video 45
Here is the lovely press video.. its didn't quite work the way i wanted either lol my directional folding wasn't quite tight enough for a big "drip" :)
&the Press was set to 65°c
Photo's 46-50 are pretty self explanatory :) I had a blow out.. but still managed to pull an 80% return from the hash once squished...& yes it tasted amazing :)
Was it worth it in the end... that could be debated.. for some..i understand..its not your thing, but for those of us that are interested in making our own concentrates.. free from Solvents...
I wouldn't make it any other way :)
If even ONE of you reading this diary finds it helpful to reference for ANYTHING.....even if its "what not to do" ill consider it a success !
Thanks again for tagging along on this garden adventure.. its been one heck of a journey !
Much Love from B.C. Canada,
Until Next time,
Cariboo

Likes
14
Share


@Momgrowsthechronic
Follow
So it’s the end of Week 5, Day 35 for the Sweet Seeds Gorilla Girl XL auto flowering grow. I have come to the conclusion that these four plants are not going to be XL after their pre-flower stretch. Overall the plants are healthy but the prolonged low humidity and temperatures have robbed them of the vigorous growth documented in my previous Sweet Seeds diary (Cream Mandarine XL Autos). I am disappointed that this will most likely be an XS harvest but a tiny quantity of quality bud is better than nothing. I gave them their first feeding of GHE FloraNova Grow fertilizer at a rate of 1.25 ml/gallon and this is 1/4 of a full dose that would be given to a photosensitive strain. I am still watering every fourth day at a rate of 2.8 litres per plant or 0.7 of a litre per plant per day. I will only be using the fertilizer every other watering or every eight days. That’s about it for this update and on to…
Mom’s Tip for Week #5- To Tuck or Take? The when, where, why and how to defoliate Autoflowers successfully…. Lets start with some basic Biology- Photosynthesis is the process by which green plants take in sunlight, water and Carbon Dioxide and transform it into energy in the form of sugars that feed the plant and make it grow. So essentially, every fan leaf on your plant is a solar panel collecting light and therefore valuable in it’s own right. I always try to tuck my leaves if possible before considering removal as my plants need all the energy they can get to power through until harvest. But sometimes tucking isn’t enough or just isn’t an option anymore so here are my suggestions for taking the fan leaves from your Cannabis plants if needed.
When- defoliating Autos can be done anytime throughout the grow although it’s generally not done within the first 3-4 weeks. The plants are usually quite small and those early weeks are valuable growing time that these plants simply can’t afford to miss. This is when I find leaf tucking to be most valuable, allowing the plants to keep what few solar panels they have while also allowing the grower to position the leaves so that they are out of the way. I personally find that I defoliate my plants the most over the final 3-4 weeks of the grow as foliage is dying off on it’s own by that point and a few less leaves at harvest time is always a good thing! Of course anytime you see dead/dying or diseased foliage, it should be removed as needed throughout the grow.
Where- defoliating Autos is a delicate balance due to their small size and short lifespan. If my plants are healthy, thriving and tucking is no longer an option, I will only remove fan leaves if they are covering/blocking new growth or potential bud sites. As the plants age and the foliage begins to die off naturally, I tend to remove the oldest, lowest growth first working my way up the plant as needed until harvest.
Why- defoliating Autos is done for a few basic reasons but only as an extreme in my garden when all else fails. Removing certain large leaves will allow more light into the lower portion of the plant’s canopy reaching young branches or potential bud sites. As the plants age, it also helps with increasing airflow around your swelling buds thus reducing your risks for mold and fungi in humid grow environments. Removing any and all dead/dying or diseased foliage is absolutely necessary in keeping your plants healthy and the grow room clean and pest free.
How- defoliating Autos is simple if you keep it simple. Only remove what you absolutely have to and use a sterilized set of sharp pruners for a clean, controlled cut. As the plants age and the foliage begins to die off naturally, just wait. What doesn’t fall off on it’s own will snap off with a simple twist of the leaf’s stem. If the leaves don’t come off with ease, they’re just not quite ready yet so be patient.
Be mindful that removing the solar panels from your Cannabis plants is always risky business but Autoflowers are even more challenging in their own way. Smaller plants with a lower leaf to bud ratio and a short lifespan means less room for error so paying close attention to the when, where, why and how is crucial for successfully defoliating Autoflowers. Tuck if you can, only take what you absolutely have to and of course- never take more than 25% of your plant’s overall foliage at one time as this can be devastating or deadly to even the healthiest of plants. Allow your plants to take the lead and they will show you which leaves are ready to go- at what time, all on their own just as nature intended.
Likes
89
Share

@squalino
Follow
🌿 Journal de Culture : Mac 1 Autoflower – "Bee Happy" 🐝 (Semaine 12)
#Dryrocket
Nous y voilà, l'avant-dernière étape avant le grand jour. Ma petite abeille a reçu son tout dernier apport de nutriments la semaine passée et est entrée officiellement dans sa phase finale.
Un Grand Merci
Un immense merci à @mia_biotabs pour avoir été présent à chaque étape de ce run à travers ses conseils. Un grand merci également à @Dryrocket : l'appareil va bientôt arrivé et est prêt sera pret à entrer en action pour le séchage, j'ai hâte de voir le résultat !
Merci enfin à toute la communauté qui vibre avec moi depuis le premier jour.
Paramètres de Culture & Climat Extrême
Taille : Stable à 91 cm.
Climat : C'est le gros point noir et la principale bataille de cette fin de run. La chaleur dans la cave est devenue excessive avec de grosses hausses de température ces derniers jours. J'atteins des pointes compliquées à 29 - 30°C. Malgré ces conditions loin d'être idéales, "Bee Happy" fait preuve d'une résistance remarquable et encaisse le coup sans broncher.
Humidité : Toujours stabilisée à 50% pour éviter tout problème de moisissure sur les fleurs compactes en fin de vie.
Gestion de l'eau :
Le rinçage est entièrement géré par l'Autopot. Le réservoir a été basculé à 100% sur de l'eau claire pour nettoyer le substrat et pousser la plante à consommer ses dernières réserves.
État des Buds & Observations Visuelles ❄️
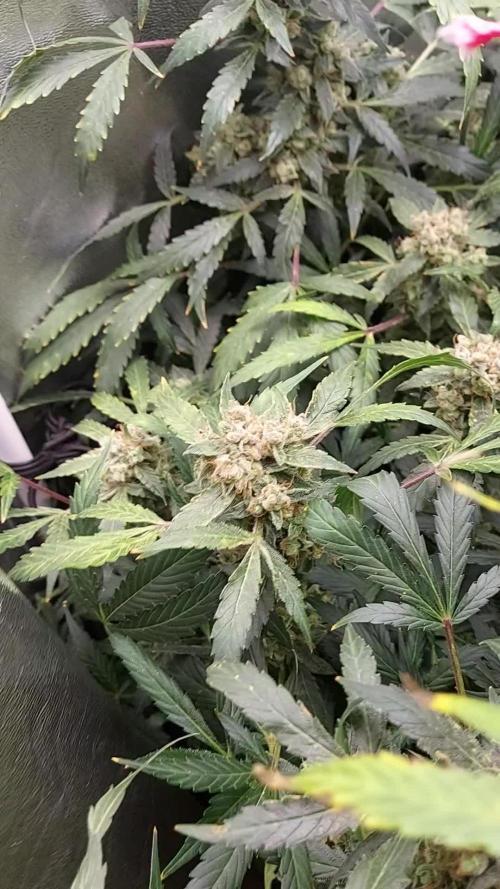
Les têtes sont devenues extrêmement denses et sont littéralement blindées de trichomes. Le manteau de résine est lourd et collant.
En jetant un œil attentif aux détails des photos, on constate que le cycle se termine en beauté.
Malgré le manque de contrôle global que je regrette sur cette session (entre la colocation serrée avec Spirit, les caprices de pH du bulleur au début et les températures actuelles de la cave), la génétique a fait des miracles. Les calices sont gonflés au maximum, formant ces fameux blocs compacts typiques de ce phénotype "chou-fleur". La sénescence commence doucement à s'installer sur les pointes et les petites feuilles, signe que le rinçage à l'eau claire fait son travail en profondeur et que la plante puise ses derniers retranchements.
Cap sur la récolte ✂️
Le compte à rebours est lancé. Les têtes sont dures, la résine est mûre, et le rinçage libère les derniers arômes de la plante. La semaine prochaine sera celle de la récolte ! ---
Merci à tous d'avoir suivi ce run mouvementé mais ô combien riche en enseignements ! Rendez-vous dans sept jours pour le point final, la coupe, et le passage officiel dans le Dryrocket. Restez connectés, le meilleur reste à venir !



Likes
3
Share

@00110001001001111O
Follow
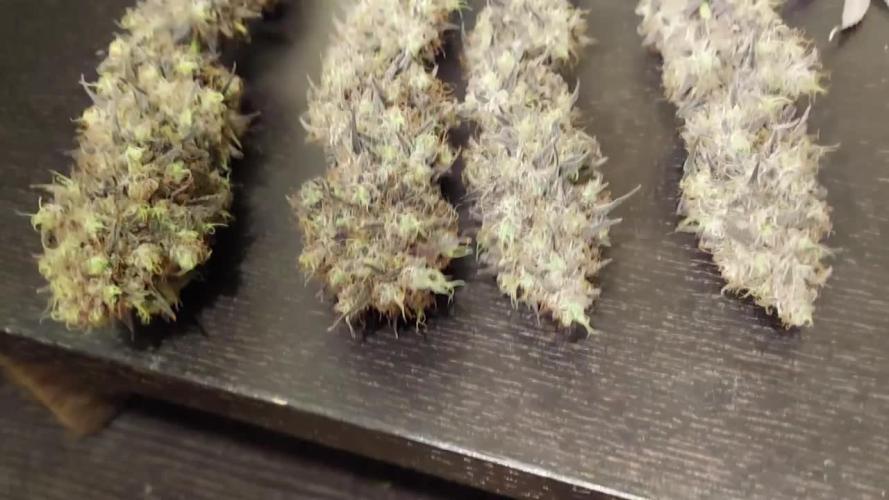
Gorilla Glue #4 x White Widow from Expert Seeds
Harvested 2020 - Solo Cup grow
While I am not a fan of this plant in hindsight with greater expereince, it was definitely a robust plant. This thing was nearly bursting through the solo cup by the end. Unfortunately, they were really late announcing an extension to the contest at the time and I had already harvested a bit early to make the original cutoff date. ~40 grams and it needed another week or so.
I wasn't trying for max yield. I just trained it into a slender candelabra type shape and called it a day.
Hindsight -- If I new then what i know now.... I'd shave off 2 weeks from vege and it'd end up the same size. This also would have allowed it to finish before the contest end date. I'd also do my normal addition of vermiculite or perlite to the promix. I was afraid of needing multiple waterings per day as it grew out, so i went with pure Pro-Mix HP, which is only ~20-25% perlite.

Likes
36
Share


@rhodes68
Follow
9/28 Week 5 and hanging onto veg by a "hair"
She is transitioning so doubt the week will be veg for long we will see.
Introducing Bloom tonight at 2.5ml/gal increasing from there till 50%
9/29
Still technically in veg as no colas are forming yet but any day now.
Will continue to increase Bloom while decreasing Grow WHEN it looks needed.
Currently 6ml/gal each of Grow and 2 ml/gal each of Bloom
Next step will be 5 each of Grow and Bloom keeping that EC kind of stable.
Update: Her stretch has begun so should be seeing some real changes now. 3 inches in one day.
pics
10/1
Pic
In transition fully, growth tips getting hairy and changing
Few more days be in full flower
The transition feed is as shown 50% grow and bloom
10/2
27" not quite into flower completely
10/3
dropping lights to 20 hrs she seems to healthier with that schedule
Getting a little worried about her stretch, increasing Si 3 fold and dropped lights
Hit 29 inches at lights on.
Likes
14
Share


@PREPPYPUNK
Follow
24 hrs of darkness begins. amber trichomes are hard to see under certain lights and through glasses, i dumped the glasses and moved each one to a different room and sure as shit "amber trichomes!". I just realized a jewelers lupe with a light works better without looking through reading glasses. 3 yrs of crap harvests and it aint over yet but if i get these dried at 60rh @ 70 deg F for 6-10 days APPPROX! CAREFUL FOR MOULD, and i got the 32 oz jars, belvidas and humidity guages for cure. as long as i can do that right, man things are really looking good. PRINCETON CAN USE A GUY LIKE JOEL! We'll see. I am starting another diary for the 2 gorilla glues that are growing really slow. I was going to dump them but i kept putting it off and slowly the buds started stacking up. I would love to know if this is common with all seed vendors and not just mine and why its happening like this. More important, I GREW BIG POTENT BUDS BY MYSELF!!!!!!! PRETTY HAPPY ABOUT THAT. HOURS AND HOURS OF VIDEO LESSONS, GROW DIARY QUESTIONS AND LOOKING AT OTHER PEOPLES GROWS, CONDITIONS PRODUCTS, EQUIPMENT AND RESULTS. FOR ME, GROWING WEED INDOORS IS A BIG FREAKING JOB AND I REALLY LOVE DOING IT FOR SOME REASON. IM HOOKED.

Likes
1
Share


@Cannabees_grows7691
Follow
The light I had wasn’t strong enough but it worked. Definitely am happy I upgraded to a 720 watt light.

Likes
46
Share


@Mr_Motalovah
Follow
Hello growers and tokers! 👋 👩🌾 🧑🌾.🔥💨
It's my first harvest on this community and I'm loving it.
Everyone always ready to help each other and have great feedback.
Tracking my grow on here has made it way easier.
There were times that I misplaced notes or forgot what I did or when with a certain strain and all I had to do was come on here and check it.
Also motivated me take more pictures and do more logs. All out great site. Don't know how I haven't found it earlier.
HIGHLY recommend for all growers.
The grow cycle went pretty smooth.
She's easy to grow and flowers early so you can't do much training. That being said it's great for beginners. 👌
Had no problems with pests on these, while on the other plants (none cannabis) in the balcony I had issues with spider mites.
They grew better than expected given the few hours of direct sunlight they received.
Results were good, I was expecting 10-15 grams per plant and ended up with a tad bit more.
Drying went a bit fast because there were few buds.
I probably could have took it down a few degrees as well.. my fault on that part.
They dried in 4 days, they've been curing for 10 days.
I normally test them after 15 days but they smelled so good I had to try them.
Smell: Lovely earthy, woody, slightly like diesel. Quite pungent for being autos.
Taste: Just as it smells.. leaving a nice after taste of diesel.
Touch: Very sticky, dense buds.
They break down finely in the grinder.
Cleaned the grinder before testing and after 4 joints ( 2 grams or so)
I already have a good amount of kief collected in the bottom. (Check photo)
Might grow this one again just to make some bubble hash.
The high is awesome nice uplifting, long lasting energetic but without a heavy euphoric rush.
Reminds me of a smooth haze high, although if you smoke a lot even being an experienced smoker, she'll get to you.
Only down side is dry mouth, very dry mouth!
Have some water on hand because your mouth will transform into a desert. 😂
Great strain to kick start the day.
Beginner smokers take it easy with this one. She hits hard! 👊

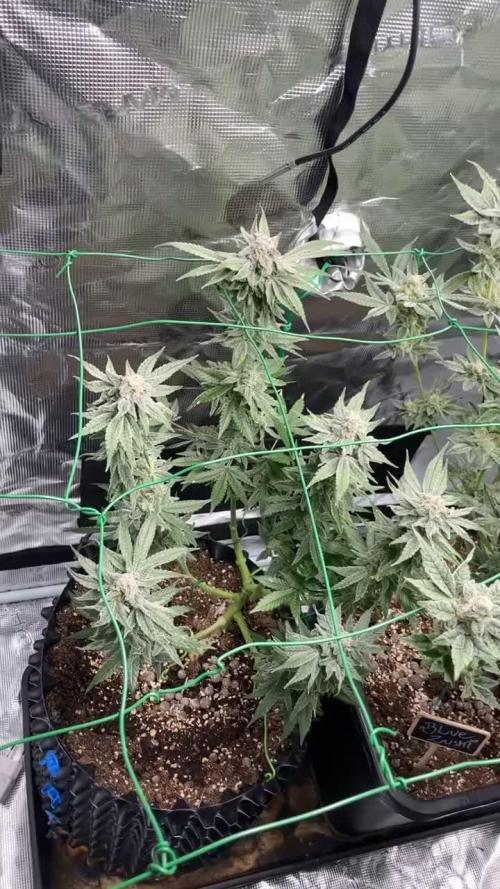

Likes
75
Share


@Secretflower
Follow
Bonjour mes amis,
💨 Le 18 Mai..Jour N°98 💨
🌻 Flowering Day 33 🌻
5ème semaine de floraison pour mes trois Original Glue Feminisées..
Franchement en une semaine c'est abusé comment les buds ont grandi.
Cette génétique c'est de la balle..
Ça commence à sentir très bon..😘
💉 : je ne change rien..👍
🔦 : Quantum Board 480 watts à 100% de puissance et à 40 cm de la canopé.
www.weedseedsexpress.com
Voilà c'est tout pour l'instant mes amis, merci beaucoup d'être passé voir mes chéries, hésitez pas à Sub et je vous suivrai en retour.
Prenez soin de vous et de vos proches.
Je vous souhaite que du bonheur avec vos plantes..😘
À bientôt..💨💨


