


Likes
Comments
Share

@Leprechauns_Garden
Follow
Hallo liebe Grower,
leider habe ich die Anbaustrecke der Automatics nicht dokumentiert, da es mein erstes Mal war und einiges schief lief. 🤔🤫
Kurz gesagt: 1 Pflanze wurde fertig, reif und erntbar!🌿💚
Daher möchte ich nun zumindest von dieser berichten.
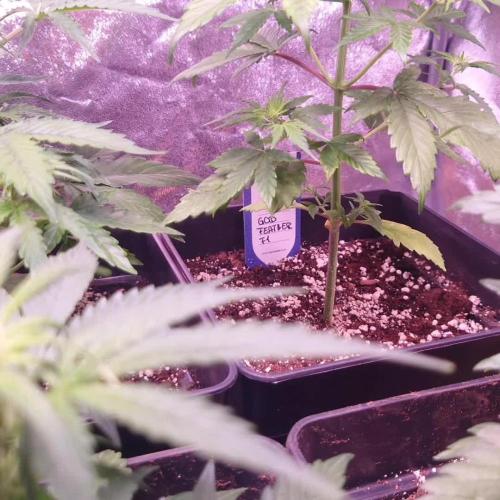
- Genetic: Zamnesia God Feather F1 🌿
- Lucilu Shuttle 6 240W LED 💡
- 7 Liter Kunststoff Topf ?
- Plagron Royalmix (Hauptsubstrat)
- BioBizz Allmix (Keimerde)
- Plagron Alga Bloom
- Plagron Sugar Royal
- Plagron Green Sensation
- Plagron Power Buds
Gekeimt wurde im Biobizz Allmix, und nach 3 Tagen erblickte Sie das Licht der Welt. 🌱
2 Wochen später, wurde Sie in Plagron Royalmix umgetopft.
2 Wochen später ging man in die Vorblüte und den Stretch. Der Stretch war enorm... Sie streckte sich von 25cm auf fast 80cm nach oben.
3 x mal Lampe justieren war angesagt!
Danach gab's Plagron Organic Linie nach Düngeschem + Power Buds zusätzlich.
Sie hat so extrem geblüht .. teilweise über Nacht sichtbare Veränderung in Größe und Menge!💚
Top Pflanze .. hat sehr viele Fehler verziehen ..💚
Am Ende geerntet und direkt nass gestimmt.
- 284 gr Nass auf der Waage 😳
- ... gr trocken auf der Waage (sobald trocken)
Riecht herrlich zitronig frisch bis jetzt
Ernte: 4 h lang geschnitten und dann alles gewogen und in den Trockenschrank gebracht.
Es war sehr harzig .. aber eher trocken und nicht wirklich für Fingerhasch geeignet.
Alles in allem eine sehr spannende Erfahrung mit dieser Sorte.
Let IT grow 🌱 🌿 💚


Likes
13
Share


@DudeGrowsWeed
Follow
Bent her a little too hard (or too late) and snapped the main stalk, but taped it up and she seems fine now. Also gave her some defoliation. Fed Recharge for the first time too, seemed to like that, I think it helped with the fast healing of the snapped stalk. Bud sites starting to develop. AVT is front-right in the group shots.

Likes
4
Share


@KhaVigga
Follow
-everything is on schedule and good, tried 3 times rapid of nutrient tea(just lightly bit of kelp and alfafa and aerated 24hrs) and she loves it
-i'm using a type of kale as cover crop for many benefits but i need most from it is heat fix(it's damn hot outside :D)

Likes
2
Share

@420-Grow
Follow
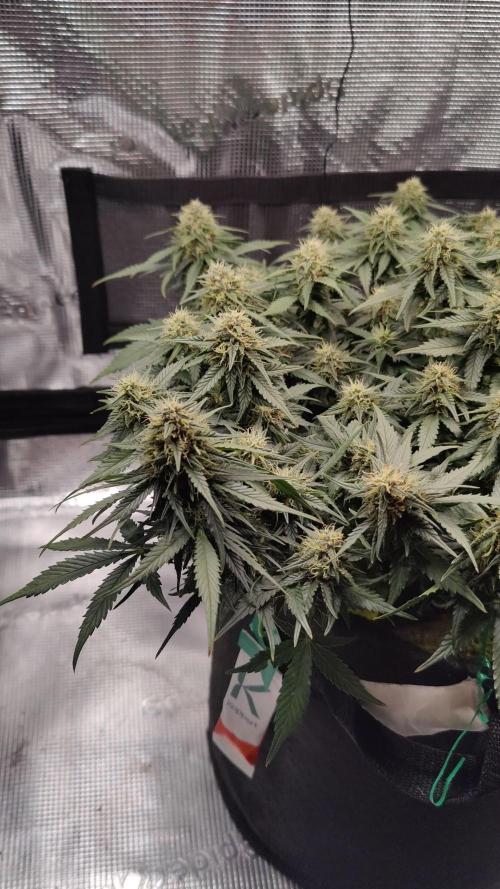
Die Woche nur gegossen und paar Zweige runter gebogen wegen den Blüten sonst läuft die bluebarry bubbelgum super

Likes
22
Share


@Mr420
Follow
Day 1 soaked seeds for 18hrs.
Day 2 seeds in dirt two seeds already popped in water and they where the auto's.
Day 3 just keeping them moist and warm.
Day 4 Northern lights came up and Great white shark came up. Watch these seeds sometimes the shell doesn't come off and you got to help it
Northern lights shell was stuck and I took a tooth pick and helped it get it off.
Day 5 Acapulco gold came up still waiting on Yumboldt auto and it had a tail on it when put in dirt..
Day 6 planted another Yumboldt auto seed directly in soil the other one was bad. So this one will be 6days behind others.


Likes
6
Share


@Cultivandomedicinanatural
Follow
Hemos empezado un cultivo con semillas del banco Sweet Seeds y toda la gama de nutrientes y coco premium de Plagron.
Es nuestra primera vez con coco y esta marca de nutrientes pero nos va a sorprender para bien!
Primero diluimos siete gotas de seedbooster plus en un litro de agua y dejamos la semilla en esa dilución 12 horas. Esa misma agua la usaremos para empapar el papel donde pondremos a germinar las semillas. Al segundo día ya tenemos las semillas nacidas, y los líquidos de riego los haremos a un ph de 5,8 y usaremos power roots, silice rock y pure zym para cada riego con una EC de 0,5.
Una vez a la semana haremos una pulverización de vita start y otro día a la semana vita race. Hacemos una dilución de estos mismos de 1 ml por cada litro de agua para pulverizar dejando bien empapadas las hojas. Vita start nos aporta un npk bajo para nuestras pequeñas y vita race le aporta hierro, de manera que con ellas conseguimos un mejor enraizamiento, ramificación y un color sano de nuestras pequeñas en sus hojas. Tendremos que ir subiendo el nivel de la Ec, ya que pecaremos de cautos en comida al no haber usado nunca coco antes.😎


Likes
31
Share


@JeyGanesha
Follow
🦍 cookies ancora pochi giorni ed è cotta anche lei.. buonissima,!! Ha un profumo delizioso super.
I'attesa si fa lunga 🤣😉🤣😉
Likes
9
Share


@Jakobyzone420
Follow
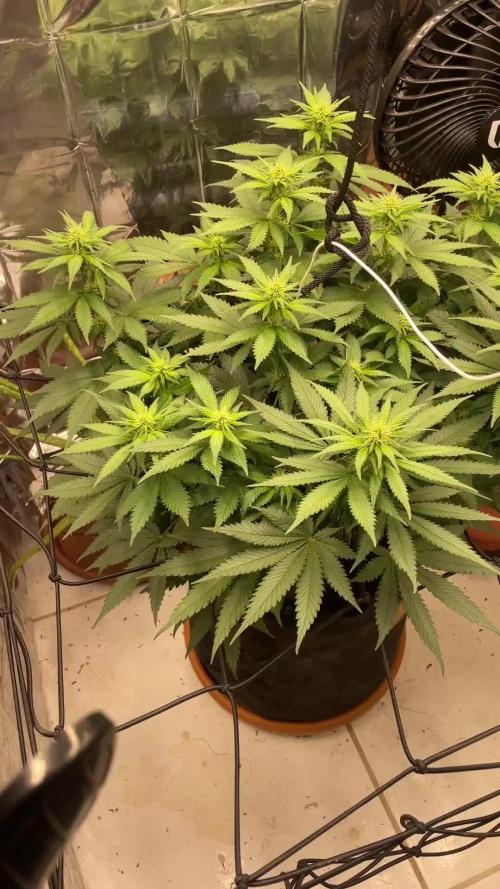
Settimana 11 di lavaggio radici aspetto di arrivare alla 12 e taglio tutto sono molto contento se avete consigli su una buona essiccazione e concia vi ringrazio ragazzi 💚




Likes
13
Share


@NuttyYeti
Follow
It smells very skunky and diesely, kind of burned my eyes while harvesting it was so strong. Very excited because this was my first grow and my first harvest and it went very well.

Processing
Likes
19
Share


@CannabisAprendiz
Follow
Bueno , este es el segundo cultivo que realizó del la cepa "Waka" , el anterior lo tengo igualmente documentado en otro diario .
en esta ocasión cultivamos los clones que habíamos recolectado del cultivo pasado , guardando los fenotipos que nos gustaron más y los clones restantes los pasamos a floración que fueron los que se le hizo seguimiento en este diario.
El crecimiento fue bastante explosivo y reaccionaron muy bien a cada trasplante realizado .
pude observar que los clones de cada fenotipo seleccionado se desarrolló con mucha similitud al de sus madres .
El olor en vegetación es bastante discreto y en floración se pone un más intenso
El desarrollo en floración fue explosivo generando bastante resina y se vieron muy hambientras .
Al fumar se puede sentir un rico toque cítrico en las N° 4 se siente un fuerte sabor a limón en algunas flores mucho mas marcado que en otras,
N° 3 y 13 un agradable toque a naranjas muy rico de sentir en el paladar , La N° 8 con pizcas dulces bastante interesantes.
El humo al fumar es muy suave lo que permite sentir mejor el sabor de cada fenotipo.-
saludos y buenos humos😉
Al momento de cosechar se cortaron los clone y se dejo secando en oscuridad a temperatura ambiente por cerca de 16 días posterior a eso se pasó a curar en frascos

Likes
25
Share


@Cannibalgardens
Follow
Well there is not a whole lot to talk about , the legendary team over at Seedsman have been throwing out fire for so long . Was a great frosty strain to grow and would be a winner for hash or dabs extraction fans a must . .. it's a winner for sure in my books . She germinated fast in a paper towel and water in a warm spot. It lived well in soil amended with garden soil and compost .. never skipping a beat it was a good yielding strain and given enough room could have been the best in garden . The only draw back I had was it's resistance to pm .. it didn't matter what I did I was battling that in the final two weeks before harvest but nothing crazy just on down lower branches . Over all it took my mistakes and overfeeding with out even skipping a beat and could have easily been a monster that is very well suited for extracts because of the high trichomes content .. cheers and happy growing ..


Likes
21
Share


@ArtisticGrown
Follow
Okay sooooo big big sighhhh! I’ve been dreading making this post so I’m sorry I’m behind 2 weeks. I had to go outta town for 8 days. I had everything set up for my brother to take care of the plants. It was a really hot week the week I was gone and these plants were taking a beating and started to get burnt from the heat! One plant died and I’m super sad about it. But we living and learning out here! I have tried to trim the dead leaves without taking too many fan leaves off so I don’t shock em more. All last week was surviving giving the plants a little over a gallon of water a day! Doing some of the nutrients every day but not all. I like to run water in Between the nutrients. But with coco coir I’m not too sure if it’s needed. “Learning over here” so ya thankfully it’s been cooling down and I’ve learned some new tricks to cool the tent off! I got a air water cooler that’s blowing cold air into the tent and my 6” duct sucking out hot air. Things are looking better! One more week with nutritions then a week of flush and Harvest is what I’m thinking. Any suggestions thoughts or ideas for me! I’d appreciate it!


Likes
57
Share


@Salokin
Follow
Week 2 Veg Update on Epic Buzz by Anesia Seeds
As we enter the second week of vegetation, our Epic Buzz seedlings are embracing their new home with vigor.:
One of the seedlings has been carefully moved to the 20-liter reservoir. It has adapted well to its new environment, showcasing an impressive array of roots throughout the net pot, indicating healthy and robust development. Both plants are progressing as expected, with no significant issues to report. The steady growth and absence of complications suggest that the conditions in my indoor setup are well-tuned to the needs of Epic Buzz. The images captured this week show that the roots are not only healthy but thriving. They have begun to colonize the net pot, which is a strong indicator of the plant's potential for nutrient uptake and overall growth. With the transplant successful and the roots establishing themselves, I'm keen to see how the increased space and resources will accelerate growth. I expect that the coming week will bring even more visible progress as the plants continue to mature. Watching the Epic Buzz seedlings transition smoothly into the vegetative phase is both rewarding and exhilarating. The absence of any noteworthy problems speaks volumes. I'm looking forward to observing their journey and sharing their growth milestones with the community.
Stay tuned for next week's entry, where I hope to report on the continued prosperity and vigor of Epic Buzz in its critical vegetative stage.
Likes
14
Share


@BOMbolenath
Follow
Very easy plant to harvest, didn't have too much leaves, so very easy to take out fan leaves and prepare to dry.
