


Likes
26
Share


@Weed_marseille
Follow
Cette semaine les nuriments sont au maximum, seulement P et K.
D'ici une semaine je vais rincer l'ensemble de la culture. Pas de problème recurant, je suis très content des couleurs.

Likes
72
Share


@BodyByVio
Follow
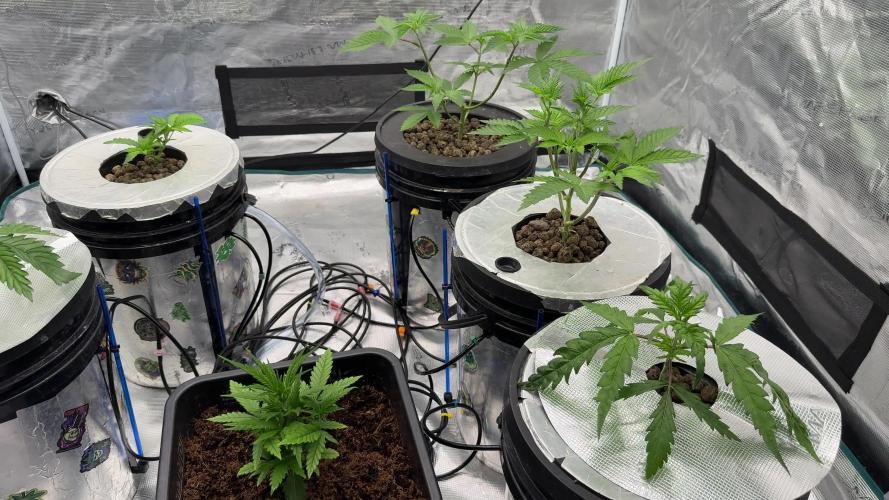
Day 65 : officially 1st day of flush . Changed the reservoir with fresh water and 1.2g/5 gallons of Yucca extract and 5ml/gallon of Cleanex from Botanicare .
Day 68- I did some defoliate. Few more days until harvest.
Likes
19
Share


@Theia
Follow
I have spent the week bending and tightening all the bondage straps to maintain the even canopy I'm after and allow for maximum footprint. I expect during this week she will get a net slung over her as I am running out of pot circumference to keep using ties. I need to work it all outwards now .
She got a spray of boom boom spray this week after the heaviest HST session. It's a
Foliar biostimulant that helps the plant recover from stress.. mixed 100ml to 0.5ml of boom spray and applied at lights on
Still feeding just plain untreated tap water. About 1l a day ATM.
Lights are at 60% and environmental figures are spot on.
This is a super healthy plant . I am very very impressed with biotabs as a product. So easy ..

Likes
11
Share


@m0use
Follow
Memes for the fastbuds meme contest
Memes for the fastbuds meme contest
Memes for the fastbuds meme contest
Memes for the fastbuds meme contest

Likes
4
Share


@Masshysteria
Follow
Day 22 Update: LST rechecked and adjusted as necessary. All three got dechlorinated tap water, PPA1 and PPA2 each got nearly a L, and PPA3 got about 1/2-2/3rds.
Day 24 Update: LST rechecked and adjusted as necessary. All three got dechlorinated tap water; PPA1 and PPA2 each got nearly a L, while PPA3 received about 2/3rds. Pictures show decent foliage filling in over the past two days, so I adjusted again. One, maybe two more good adjustments and then I'll mostly let em grow. PPA3 seems to be recovering from the topping well, but I wouldn't know the difference yet anyways. Its fun to watch them grow regardless!
Day 25 Update: Just took a picture of each today.
Day 26 Update: Took a picture of each in the tent. They will likely all be getting water tonight. I think just regular water again tonight. The tip with 2 sets of stems broke off PPA2 so they’ve all been topped if inadvertently. I always had my doubts because of the soil PPA2 is in, but this will drastically affect the outcome.
Day 27 Update: I watered them with about a .75 L each tonight. Decholorinated tap. Maybe add some Tiger Bloom next time? Pretty sure the soil was still pretty hot at least with nitrogen from whatever I had growing before, so maybe just water again honestly. Updated pictures of each today. PPA2 is going to be severely limited. I looked through the pictures, you can see the break on PPA2 on day 24. I probably could have saved if I'd noticed, so I've learned to keep a better eye on the training and not force the main stalk so much. I don't know if I'll adjust the training anymore.
Day 28 Update: Just a new picture of each. There’s also a video showing off my whole tent. Light dose of Tiger Bloom tomorrow night is the plan.

Likes
16
Share


@Lazuli
Follow
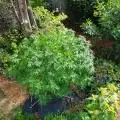
This was my last grow during the winter ever, its too hard for me to keep the room warm, the plants suffered and less yield then my other blue dreams i grew in the past.


Likes
9
Share


@TeamQuality420
Follow
This week I am going through and pulling the large fan leaves off , she is a slow flowering plant so I'm just doing my best to be patient with her !!! A true gem with an unique structure !!!
I think this girl is gonna be a 10 week flower , she is just starting to get smaller flower spots . Still a beast !!
Added a CO2 bag directly above the canopy , added a 150 watt "blurple" light above GG#4 S1( number 2)
More picture notrs and videos to follow !!

Likes
3
Share

@kdifiori_
Follow
The girls are doing great. Pineapple and Cheese are huge for autos, Bubblegum is a little slower than the others, and Skunk had some trouble building flowers, probably because of the heat, but there's a solution to everything, I just have to find it.
Likes
14
Share

@Arcadium
Follow
Hot, dry, couldn't of asked for better weather all week. 10g airpot started to flower, earlier then last year, should be excellent finishing weather. Super crop abuse from last week is recovering, height hasn't moved which is great, she'll be stackin in no time.
Canopy on the large one is developing nicely, super flat. I pulled the net out which helps to gently guide and redirect the canopy as it gets to max height, and adds some epic support in the later season when size and winds are a factor.
Just a shot of Monster Maxx, silica, 90min drip and weekly LCPT spray this week, smooth sailing.

Likes
44
Share


@RakonGrow
Follow
Note :
+ jegliches Zubehör wird in der GermniationsWoche aufgelistet . Zeitraffer Videos folgen immer nachträglich.
+ videos werden so geschnitten das nur ein geschlossenes Zelt erscheint , ergo Fehlen paar reale Minuten (ca 1 Std) .
Sanlight Tageslichtzyklus in Lebenswoche 6 :
+ 200PPFD - 1h - 750PPFD - 16h - 750PPFD - 1h - 200PPFD = DLI 46.60
+ + Formel : DLI = PPFD * h * 0.0036
+ + in LebensWoche 6 ist der Max-DLI ohne CO² : 45.0
Dazu kann man sich gerne die Zeitraffer angucken . Die Pflänzchen brauchen schon Ihre Zeit auf touren zu kommen . Ergo ist Sonnenaufgang und Untergang reines Stromsparen .
Day 36:
+ 2Liter Flaschenwasser
+ + Dünger für Büte
+ + + Canna Terrar Flores (Achtung wirkt wie PH-)
+ + + Canna Boost
+ + + Cannazym
+ + + Canna Rhizotonic
+ Final : PH 6.2
Nach dem die Mangelerscheinungen wie gewünscht aufgetreten sind, gehts jetzt mit Blütedünger weiter . Sie hat sich prächtig in die neue Umgebung eingelebt. Wetter werte sind hier Super , also ist auch im Zelt super Stimmung :))
Videos folgen in den Tagen .
Day 37:
Sie wächst gerade noch paar Zentimeter :)) Blühten werden mehr .
Day 38 :
Und wieder das Licht etwas höher händen , den Sie wächst noch immer !!!
Day 39 :
+ 2Liter Flaschenwasser
+ + Dünger für Blühte
+ + + Canna Terrar Flores (Achtung wirkt wie PH-)
+ + + Canna Boost
+ + + Cannazym
+ + + Canna Rhizotonic
+ + + Greenhouse Feeding BioEnhancer als PH+
+ Final : PH 5.5 (das Urgesteinsmehl zieht das sowieso auf mindestens PH 6.5)
+ etwas Entlaubung der defiziet Blätter.
Day 40:
Day 41:
+ 2Liter Flaschenwasser
+ + Dünger für Blühte
+ + + Canna Terrar Flores (Achtung wirkt wie PH-)
+ + + Canna Boost
+ + + Cannazym
+ + + Canna Rhizotonic
+ + + Greenhouse Feeding BioEnhancer als PH+
+ Final : PH 5.5 (das Urgesteinsmehl zieht das sowieso auf mindestens PH 6.5)
Day 42:
+ 2Liter Flaschenwasser
+ + Dünger für Blühte
+ + + Canna Terrar Flores (Achtung wirkt wie PH-)
+ + + Canna Boost
+ + + Cannazym
+ + + Canna Rhizotonic
+ + + Greenhouse Feeding BioEnhancer als PH+
+ Final : PH 5.6 , Drain PH 6.89

Likes
12
Share


@Nxs235
Follow
And here is a photo of the second plant at the beginning of the 18th final week, the temperature in the box is 23 degrees Celsius, from which the buds turned purple
Likes
3
Share


@B_AECH
Follow
Had a PH issue which almost spoiled the entire plant.
But fantastically I noticed the issue right from the start, so even though she became very yellow she's pushing through till the end and is back to absorbing nutes.
+Day 61 started flushing
SHE'S A TRUE FIGHTER <3
I'm happy that I managed to learn the importance of pH.
Likes
5
Share


@DaddyPrime2
Follow
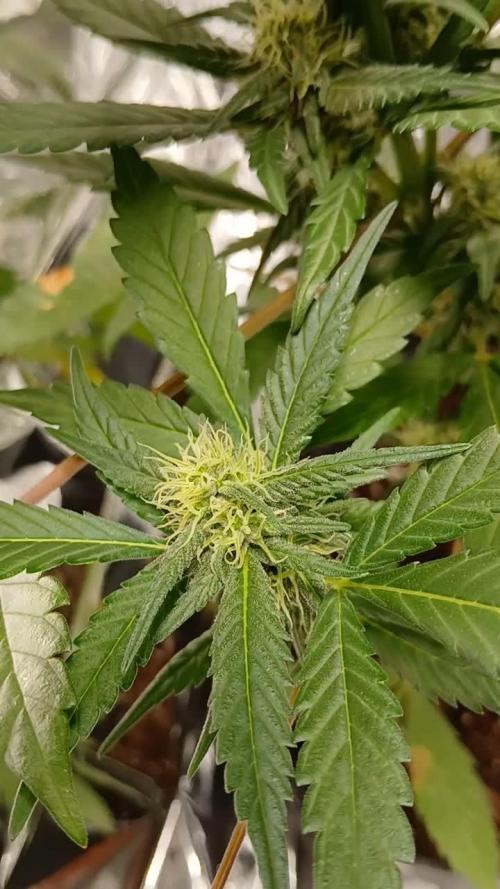
5/5/24 weird pistils🤷🏽♂️
5/10 she’s coming along slowly. Has some frost on fan leaves
Likes
5
Share


@LAShugars
Follow
I can’t wait to smoke the delicious Lemon Cherry Cookies 🍪 again!! Looking good so far.
Likes
33
Share


@burnerac
Follow
Day 113: Decided to add one gallon pH6.5 water with nutrients. This should be the last feed.
Day 114: tent hotter than I would like. Exhaust fan full speed. Cleaned up more leaves. Hopefully can make two more weeks but I am a little concerned.
Day 115: gave one gallon pH6.5 water with 2 tablespoons of Herculean Harvest. Removed a few leaves. The urge to defoliate is huge.
Day 116: removed some more leaves. May harvest this weekend instead of the next.
Day 117: no water added. Removed a lot of dried up leaves. I would be worried if it weren't for other ak47 journals showing the same yellowing leaves toward harvest time.
Day 118: no pictures
Day 119: added one gallon pH6.5 water with 2 tablespoons Herculean Harvest. So want to harvest but will wait 4-7 days.


Likes
11
Share


@SintrexGrow
Follow
Plant is showing fast growing and responded well to my diy setup and diy lights 💪

Processing
Likes
4
Share


@Mr_nugs_lover_David
Follow
She's an organic beauty haha,I'm giving her all my love man I love this lady,she looks super healthy and strong,very green thanks to the lactobacillus liquid and all the bacteria and fulvic and humic acids of the bat guano and also the mycorrizae that contains florians living organics,she's a happy girl 😍 I suppercroped her so I could uncover a few young branches let's she how she keeps developing,hope you like my work guys peace ✌️ 💚 ❤️ 💛

Likes
109
Share


@OrganicNature420
Follow
Day 52
No problems, slight yellowish spoting on some leafs but nothing to worry about. Light at 65% and girls have had a trim 🌱