


Likes
Comments
Share


@Maven26
Follow
Thick root system. Currently she is competeing for grow space against the larger Bermuda Gold

Likes
5
Share


@Imccloskey
Follow
They continue to grow. Some of the lower leaves are yellowing. We removed these shortly after this. Soon they will go into the one Gallon pots with 66% soil mixture and 33% Happy Frog.

Processing
Likes
27
Share


@Fibro_Witch
Follow
Good week, they're happy to be in larger pots. Used Coast of Maine Bar Harbor Blend potting soil. Got some new growth coming in, especially on the redder one.
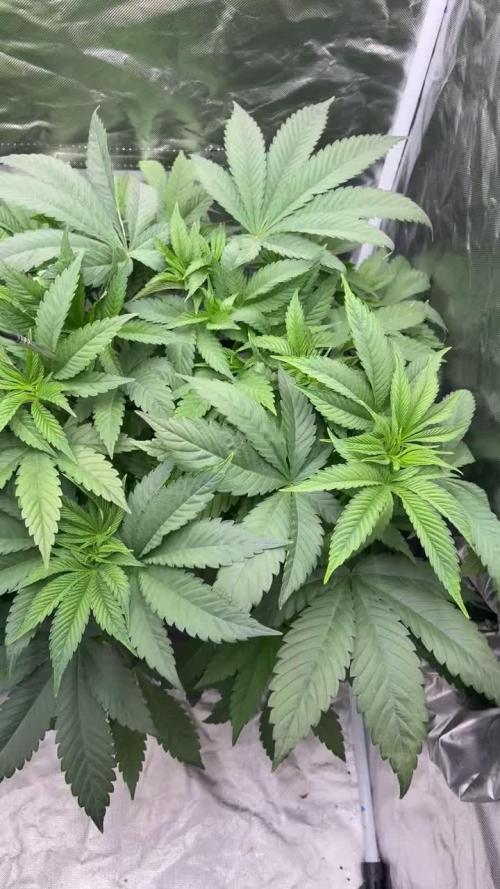
Big Bloom this week. Seriously considering putting them in the ground soon despite cold nights. They want the sun!

Likes
50
Share


@DogDoctorOfficial
Follow
Week 6 Veg Report – Runtz We Meet Again!
Another week, another step forward in our Eternity Grow Cup 2025 journey, and oh boy, do we have a lot to unpack! These Runtz girls are showing their potential, and we’re dialing in every little detail to ensure they thrive. Let’s dive deep into everything that happened this week!
Cal-Mag Deficiency Adjustment – Pheno #5’s Special Needs
This week started with a close inspection of our phenos, and we noticed that Pheno #5 was showing early signs of a calcium/magnesium deficiency. Whether it was slightly off VPD levels or this particular plant being more demanding, we decided to correct it by increasing the dose of RO Water Conditioner. Now, while this isn’t a direct substitute for Cal-Mag, it does contain trace amounts that can help stabilize the situation.
🔬 Understanding Cal-Mag Deficiency:
Calcium and magnesium are essential secondary nutrients. Calcium strengthens cell walls, preventing issues like tip burn and weak stems, while magnesium plays a critical role in chlorophyll production, allowing plants to efficiently absorb light energy.
💡 Signs of Deficiency:
• Yellowing between veins (Magnesium)
• Rust spots on leaves (Calcium)
• Slow growth and weak stems
⚡ How We Address It:
• Slightly increasing RO Water Conditioner to see if trace minerals help
• Keeping an eye on overall nutrient uptake to ensure no lockout
• Monitoring VPD (Vapor Pressure Deficit) closely to optimize nutrient absorption
Let’s see how she reacts next week!
Branching Development – Pheno #2 Leading the Race
All five phenos are thriving, but Pheno #2 is showing the most aggressive branching, pushing outward faster than her sisters. However, overall, we’re seeing very uniform growth, which speaks volumes about the stability of these genetics.
🌱 What is Branching & Why It Matters?
Branching is the plant’s way of expanding its canopy, increasing surface area for photosynthesis, and maximizing potential bud sites. Well-structured branches allow better airflow, light penetration, and more even growth—key for a successful high-yield harvest.
⚖️ Topping vs. Leaf Bending – The Training Choice
Instead of topping, I’ve decided to go with leaf bending for now. This method allows for gentle manipulation of the plant’s growth without causing major stress. Once we introduce the SCROG (Screen of Green) net, this training will help maximize the canopy spread.
Moving to the TrolMaster Ecosystem – A Game Changer
Big move this week—our Runtz girls officially transitioned into the TrolMaster Ecosystem, and let me tell you, they are absolutely loving it! Under the ThinkGrow Model 1 LEDs, they’re thriving, leaves praying upward, soaking in that optimized spectrum.
💡 ThinkGrow Model 1 LEDs – Why They Work
• PPFD of ~400 µmol/m²/s at their level, running only on Channel One
• Full-spectrum lighting tailored for optimal vegetative growth
• Passive cooling design, keeping temps stable while saving energy
Environmental Conditions (Measured on the TrolMaster Tent-X and the AMP-3)
• Temp Max: 26.6°C | Min: 16.2°C
• RH Max: 77% | Min: 52%
• VPD Max: 1.65 kPa | Min: 0.43 kPa
• Solution pH: 5.8
• EC: 0.96
• Water Temp: 16.3°C
Why These Numbers Matter:
• Keeping VPD in check ensures efficient nutrient uptake
• pH and EC levels fine-tuned for maximum root absorption
• Water temp stable to avoid root shock and slow growth
Autopot System Prep – Getting Ready for the Next Phase
The week wraps up with us cleaning and preparing the Autopots for their next phase. These self-watering systems will allow the Runtz girls to access water and nutrients at their own pace, optimizing growth as we head into pre-flower soon!
A huge THANK YOU to Zamnesia, Plagron, and GrowDiaries for making this incredible Eternity Grow Cup 2025 possible! Also, a big shoutout to my main sponsors, thank you for keeping this journey running:
🔥 Aptus Holland – Precision nutrients for peak plant health
⚡ TrolMaster – Bringing automation and accuracy to the grow
🌱 Pro-Mix – The foundation of strong roots and healthy plants
💨 The CannaKan – Premium solutions for top-tier results
Grove Bags – Revolutionizing post-harvest storage & terpene preservation
📜 Ziggi Papers – The ultimate rolling experience
And of course, a massive thank you to the community—followers, supporters, lovers, and even the haters. You ALL fuel this journey, and I appreciate every single one of you!
🚀 Good luck to all fellow competitors—watching everyone’s grows is inspiring, and the competition is fierce!
📢 Join the journey on YouTube & Instagram for exclusive content, behind-the-scenes action, and more insights into this epic run!
👊 Let’s keep pushing, learning, and making history—see you all next week for another deep dive into the Runtz We Meet Again grow! 🌿🔥
💚 growers love to all 💚
Genetics - Runtz https://www.zamnesia.com/6000-zamnesia-seeds-runtz-feminized.html
Nutrients - Plagron https://plagron.com/en/hobby
- Aptus Holland https://aptus-holland.com/
Controls - Trol MAster https://www.trolmaster.eu/
LED - https://www.futureofgrow.com/en
LED - https://www.thinkgrowled.com
Soil - https://www.promixgardening.com/en
Germination - Cannakan https://cannakan.com/?srsltid=AfmBOopXr-inLXajXu3QFgKXCXXos4F1oEvScjMKIB5MR5dk8-GJ-F49
DOGDOCTOR 15% off
Smoking Papers - https://ziggioriginal.com/
Terpene saver - https://grovebags.com/
As always thank you all for stopping by, for the love and for it all , this journey of mine wold just not be the same without you guys, the love and support is very much appreciloved and i fell honored with you all in my life
With true love comes happiness Always believe in your self and always do things expecting nothing and with an open heart , be a giver and the universe will give back to you in ways you could not even imagine so
As always, this is shared for educational purposes, aiming to spread understanding and appreciation for this plant. The journey with nature is one of discovery, creativity, and respect. Let’s celebrate it responsibly and continue to learn and grow together!
Growers Love To you All 💚
#EternityGrowCup #RuntzHunt #GrowersLove #CannabisCommunity #AptusHolland #ProMixSoil #TrolMaster #Zamnesia #Plagron #ZiggiPapers #Grovebags

Likes
35
Share


@DudeGrowsWeed
Follow
February 20, 2019 update:
Pretty much just waiting to be ready for harvest. Everything is moving along nicely at this point. Planning on feeding until the end of February, then starting a 2 week flush with most of the plants going in the flower room now, but I may let the Cookies & Cream go a little longer.
Fed MegaCrop, Cal+Mag Pro and Mammoth P this week. I've used up the last of my Mammoth P at this point. It will be MegaCrop & Cal+Mag Pro only until flush.
All pics were taken with the lights on. I tried color correcting the best I could, but the pics really don't represent the actual colors very well. Usually I try to get some pics with the lights off also, but I was not able to do that last week. I'll make sure to get some better pics next time. 👍

Likes
422
Share


@Crashoverite
Follow
Hi all 🧑🌾
Welcome to my 🍌💜👊 week update.
Hope everyone keeping well and having a good week.
Thank you so much for your support on this bananas journey 💜💚💜💚
I am so happy to see how girls are developing in recent days. It's seems that Athena finally stopped her stretch and hoping that Xena will follow her sister very soon. Buds are gaining weight and size rapidly. Lots of nice colours and tonnes of trichomes on those buds already.
Week 10
Dec 18-24
Dec 18-19
Mainly observation. Xena is still stretching like crazy. both girls are developing beautifully.
Dec 20
First watering for this week. 7.5 ltr beetwen both. Runoffs PH's Athena 6.2 Xena 6.3.
Dec 21
Due to lack of light at lower parts of conopy decided for another selective defoliation, lowered a bit tallest branches with colas dangerously close to light by tieing them to netting. Couple cm will make a huge difference here. Could not clear well at the back wall of the cabinet due to limited access.I'm very happy with final result.
Dec 22-23
Joyful observation of my 🍌💜👊girls development 🧑🌾
Dec 24
All is looking great. It's seems that stretch is finally stopped. Girls looking healthy and happy.
Second watering for this week. 8 ltr beetwen both. Both runoffs PH 6.2.
It's the end of this week.
Happy Xmas everyone 🤶🎄❄️🎁☃️✌️💚🌲🎅🎄
Stay tuned for new week update ✨🍀✨✌️💚

Likes
17
Share


@Eddjack
Follow
Continua a crescere e di piegarla non se ne parla,visto che non ho più spazio ...pessima scelta fare due ceppi in un box 60x60cm. Comunque cresce super forte e bene ! Ci sono parecchie piccole gemme alla stessa altezza mentre le 2 apicali primeggiano sulla chioma. Alla prossima settimana speriamo esploda con dei super fiori !
Likes
137
Share


@Natrona
Follow
***DIVINE SEEDS *****
*****OPIUM*****
Week 22
For my outside ladies, Opium, Fractal, and Lemon Cake
These gals are weathered. Opium is taller than I can see (over 6.5 feet) but from my dining room window, I see the top 3 inches of her main cola is dead. Many dead leaves packed in the buds. Her colas on all stems are massive, sticky and resinous. My plan was to wash and make bubble hash from her. Temperatures should be dropping into the 70 with nights in the 60’s but have returned to the upper 80-90 with high humidity. This week rain is expected every day following another hurricane. That was the determining factor to chop all outside girls down.
All the plants were chopped on Sept 12. Opium hung in the dark for 2 days and when Hubby started trimming up Opium he found dark areas deep in the buds and much of the bud mass just fell off. So both Lemon Cake and Opium have been tossed into the trash. I don’t even want to compost the plants in the event spores over winter. I hate losing any plant after I spent so much time growing them out but I won’t risk health over questionable harvests. I did an initial spot check on Fractal and she looked clean, but is being trimmed for a thorough inspection for any disease.
These ladies had a long vegetative phase. Probably too long since I started them in April so they would be hardened off before I went on vacay in May. Three months of veg caused massive vegetative growth, especially on Opium deep in the buds.. The various breeder notes on photos indicate late September or October harvest. So that was in the back of my mind during this grow.
All of them were in flower by early July. Light hours were over 14.5 and won’t be at 12/12 until September 26 (2 more weeks). I’m sure the plants were confused by the long veg and just said "Hell, I'm going for it" and started early flowering. I grew them too long waiting for the trichomes to develop.
👉Note for next year start seeds later in spring.
👉Plan start date based on counting back from the vernal equinox.
👉Based on such a long growing season, Autos may be preferable to finish quickly and not have extended vegetation phase before flower.
Thank you @DivineSeeds for the opportunity to grow your exotic strains. I wish I could have completed the grow with a smoke report. I was looking forward to being daydreamy psychedelically stoned, not to mention killing my chronic pain and insomnia. I do have more seeds and will try again in a controlled environment and trying topping or mainlining to keep her shorter and more manageable.
Thank you friends for the visits, likes and comments, I appreciate all of you💚.
Sending love, light, and healing 💫
💫Natrona 💫

Likes
33
Share


@Mrs_Larimar
Follow
Monday, March 1st.
The Cbd grows very good. lots of laterals she quadrosized in the last Week.
Looking fresh and strong, als already smelly.. gassy green

Likes
14
Share


@Fullmeltalchemist
Follow
D9 - 9.21 - Just growing growing growing. All of them have nice velvety roots lining the bottom of the cups 💪😬
D10 - 9.22 - Super impressed by the growth and color of these ladies
D13 - 9.25 - Transplanted into my 5 Gallon fabric pots with 1/3 Nature's Living Soil Super soil mix on bottom and fox farms on top
------------ Right now these are under 250w (True watts) of LED. One of the lights is a "600w" Phlizon full spectrum, the other is a "600w" YGrow for a mixture of 2-peak blurple and 3500k, respectively
D14 - 9.26 - Loving their new pots and tent space! 👽👍
Likes
7
Share


@Easygrower
Follow
Hello growers day 49 in the garden with Zkittlez I’m sorry iv missed a few weeks been occupied elsewhere but I’m back and these two lady are doing excellent there budding up nicely around 90 cm in hight so there pretty big for autos but can’t wait to see the end until next week be safe and happy growing ✌️
Likes
14
Share


@eldruida_lamota
Follow
Vamos familia octava semana de floración de estás Tropical Zmoothie de SeedStockers.
Que ganas tengo de ver el progreso de esta variedad, las plantas están sanas, se ven con buen color.
Ya entramos en la recta final de esta variedad.
La cantidad de agua cada 48h entre riegos.
Esta semana quitamos los nutrientes de la gama Agrobeta.
Las plantas están bastante bien y eso que subió par de grados la temperatura que en mi tierra hace mucho calor.
Estas próximas semanas veremos como avanzan y terminan de madurar las flores.
Mars hydro:
Code discount: EL420
https://www.mars-hydro.com/
Agrobeta:
https://www.agrobeta.com/agrobetatiendaonline/36-abonos-canamo
Hasta aquí todo, Buenos humos 💨💨.

Likes
31
Share


@420DeepGrow
Follow
Gracias al equipo de FastBuds y XpertNutrients, sin ellos esto no sería posible.
🍁 💐 ¡Hasta un 26 % de THC! Una potente variedad Indica que te relajará de verdad y te hará dormir.
Una cepa única en su especie. Genética autofloreciente revolucionaria para los cultivadores más exigentes.
Gran sabor en cada calada. Terpenos de mermelada ácida de albaricoque que hipnotizarán tus papilas gustativas.
Cosechas afrutadas. ¡Hasta 550 g/m2 en 9 -10 semanas!
Perfecta para extracciones. Copiosas cantidades de sabrosa resina hacen los concentrados más deliciosos.
🚀Consigue aqui tus semillas:
https://2fast4buds.com/es/seeds/apricot-auto#description
🍣🍦🌴 Xpert Nutrients es una empresa especializada en la producción y comercialización de fertilizantes líquidos y tierras, que garantizan excelentes cosechas y un crecimiento activo para sus plantas durante todas las fases de cultivo.
Consigue aqui tus Nutrientes:
https://xpertnutrients.com/es/shop/
📆 Semana 6:
Parece que el temporal por fin se va a pasar esta semana, todo esto le ha afectado mucho y se va a quedar una diminuta. Por lo menos probaré esta delicatessen.
Todavía no se aprecian las preflores.
Voy a aplicar unas enzimas para ver si asi se recupera de todo este estrés.
Likes
6
Share


@BasedBuds_89
Follow
This baby was horribly stunted, but I decided to keep her alive and now it's covered in Crystals. May use it for consentrates.
Likes
2
Share


@Madman2020
Follow
Oct 5-11 Vegetative steering?
Aiming for:
leaf Temp -80f
CO2 -1250ppm
VPD +1.04
(65%/75F)
Vegetative Steering 6P1/ 2P2/1P3
Each P1 water event is 15 minutes apart. Seems to far apart. I think i Need More water events, with less time in between events in order to get a strong veg signal?
Watering for 2min(110)ml
May need 3min waterings(currently not getting runoff)
I have to hand water every two days.
Day 11 flo
18.5inches tall
12inches from light(moved to 16)
1300ppm
Day 18
Defol
Sprout chickpea(2days)
Soaked 1cup for 4 hours then rinsed. Completely covered then Soaked overnight.
Rinsed then poured water out and layed jar on the side for one day.
Blended with water(aloe vera and coconut)
Day 19&20 foilarspray
Alfalfa/Chickpea SST with Kelp,aloe,coconut,silicate,microbes brewed for 1.5 days
Day 21
Fed the Tea blend
Leaf temp 80
65kluxx
Co2 100
Plants look like they responded well to the foilar. The flowers at this stage are my best performance yet .crop steering may be working?


Likes
13
Share


@ThatsmyGrow
Follow
Its the last week befor we Flash. I love the buds, they are fat like a cola can. They smell like lemon, its a crazy pheno
Likes
4
Share


@alexb420
Follow
buds starting to get shape and trichs coming in nice. the blueberry muffin has such a unique berry pastry smell. no dank weed smell at all. the khalifa mintz x (bcc x jealousy) is still pretty gassy, with stronger fruit profiles on both strains now that the buds are starting to get fuller. update in a bother 2-3 weeks lol.


Likes
38
Share


@Ukfarmer420
Follow
Hi guys
A day early but thought ill post this now day 20 from switch, just done a major defoliation on them I will do a final next week, im going to add a.little bit of nitrogen in the mix as I feel the bloom doesn't have enough in it on its own, plants are doing well tho.
Bullets are appearing now so thats a good sign, installed the ac infinity s6 cloudline and put in the dehumidifier.
I'll keep you all posted
Happy growing guys
Day 22 from flip
Hi guys I done the day 21 defoliation yesterday to expose the bud sites.
So this week my plants are looking really hungry. I am using the bloom mix and trying to get some colour back in the leaves. The blue cheese is by far the better plant at this stage.
I'll keep you updated.
Happy growing guys 👌💪💚


Likes
3
Share

@CalGonJim
Follow
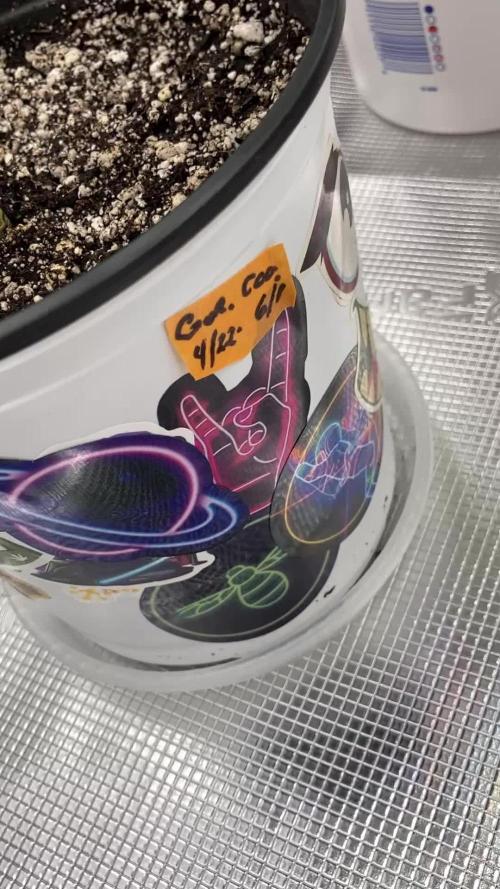
6/9 12am MONDAY. They look great, went to 4mL per L of Con Grow looking great
6/10 9am. 1130pm loo
GC 🚨🚨 TOP REDSIGN. NODE 5 & 6 HAVE 2 EXTRA BUD SITES.... I USUALLY TOP AT 3 OR 4 AND THEN TRIM OFF NODE 1 DEPENDING ON MAIN STALK HEIGHT, EASIER TO WATER AND MAINTIAN. BUT I CUT OFF NODE 1 THRU 4 AND LEFT MAIN COLA. INVERTED TOP??? SHE IS GIVING ME IDAS.... I WILL TOP GOAT AND GROW AT NODE 5 & 6 GOAT 2 WILL BE TOPPED AT NODE 3 & 4.....🚨🚨⚡️⚡️
6/11 330am new air assist exit fan design prot
6/12 9am tried something new I mixed bud factor X2 mL per liter and big bud 2 mL per liter did a supplement only watering today. It was full strength. I’ll see what kind of damage I’ve done.💦💦
6/13 NO DAMAGE...wow. MY PH PEN WAS OFF BY UP TO 2 POINTS FOR 3 YEARS.... SHIT...ALL THE TIME I SPENT BLAMING THE NUTRIENTS.... GOTDAMNIT.
1am They look great, GC is crammed in for just a few hours until the other tent wakes up, then transfer OR I will have to light an ENTIRE tent for 2 plants, no way. I put them in the 12/12 tent. Should top today, feeling sick to my stomach.....nausea makes mobility impossible.
6/15 1255am BEST VEG EVER...I RIPPED GOAT'lato in 2/3's. RIPPED a BUBBLES BLUEBERRY in 1/2 and got them both fixed.... ALL are doing great. I think my BAD PH PEN... FOR 2 YEARS...so stpid. After calibrating pens and using TWO now. pH to 5.6 - 6.2 avg between the 2 and ONLY AN CON GROW... everything else is overkill and burns in my small container and not much runoff when I water. I water from bottom mostly. DO NOT us supplements and nutrients at the same time or the same watering.!!!!
1240pm topping today for sure this time. 111pm GC has a burned top...I did not top big mistake. but wanted to see her grow without topping.... BPP looks tiny but aWESOME. 🚨🚨3pm I made 4 Gorilla Gas F1 CLONES by Seedsman at nodes 3 & 4!!!!! The I topped her as well. I cant upload pics now but she's great.