


FARMBROS 700W LED & Purple Kush Grow





Lamp
FARMBROS LED 700W
Light
VEG
FARMBROS LED Lights 700W Light Emitting Diodes/700W
FARMBROS
FLO
FARMBROS LED Lights 700W Light Emitting Diodes/700W
FARMBROS


Box
Secret Jardin
Grow Boxes

Fan
Prima Klima PK 125 EC/
Prima_Klima
Fan
Cloudray S6
AC_Infinity

Filt
Rhino Pro Aktivkohlefilter 600 m³/h
Rhino



Indoor
Room Type
Transplantation
weeks 1, 4
Lollipopping
weeks 10
LST
weeks 5-6
Main-Lining
weeks 5-6
Defoliation
weeks 5-6, 8, 10
15 liters
Pot Size
0.9 liters
Watering
Start at Harvest
G
Germination1y ago
Nutrients 1

Seedbooster Plus
0.3 mll
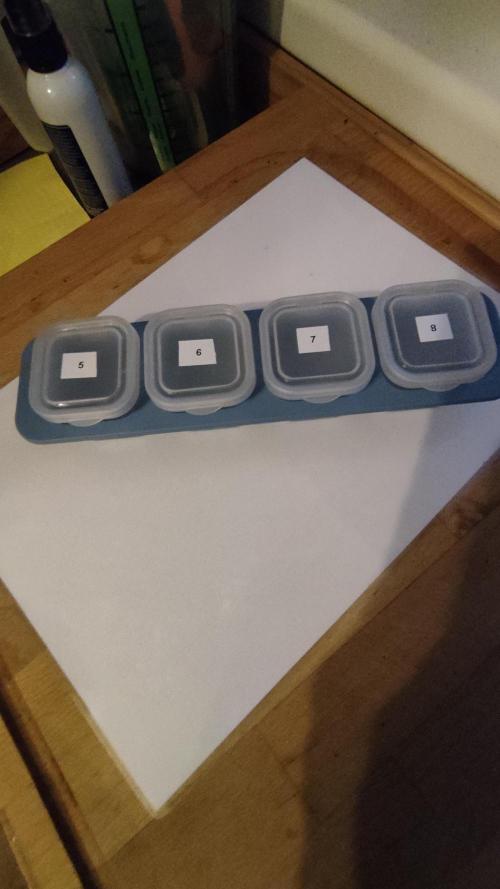
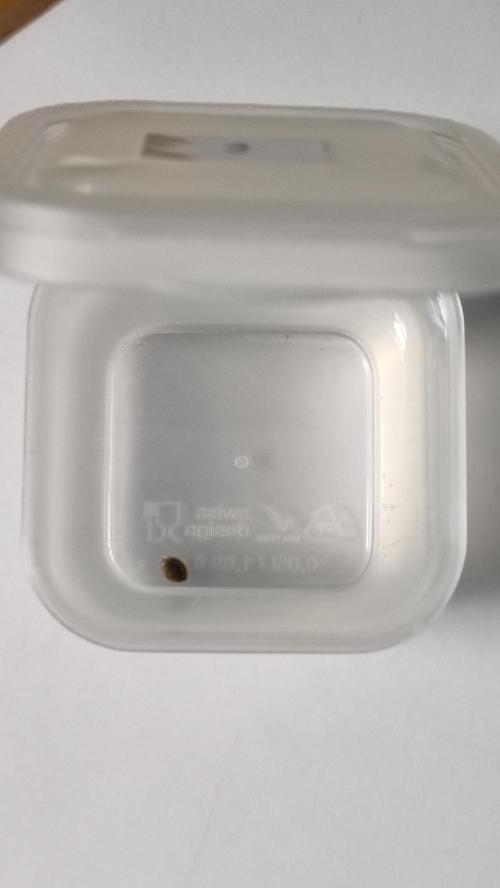
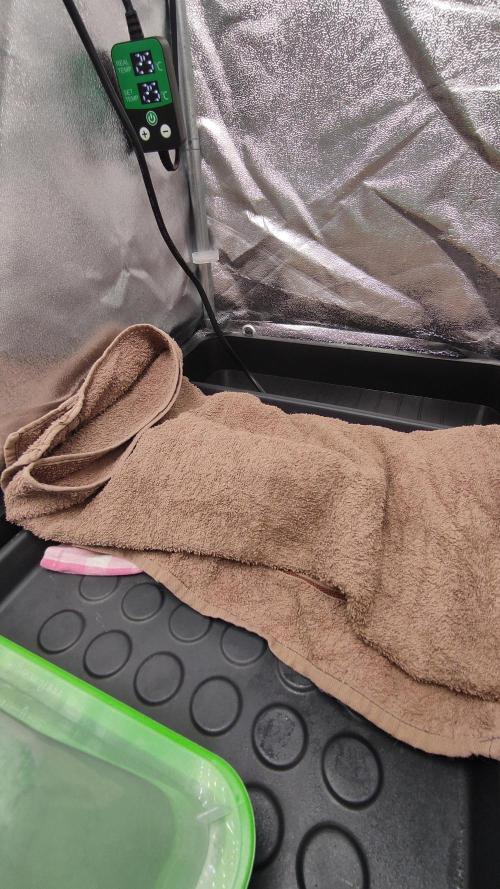
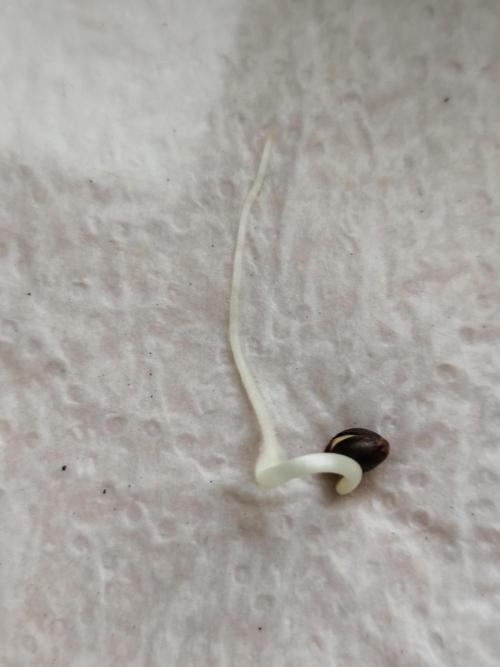
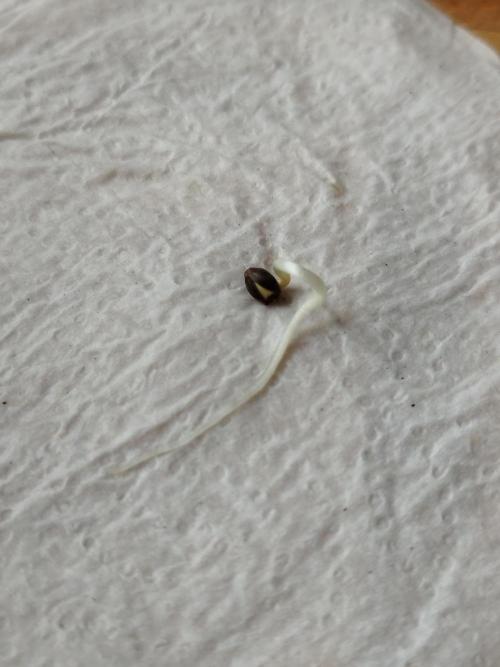
Berlins_Finest I always soak the seeds for 2-3 days in water that has been lightly pre-fertilized with Plagron Seedbooster. Then, they are placed in moist kitchen paper for another 1-2 days, then placed in a zip-top bag to retain moisture. During the germination phase, a heat mat runs continuously at 25°C. I use an adjustable heat mat. During the germination phase, I also shade the seeds with a towel. After 5 days, I planted the seed, with a radicle approximately 2 cm long, into the first small growing pot. I used Plagron Lightmix, which was enriched with mycorrhiza, as the substrate. The substrate was also pre-watered with water + Plagron Seedbooster, and the seeds were placed in the moist substrate.
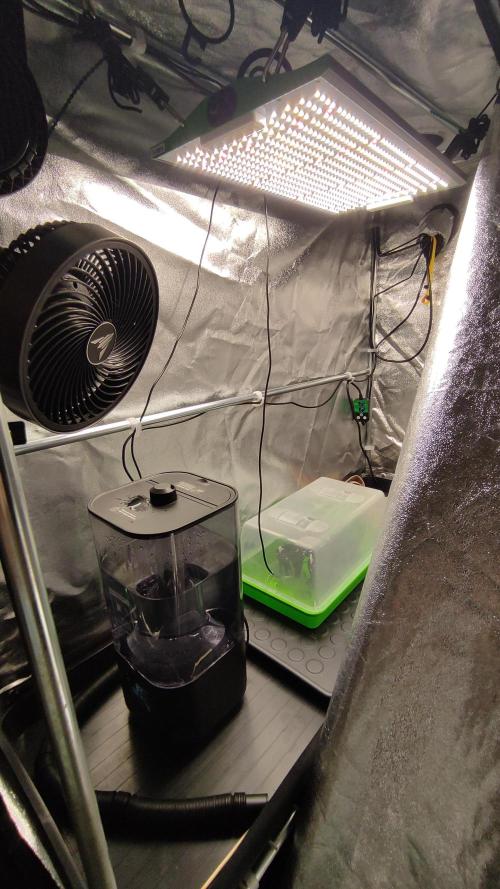
Equipment used:
Riogoo heat mat with thermostat controller, 10 x 20.7 inches, 3 pots
Pot size: 7 cm diameter x 5.5 cm height
Lamp: Viparspectra Pro P2000, increasing from 5%-10%, equivalent to 50-100 ppfd or 7.5-10K lux
Substrate: Plagron Lightmix (spoiler alert - seems too light, nitrogen deficiency symptoms will occur later in the grow)
Fan: AC Infinity - Cloudray S6
Humidifier: AC Infinity - Cloudforge
2 likes
1 comment
Share
Used method
Glass Of Water
Germination Method
1
Week 1. Vegetation1y ago

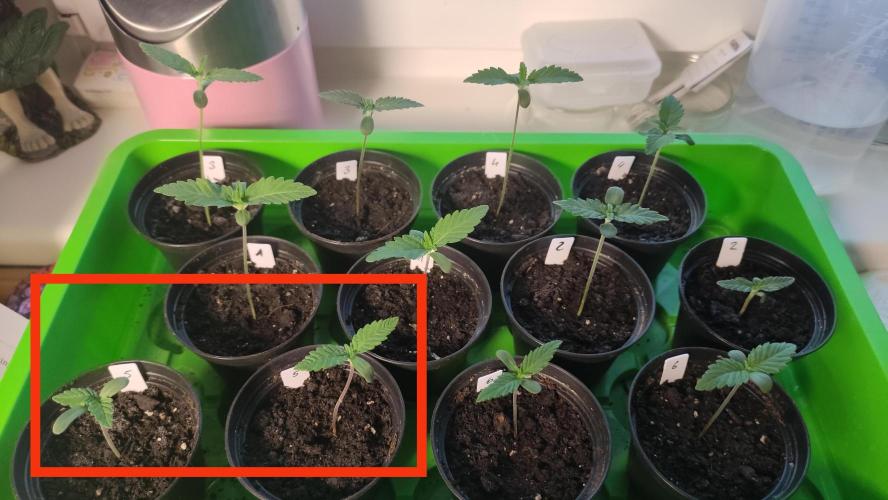
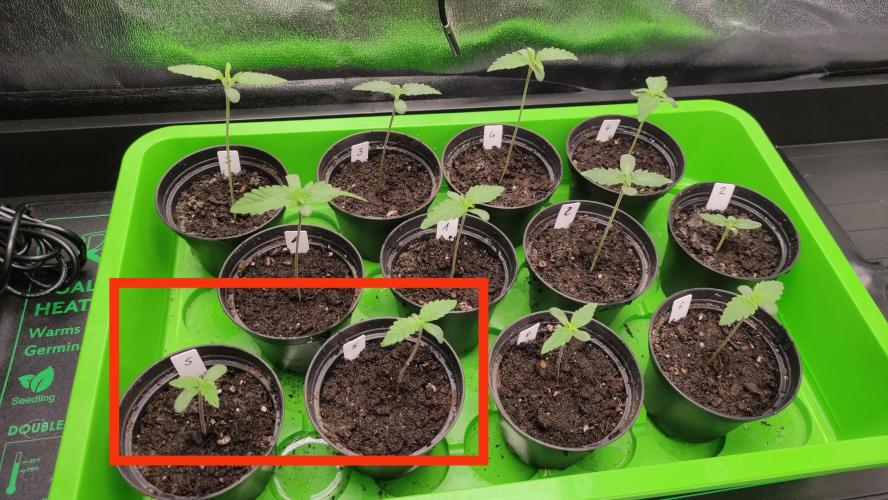
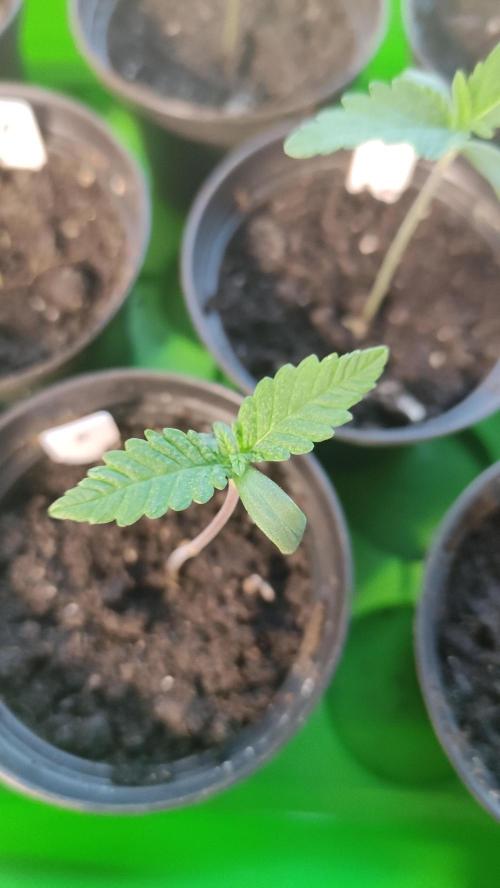
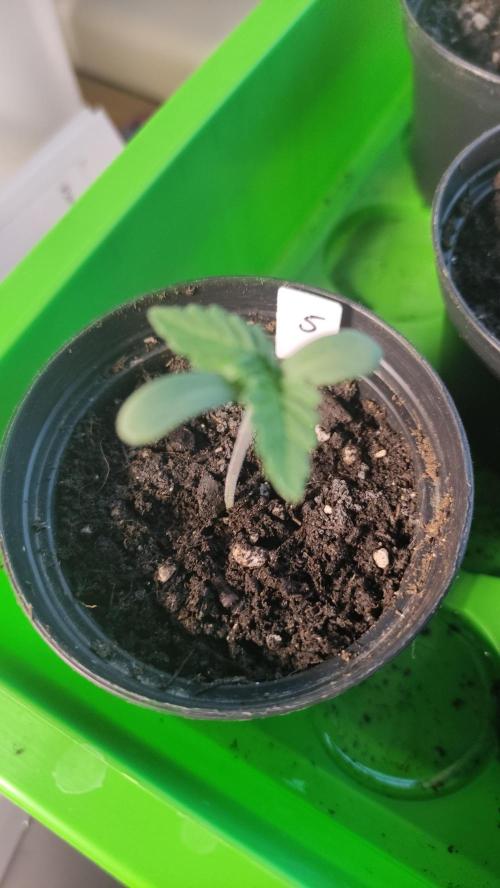
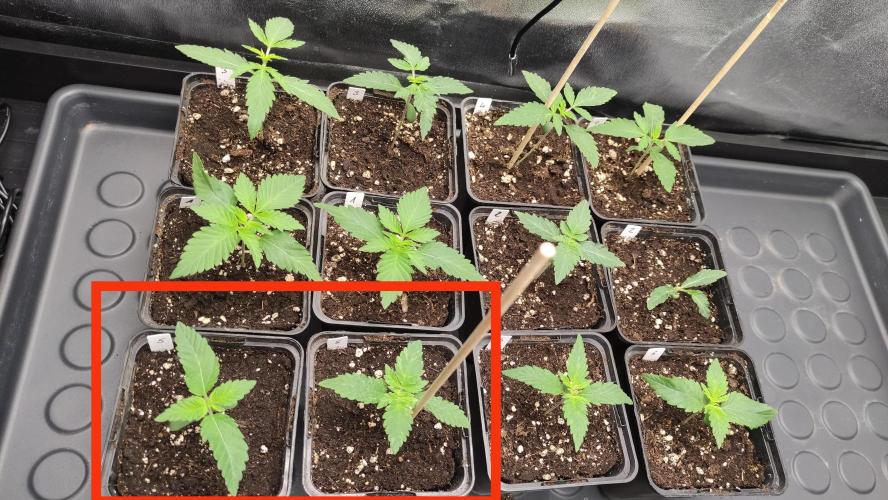
7 cm
Height
7 hrs
Light Schedule
25 °C
Day Air Temp
6.2
pH
No Smell
Smell
400 PPM
TDS
75 %
Air Humidity
20 °C
Solution Temp
23 °C
Night Air Temp
0.02 liters
Watering Volume
70 cm
Lamp Distance
Nutrients 1
Seedbooster Plus
0.3 mll
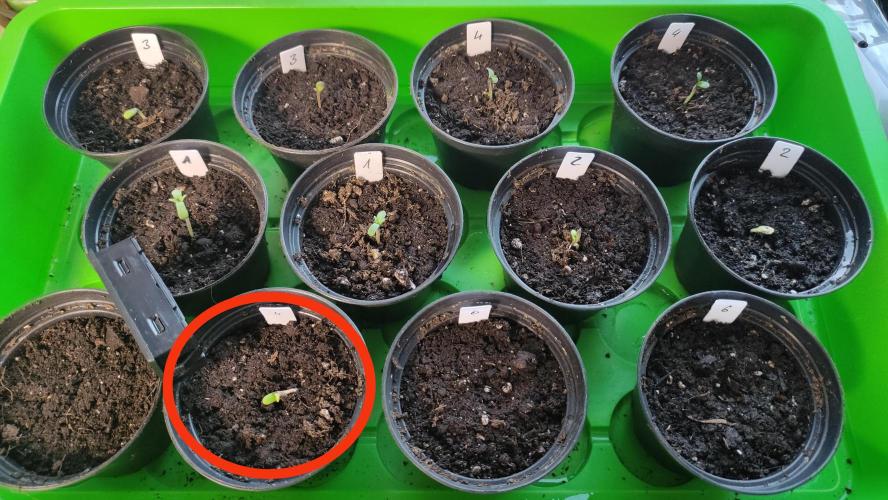
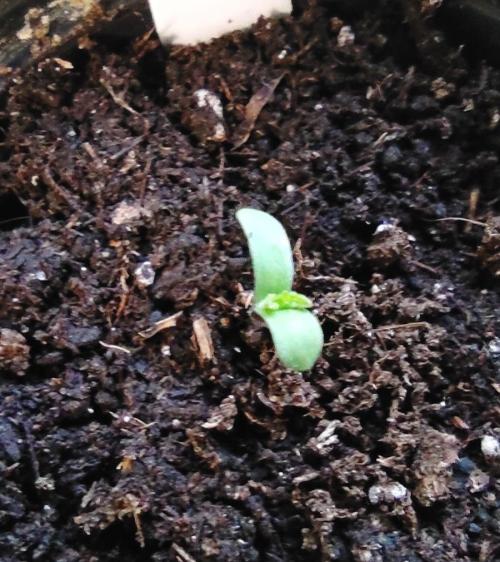
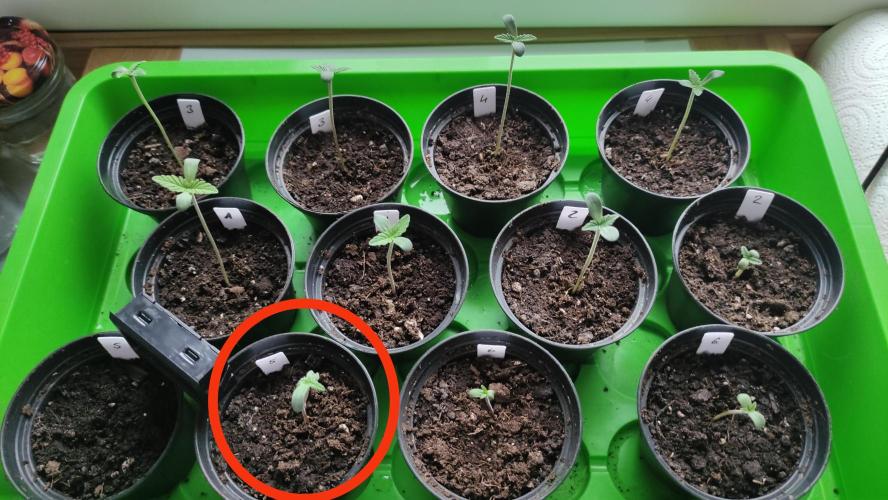
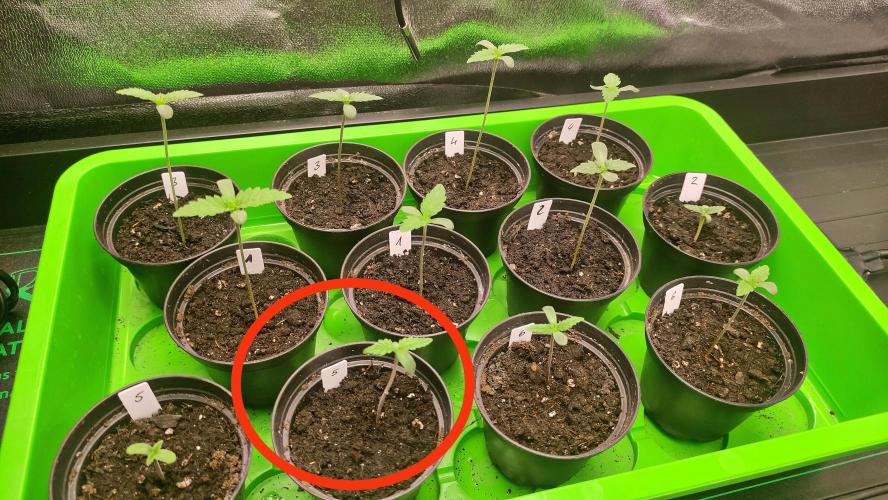
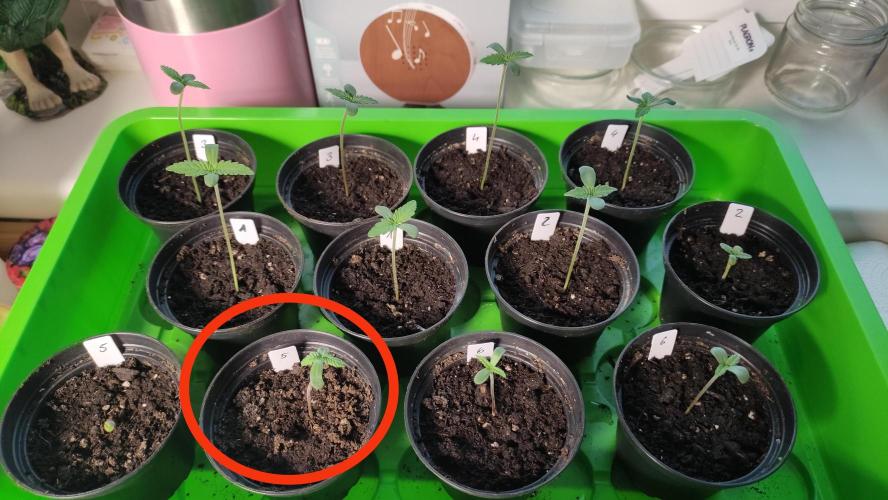
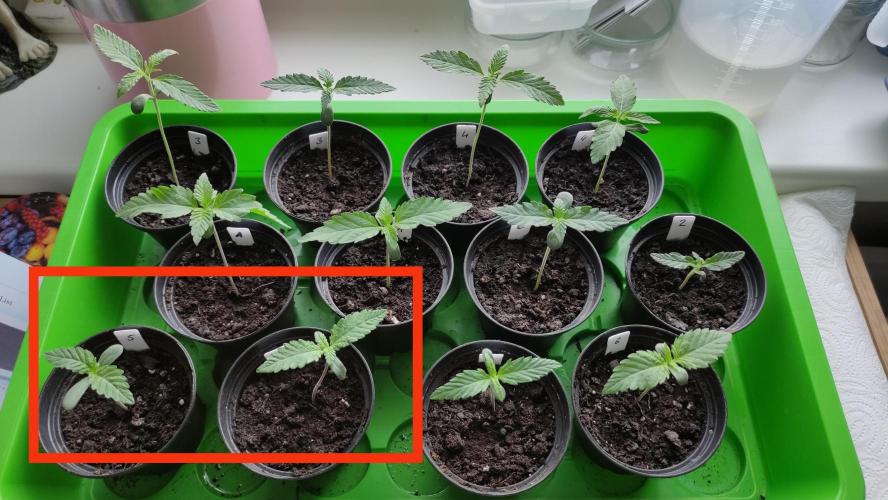
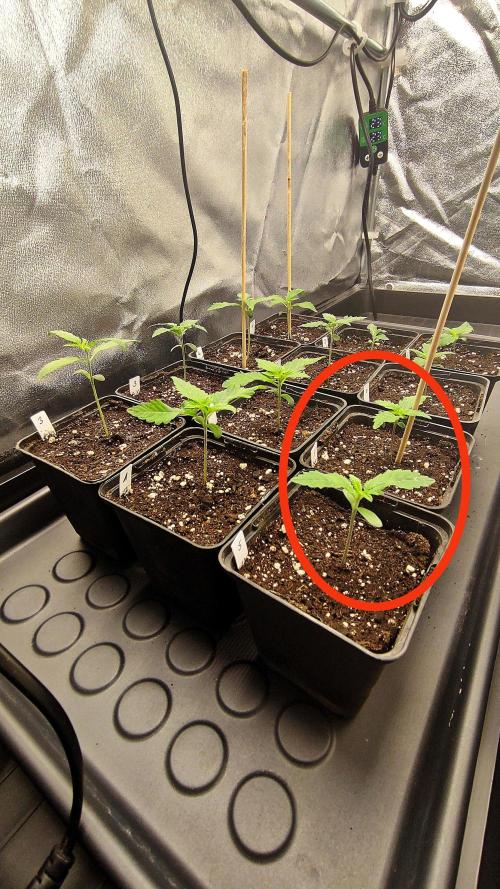
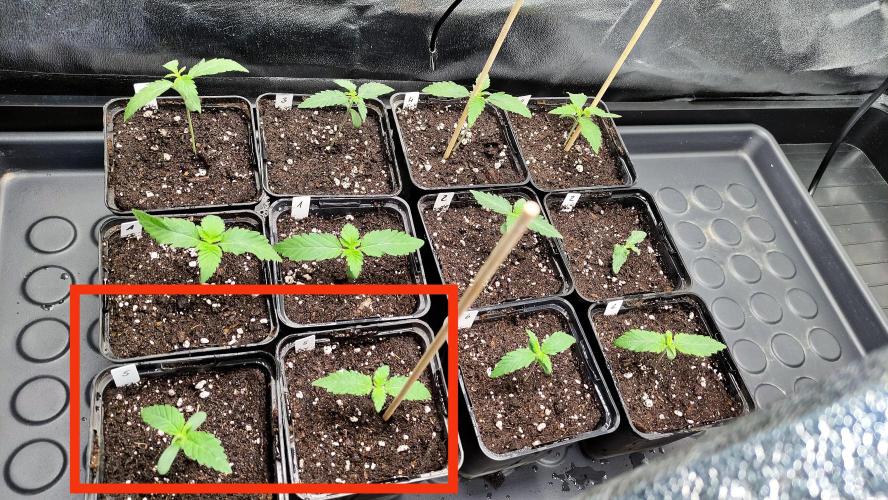
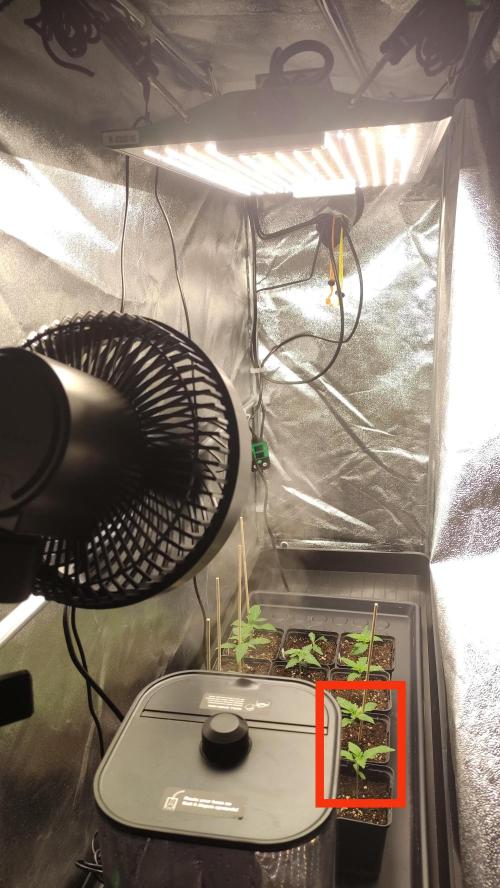
Berlins_Finest I divide the vegetation phase into the seedling phase, which lasts 3 weeks, and the actual growth phase, which lasts 3-6 weeks. For the Purple Kush grow, it was a 3-week seedling phase and a 3-week growth phase. The amount of water required may seem very small, but due to the high humidity in the grow room, not much watering is needed. I've then calculated the watering rate for you over 24 hours. Not much happens during the week; monitor the readings and check for mold and signs of deficiency. From day 1, the seedlings were placed in nursery pots and remained there until day 5. On day 6, the young plants were transplanted into larger pots.
Equipment used:
Pots: Day 1-5, 7cm diameter x 5.5cm height, from day 6, 9x9cm x 9.5cm height
Lamp: Viparspectra Pro P2000, increasing from 5%-10%, equivalent to 50-100 ppfd or 7.5-10K lux
Substrate: Plagron Lightmix (spoiler alert - seems too light, nitrogen deficiency symptoms will occur later in the grow)
Fan: AC Infinity - Cloudray S6
Humidifier: AC Infinity - Cloudforge
1 like
1 comment
Share
Used techniques
Transplantation
Technique
2
Week 2. Vegetation1y ago
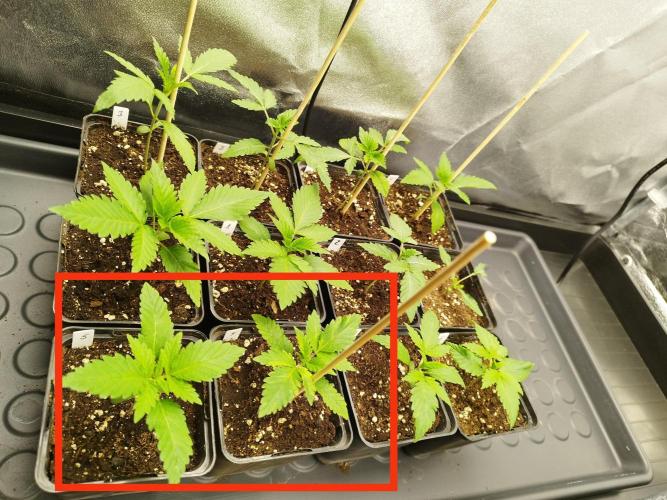
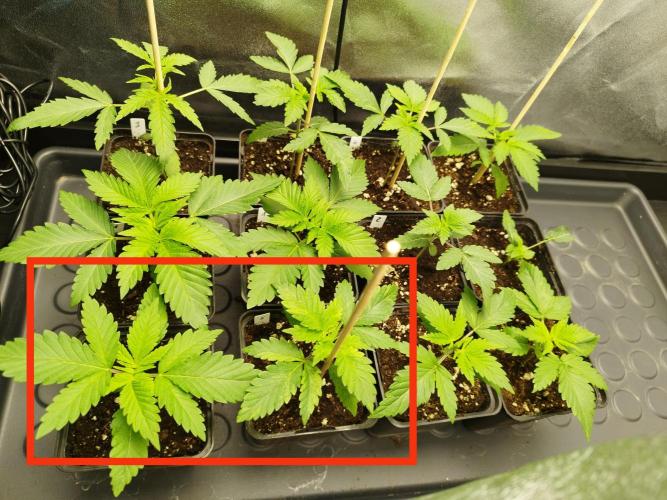
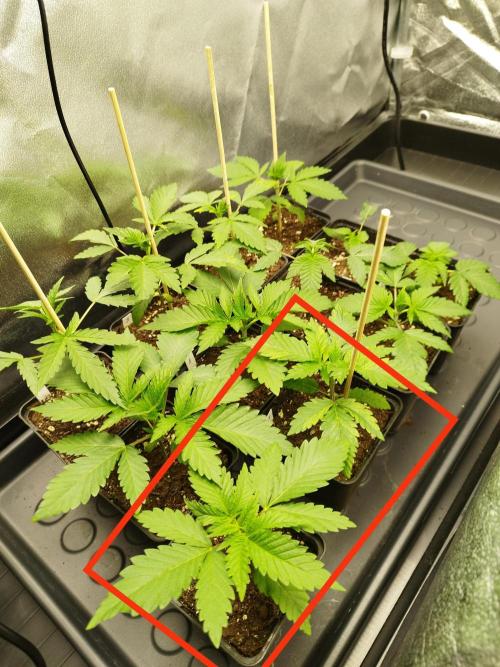
11 cm
Height
17 hrs
Light Schedule
25 °C
Day Air Temp
6.2
pH
No Smell
Smell
400 PPM
TDS
75 %
Air Humidity
20 °C
Solution Temp
23 °C
Night Air Temp
0.7 liters
Pot Size
0.02 liters
Watering Volume
60 cm
Lamp Distance
Nutrients 2

Power Roots
1 mll

Vita Start
1 mll
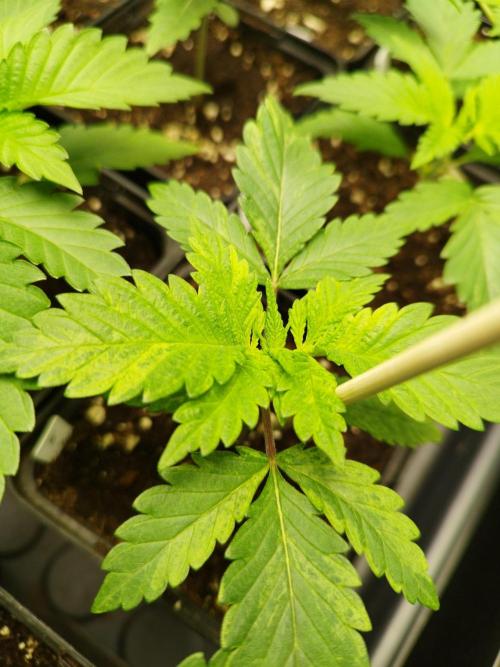
Berlins_Finest At the end of the first week, beginning of the second week, the seedlings were transferred to the next larger pots, where they will remain for the next 2 weeks. It should be mentioned at this point that I used to always plant two seeds of each strain for safety, as seen in the photos. The weaker plant would then be discarded. However, I have noticed that the quality of the seeds has improved in recent years, and I had to discard good plants. Therefore, from now on, I will only take one backup seed instead of 6, in case a seed gets stuck or, as in the current case, one of the plants has a virus, a mutation, or other deficiency symptoms. Otherwise, this week all parameters for the environmental conditions will be adjusted according to the development of the plants. Light increased to 150 ppfd. Substrate, temperature, humidity remain as in week 1. As soon as the plants threaten to touch the lid of the mini greenhouse, the lid will be removed, and the ventilation will be slightly increased, allowing the plants to sway gently in the airflow, which leads to more stability in the cell structure. The plants need a little more water. And I will start with minimal fertilization. Essentially, just something to support root growth and a little Plagron Vita Start.
The technique used is the same as in week 1.
2 likes
1 comment
Share
3
Week 3. Vegetation1y ago
15 cm
Height
18 hrs
Light Schedule
25 °C
Day Air Temp
6.3
pH
No Smell
Smell
400 PPM
TDS
70 %
Air Humidity
20 °C
Solution Temp
23 °C
Night Air Temp
0.7 liters
Pot Size
0.04 liters
Watering Volume
55 cm
Lamp Distance
Nutrients 2
Power Roots
1 mll
Vita Start
1 mll
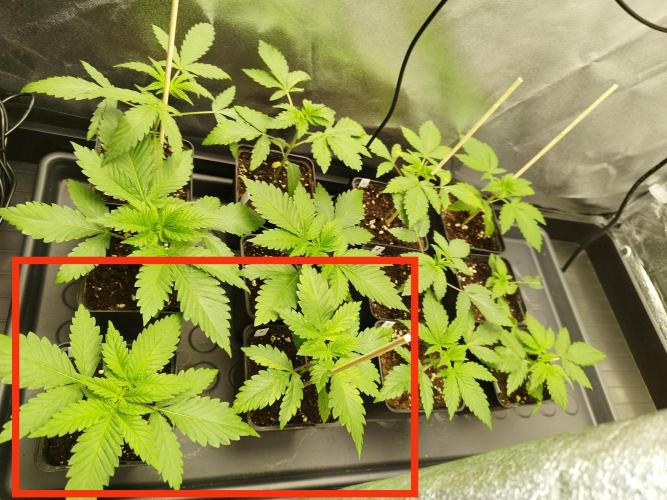
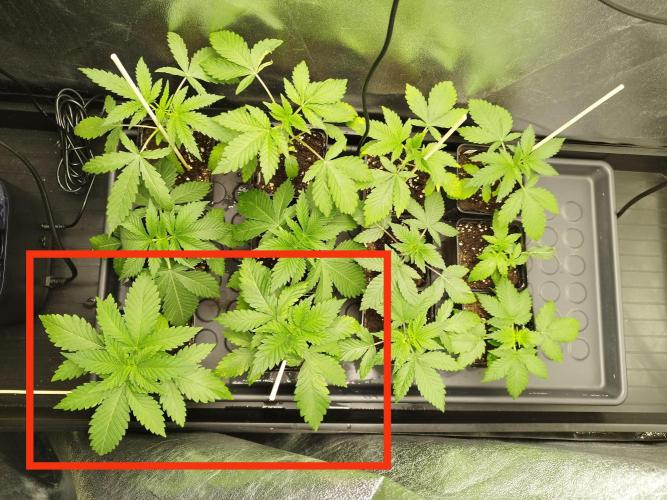
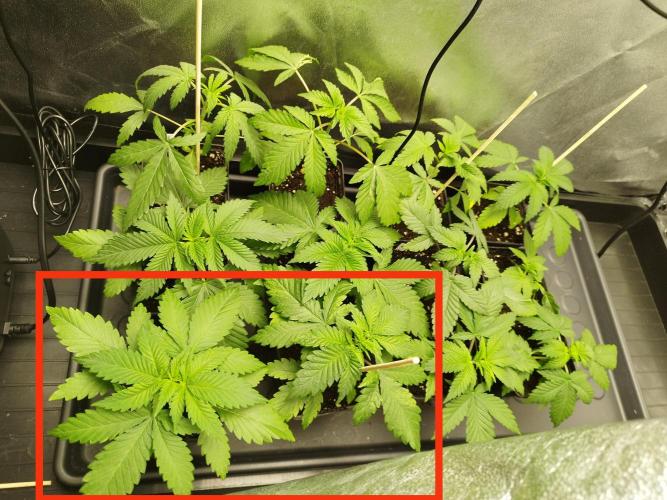
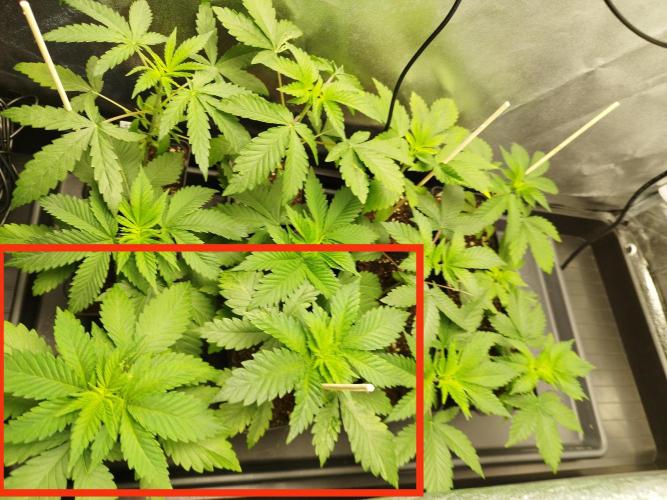
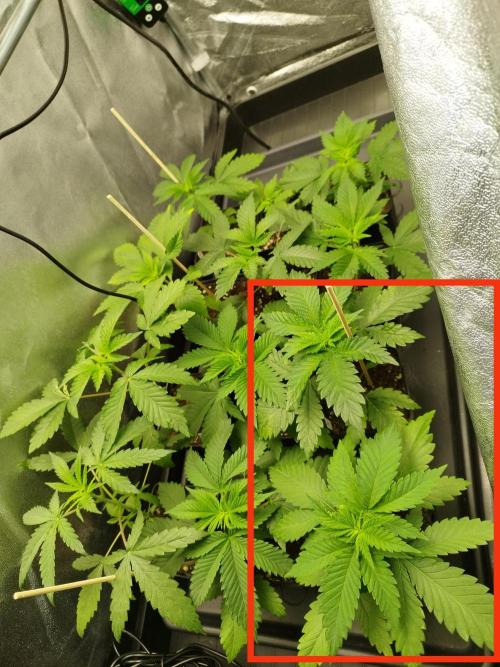
Berlins_Finest In the third week, it's time to observe the plants and meet their needs. Raise the light to 200 ppfd, and water according to the plants' requirements. Support weak plants with wooden sticks.
To make watering easier for myself, I got soil moisture sensors. The first ones from Wendowerk were unfortunately junk and now sit in the flower boxes on the balcony. The display is too inaccurate and not useful for cannabis cultivation. I then did some research and came across the Ecowitt products. To make it less work, you need a gateway to read or export the data via WiFi and the associated app. Admittedly, it cost me a few of my few remaining hairs until the devices were recognized and set up in the app. However, the devices reliably show the moisture of the soil. After watering, my value is at 80% and then dries down to 30-45% in 2-3 days, which tells me when I need to water again. Additionally, I weigh the pots so I know how much I need to water.
Used equipment:
At this point, I want to mention the devices I use for my measurements.
Parmeter: VidalKraft Quantum Parmeter
Luxmeter: Urceri Digital Lux Meter
EC/PH meter: AC Infinity Hydroponic Meter PRO Kit; UIUZMAR pH and EC meter, calibration solution from Apera
Soil moisture meter: Wendowerk soil moisture meter (unfortunately major junk, do not buy); ECOWITT GW1206 (gateway), wireless soil moisture sensors WH51 (one for each pot)
Scale for weighing the plants: HENDI Digital Kitchen Scale up to 15 kg
1 like
comments
Share
4
Week 4. Vegetation1y ago
20 cm
Height
18 hrs
Light Schedule
26 °C
Day Air Temp
6.3
pH
No Smell
Smell
450 PPM
TDS
61 %
Air Humidity
20 °C
Solution Temp
21 °C
Night Air Temp
15 liters
Pot Size
0.5 liters
Watering Volume
35 cm
Lamp Distance
Nutrients 7

Sugar Royal
0.17 mll
Power Roots
0.32 mll

Pure Zym
1.1 mll
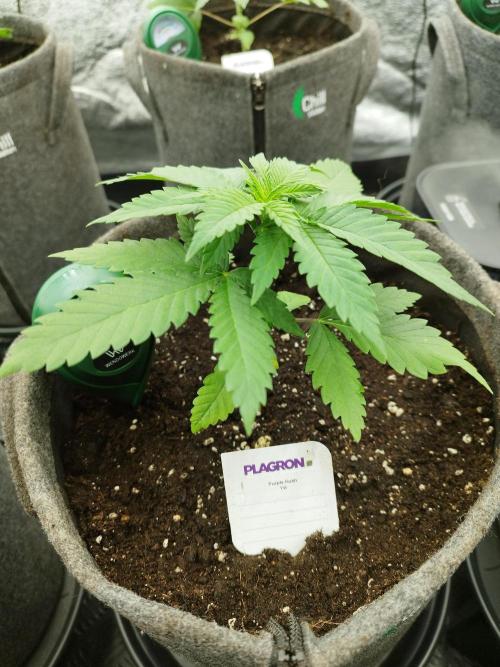
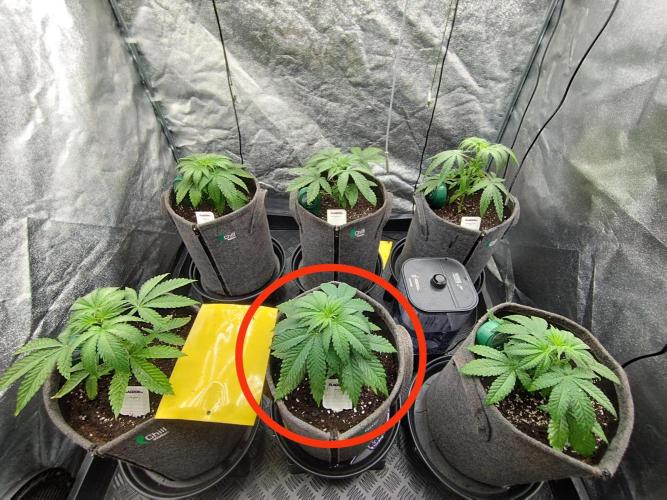
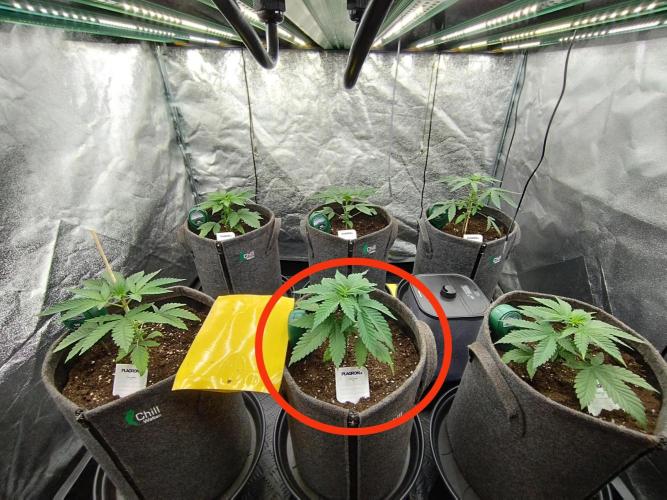
Berlins_Finest In week 4, for me the first week after the seedling phase, the repotting into the final pots took place. I'm currently using fabric pots from "Chillwelten," now "Rooties" (https://rooties.eu/). I've been using their pots since they hit the market (several years) and I'm convinced of the quality. They used to be the best fabric pots on the market. Nowadays, everyone is copying, so you can also find high-quality pots from other brands. But Rooties also has special fabric pots for Living Soil - definitely check them out.
I like to support small local suppliers who invest a lot of love and passion into the development of good ideas, so I stick with the "Rooties." I've had good experiences with tomatoes, chilies, various herbs, flowers, and cannabis in these pots.
The pots retain moisture well, are breathable, come in all common sizes, and have a zipper, which is sometimes helpful for checking roots or disposing of old substrate. There are matching covers, which I'm not currently using. Outdoors, it started to form mycelium under the covers, but I can't assess whether it came from the mycorrhiza or if it was mold. So better left out.
I filled the 15l pots with Plagron Lightmix (I have the impression that the Lightmix might have been too light, and my plants started showing nitrogen deficiency symptoms relatively quickly. Therefore, I will mix some worm humus into the Lightmix in the next grow.
I prepared the pots a week in advance. The Plagron Lightmix is well moistened beforehand (but not soaked); when you squeeze the moist soil in your hand, it should hold its shape, and only a few drops should be able to squeeze out. The moist soil is then pre-treated with nematodes against fungus gnats, which can then do their job for a week. If there were fungus gnat larvae in the substrate, the nematodes would have eliminated the problem before I plant the seedlings.
I then make holes the size of the current pots in the center of the large pots, add a mycorrhiza preparation from Dynomyco into the planting hole to give the seedlings an optimal start. The mycorrhizal fungal network penetrates the cannabis roots and forms a symbiosis with them. Through the fungal mycelium, the cannabis plant receives water and nutrients, and in return, the fungus gets sugars that it cannot produce itself. I've been working with mycorrhiza for over 2 decades, and it has always benefited all seedlings. It also benefits the later adult plants.
Under my fabric pots, I have standard large pot saucers from the hardware store for a small price.
Underneath, there’s a Drainmaster; unfortunately, when I got it, there wasn't a large version for big pot diameters, so I have the pot saucers in between.
I always lay out 3-4 large yellow sticky traps to attract any pests and check if I have a pest problem.
In this grow, there were no pests!
Used equipment:
Light: Farmbros Led 700W (three-channel LED, Veg, Bloom, UV-A, continuously adjustable, cannot be controlled with the AC Infinity controller)
Light Controller: Jerry 43 - the product is sold by several manufacturers, RJ45 cable required for the lamp (sunrise and sunset, and the 3 channels can be controlled separately, timers can be saved...)
Exhaust: Prima Klima PK125 EC-TC fan, with integrated temperature and speed control, 680 m³/h + Rhino Pro exhaust filter
Circulation: 2x AC Infinity Cloudray S6 Gen2
Humidifier: AC Infinity Cloudforge T3
2 likes
comments
Share
Used techniques
Transplantation
Technique
5
Week 5. Vegetation1y ago
25 cm
Height
18 hrs
Light Schedule
27 °C
Day Air Temp
6.3
pH
No Smell
Smell
750 PPM
TDS
63 %
Air Humidity
20 °C
Solution Temp
21 °C
Night Air Temp
15 liters
Pot Size
0.43 liters
Watering Volume
35 cm
Lamp Distance
Nutrients 6
Sugar Royal
0.78 mll
Power Roots
0.83 mll
Pure Zym
1.1 mll
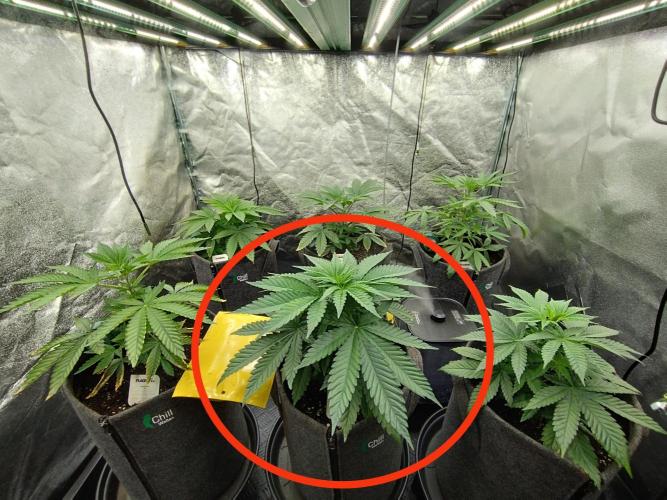
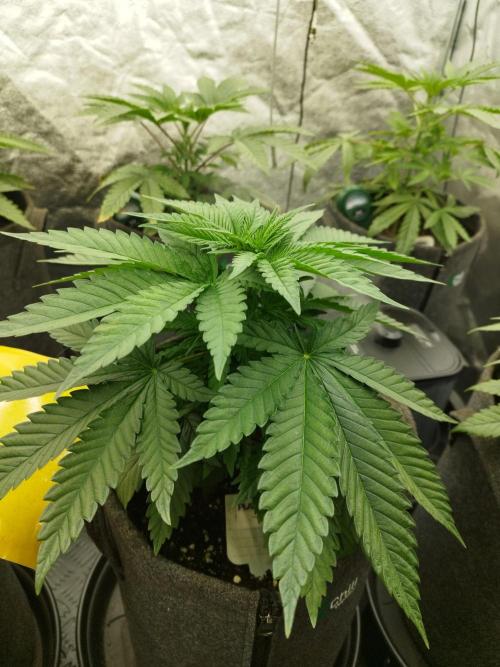
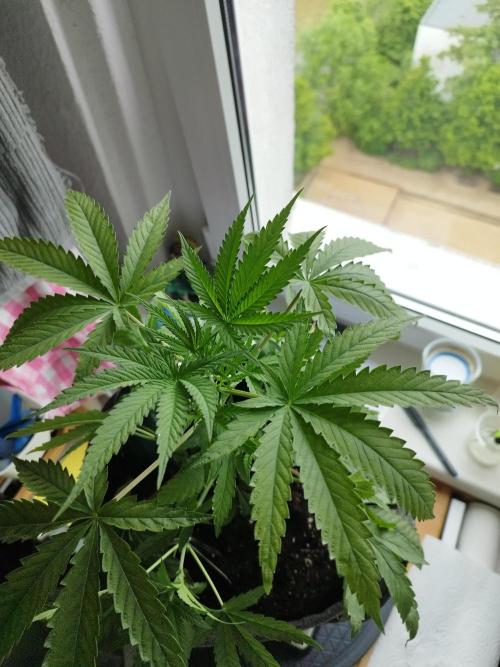
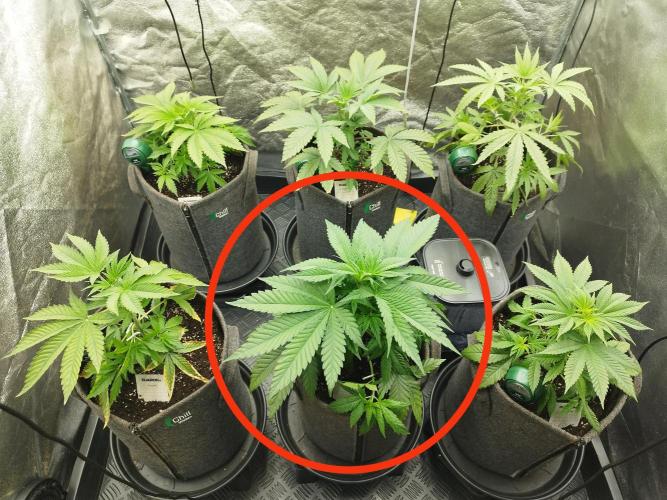
Berlins_Finest In week 5, not much happens at the beginning. Just keep increasing light, water, and nutrients moderately, and pay attention to what the plants are trying to tell you. In week 5, I noticed slight deficiency symptoms. The leaves started to turn a bit yellow, while the leaf veins remained dark green. The damage could have several causes, but for me, nitrogen or magnesium deficiency seemed most likely. Iron deficiency was also a possibility, but I spray Plagron Vita Race during the growth phase, which contains iron as a trace element, so it couldn't be an iron deficiency.
Most likely, it was magnesium deficiency. The tap water I use has a Ca - Mg ratio of 11:1 (normal is 3:1), so way too much calcium compared to magnesium. To balance the deficit in the water, I use a 10% solution made from 10g of Epsom salt (magnesium sulfate heptahydrate MgSO4 x 7 H2O) and 90ml of distilled water.
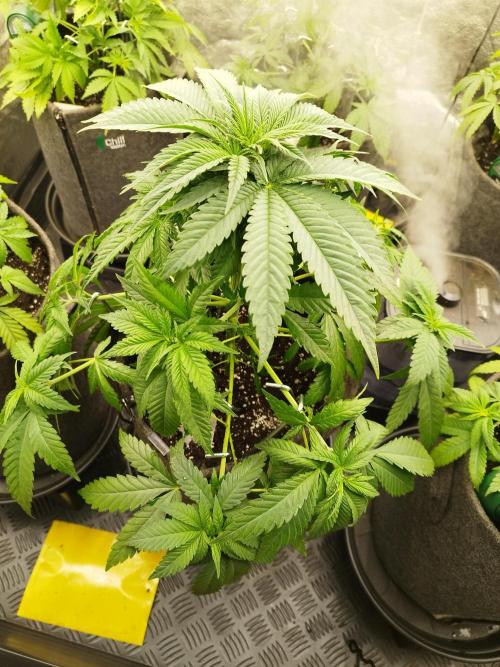
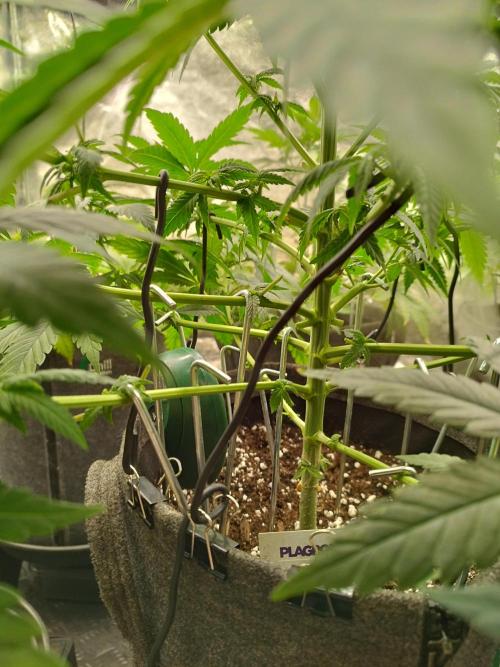
By the end of the week, I started mainlining and LST. To secure the shoots in the desired position, I use 22cm long stainless steel tent pegs, rubberized binding wire, and paper clips. The Purple Kush from Kannabia is very robust, forgiving of grow mistakes, as it handles high nutrient doses well and has endured all training techniques. The Purple Kush was always the first to recover excellently after each intervention. I could have pushed the Purple Kush even further, especially with nutrients. However, as seen in the pictures, the other plants were not as tolerant and quickly showed nutrient burn, so I had to adjust to a lower common level for all plants. Thus, I couldn't fully exploit the potential of the strain. But I will try again in another grow with plants that I know can handle as many nutrients as the Purple Kush.
One or two leaves had to go because they were shading the underlying shoots too much. The diameter of the largest leaves was 25cm. 😱 During one watering in week 5, there was clove extract, field horsetail extract, and effective microorganisms for the general improvement of plant health and strengthening of plant defense mechanisms.
Cal-Mag calculator: https://calmag.webklex.com
1 like
comments
Share
Used techniques
Main-Lining
Technique
Defoliation
Technique
LST
Technique
6
Week 6. Vegetation1y ago
36 cm
Height
18 hrs
Light Schedule
27 °C
Day Air Temp
6.3
pH
No Smell
Smell
750 PPM
TDS
62 %
Air Humidity
20 °C
Solution Temp
22 °C
Night Air Temp
15 liters
Pot Size
0.67 liters
Watering Volume
35 cm
Lamp Distance
Nutrients 7
Hakaphos Soft Plus 14+6+24 (+3)
0.55 mll
Sugar Royal
0.67 mll
Power Roots
1.11 mll
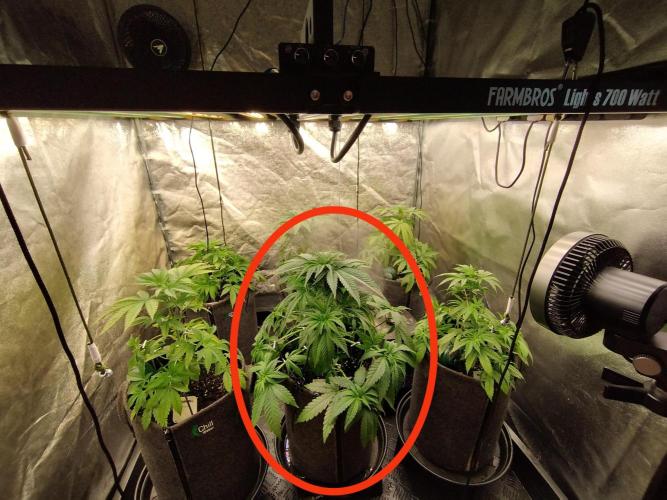
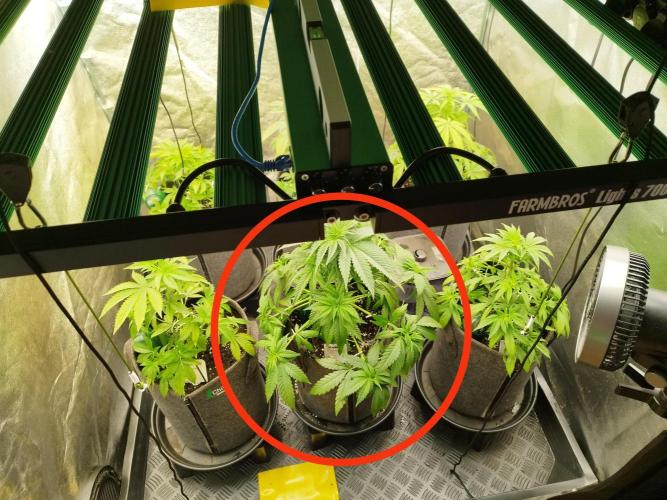
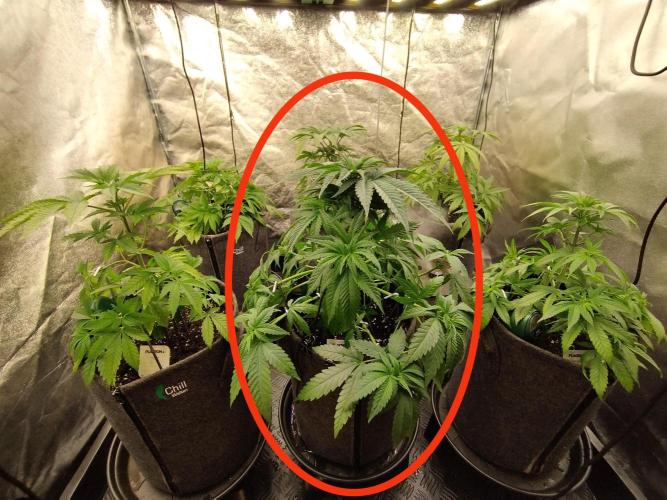
Berlins_Finest This week I continued with LST / Mainlining. The plants are noticeably starting to stretch. Since I was unsure about the deficiency symptoms, I added Hakaphos Soft Plus with a lot of nitrogen and potassium during one watering. In the end, there were no issues with the Purple Kush, only with the other plants.
2 likes
comments
Share
Used techniques
Defoliation
Technique
LST
Technique
Main-Lining
Technique
7
Week 7. Flowering1y ago

43 cm
Height
12 hrs
Light Schedule
28 °C
Day Air Temp
6.3
pH
Weak
Smell
800 PPM
TDS
61 %
Air Humidity
20 °C
Solution Temp
21 °C
Night Air Temp
15 liters
Pot Size
0.9 liters
Watering Volume
35 cm
Lamp Distance
Nutrients 8
Sugar Royal
0.5 mll
Power Roots
1 mll
Pure Zym
1.2 mll
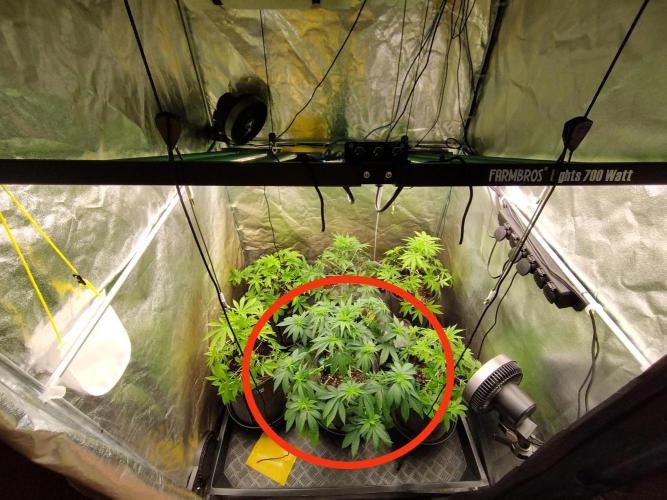
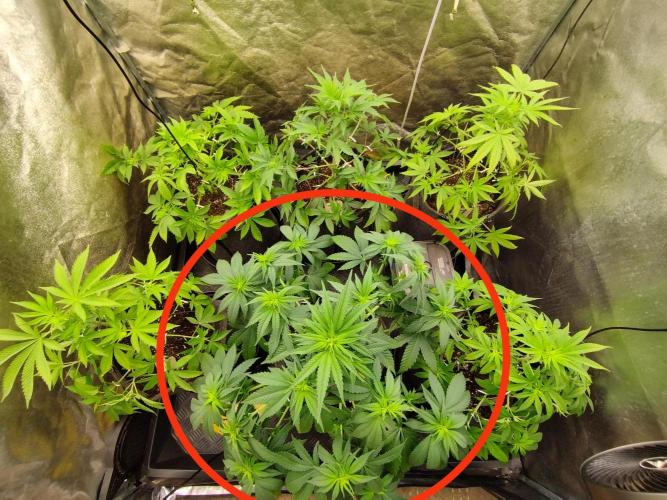
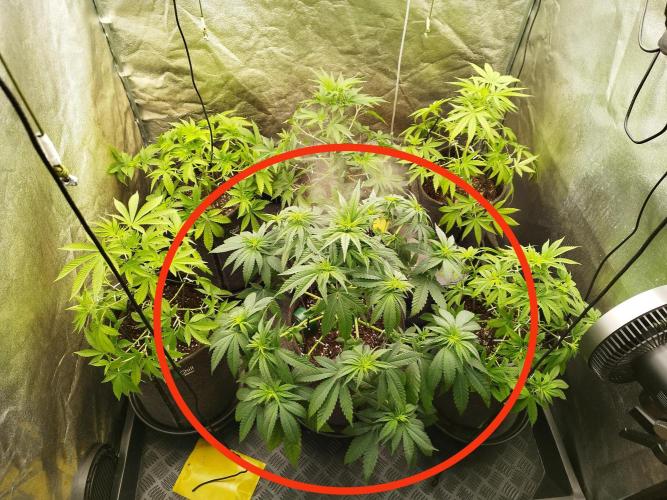
Berlins_Finest The only noteworthy thing from this week is that I thought the plants still had a slight nitrogen deficiency, which is why I applied a foliar feed with "Hakaphos blue" once daily in the morning. I set the EC value for the spray solution to 1.0-1.2.
Tip: For all spray solutions, I add a drop of dish soap to the pressure sprayer; this breaks up the surface of the spray mist a bit, creating a finer spray mist and preventing large droplets on the leaves, which reduces the risk of burns (due to the magnifying effect of the spray droplets). Personally, I've never had issues with leaf burns.
2 likes
comments
Share
8
Week 8. Flowering1y ago

51 cm
Height
12 hrs
Light Schedule
27 °C
Day Air Temp
6.3
pH
Weak
Smell
800 PPM
TDS
61 %
Air Humidity
20 °C
Solution Temp
20 °C
Night Air Temp
15 liters
Pot Size
1.1 liters
Watering Volume
35 cm
Lamp Distance
Nutrients 8
Sugar Royal
0.4 mll
Power Roots
0.5 mll
Pure Zym
0.6 mll
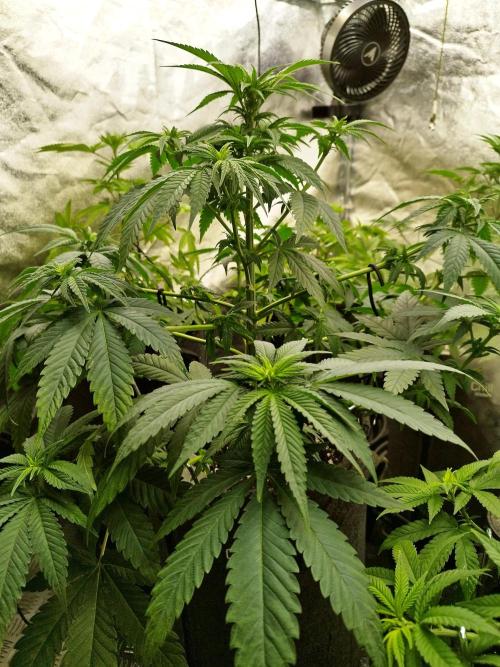
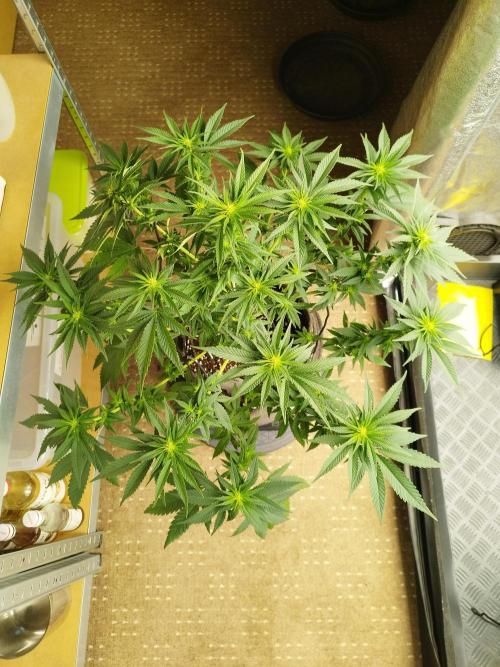
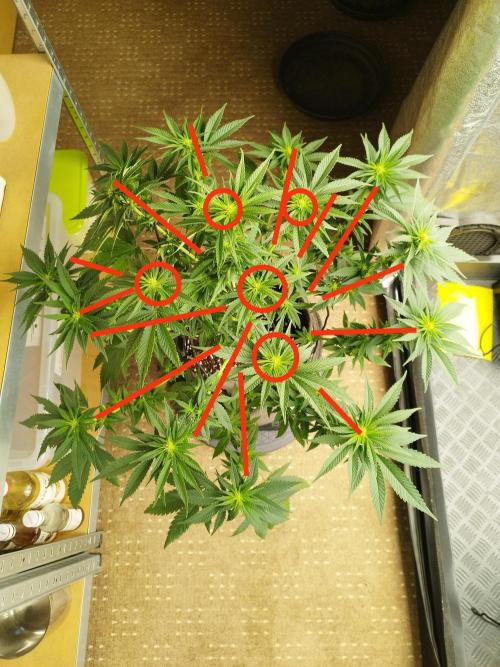
Berlins_Finest In flowering week 2, I do my first major defoliation. All leaves that cover the buds or generally obstruct light penetration are removed. Mostly, leaves from the interior of the plant are taken off. The branches are then bent or pulled into their final position to ensure the highest possible light yield for the plant. In one picture, you can see how well this works with the tent pegs and tie wire. Micro buds in the lower part of the plant are also removed right away. They just rob the more important buds of their nutrients, and it doesn't make sense to leave them on the plant until week 4 (2nd defoliation / lollipopping). In the end, I had 14 shoots in the lower and middle areas forming the outer flower circle, plus 5-6 shoots in the inner flower circle. (see picture)
2 likes
comments
Share
Used techniques
Defoliation
Technique
9
Week 9. Flowering1y ago

57 cm
Height
12 hrs
Light Schedule
28 °C
Day Air Temp
6.3
pH
Normal
Smell
800 PPM
TDS
60 %
Air Humidity
20 °C
Solution Temp
21 °C
Night Air Temp
15 liters
Pot Size
1.5 liters
Watering Volume
35 cm
Lamp Distance
Nutrients 8

Terra Bloom
1.6 mll
Sugar Royal
0.3 mll
Power Roots
0.5 mll
Berlins_Finest Week 3 of flowering is basically a pretty boring week, there's not much to do. Light intensity and nutrients need to be adjusted, maybe remove a leaf here and there or bend it out of the way; otherwise, just let the plant grow and gain mass as undisturbed as possible. In week 3, there’s also a noticeable stretch, which for the Purple Kush was almost reaching its end.
3 likes
comments
Share
10
Week 10. Flowering1y ago
58 cm
Height
12 hrs
Light Schedule
30 °C
Day Air Temp
6.3
pH
Normal
Smell
900 PPM
TDS
60 %
Air Humidity
20 °C
Solution Temp
22 °C
Night Air Temp
15 liters
Pot Size
1.6 liters
Watering Volume
35 cm
Lamp Distance
Nutrients 8
Terra Bloom
3.3 mll
Sugar Royal
0.7 mll
Pure Zym
0.9 mll
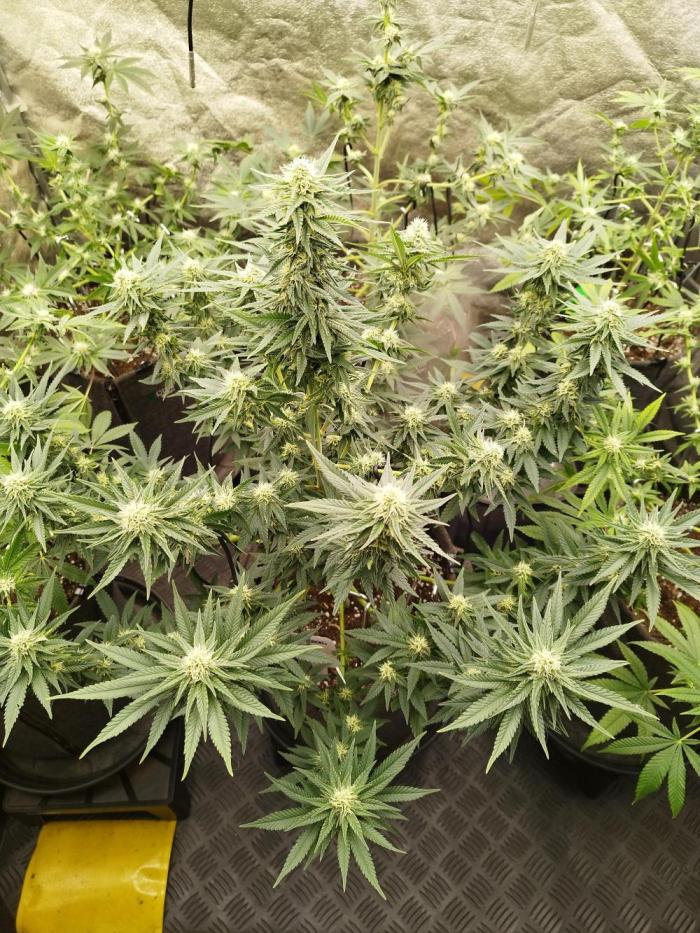
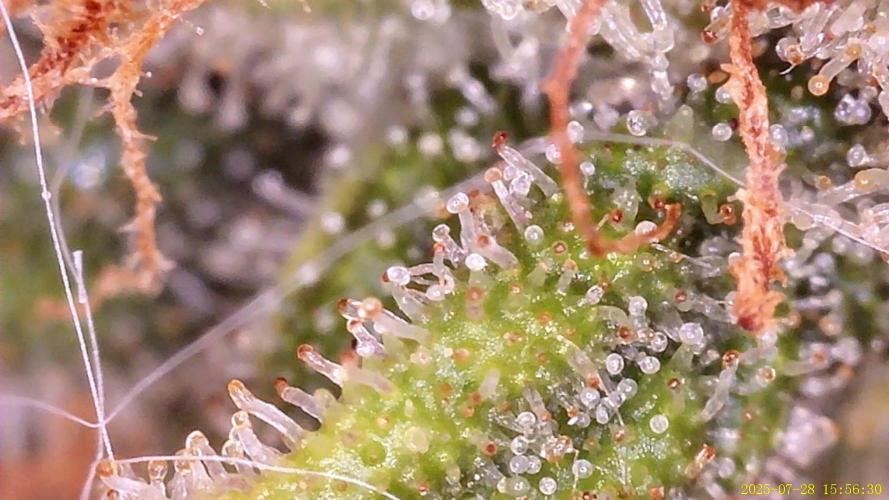
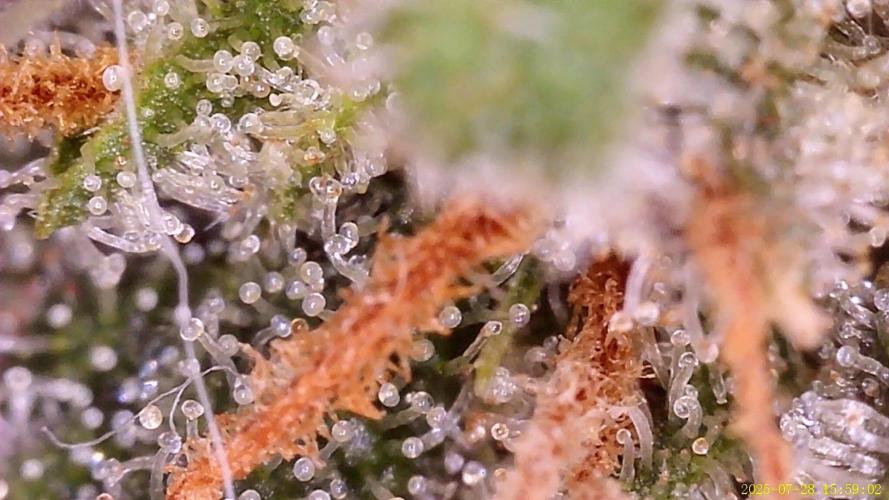
Berlins_Finest Flowering week 4 is mostly, like week 3, quite boring; it’s all about watering and checking. But towards the end of the week, around flowering day 25-28, things get exciting. Then it’s time for the ladies - it’s getting trimmed! The big defoliation takes place, removing most of the fan leaves, leaving only the top 1-2 leaf pairs. The lower third up to 50% (depending on the plant's growth and the amount of buds) is radically removed by me. Leaves facing outward that don’t cover any buds (not even from other plants) can stay on the plant. The first trichomes are already visible, and from now on, the sugar content increases more and more each day.
3 likes
comments
Share
Used techniques
Defoliation
Technique
Lollipopping
Technique
11
Week 11. Flowering1y ago

59 cm
Height
13 hrs
Light Schedule
30 °C
Day Air Temp
6.3
pH
Normal
Smell
1000 PPM
TDS
60 %
Air Humidity
20 °C
Solution Temp
23 °C
Night Air Temp
15 liters
Pot Size
1.2 liters
Watering Volume
35 cm
Lamp Distance
Nutrients 7
Terra Bloom
2.9 mll
Sugar Royal
0.58 mll

Power Buds
0.71 mll
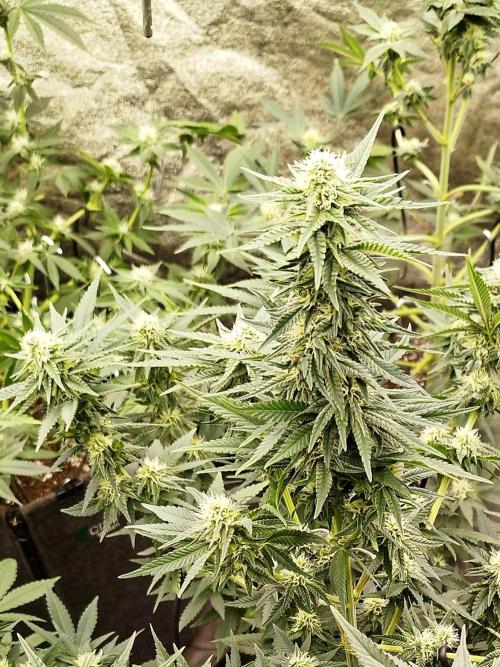
Berlins_Finest At some point in the summer, the outside temperatures get too high for our plants, and we need to be prepared to take quick countermeasures. I encountered this problem sometime between week 5 and 6. The outside temperatures were around 32-36°C in the shade. My grow room is oriented to the north side, so it's 2-4 degrees cooler on that side of the apartment than on the sunny side. Still, I had to do something to keep the temperature in the tent around 27-29°C. First, I turned down the power of the LED a bit, then I placed a second humidifier from AC Infinity in the tent, as one was no longer able to maintain the humidity at 60%. However, I intentionally increased the humidity with both humidifiers to 70-75% to achieve an acceptable VPD (between 1.2-1.3) for the plants. Important!!! If you maintain such high humidity during the day, especially in the middle of the flowering phase, it must be reduced to a level that prevents mold formation before it goes into the dark phase. So about 1 hour before the dark phase, I turned off one humidifier and turned on the dehumidifier about 30 minutes before the dark phase. This way, I had a good value of around 60% at the start of the dark phase. If that were all, but on top of that, it poured like crazy at night, which meant the dehumidifier had to run continuously at night. With these measures, I was able to keep the temperature on average at 29°C during the day, which is already at the upper end of the cannabis comfort zone.
2 likes
comments
Share
12
Week 12. Flowering1y ago



61 cm
Height
13 hrs
Light Schedule
31 °C
Day Air Temp
6.3
pH
Normal
Smell
750 PPM
TDS
60 %
Air Humidity
20 °C
Solution Temp
22 °C
Night Air Temp
15 liters
Pot Size
1.5 liters
Watering Volume
35 cm
Lamp Distance
Nutrients 7
Terra Bloom
2.58 mll
Sugar Royal
0.53 mll
Power Buds
0.75 mll
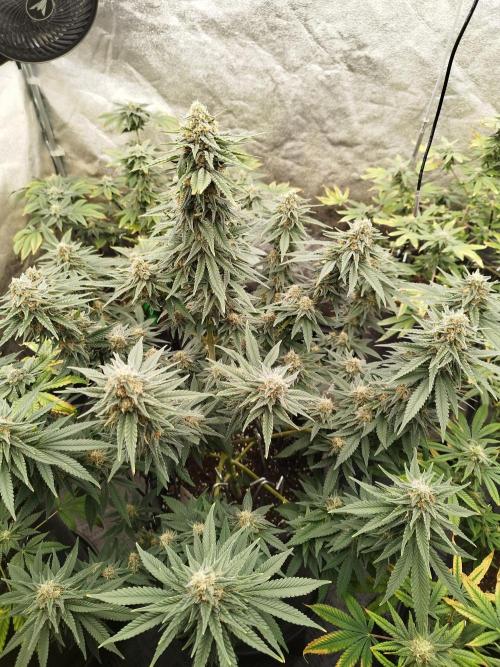
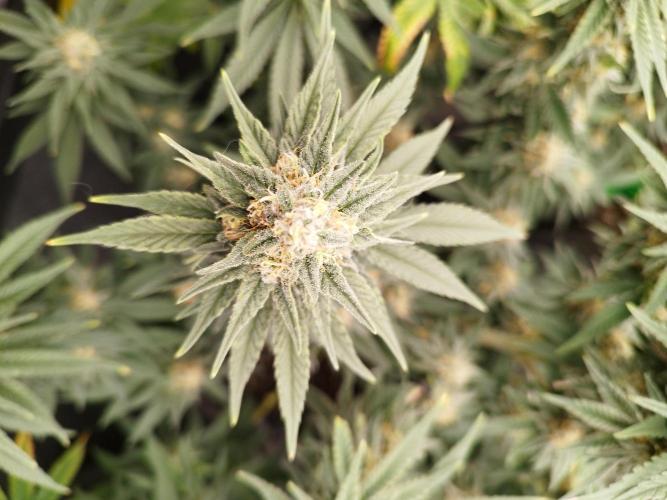
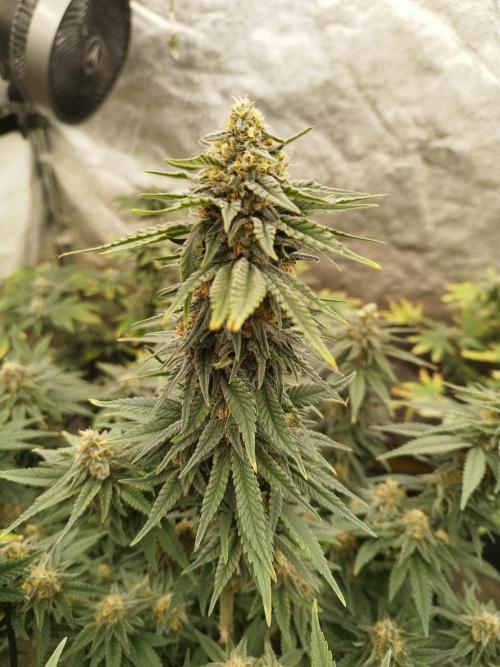
Berlins_Finest Magnesium deficiency and signs of over-fertilization on the other plants are on the to-do list this week. The Purple Kush, however, is facing these challenges with calm; it doesn't care much about such problems. The plant looks great, but unfortunately, I have to reduce the EC value of the watering to match the level of the other plants. So I couldn't fully unlock the potential of the Purple Kush. But I will grow this strain again with others that I know can handle higher fertilizer amounts.
I addressed the magnesium deficiency of the other plants with a 10% Epsom salt solution (10g Epsom salt + 90ml distilled water). I explained this in more detail in VEG 5. Well, to combat the over-fertilization, I reduced the amount of fertilizer, which goes without saying.
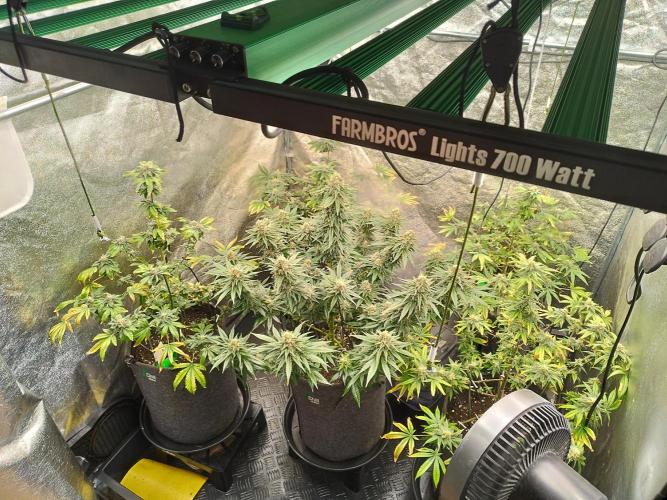
One of the plants in the grow room actually turned out to be a hermaphrodite. It was a true hermaphrodite with both male and female flower characteristics. I carefully removed the plant and banished it to the fresh air. After that, I removed all the male pollen sacs from the plant, and for the rest of its life, it stayed on the balcony, which unfortunately resulted in a lower yield because it didn't have the same light conditions as in the grow tent.
Unfortunately, the hermaphrodite plant had already released some pollen, which is why one branch of the Purple Kush developed a few seeds. But fortunately, it was only one branch.
3 likes
comments
Share
13
Week 13. Flowering1y ago


61 cm
Height
12 hrs
Light Schedule
29 °C
Day Air Temp
6.3
pH
Normal
Smell
800 PPM
TDS
60 %
Air Humidity
20 °C
Solution Temp
24 °C
Night Air Temp
15 liters
Pot Size
1 liters
Watering Volume
35 cm
Lamp Distance
Nutrients 7
Terra Bloom
4.33 mll
Sugar Royal
0.82 mll
Power Buds
0.78 mll
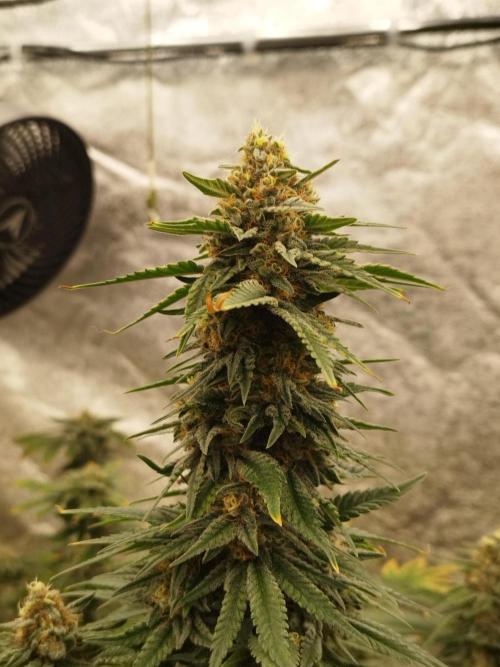
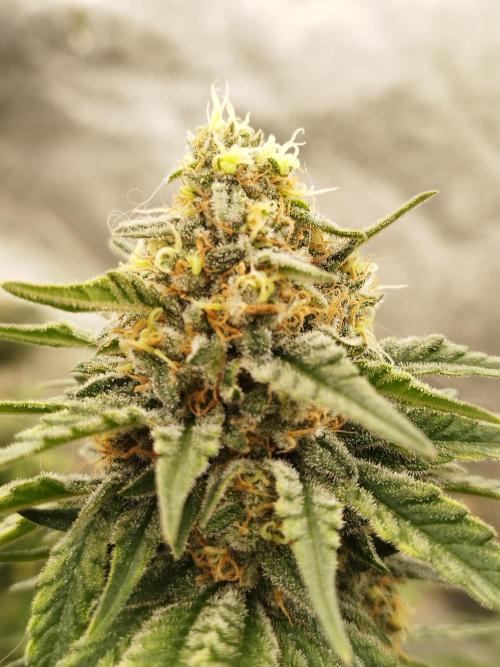
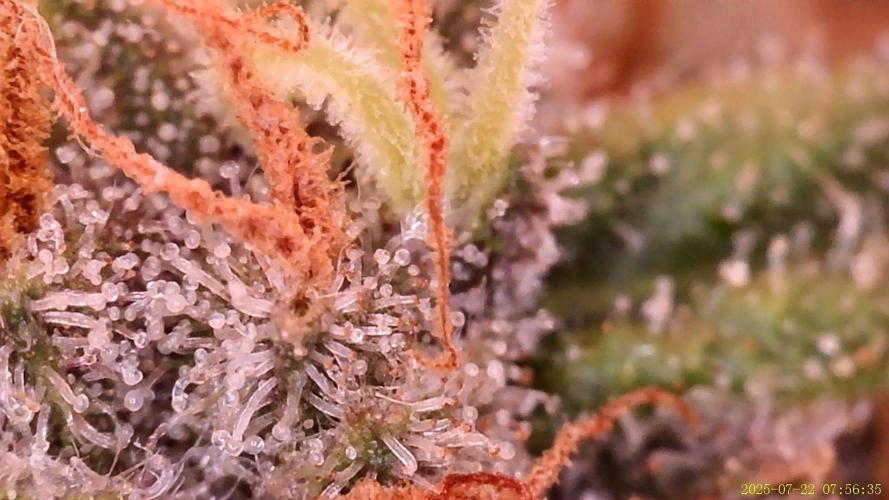
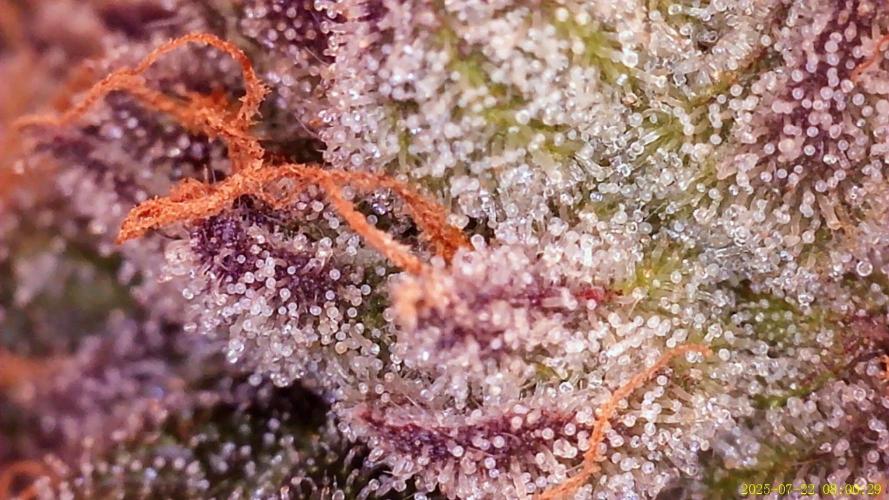
Berlins_Finest As the saying goes, "The thick end comes at the end!" - and for this grow, that meant weather! Heat in Germany during the day and rain and high humidity at night. The plants seemed to sense their end was near - they were under heat and probably light stress as well. I couldn't even chill out with some reggae music for relaxation. In response to all the stress this week, all the remaining plants in the tent started to hermie (false hermaphrodites). True to the motto - before I die - I’ll impregnate myself - they all went off like fireworks. I picked the new bananas (pollen sacs - they look like yellow curved bananas) from the plants daily with tweezers and always prayed that not much or preferably no pollen had spread onto the buds. I tried to de-stress the plants with Siapton (enzymes + hormones), but I didn't quite succeed. What did I learn from this? The next summer grow will be timed so that the light cycle is at night, and I need to get an air conditioner. That should solve the heat stress problem.
2 likes
comments
Share
14
Week 14. Flowering1y ago



61 cm
Height
11 hrs
Light Schedule
29 °C
Day Air Temp
6.3
pH
Normal
Smell
500 PPM
TDS
60 %
Air Humidity
20 °C
Solution Temp
24 °C
Night Air Temp
15 liters
Pot Size
0.9 liters
Watering Volume
35 cm
Lamp Distance
Nutrients 7
Terra Bloom
1.74 mll
Sugar Royal
0.33 mll
Power Buds
0.37 mll
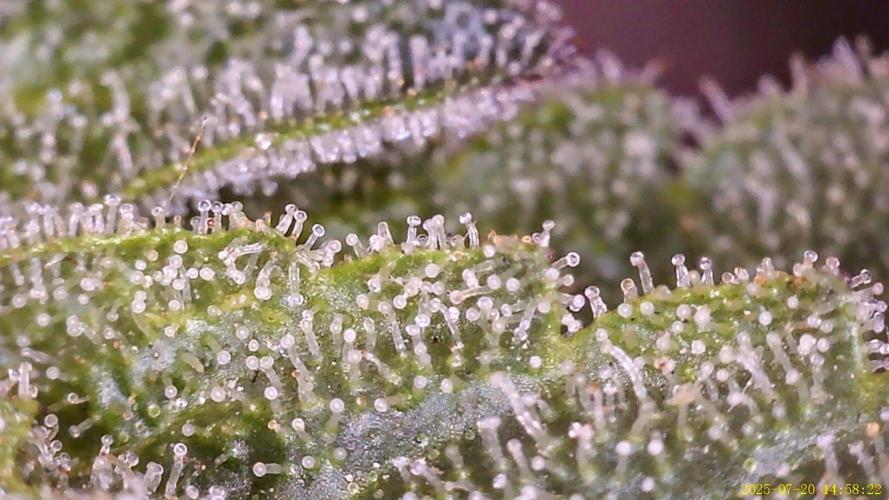
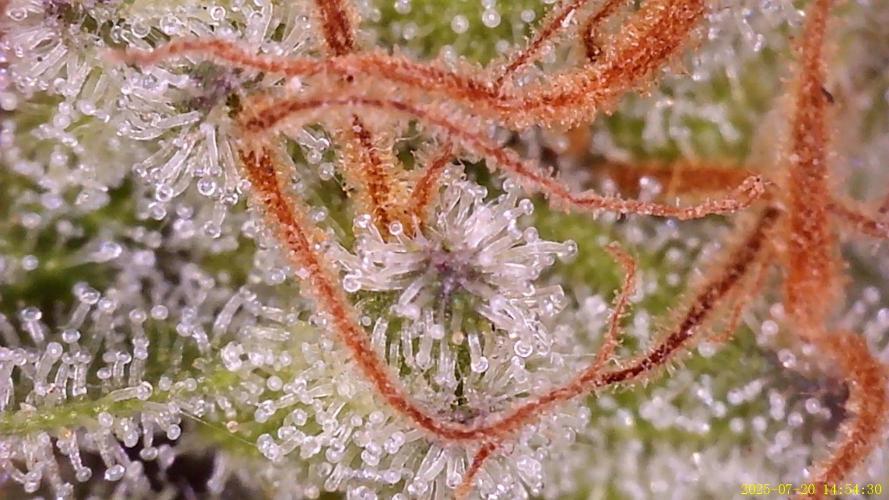
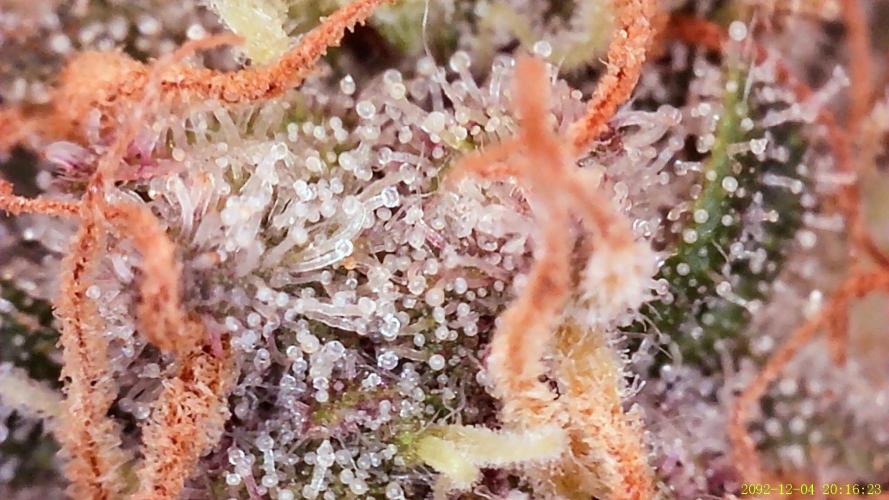
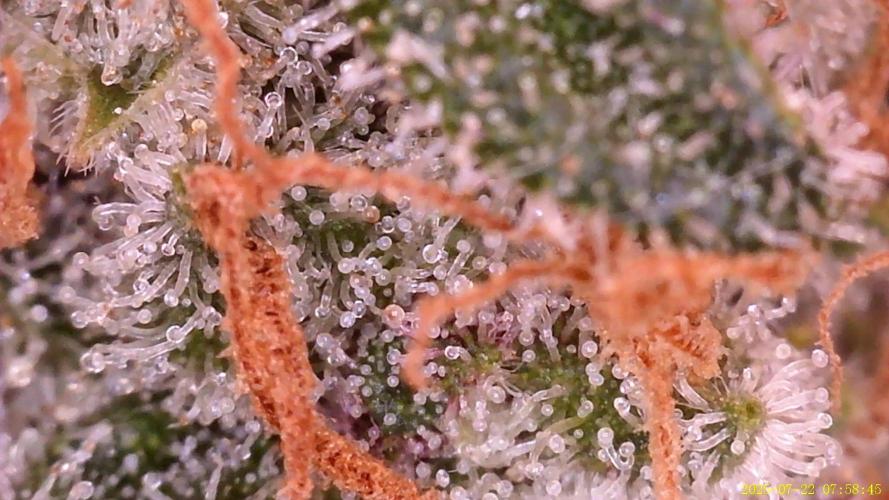
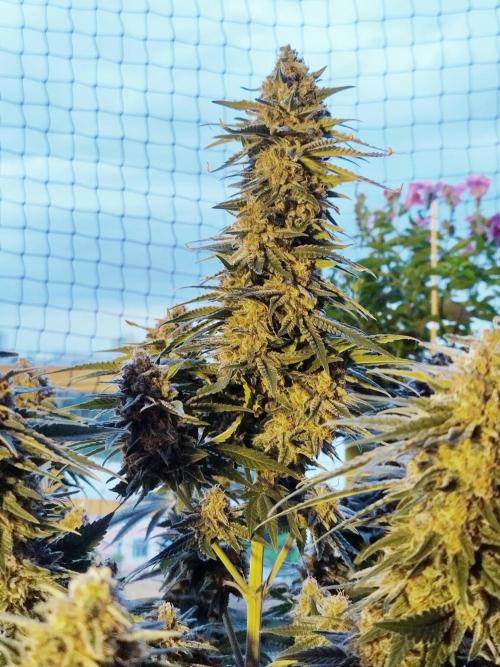
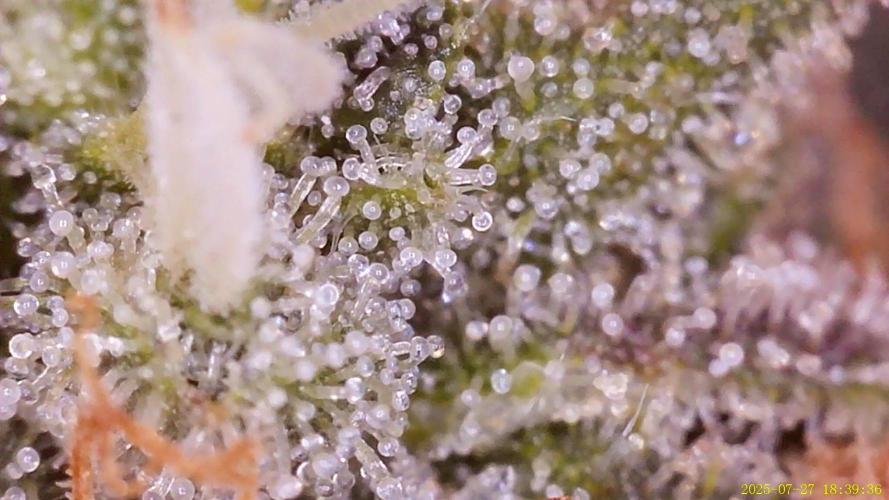
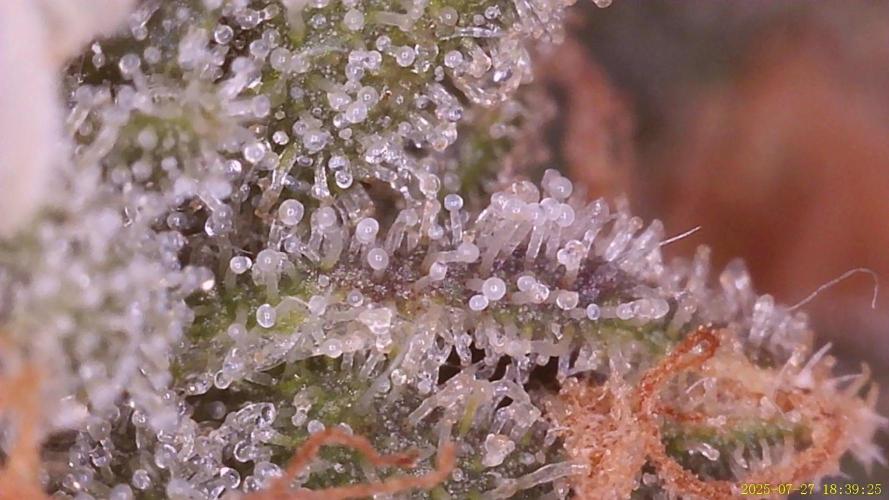
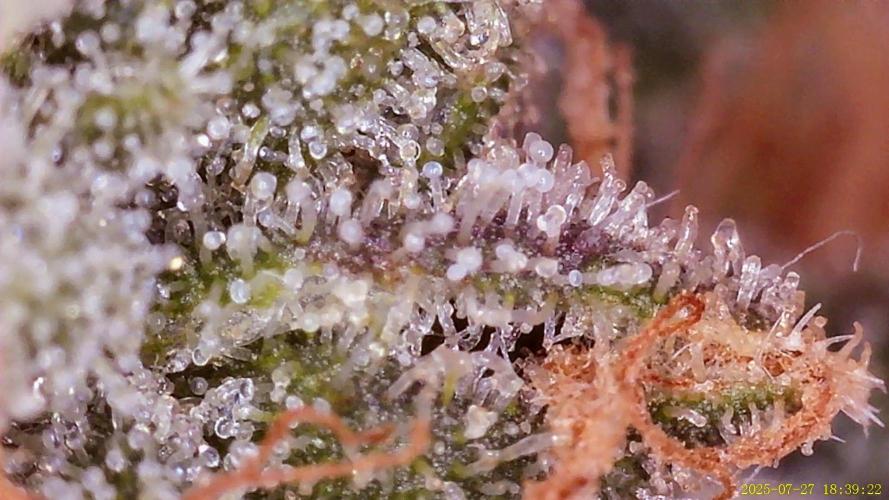
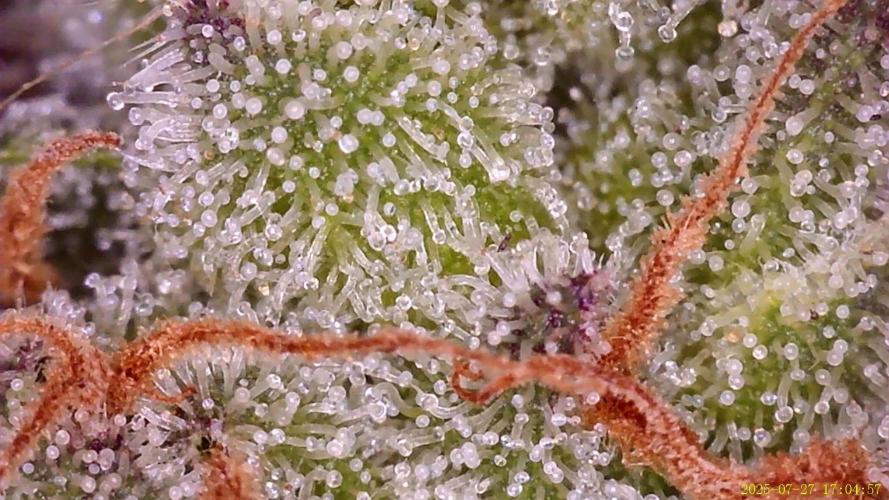
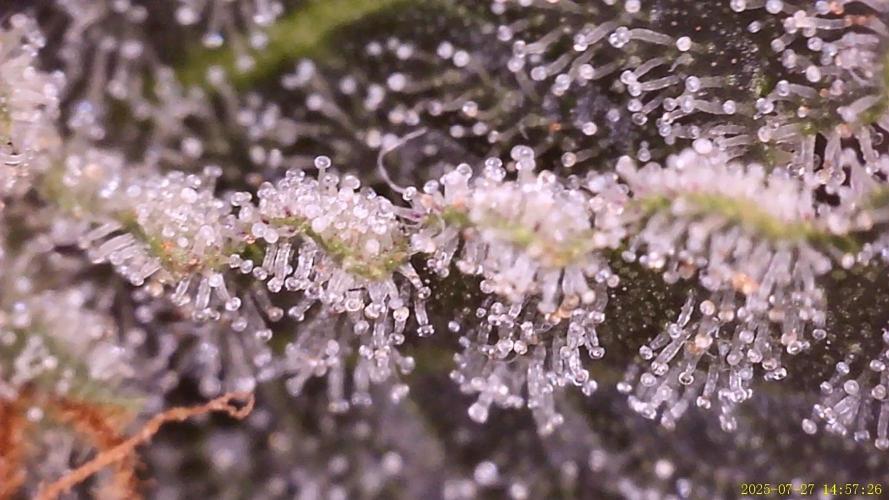
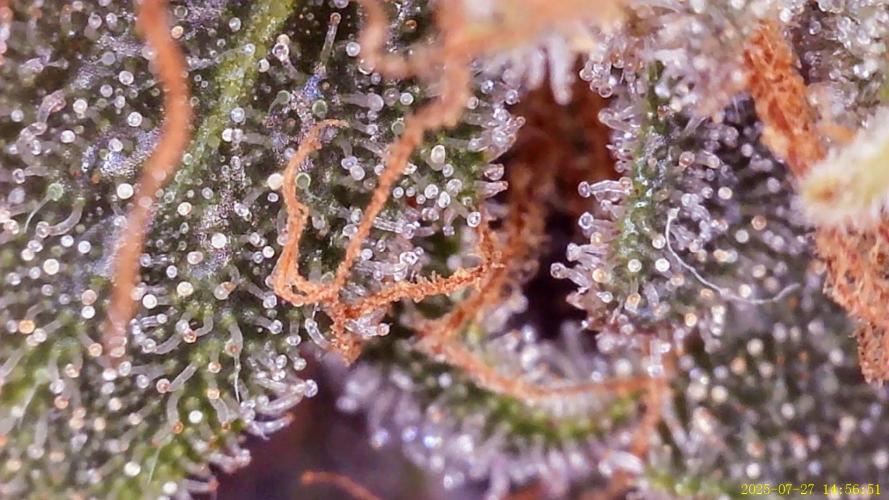
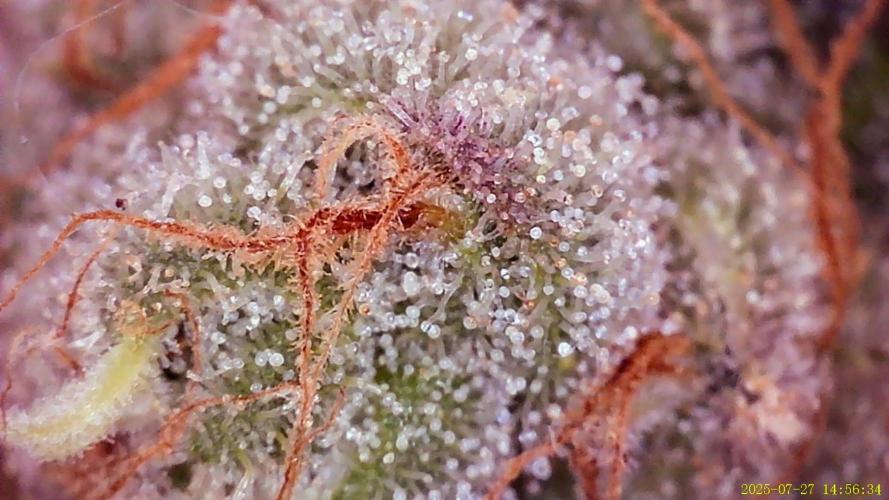
Berlins_Finest The last flowering week for the Purple Kush. A trichome check showed that in the upper third, there were predominantly milky trichomes with some amber ones at the outer flower tips. In the middle third, there were about 70% milky and 30% clear trichomes. Unfortunately, I couldn't let the plant flower for another week due to hermaphroditism. So, I started the harvest preparations, which turned out to be a bit shorter than usual. I watered less in the last week and didn't add any nutrients. The light duration was reduced to 11 hours. Just in time for the end of the 8th flowering week, the harvest took place.
3 likes
comments
Share
15
Week 15. Harvest1y ago
Happy Harvest Day!


9/10
Rated
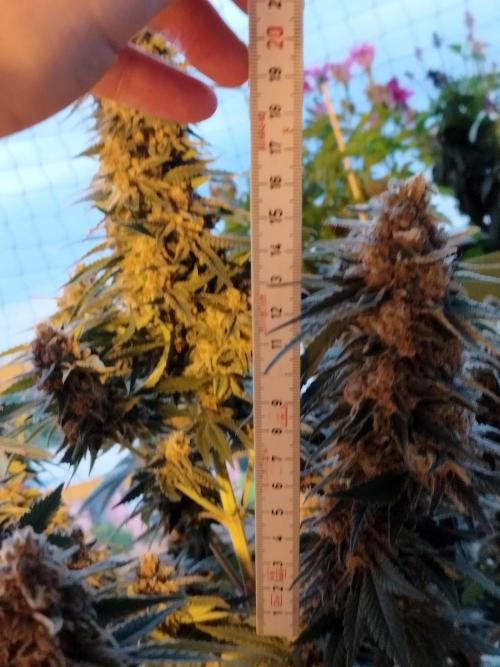
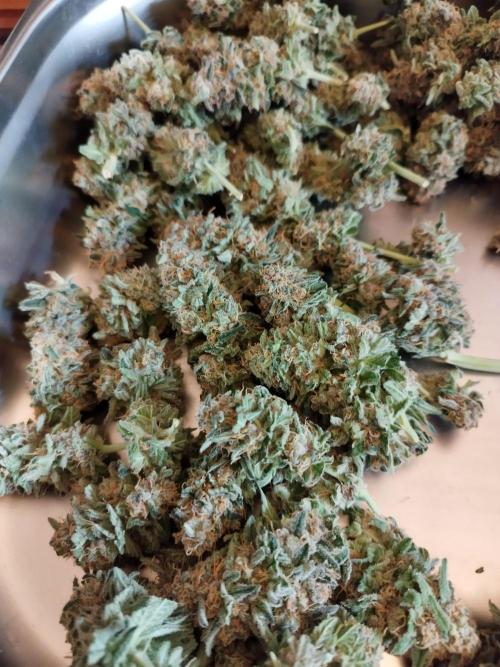
Ich habe den Strain überwiegend wegen seiner Wirkung gekauft. Meine Frau hat MS und der Strain soll Migräne und Kopfschmerzen vertreiben. Er soll bei Schlafstörungen helfen, die Muskeln beruhigen... Alles positive Eigenschaften, von denen meine Frau nur profitieren kann. Und sind wir mal ehrlich, sexy ausschauen tut sie auf den Verkaufsbildern von Kannabia auch noch. Das Geschmacksprofil mag ich auch sehr. Also ab an den Kühlschrank gegangen, 2 Samen von der Purple Kush herausgeholt und erst einmal gebetet, dass keine Rohrkreppierer dabei sind. Nach 3 Tagen waren beide Samen ohne Komplikationen gekeimt. Nach den ersten 4 Wochen Sämlingsphase habe ich mich für die stärkere Pflanze entschieden. Von Beginn an hat sich die Pflanze hungrig dem Licht entgegengestreckt. Sie hatte zu keiner Zeit ein Problem mit der Lichtmenge, auch nicht mit der Menge an Dünger. Ich hätte wahrscheinlich easy einen EC-Wert von zwischen 2.0 - 2.5 fahren können, die Purple Kush hatte wenig bis keine Probleme mit der Düngermenge. Ich musste aber die Düngermenge an die Verträglichkeit der anderen Mitbewohner, im Zelt, nach unten anpassen, die waren leider nicht ganz so tolerant. Sie ist schön kompakt gewachsen und ließ sich gut trainieren. Die Buds sind sehr schön dicht gewachsen, waren über und über mit Trichomen besetzt. Der Main Head Bud hatte eine Größe von über 20cm, die anderen Top Buds von ca. 15 cm. Leider begann sie erst sehr spät zu purpeln, wie auf den Trichombildern zu sehen ist. Es war einfach auch zu warm diesen Sommer, die Nachttemperaturen waren nicht ausreichend niedrig genug und da ich sie nach der 8. Woche ernten musste, bleib sie grün, bis auf wenige Spitzen. Auch auf den Trichombildern, der 15. Woche, ist zu sehen, dass mein Exemplar nach 8 Wochen für meine Verhältnisse fertig war. Es waren bereits diverse bernsteinfarbige Trichome erkennbar. Die angegebene Reifezeit von Kannabia (60 Tage) stimmt also. Der Geruch im getrockneten Zustand ist für mich ein beeriges / grapefruitiges Aroma, man kann es schlecht beschreiben, aber da ist noch etwas Brizziliges fast wie Brausepulver. Sehr lecker Die Wirkung entspricht dem oben Beschriebenem. Es ist ein angenehmes Rauchgefühl, nach 7 Tagen Trocknung und 3 Wochen Fermentierung. Die spritzige Zitrusnote (für mich nach Grapefruit) bleibt im Geschmack erhalten, vor allem beim vapen und wird von erdigen und Beerennoten ergänzt. Ich finde der Strain hat schon ab dem 2. Joint ein gewisses Narkose Potential und ist ein perfekter Abschluss für den Tag.
Show more
Translate
Spent 100 days
Ger Veg Flo Har
475 g
Bud wet weight per plant
1
Plants
1.4 m²
Grow Room size
Easy
Difficulty
Height
Day air temperature
Air humidity
PPM
PH
Light schedule
Solution temperature
Night air temperature
Pot size
Lamp distance

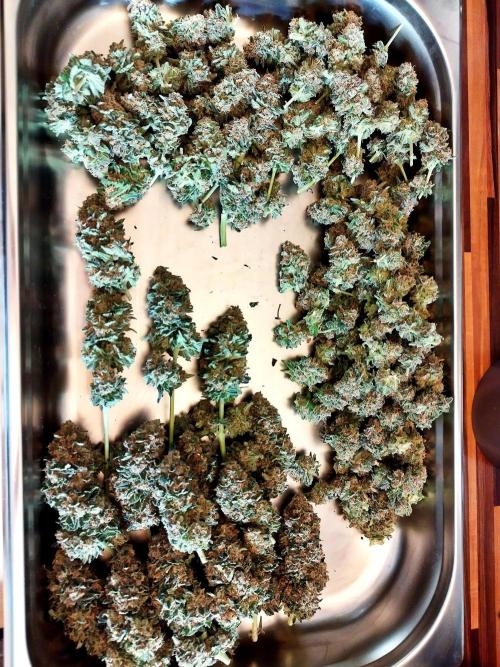

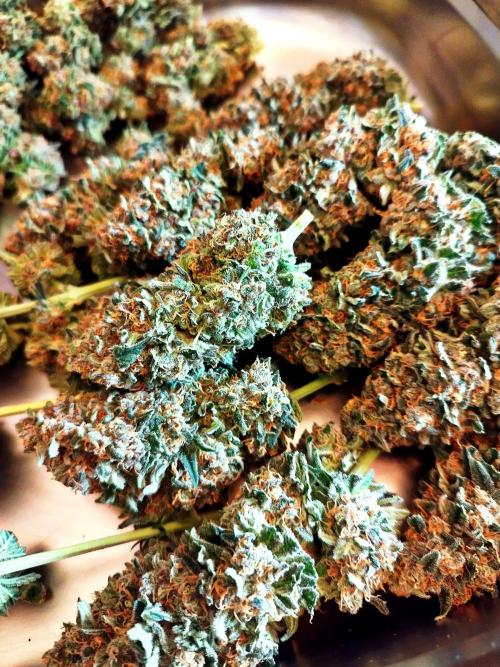
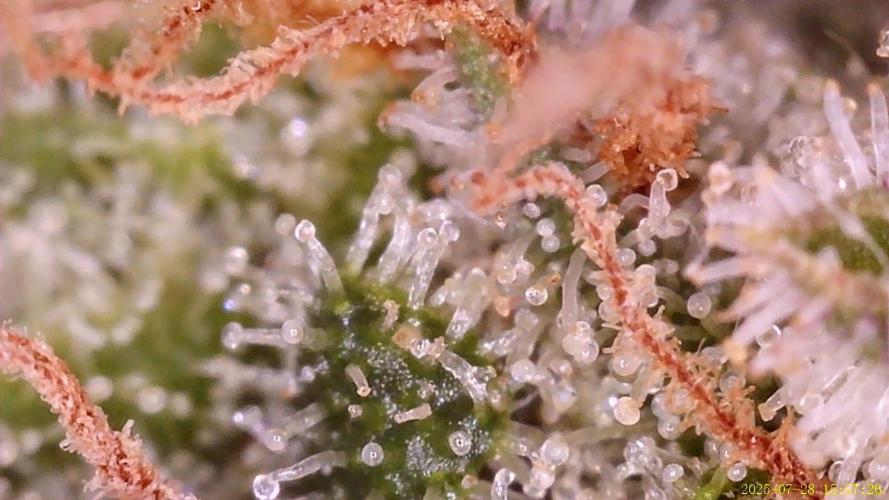

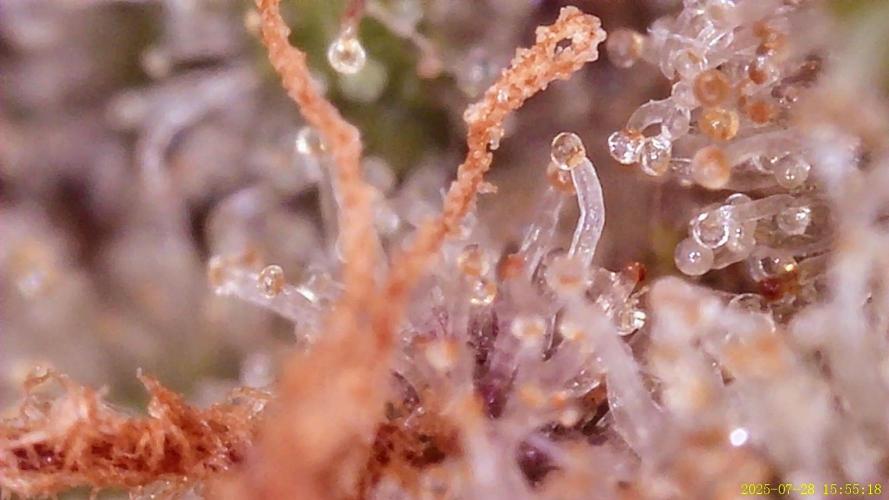
Berlins_Finest Tbd
4 likes
1 comment
Share
Equipment Reviews












4 comments
Sort by
popularity
popularity
newest
oldest

RealGrowDiary commentedweek 01y ago
Good luck
likes 2

Berlins_Finest commented1y ago
@RealGrowDiary, Many thanks! The grow is finished successfully. I will try to post the missing growweeks as fast as passable.
likes 2

Kannabia  commentedweek 151y ago
🎉 Congratulations on your harvest! You’ve truly grown a beautiful Purple Kush, full of dense and compact buds 🌿✨. Now all that’s left is to wait a bit before enjoying the fruits of your amazing work. 💨🔥 Enjoy every puff when it’s ready! 🧡
like 1

GhostTerpZ commentedweek 21y ago
Looking Really Good ❗️
like 1

the end.
Enjoying this diary? Follow for more updates!
Prefer the old Diary view?
Go back to the old Diary view