


Likes
Comments
Share


Likes
18
Share


@ReefermanGenetics
Follow
This is week 4 we are about to flip them to flower. 8 strains being test grown new strains.

Likes
24
Share


@DeepRootsGrowTrees
Follow
SWISS DREAM ROSE 🌹 CBD AUTO ORGANIC GROW KANNABIA
From seed to harvest this plant was easy to grow she didn't have any issues she made up for lack of height with dense buds down her stem her beautiful purple color offset by green leaves just looked amazing as she was finishing up.
Thank you to KANNABIA as always for your great genetics and support!!!
Thank you to FOOP!! I appreciate your support with this grow!!! FOOP is doing great things with your organic nutrients!!
Thank you to the grow community who has committed, liked and viewed this diary!!


Processing
Likes
9
Share


@JakeTheButcher
Follow
Topped and installed the scrog net this week, they took a bit to recover from topping and also defoliated 48 hours after.
Changed out the nutrient solution and upped the nutes. I was hoping for more growth at this point but overall I think I'm only about a week behind. Being my first grow, I didnt know what to expect.

Likes
28
Share


@GanjaFarmar
Follow
Got final weight of 29 grams. Which is not bad for a plant thats not been touched.
I wish i topped or trained this for more yield but still glad with what i got.
I would also recommend this for beginners as it grows with ease and minimal maintenance.
I smoked a spliff of this today, its only been in the jar for 2 days. The taste can still improve within few weeks. But the high is very strong.
5 star Breeders!!
One Love!

Likes
102
Share


@love_2_grow
Follow
D13 - BOOM! The new #1 had made her modest appearance. Only the top of the seed is visible so far, but it's a start. :)
#2 is moving along nicely, quietly doing her thing.
D14 - #1 is still shy and hasn't fully emerged yet, but she is at least poking up more than yesterday, so there's progress at least.
#2 is doing great, and I like her structure. Short and stout with large leaves and very short internodal spacing. She is 7 cm tall but already 11 cm wide.
I also cut back the cover crop as it was getting a bit wild and partly overshadowed the girls.
Since starting the grow, I have yet to water the girls properly, but they did get a little bit a couple of days ago when I had some extra after watering nematodes (against fungus gnats) to our regular houseplants. Better to be proactive than reactive ;)
D15 - I started a simple compost tea consisting of worm casting, rock dust, algal limestone, bentonite, biochar, and molasses. I'll leave it brewing overnight, and then it's watering/feeding time tomorrow.
D17 - No idea what is going on with the first girl, but it sure isn't much. The seed has maybe emerged for another two millimeters from the soil, but that is it. The seed hasn't cracked, and no leaves are visible. Hell, I can hardly see the stem.
Yesterday, I gave each girl about one liter of the compost tea that I started a couple of days ago. Let's see if that helps, although, at this point, I kind of doubt it.
As always, I completely forgot to check the pH of the tea. I have no idea why I keep forgetting that with my teas when I have no problem checking the pH when I use plain water. Oh well. Not the end of the world but something I need to keep in mind for the next tea in a couple of weeks.
The second girl looks great, though, so that's something at least.
D20 - Alright, it is official. The third girl died as well. The seed never cracked, and the stem went limp. I have no idea why this happened, and now I'm out of Colorado Cookies seeds, so that's that.
I have already planted another seed to see if the problem persists with another strain. I will make a separate diary for that one, though.
On the positive side is that the remaining girl looks strong and healthy. She is now 9 cm tall and 18 cm wide on this last day in week two of veg. Upwards and onwards!

Likes
18
Share


@PEAKYPLANTERS
Follow
Hi everyone, brothers of the Weed.
Welcome back to the enchanted gardens of Peaky, these two sweet dolls are developing solid and fatty buds ... I think you miss the harvest little
see you around
I hope the contents are of interest to you
best regards

Likes
5
Share

@billycardine0420king
Follow
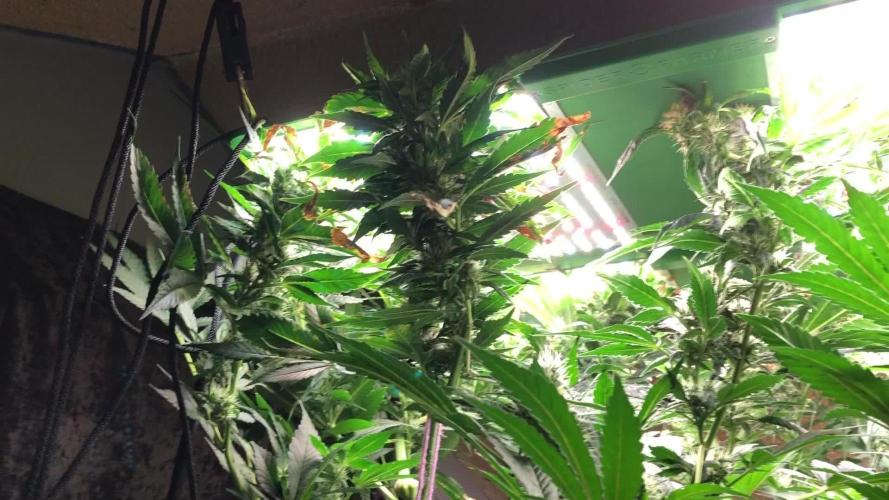
8/23/2025- Emptied and refilled resevoir with the above nutes. Nuggets are smelling stinky now and looking good but I have to be transparent in identifying mistakes, not reporting them only fucks myself in future grows. I have snapped several plants stalks and folded them under my lights as they just grew above the lights to the ceiling. I hated doing this but I simply ran out of room and didnt do any topping or training. That aside, I see lots of fat colas and stinky nuggets, I just blew the sativas a bit by letting them get too damn tall.


Processing
Likes
54
Share


@SAC87
Follow
Day 49-56: They’re still growing. It really slow and it’ll be what it’ll be, if the flower is crap I’ll turn it into concentrates. R3 is looking ok, CbDreams pistils are darkening and the buds are getting bigger. R2 has a ton of leaf, with full size fans coming off tiny off shoot branches. It may be better for a sog where it could be removed and defoliated better. Smell is getting to be slightly noticeable even with the carbon filter in place. Just going to keep running it for a few more weeks and see what happens.


Likes
35
Share


@nonick123
Follow
Día 94 (02/09) Aplico Insect Frass como Top Dress para ver si revierto un poco el amarilleamiento que muestran algunas hojas, ya que empieza a ascender por la planta
Riego con 500 ml H2O pH 6,5
Día 95 (03/09) Dia nublado y de temperaturas entorno a 24 ºC. NO es necesario regar!
Día 96 (04/09) Llueve que te llueve! 🌧️. Temperatura 21 ºC. Días de humedad alta por aquí!
Riego con 500 / 1000 ml H2O pH 6,5
Día 97 (05/09) Floración en progreso. No veo ni una sola oruga con el bacillus thuringiensis y espero que siga así! 🤞
Dia muy nublado. No hace falta riego
Día 98 (06/09) Riego con 500 / 1000 ml H2O pH 6,5 + 4 ml/L de BioGrow de Biobizz para tratar de parar el amarilleamiento que asciende por la planta
Día 99 (07/09) Riego con 500 / 1000 ml H2O pH 6,5 + 4 ml/L de BioGrow de Biobizz para tratar de parar el amarilleamiento que asciende por la planta
Día 100 (08/09) Riego con 1 Litro de Té Floración de Lurpe Solutions. Preparación: 24 horas con bomba de aire (oxigenación) con ingredientes:
Healthy Harvest 8 ml/L + Insect Frass 16 ml/L + Hummus Lombriz 8 ml/L + Melaza 1 ml/L + Kelp Hidrolizado 0,25 g/L
Aplico de nuevo Insect Frass como Top Dress
💦Nutrients by Lurpe Solutions - www.lurpenaturalsolutions.com
🌱Substrate PRO-MIX HP BACILLUS + MYCORRHIZAE - www.pthorticulture.com/en/products/pro-mix-hp-biostimulant-plus-mycorrhizae


Likes
8
Share


@Scottydarkmoon75
Follow
The seeds and strains from 420fastbuds are the most reliable that I have ever grown. I have never experienced a failed germination with fast buds. Here’s a quick update on their progress: most of the plants are now starring to flower.
Likes
99
Share


@TheFoxFarmer
Follow
Week 8 Flower
Flush flush flush 💦🚽💦🚽💦
It's extremely important to flush for at least 14 days when using synthetic nutes, or any bottled nutes in my opinion. The aim is to make her cannibalize (fade) as much as possible before she's chopped. By doing this, she's using up her stored nutrients, causing the leaves to eventually die. The better the flush the cleaner the smoke 👌💨 even when in an organic set up, the plant needs to be nicely faded before being harvested. Otherwise she's still full of nutrients. I still feel I'll be able to get an even better flush when I eventually make the switch to RO water, as my tap water holds a ppm value of approx 150. It's not too much, but 0 is always better.
She was taken down on Day 57 flower, after a 16 Day flush. I didn't want to take her any further as she was quite stressed being so close to the light. So to avoid getting seeds I waited until she had a beautiful fade before giving her the chop ✂️ I always take my girls down about 30mins before the light turns on so there is minimal chlorophyll production in the plant. This is to ensure the best smell, taste and overall burn after drying and curing.
A subtle but very sweet-ish tropical fruit skin kind of smell to her. Her buds are super dense and covered in trichomes. I trimmed off all fan leaves and then each branch was hung in my drying box and placed in a cool area. She was dry after 6 days and ready to be dry trimmed and jarred for curing. I'll post those pics with the harvest update!
Thanks for following and happy growing! 🐺
Likes
54
Share


@MadeInGermany
Follow
Flowering day 28
since time change
to 12 / 12 h
Hey guys :-)
The lady is growing very nicely.
The buds start to swell and they start to smell delicious :-) .
I look forward to seeing her every day 💚.
Watering was done twice this week with 1.2 l each.
Have fun and stay healthy 💚🙏🏻
👇🏼👇🏼👇🏼👇🏼👇🏼👇🏼👇🏼👇🏼👇🏼👇🏼👇🏼👇🏼
‘Powered by GreenHouse Feeding’
Copy the link for 10% off all Nutrients 👇🏼
https://shop.greenhousefeeding.com/affiliate/MadeInGermany_PassionGrower
👇🏼👇🏼👇🏼👇🏼👇🏼👇🏼👇🏼👇🏼👇🏼👇🏼👇🏼👇🏼
You can buy this strain at :
https://www.amsterdamgenetics.com/product/choco-cheesecake/
👇🏼👇🏼👇🏼
Use the coupon code: madeingermany
for 10% on all Amsterdam Genetics seeds
Water 💧 💧💧
Osmosis water mixed with Cal/Mag (24 hours stale that the chlorine evaporates) to 290 ppm and Ph with Ph- to 5.8 - 6.4
MadeInGermany

Likes
6
Share


@Bwright_315
Follow
Planted 2 weeks after my other Plant and it already the Same size as all them growing like a champ. I know I need more soil.

Likes
148
Share


@Natrona
Follow
Frostbanger Plants 1-6
First thank you if you actually look at all these pictures that I photobomb with each week. Documenting six plants on a tester strain to provide ample information regarding the new strain characteristics takes a lot of time, work, and effort. I am so frustrated with Grow Diaries system doesn’t load pics or videos without error.
When I load pictures, I am systematic and load every picture on that plant together, each video that I load first on the pictures identifies the plant pictures that follows.
However, Grow Diaries puts the videos first, moving the picture out of order. I know which pictures of plant parts go with each plant, but with GD shuffling my pictures around good luck everybody else. This week I had so many errors uploading simple pictures that I had to go back and reload them. You may see multiple duplicate pics this time due to these system errors. Sorry about that but at least they are there.
I will not do this level of photographs and diary support again.
Week 11 June 1-7 FLOWER 6
Nutrients : 3 gal
GH Micro 7,5ml
GH Gro 0ml
GH Bloom 23ml
CalMag 7.5 ml
Elm Bloom 15ml
6/1 PH 6.62 PPM 646, temp 67 2 ltr each
6/3 PH 6.6, PPM 493, temp 68 2ltr each
6/5 PH 5,84, PPM 580, temp 68.5 2ltr
6/3 Defoliation
6/4 weekly pics & vid
As aways, thanks for visiting, for the likes and most of all growers’ love and support because I surely haven’t gotten any from @Fast_Buds on this grow.
Stay green, growers love 💚🌿my friends.
💫Natrona💫
Likes
9
Share


@Chucky324
Follow
Hello This is the end of week 6 and the beginning of week 7 of veg.
Turned the dehumidifier on this week. The rh was up to 65% in here and I don't need any WPM to show up.
Everything else is going good here. I got out another large tray out to spread the plant out some more.
I wanted to get the plants out to the greenhouse at the end of March, but the weather is still cold here, so, we'll see.
Got lots of branch tips poking out from the lower fanleaves. They should spread out good when I get them on the SCRoG table.
5 or 6 females showed their sex last week and I saw 3 males that have little balls forming,
So I've got a few more plants to show their sex. I'll look again next watering.
I'll take off some more bottom leaves off this week. It will make it easier to water and that will promote more upwards growth.
OK. Be Cool.
Chuck.

