


Likes
34
Share


@Roberts
Follow
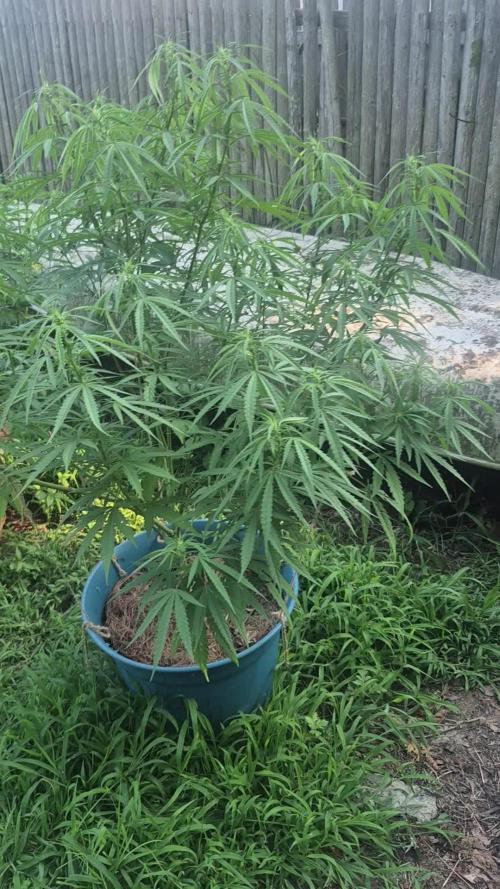
FBT 2308 is growing great in the Agrogardens nutrition, under the Medic Grow Mini Sun-2. She has gotten her roots pruned, and selective defoliation plus lst. Everything is looking really good for it at the moment. Thank you Medic Grow. Agrogardens, and Fast Buds. 🤜🏻🤛🏻🌱🌱🌱
Thank you grow diaries community for the 👇likes👇, follows, comments, and subscriptions on my YouTube channel👇. ❄️🌱🍻
Happy Growing 🌱🌱🌱
https://youtube.com/channel/UCAhN7yRzWLpcaRHhMIQ7X4g

Likes
84
Share


@Doc_Homegrow
Follow
I had a pretty stressfull week. Same as my Lady. Trained her every day with LST. I think she looks beatiful and I am pretty happy with her.


Likes
3
Share


@BearBuds
Follow
We have made it to the end of Week 6. Conditions in the tent have improved DRAMATICALLY. The heat wave has finally passed and the temperature has finally leveled out. Not only that, the super weird monsoon weather that we were having has also passed and now the humidity is not rising above 60%. This turn for the best is really showing and also fixing the pH problem I had also probably helped a lot. Going to push the PPM a little more this week, between 750-850 The color of the buds is really coming through now, especially in the pineapple express and zkittles. The melonsicle seems to be growing much more like a traditional sativa. I feel it's about a week behind schedule with the rest of the plants. It seems to be on a true 9 or 10 week tract at this point. I think the blue gelato is going to be a bust in terms of yield. It just got heavily over shadowed by the other three plants from the beginning. It has stayed quite small and I am not sure it will yield heavily. Hopefully the smoke is quality and I will be impressed enough with my first Barney's Farm experience to try again.


Likes
2
Share

@Bdog7878
Follow
The Mimosa x orange punch is budding up pretty good the dynamite desiel and og kush are starting to go but behind the mop for sure. All the photo plants are doing well and still stretching. Been watering the big plants every 2 days and the sour desiel auto about every 4 days. I saw some very early signs of bud rot on a few of the buds on the sour I immediately cut them off and separated the plant from the rest of them. We had 4 really hot humid days than 3 days of hard rain im thinking it came from that. I'm hoping I got it before its too late the plant got about 2 more weeks to harvest im hoping to make it I don't want to chop early but if I have to I will. Keeping a close eye on it. I'm still feeding grow nutes to the big plants and I've cut the bloom nutes in half for the sour auto im gonna feed one more time at 1 tsp and than start the flush


Likes
48
Share


@CrazyHorse
Follow
So it's next week, getting closer to happy times. There has been a significant increase in the size of the buds, they are beautiful. It looks like this pretty girl will arrive on schedule 😇

Likes
43
Share


@TheCannaProphet
Follow
~ FastBuds PAPAYA SHERBET Photoperiod~
Well here we go on another journey together through 'Canna-land' and this one's kinda special... forget that, it's VERY special because this is FastBuds newest surprise for the community, a FEMINIZED PHOTOPERIOD STRAIN!🤯
I was fortunate enough to score these seeds, of which only 1000 were available and can't wait to see what this strain can do! This Papaya Sherbet, according to FastBuds, is a hybrid with a 9-10 weeks flowering period. For a more detailed and accurate description of this strain the following from FastBuds says it best:
"Combining the massive stature of Papaya (Oni Selection) with the strength and resilience of one of our best keeper cuts (Sunset Sherbet), this strain develops into a big, expansive bush adorned with numerous bud sites that later transform into a generous harvest of medium-sized buds. Papaya Sherbet flowers deliver a signature flavor of premium cannabis with subtle citrus undertones that emerge upon inhaling. During growth, her aroma makes for a sweet yet pleasantly bitter fragrance, giving you an idea of what the smoke will taste like. Notably stress-resistant, Papaya Sherbet is a great choice for growers working in challenging environments. She is very forgiving and rebounds quickly from any adversity, allowing growers the freedom to experiment with confidence that she will take everything like a champion she is. This strain embodies resilience, flavor, and abundant yields in every grow cycle."
Sounds like an epic strain and I personally cannot wait for this lady to strut her stuff!😍
________________________________________________________________________________________________________________________________________________________________________________________________________________________________________________________________________________________________________________________
The Setup:
This is going to be an outdoor grow, but I have started the Papaya Sherbet photoperiod indoors as our weather is still a bit too chilly to put a newly sprouted seedling outside (nighttime temp's dipping regularly into the 40's℉).
The plan is simple... let her grow inside under a 19/5 light schedule until the nighttime temperatures are in the mid 50's℉, which shouldn't be long. After which, she'll be moved outside and transplanted into the soil which I have already setup and inoculated with beneficial microbes from BioTabs and slow release dry amendments from Gaia Green. Once she's established herself outside she'll be given periodic top dressings of Gaia Green 4-4-4 and 2-8-4 along with worm castings and Compost Tea's. Her grow area is approx. 5'x5' and I have posts and a trellis net set up already for when she gets bigger to aid in training her. Let the fun begin!🤪💚
________________________________________________________________________________________________________________________________________________________________________________________________________________________________________________________________________________________________________________________
Weekly Updates:
5/23- Week three from seed and the second week of veg for the FastBuds Papaya Sherbet photoperiod and she's doing surprisingly well considering the crappy weather, and being eaten like a salad by slugs and a rabbit!
5/25- The diatomaceous earth that I spread around her seems to have lessened the attacks on her leaves. I've also been spraying her down every other day with Neem Oil, and every three days with an organic insecticidal soap that I'm sure has helped as well.
I watered the Papaya Sherbet today via garden hose and began to train her branches a bit as well.
5/27- The FastBuds Papaya Sherbet continues to do exceptionally well with great color and vigor, putting out new growth it seems daily.
5/29- There's three weeks on the books for this little lady and I'm looking forward to see what she'll look like in the coming weeks! I will have to top dress her soon, probably in the next few days. I haven't added any dry amendments to her since I initially amended her soil and she's a hungry girl... Hope to see you next week, stay Blessed!
Thank you for checking out my diary, your positive comments and support make it all worthwhile! 💚Growers Love!💚😎🙏
Likes
21
Share


@Whitebelt
Follow
Week 8 - second week of flower
One plant is much smaller - still not confident on sex of any of them ... maybe that small one is a male - I’m guessing they’re all female tho. Either way i may need to slaughter that little guy - the other plants are just overtaking the tent - might not be worth keeping that little one in there.
Update 6/5/19 - I’ll take some updated pics tomorrow - I’m 95% sure I have FOUR out of four female plants.
Just picked up some yucca to try - and I got some more led hangers so maybe I’ll upgrade the lights today - the rapidLED far red flower initiator isn’t coming until Wednesday unfortunately but I have two more SolStix I could add.
Update 6/5/19 - far red flower initiator and the two (now 4) solstix are installed - I need to make a simple aluminum frame - maybe this weekend
Picked up some 29% H202 to clean the rez tank and pumps and filter etc (not to put in the nutes for the plants tho!)
Got a better air pump and airstone for the rez.
New Vivosun oscillating fan - wtf!? Made for grow tents but can’t turn without stopping on the sides of the tent!? - I emailed them maybe it’s defective.
Likes
19
Share


@Naujas
Follow
I visited her today!!!! Day 147!!! when I came I saw one broken branch, yesterday there was quite a strong wind, I think it's his fault :) but everything else looks good, just found 1 small ring of rot :), which allows me to leave it to grow for another week :) very beautiful girl :) there will be a renewal, good luck!!!!
Likes
Comments
Share


@Jbcultivates
Follow
First week back with my plants and they’re wayyy bigger than I thought they’d get! Decided to do a big defoliation since it’s about the 3-4 week in flower. And they’re getting stanky
Likes
7
Share


@Damonkey
Follow
It’s spreading out really nicely and quite slowly as hoped. Defoliation and bending continues until flowering hopefully I should manage with space 😱😱😱😂
Likes
8
Share


@NoProbation4Weed
Follow
i harvested second part this week. the rest will be harvested in about a week. Buds turned out beautifully. Great Colours and great smell.
My best Autoflower so far. Terps are dark and red Berrys combined with some floral Rose aroma. Super Sticky and as you can see good producer.


Likes
90
Share


@CRiSPrGrow
Follow
Fucking chem og how resilient is she, for sure, she's a fighter, came back as determined as ever to pack it in some more, she didnt mind the dark, was a bit scared about the mold, so far no signs of it so let's all make a prayer for chem og, hope the taste is what i enjoy kinda fun flying blind ... but even a blind person would notice what an indica this is 😅 last week of smart proteins no nutrients added yet, just plain water and one point four bricks of shitting in my pants what a shake down my leg ! I'm smoking Dr. Grinspoon rn, and i've listened all i can to cypress hill's dr. green thumb and they say
"I never grow at my home" but what they dont say is all about the rest of it lol abricots? peaches ? 🚀
dropped her down to 10/14 so she's got plenty of time for resin production now she's a stinker smells like citrus and indica, or more like indica citrus, does that make sense ? 👊


Processing
Likes
2
Share


@Pauwela
Follow
7/28 7-days old,, 4 clones survived, on their way at 2.5” a 3.5” tall


