


Likes
Comments
Share


@SkunkyDog420
Follow
Hallo zusammen 🤙
Sie wächst sehr schön und macht keine Probleme


Likes
9
Share


@DaddyPrime2
Follow
chopped #1 on 1/21/25
started curing today 1/27/25
chopped #5 on 1/23/25
still hanging and drying.
will update with weights and smoke reports and more pictures when dried and cured
#1 33 grams. nice big nugs. i really like how the mainline turned out with the final product
#5 32 grams smaller buds overall but the yeild is very similar.
these are weights after trimming. i did a fairly heavy trim on thesr 2 plants.
this diary started with 5 plants but because of my perpetual flowering set up, i have had 3 other diaries for the flowering stages of the other 3.
The flowering stage of this diary are only plant #1 and plant #5


Processing
Likes
27
Share


@Fifty5ive
Follow
Flowering started:
Saturday I switched the nutrients in the reservoir to flowering specifications after installing the SCROG and giving a massive trimming.
After the final lights out Saturday, 3pm which was an extended session, I switched the timers to come on again Sunday on a period of 8pm to 8am (12 hours).
The photos added today are from This morning after the first 12 hour period before the first lights our for 12.
*fingers crossed*
Likes
23
Share


@Susquihanna
Follow
FBA 2025 turned Frostbanger was a fun grow in many ways. First, my friend gifted me the seed and I grew outside while she grew inside. It was fun to watch the plants grow in different settings and different growing methods. If you have been following me, then you know our weather has been crazy here. We have had lows of 50* and highs of 90*. We had a hail storm and lots and lots of rain. Today, I was. forced to take my Frostbanger down. I found a couple of buds rotting and it is supposed to rain for the next 4 days, so this grow has come to an end. But first, true to Frostbanger's description, "Just keep in mind, this strain’s dank, pungent odor is super strong—meaning a carbon filter is a must to mask the aroma in any grow room and she’ll make her presence known when grown outside" and boy did my backyard smell.
Also, just like its name, it is a "trichome-studded beauty." Sticky, sticky, sticky. It also had a nice fruity smell, almost like a cantaloup.
I like to wet trim, so I spent the past 2 days trimming. My wet bud weight is 102.19 ounces. Not A big harvest. Had to throw away some bud rot and I had to take this plant down early --But that is how a hail storm, cold weather, hot weather, Rain and more rain will effect a harvest. I'm happy to be somewhat successful.
FYI: today's weather: It has rained 2.05 inches in the past 24 hours and expecting 1.6 inches in the next 24 hours..
I am pretty proud of Frostbanger's cola as it is 10 inches long and approximately 9 inches around. Wish I could have seen it with 2 more weeks of growth.
I may not have the growing experience of others, but I am super happy with this grow and glad I could enter a contest. It was fun!
Likes
76
Share


@Roberts
Follow
It is the start of vegging for Purple Ryder auto. So far everything is looking good. She is in the Agrogardens nutrition, under the Medic Grow mini Sun-2. 🤞🏻 for a great grow. Thank you Medic Grow, and Doctor's Choice. 🤜🏻🤛🏻🌱🌱🌱
Thank you grow diaries community for the 👇likes👇, follows, comments, and subscriptions on my YouTube channel👇. ❄️🌱🍻
Happy Growing 🌱🌱🌱
https://youtube.com/channel/UCAhN7yRzWLpcaRHhMIQ7X4g

Likes
3
Share


@Unculti_responsable
Follow
Esta semana hicimos poda de bajos a podas las puntas y una poda de bajos a todas las ramas , se recupera muy bien de las podas la Jack está semana ya arrancamos de a poco con los fertilizantes de flora , así hacemos el último trasplante a 10 litros para pasar a flora , yo creo q ta esta más que bien para entrar en floración ya , pero quiero hacer el último trasplante antes , vamos a ir viendo como vienen las siguientes semanas

Likes
41
Share


@Hawkbo
Follow
They grew pretty well. Obviously 1 had alot more veg time and extra training where the other 2 had no training. Could have been better if I had both arms and didnt have the one bad feed where my meter was off and burnt the tips. Easy strain to grow I highly reccomend to any level grower.

Likes
10
Share


Likes
15
Share


@Geili_Seili_fireinfireout
Follow
Absolut super wuchsform. Jab jetzt gehts in die breite.
Cuts from roots farms at - best in austria and europe
Likes
3
Share


@The_Chef_420
Follow
Well here goes nothing! Only one seed so this is do or die lol, but at least it looks quite healthy. Going to start it indoors until it sprouts, it's only 45°F for a high during the day and 29°F for a low at night so there's no way to get her outside today. I have a 10ft x 10ft pop up greenhouse that I plan to have functional by the weekend.
Update*- Smoothie sprouted on 4/22 yesterday and is looking like a healthy girl. So stoked!
Processing
Likes
8
Share


@Ogkeely33
Follow
Ive Been Real Busy Lately.. But Im Still Here... Everything Is Outside Now.. Lost Several Plants Due To Them Being Males...

Likes
52
Share

@Roberts
Follow
I just harvested her today. Frosty looking nuggets with a pine citrus earthy aroma. Super sticky as well. I had about a 5 to 10 percent amber trichromes. I might of been a pinch early, but she was starting to foxtail. The colas look really nuggy.
I had issues with mites early when I switched to flowering. This likely impacted some of the yield potential as she was neem oil treated for a week during that time. She did way better then I expected after that big stressor in play. Mites are long gone now. The plant will now hang dry 24 hours then get a light to mild agression wet trim, and end up in the cannatrol. To start a 8 day dry, and cure process. I will then run it in the bud trimmer. Then hand trim to finish.
The G3000 light is a great quality light. I just ran it 19 weeks on a photoperiod grow, and had no issues with any of the Spider Farmer Equipment used. I used the 2.3x2.3x5tent, G3000 light, germination mat, 4 inch inline smart controller exhaust fan, and I will be using the new 16 inch Spider Farmer bud trimmer bowl when time comes. Excellent equipment from start to finish in my grow. I want to thank Spider Farmer, and Pure Instinto Seeds. 🤜🏻🤛🏻💪🏼❄️🌱
I also want to sat the biggest thank you to the grow diaries community for the 👇likes👇, follows, comments, and subscriptions on my YouTube channel👇. ❄️🌱🍻
Happy Growing 🌱🌱🌱
https://youtube.com/channel/UCAhN7yRzWLpcaRHhMIQ7X4g
Spider Farmer G300w: https://amzn.to/3S2zvsd
Spider Farmer 10X20 Heat Mat Kit - https://amz.fun/lsa0J
Spider Farmer Amazon Store: https://www.amazon.com/spiderfarmer
Spider Farmer Official Site: https://spider-farmer.com
Discount code: saveurcash (stackable)

Likes
17
Share


@Fat_Olsh_Farms
Follow
Always dry trim. The leaves come off more easily when dry and it preserves more THC with the longer drying time. Will weigh up in 7-10 days.
Smoke report. Tastes like strong grape juice when you hit it. Very smooth and easy on the throat. Pretty much gave me instant relaxation and relief from my depression. Seems like a good morning smoke which I love. Thanks fastbuds!
Weighed up to 2.5 Oz. Could've claimed 3+ but didn't count ANY larf.


Likes
Comments
Share

@FATTSx650
Follow
8/22
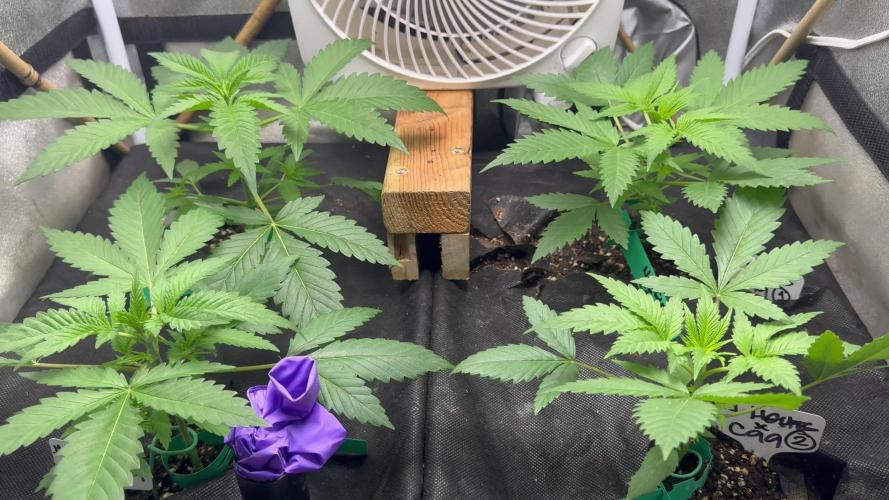
Nine days into veg and looking great. I want to veg these for a total of 6 weeks instead of the more common 4 weeks. But in case they get a little too tall for my liking, i'll transition sooner into bloom. I'm scared I might run out of room, but we'll see. I gave these guys about 500 mil between each earth box which contains 2 plants in each box. I haven't added any fluids to the reservoirs as of yet. I want to make sure the roots get a chance to stretch out so I'm just giving them a little water from the top for these first couple of weeks then they should be ready to the self watering system. Nothing but tap water aerated for 36hrs and ph'd at 6.0 and cal-mag. I topped dressed each earthbox, should be good for another 2-3 weeks. I'll update if ther are any changes that need to be made for the nutrients, but so far all the ladies look great. My goal is to to get a full canopy converage using two rows of scrog nets to help me get what I want. This 2x2 isn't as tall as others, it only reawches 5' tall and I still have to account for the light and exhaust located inside the tent at the topmost region. I'll get some pics of how tall this tent really is on my next post.
The shortest plant measures at 5.25" while the tallest plant stood at 7". I plan on using a scrog net to get a nice even canopy later on and maximize all the space in this 2'x2' grow tent
Likes
45
Share


@tresplantes
Follow
Super nice strain super nice colors with a strong grape Gary Payton Gas smell during flower
Nice looking rock hard buds with a Great Taste and effect all at all im very happy with the outcomings


Likes
23
Share


@Kakui
Follow
F5, se empezó a regar con fertilizante de floración, EC 2.2 y pH 6.3, están estirando bastante, han alcanzado los 50cm.
Likes
39
Share


@BlackDragon22
Follow
È veramente un mostro a parere mio. Cresce a vista d'occhio ogni giorno, ho dovuto rivedere il baldacchino, non smette di crescere.. Quindi ho eseguito ancora Lst. Tra qualche settimana sarà solo lei nella tenda.. Non vedo l'ora perché si è presa già tutto lo spazio