
Likes
Comments
Share


@Rko41
Follow
Le2em est top le premier est plus gros plus en retard et sauterelle et chenille en vue!!


Likes
12
Share


@Jays_Not_Here_Man
Follow
This was their last week! Harvested on Day 60. Smells are incredible, tricomes are carpeted and have a good mix of amber and cloudy. Love the wireless microscope I got of Amazon ❤️ i gave the girls their last watering on day 55 , and I watered till I had about 15% runoff. I like to whole plant hang dry my plants in my tent, hopefully, aiming for about 60 degrees and 60% humidity for about 10-14 days. Typically the more there is, the longer it takes. i cant wait! 🤤

Likes
13
Share


@Popothamio
Follow
Ya empecé esta semana regando con un litro un día si y un día no y alternando también los fertilizantes un riego con ellos y otro sin. Al poner le el led a la carpa pequeña para el final de la floración ha subido mucho la temperatura pero espero que aguanten.. creo que esta será la última semana que eche fertilizantes como lo veis?


Processing
Likes
6
Share


@Weedzoks
Follow
La plante a fortement jauni cette semaine et des taches sont apparues
Flo 23: Arrosage eau
Flo 24: Pulvérisation de 3ml de Vita Race

Likes
18
Share


@mrHazeCake
Follow
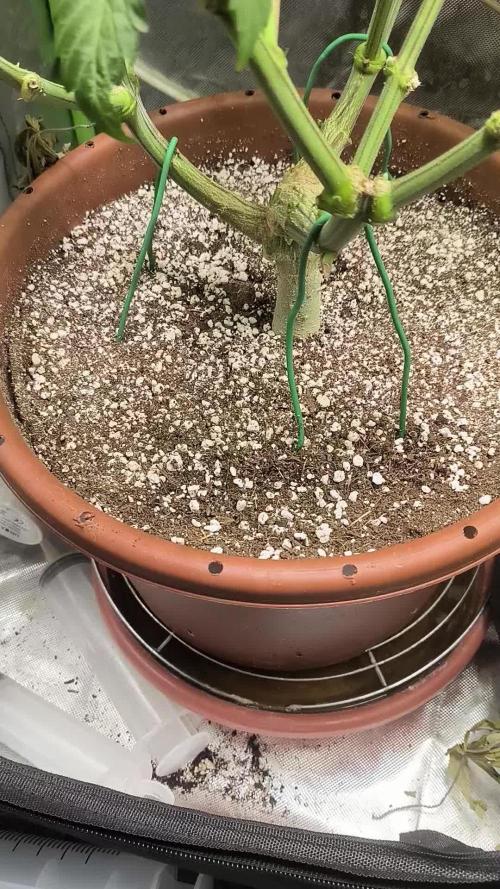
26/09 The second week of vegetation has begun, the sprout feels super great, I buried it 2-3 cm, so it looks a little shorter.
I will start fertilizing from about the 15th day, until that moment I just pour water with the addition of Piranha 2ml / l, today I poured 10ml from a syringe around the sprout and today it stood all day without a cup under full light
Tonight I added to the AD Piranha solution more nutrition for these mycorrhiza fungus in the form of Bud Candy. And carefully poured 5 ml of the solution 2-3 cm from the sprout on one side. Perhaps this will immediately help develop an excellent root system.
I continue to occasionally wet the ground for it so that it would be more humid around it, since I have a fairly strong lamp for such a grow box, I think that it can be hot, although other plants felt great at this stage
30/09
Last night I poured her compote with Piranha and BudCandy 2 ml / l each, poured about 500 ml into her eye and lo and behold, she responded with rapid growth, she adds very much every day. I will try to alternate watering with ordinary water so as not to overfeed. And super genetics, she is gaining the thickness of the trunk already!
Likes
9
Share


@SimpleDiaries
Follow
They all are getting close to harvest except Gorilla Glue which decided to out grow tent. Had to open vent and add light for top cola. Ugh


Likes
15
Share


@Waveform
Follow
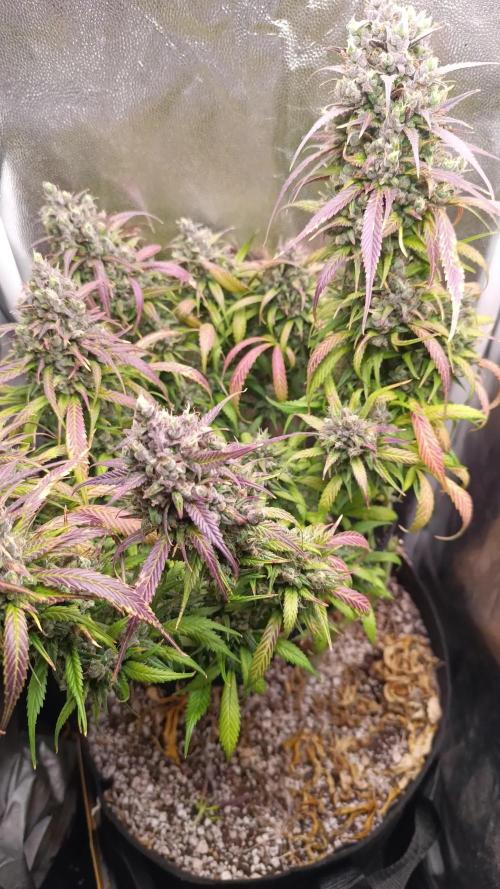
Day 60 and a new week, with lady #2 starting to show her age by getting some more yellowish fan leaves. Sugar leaves on both started to show a very lovely, deep violet color. By breeder information they should be ready in 60–63 days. I guess it will be a few more in my case.
Lady #1 is foxtailing a bit. Summer grow, definitely, and it was over 30 °C outside most of the daytimes, so I couldn’t avoid peak temperatures of more than 31 °C fully. Like every indoor grower – no restriction to this kind of plant only – I like to see self-grown green become big and bushy, but I guess with a 1,60 m tent it‘s better to stick with shorter specimen.
Even some fan leaves are getting into their autumn dress now, and wow, I like their style! Pistils are still white to more than 50%, so ne reason to check for harvest proximity or to feed them pure water only.
Day 62: With their cola foxtailing, tallest bud is now at 91 cm. Color is gaining saturation. A bit more intense leaf curl on very few of the uppermost leaves; nothing to worry about at this stage. Think I can do a microscope tour soon, even if I know it’s too early. ;)

Likes
3
Share


@MotasKush
Follow
Sunset Sherbet x Purple Punch
Ripper seeds limited edition seeds
3.flower week.., LST & Defoliation.., amazing the formation of flowers begins and the first trichomes appear.. super cool and happy healthy plants! Grow Your Own!

Likes
34
Share


@ElLocoDeLaHabitacion420
Follow
Starting week 10 things are looking great! I have nothing else to ask from this plant! it smells so good!! and super sticky when I took her out of the tent to take this photos one bud was touching my arm while I was carrying it and all my arm hairs sticked together and my arm smelled great for the rest of the day haha
Started flushing by the end of this week


Likes
50
Share


@DogDoctorOfficial
Follow
🌱 Eternity Grow Cup: Week 2 Veg Report – Building the Foundation 🌟
First, I want to extend a heartfelt thank you to Grow Diaries, this amazing community, and all the sponsors making this journey so special: Aptus Holland, Pro-Mix Soil, TrolMaster, ThinkGrow LED, Future of Grow LED, and CannaKan. And a special shoutout to Zamnesia and Plagron for their incredible support with seeds and nutrients for this run. This wouldn’t be possible without all of you—thank you for inspiring us to put our best into this grow! 💚
Growth Update: Small but Mighty
As Week 2 wraps up, the Zamnesia Runtz are still small, but they’re growing beautifully.
• Leaf Development:
• The first true leaves are now fully visible, and the second pair is starting to emerge on the horizon. Seeing those signs of life and progress fills me with hope and excitement.
• Nutrient Introduction:
• This week marked the beginning of feeding, laying the foundation for strong, vigorous growth in the weeks ahead.
Current Setup
• Environment:
• Temps are holding at 20°C, with RH at 60%—a comfortable range for young plants.
• The heat mat under the pots is maintaining an optimal root-zone temperature, keeping them cozy despite cooler room conditions.
• Location:
• Still growing alongside their sisters in the 4x8 tent but will soon transition into the full TrolMaster ecosystem, where precision and control will take things to the next level.
Nutrient Spotlight: Starting Strong with Aptus Holland
I’ve chosen to introduce the Aptus Holland lineup this week. These nutrients are carefully formulated to support plants through every stage of their growth cycle, and here’s what I’m using:
1. Aptus Regulator (0.15ml/L)
• What it is: A silicon-based additive that helps plants regulate stress and environmental challenges.
• Benefits:
• Strengthens cell walls, leading to thicker stems and stronger leaves.
• Increases stress tolerance, particularly against heat, cold, and light fluctuations.
• Improves nutrient uptake, ensuring plants get the most out of their feedings.
• Why now: At this early stage, Regulator gives the plants a strong foundation to handle the cooler temps and build resilience as they grow.
2. RO Water Conditioner (0.8ml/L)
• What it is: A product designed to optimize Reverse Osmosis (RO) water, making it suitable for plant feeding.
• Benefits:
• Balances pH and stabilizes water for nutrient absorption.
• Adds essential elements back into the water, ensuring a balanced feed.
• Why now: Using conditioned RO water prevents imbalances and provides a clean, consistent base for all feedings.
3. All-in-One Liquid (1.25ml/L)
• What it is: A complete macronutrient blend designed for vegging plants.
• Benefits:
• Provides all essential nutrients (N-P-K) in a balanced ratio.
• Easy to use and highly effective, supporting strong vegetative growth.
• Why now: As the plants develop their first leaves and roots, All-in-One Liquid ensures they have the building blocks needed to thrive.
Educational Focus: Why Start Nutrients in Week 2?
1. Natural Reserves:
• During the first week, seeds rely on their own nutrient stores within the seed casing. Introducing nutrients too early can overwhelm or damage delicate roots.
2. Signs of Readiness:
• By Week 2, the emergence of true leaves signals that the plants are ready to transition from relying on reserves to taking in nutrients from the medium.
3. Balanced Start:
• Starting with low doses ensures the plants can adjust gradually, reducing the risk of nutrient burn or stress.
Week 2 Insights: Setting the Stage for Success
1. Managing Environment Challenges:
• Lower temps can slow growth, but maintaining a warm root zone with a heat mat has been key to keeping these seedlings healthy and happy.
2. Patience in Veg:
• Early veg may feel slow, but this phase is all about establishing strong roots and foundational growth. Remember, every strong plant starts with a strong start.
3. Why Pro-Mix Soil:
• This medium provides excellent aeration and drainage, supporting rapid root growth. The added Biofungicide and Mycorrhizae further enhance plant resilience and nutrient uptake.
What’s Next?
As we move into Week 3, I’m excited to see these beauties continue their journey. The next steps include:
• Monitoring the development of new leaves and early structural growth.
• Transitioning to the TrolMaster ecosystem, where environmental precision will allow the Runtz to truly shine.
• Documenting every moment through photos and videos to share the magic with this amazing community.
Community Love & Thanks
Thank you to everyone following along and supporting this grow. To all the participants in the Eternity Grow Cup: best of luck—let’s make this one for the history books!
Stay tuned for Week 3, where we’ll dive even deeper into the evolution of these incredible plants. Until then, keep growing, keep believing, and let’s create something legendary together! 💚✨
Genetics - Runtz https://www.zamnesia.com/6000-zamnesia-seeds-runtz-feminized.html
Nutrients - Plagron https://plagron.com/en/hobby
- Aptus Holland https://aptus-holland.com/
Controls - Trol MAster https://www.trolmaster.eu/
LED - https://www.futureofgrow.com/en
LED - https://www.thinkgrowled.com
Soil - https://www.promixgardening.com/en
Germination - Cannakan https://cannakan.com/?srsltid=AfmBOopXr-inLXajXu3QFgKXCXXos4F1oEvScjMKIB5MR5dk8-GJ-F49
DOGDOCTOR 15% off
As always thank you all for stopping by, for the love and for it all , this journey of mine wold just not be the same without you guys, the love and support is very much appreciloved and i fell honored with you all in my life
With true love comes happiness Always believe in your self and always do things expecting nothing and with an open heart , be a giver and the universe will give back to you in ways you could not even imagine so
As always, this is shared for educational purposes, aiming to spread understanding and appreciation for this plant. The journey with nature is one of discovery, creativity, and respect. Let’s celebrate it responsibly and continue to learn and grow together!
Growers Love To you All 💚
Likes
10
Share

@DimJesus
Follow
Elas estão no ponto! 🍀🙏 Finalmente a colheita, elas não tá aguentando o próprio peso, balançando muito com o ventilador e galhos espalhados, praticamente sem folhas e nenhuma folha grande, o cheiro também tá bastante forte, os tricomas tudo branco e começando a escurecer, outra coisa é o foxtailing, vem se intensificando bastante a pesar que a temperatura caiu bastante. Acho que esse é o cultivo mais rápido que tive até agora, 84 dias desde a germinação, contando que tudo o ciclo foi 18/6 é um tempo razoável. Vou fazer a colheita hoje mesmo e pendurar dentro das estufas pois não tenho nada que possa fazer de dryroom. Se secar o suficiente semana que vem volto com mais informações sobre a colheita e o peso final, possivelmente o resultado da extração também, vai depender do tempo que levar para secar o suficiente para fazer a manicure 💅🌱
Likes
Comments
Share


@UGrowGuy
Follow
Been a lil busy. Haven't been on here or in the garden as much as i need to. The girls are growing all natural. I have literally taken no leaves off their entire lives. Some of the old fan leaves die during light drybacks. Inuse deybacks for stacking nutes and some light drought stress which can increase oil production. They just have a small cage at two levels. I have cut nutrients to most of them, going for quality smoke as its already more than I can consume lol. Two look like they are still bulking. Some are getting close. Everyone is still getting bokashi/ffj for the terps and ethylene found in the ripe fruits. It helps with senescence.. I turned the lights and temps down to help crop steer ‘em. We are getting close! Thanks for readin
Likes
153
Share


@StarLorr
Follow
Welcome to my Banana Purple Punch diary.
🍌💜🤪💥🥊
In this Diary:
Seeds: [420 Fast Buds]from my growmie Tropicannibis_Todd 👊🏻😎
Media: Pro~Mix HP Open Top Grow Bag, Connect.
Nutrients: Green Planet Nutrients,
2 Part Dual Fuel starter kit.
RealGrowers: Recharge.
Diablo nutrients: Ripping.
Feeding :
Tue 26Mar: 2L Nutes/Recharge pH'd 6.5
Fri 29Mar: 2L Monster K pH'd 6.5
___________________________
The buds got chunkier and are very hard and heavy, can't be more happier.
Trichomes are white and the amber should be at my satisfaction by next weekend, sorry for the quality of the trichomes video... i know it looks like the same cameraman who captured UFO🛸on a pogo stick... will try harder next time😅😂............ i can see the finish line🏁👀1 more lap😎
___________________________
Thanks for stopping by, likes and comments are appreciated.👊🏻😎
Keep on growin!
Keep on tokin!!!
😙💨💨💨💨💨


Likes
15
Share

@Patres
Follow
K.onec 10. Týdne holku jsem dnes pokosil, trichomy plně mléka a občas i nějaký ten Amber. Pupeny jsou tak těžké že při sundávání rostliny se větve samy lámaly pod tíhou palic. Až to bude suché přidám pár fotek hotového produktu. Jinak lepkavou brokolicí bych ohodnotil dobře, snadno se pěstovala, a nebyly s ní žádné větší problémy.
Likes
78
Share


@Hologram
Follow
Goodmorning growmies
My bubatz is getting some sugar! trichomes arealready forming.. she is so sweet..
she is making sure i get some sugar too ASAP!!
weather is much better for her, its HOT! 😎
ladybugs are working overtime.. they arecleaning her up real good..👌
🐞🐞
got a lot of spiders too..(small and big)
luckily i am not affraid of no bug or insect.. so when i spot one, they are dead!💀👊
for now they do no real harm, just a lil hole in leaf now and then.. (when they make web as) no biggie
My last update of my candyshop was 5 days ago, so it was a short week this time (week b4 was 10 days, so i am just maing up for that a bit..)
cya next week,
thanks for all the comments, likes and follows.. ur the best👊
Happy growing for all ✊
KISS!growing technique: KeepItSimple, Stupid!
