


Likes
22
Share


@eldruida_lamota
Follow
Que pasa fumetillas? ya estoy de vuelta, más fuerte que nunca este parón fue para mejor.
Así que vamos a empezar abriendo el diario de nuestra critical, ya la cultivé pero no fue específicamente solo de critical, si no en general de 3 variedades , así que esta vez toca dedicarle un diario a esta generosa indica.
La germinación no a supuesto un problema, de echo en 36h estaban las 6 semillas abiertas.
En la germinación use PIRAMID de agrobeta para empezar con buen pie.
Pasadas las 36h las plante en tierra biobizz light mix en macetas 0,4 L y encendí el ts600 de mars hydro.
Las fotos son tomadas el día 5 desde la germinación, haré fotos pero solo un día de la semana , para que vayáis viendo más diferencia entre semanas .
.
Como siempre, el ph lo mantengo en 5.8, la humedad ronda 70/80% . Y la temperatura oscila 22/24 grados.
.
Ahora en la alimentación, gama agrobeta.
0,5 ml x L Piramid , vía radicular.
0,5 ml x L Growth black line , vía radicular.
0,1 gr x L Cancerbero , vía radicular.
0,1 ml x L Tucán , vía radicular.
0.1 ml x L Flash Root , vía radicular.
0,4 ml x L Great Green , vía foliar.
.
Esto es todo, cualquier duda que tengáis comentarme , y que paseis muy buenos humos .


Likes
34
Share


@MrJoint
Follow
✌️🎃 Thank you for checking my cultivation.
🤤 They're very sticky and smells a lot.
💧 Watering with Ripen for start roots wash.


Likes
14
Share


@suchydog5
Follow
2-3 buds were moldy so i had to cut them hope it doesnt spread further😳
to be honest i havent seen more beautiful flower than this purple one❤️

Likes
1
Share
@Olduffybastard88
Follow
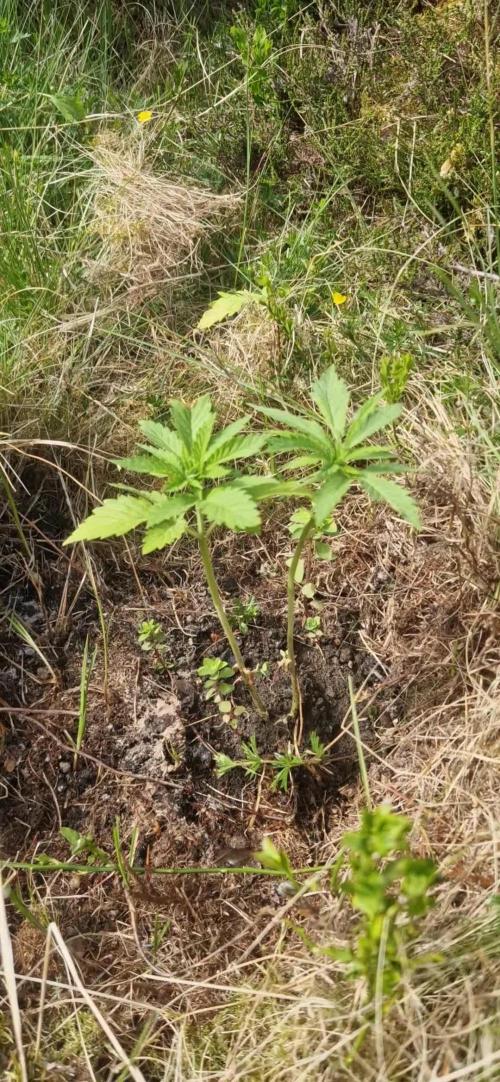
Went up and seen how the girls are getting on there first week out in the wild by themself and I'm. Over the moon there all safe and happy weather looking great for the next week


Likes
3
Share


@Farmerbry71
Follow
This AK is growing so fast she is in early flower and just starting to strech loving the bloom feed will help with the strech


Likes
86
Share


@Tropicannibis_Todd
Follow
ALRIGHTY THEN
At this very moment , hint of Grape Crush Soda smells 😛 Which is awsome
56 days into flowering
We just hit week 11 and all is well , for the most part , I'm sure I'd be further ahead if it wasn't for the cal/Mag issues early in its development 😃 .......
👉 Baby Sister Plant #2 Is 9 weeks and coming along great 👈
👉 NutriNPK NUTRIENTS IS USED FOR FEEDINGS 👈 Fresh rain water to be used 👈
Lights being readjusted and chart updated .........👍
I GOT MULTIPLE DIARIES ON THE GO 😱 please check them out 😎
👉IF ANYONE IS LOOKING FOR A PLACE TO HANGOUT VIA GROWDIARIES AND TALK GROWING AND JUST CHILL AND WHATEVER .....👈
👉I CREATED GROWDIARIES DISCORD SERVER !!!!!!!!!!!👈
LINK IS 👉
https://discord.gg/zQmTHkbejs
AND SEE HOW IT PLAYS OUT !!!!!!!
Likes
20
Share


@SirDucksAlot
Follow
Lots of growth this week. Grew 6 inches this week. Turned over to 12/12 light cycle and began flowering on Friday.

Likes
3
Share


@CaptonianMoneymaker
Follow
Grow very quickly little stretchy bud took off in bloom buds started small then just exploded after 4th week green house grow with 2 fans super clean buds patiently waiting on buds to dry
Processing
Likes
14
Share


@Mr_Og_GreenThumb
Follow
Today 7/30/19, day 57 and the start of week 9. I'm still continuing to alternate between days with my pesticide treatment (especially after finding that bug living on one of hulkberries fan leaf) and thrive alive green daily foliage spray as a prophylactic solution against any possible pests or mold going into these last few dog days of veg. I will flush them with distilled ph'd water for two days this weekend in preparation for flower. Then I'll start them on some "flower fuel" bloom booster on top of my secret for success flower recipe at 1/4 of the recommended strength.
Outside of that still no adverse issue to report for the end of the 8th week. After my last trim, they both have responded very nicely, I was kind of worried about fat banana stalled growth. But one thing I noticed when I topped her at the 6th node, yes the main stem stopped growing but it developed many bud sites up and down every stem. Whereas hulkberry was topped at the 8th node, she has mainly focused on developing long stems and only 2 or 3 bud sites along her stems. Even though hulkberry in structure, is much bigger than fat banana and has a way bigger root system. Fat banana is bushier and has developed way more bud sites than hulkberry. I can't tell which strain will yield the most at this point only time will tell!
Also, a big shout out to "J"@RQS, thank you for the excellent customer service. Another reason why Royal Queen Seeds is top 3 in breeding!!

Likes
26
Share


@HowtoBubatz
Follow
In the third week of the cannabis plant growth cycle, significant developments occur that set the foundation for future growth and yield. This stage is crucial for implementing training techniques that ensure even canopy growth, promoting optimal light exposure for all parts of the plant.
To ensure uniform growth and maximize light exposure, LST have been applied
By the end of the third week, the cannabis plants have demonstrated excellent growth, supported by strategic training techniques and effective pest management practices.
Despite the plant's healthy growth, the presence of fungus gnats posed a potential threat. To combat these pests, beneficial nematodes (Steinernema feltiae) were introduced into the soil.
Continued monitoring and adjustments will be essential as the plants progress into the next growth stages to ensure a bountiful harvest.

Likes
22
Share


@gottagrowsometime
Follow
Well, I really didn't have to do much with this Gal. She is very low maintenance. Very fruity, smelly and is full bodied.
She lost some of her hardness after a 48hr dark rest, it has made her really sticky, and I was expecting this to happen as the leaf to calyx ratio is high in this pheno. But she makes up for it in smell, let's hope it tastes as nice. I'm not too worried About it not been, as the other 3 GFS I harvested were good, even if I marked 1 wrong.
Have hung dry this gal whole, I let it dry out in the coco and took it apart (the pot) and broke away the substrate to leave the roots and let it dry as natural as I can with no stress. This my 1st time doing this, have done it on all 3, so let's hope wasn't a bad idea, will update on smoke report as soon as she's dry.

Likes
11
Share


@adam_pawloski87
Follow
This week has been great! Germination on all 4 Pre 98 Bubbas and 2 Dirty Blondes was a success!! We planted them in there pots an through out the week we gave em each a very light spray down of pure water phd at 6.5 and by Friday they all popped out the soil Let’s go!!!!! Next week we will start light feed on nutrients , so y’all keep them eyes peeled for next updates an I appreciate y’all for following my grow !!😶🌫️💨💨💨🙏🏻💚💯🤙🏻

Likes
73
Share


@Rwein93
Follow
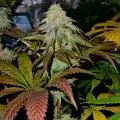
Ciao ragazzi e bentornati qui con me le sorelle Mimorange.🍊😉
Ci siamo! Fra un paio di giorni taglierò loro. I buds sono estremamente compatti, profumati e di un colore favoloso, come potete vedere nei ravvicinati delle apicali.😍
Ho eseguito un lavaggio delle radici massivo nel giorno 92 con ben 20 L di acqua ciascuna per pulire bene e poi dopo aver aspettato che asciugasse per bene, ho innaffiato loro nel giorno 96 con 1,5 L di acqua.💪
Nel giorno 98 ho eseguito anche una voluminosa defogliazione per dare concentrare le energie suo buds negli ultimi giorni.👍
Eh niente ragazzi! Anche per questa settimana è tutto. 👊
Grazie a tutti per aver guardato e restate sintonizzati per nuovi aggiornamenti.🙏
Buona settimana e felice crescita 🌱 🌱 🌱
Likes
6
Share

@k0nz1
Follow
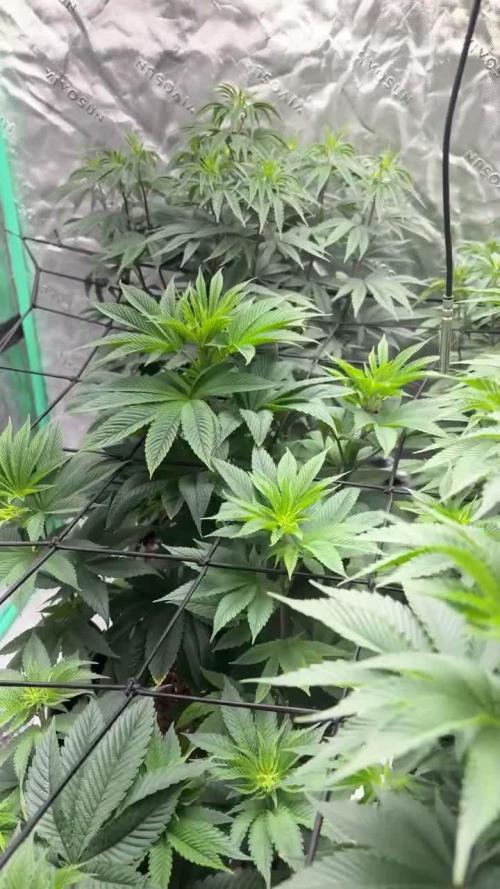
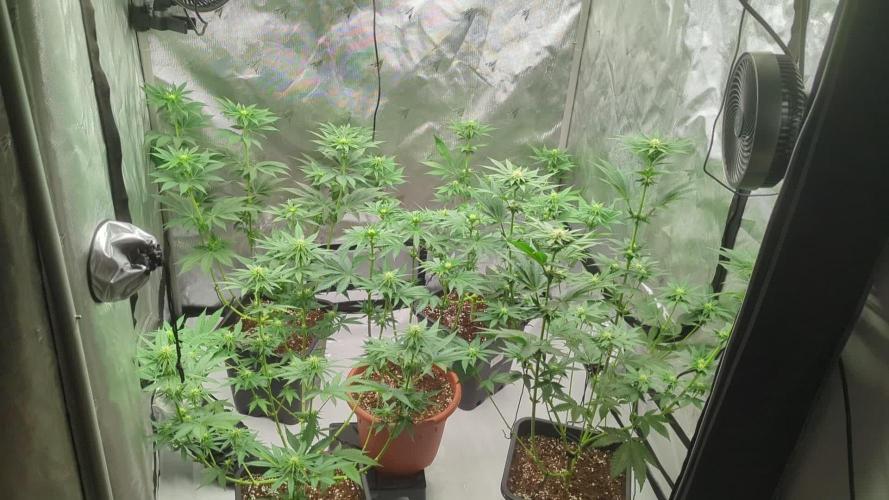
The tent ist getting really full rn. Big defoliation and lollipopping in the coming days .
The Lemon Orange stretching crazy. The Blueberry Pancakes are Bushmonsters with lots of Side branches. One of the BBP has little Nitrogen deficiency. Nothing serious.
All in all very healthy plants. Waiting for the first trichomes and aroma in the tent.
~55- 60 % rh
~ 21-26 celsius


Likes
23
Share


@dataTwiiix
Follow
06/04: Début 3ème semaine jusqu'à présent je suis content de moi, c'est ma deuxième culture. La première a été assez mouvementée et cette fois-ci je me sent plus à l'aise par rapport aux arrosages par exemple. J'ai choisi de ne pas utiliser du allmix par exemple pour pas risquer de brûler mon plant lors de l'engraissâge etc.
06/05: Aujourd'hui "tie down" des branches les plus basses. (LST j 0) + Arrosage à l'eau clair 400ml ainsi que toping des branches basses.
06/06: j'aperçois les premiers pistils la phase de pré-flo est sur le points de débuter je vais augmenter la luminosité petit à petit dans les jours qui viennent pour arriver autour des 70,000Lux en phase de flo.
06/07: je vais revoir mon planing d'engraissage et ajouter un engrais de flo. et du CalMag agent toutes les deux semaines, quand au GHE essential une fois par semaine en foliaire.
06/08: le filet est placé depuis ce matin, maintenant on attends l'étirement floral pour le remplir.
06/09: arrosage +/-500ml avec engrais, j'ai tenté de descendre le filet pour palliser le plant et commencer à diriger le branche dans les trous du filet mais j'ai changé d'avis car je le sentais pas, je préfère attendre le stretch et utiliser le filet quand les branches l'atteindront naturellement.
06/10: finalement j'ai fait un topping hiers soir car le fiming ne semblait pas prendre et le cola continuais a monter et a chaque nouveau noeud j'avais chaque fois que deux branche donc j'ai préferer le topping certaine branche latérale on déjà rejoint la hauteur de deux branche obtenue grâce au topping. je suis étonnée par la vigueur de cette variété qui se remet rapidement de tout stress!