


Likes
Comments
Share


Likes
14
Share


@Mr_nugs_lover_David
Follow
This lady has been Transplanted on day 39 since she was planted (may 10th) and I've prepared the 15L pot with the complete line of biotabs using 2 spoons of startrex for every 5L, sprinkled a couple of grams of mycotrex on the transplant hole before putting the plant and then I added 3 slow release tabs one biotab for every 5L of soil, so that's why in this case I added 3, after the Transplant was done I immediately watered the plant with 1ml/L of orgatrex and 1g/L of bactrex, I hope you guys enjoy my work this season!!

Likes
31
Share


@Chubbs
Follow
SuperSativaSeedClub
PurplePunchOGAuto
Week12
Sorry for the late update on these two lovely ladies. They're going through flower absolutely amazing starting to get super sticky and smelling delicious. I'll check the tricolms this coming week to see how looking and get an idea of hoe much longer they'll go. All in all Happy Growing

Likes
6
Share

@PurpleBeen
Follow
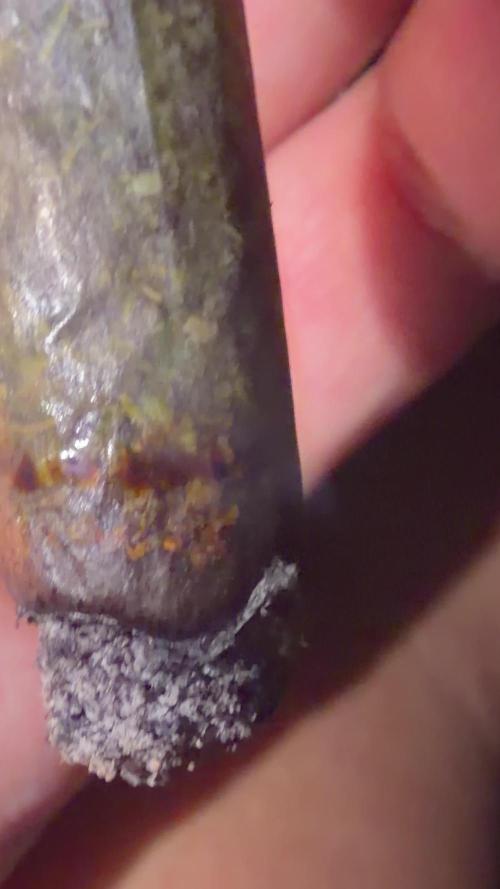
We’re almost at the end! 💚I’ve already harvested the most contaminated ones—about two-thirds of them. For the last one, I’m pushing it along with the Somango in the middle and the other girls that joined in after I adjusted the spacing, as well as a tent for drying. So, until the end of the week, it’ll be plain water only!
I already started that process with the first harvest. As for the cause, I’m not blaming the seed or my poor management. I’d say I just got unlucky and didn’t pay enough attention underneath the canopy. That’ll teach me not to rush!
Other than that, the pre-test is really promising—the terpenes and THC are definitely there🔥🌝.

Likes
9
Share

@Flavors
Follow
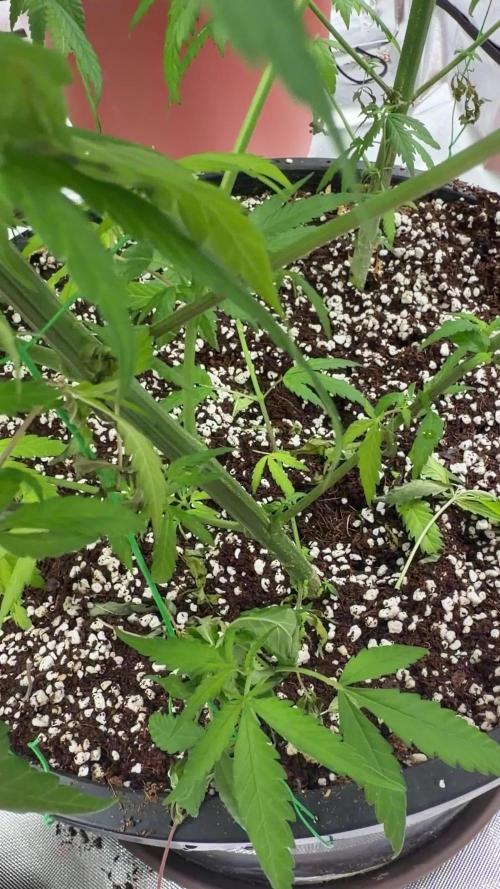
🌱 Sticky Broccoli – Grow Diary 🌱
Week 12 | Transition Week | Coco + Perlite
This week is the final stage before flower 🌸
Plant is fully mature with a dense, even canopy under the SCROG 🌐
Plan is to take clones from healthy top growth ✂️🌱
Selecting strong branches to preserve genetics before the flip.
One more defoliation will be done to clean up the canopy 🍃
Removing excess fan leaves to maximize light penetration and airflow 🌬️
Structure is dialed in—flat, wide, and ready for stretch 🚀
All bud sites are exposed and positioned evenly.
Plant remains healthy with deep green foliage 💪
No signs of stress going into transition.
Watering consistent with slight runoff 💧
Environment stable and optimized for flip.
📈 Next step: final defoliation, take clones, then flip to flower cycle 🌸🔥
Likes
200
Share


@Ferenc
Follow
Day 65, 14th of November 2020:
Amazing week....
RQS Wedding Gelato does not strech a lot and pistils coming out nicely....
Original Sensible Seeds has amazing gentics they are so strechy except Black Ghost OG, rest of them crazyyyyyyy..... I also broke two of the sides from Gelato Original Sensible Seeds but fixed with tape and now all good lol 🤣🤣🤣
Pre flowers out and I really hope they stop growing lol.
I also noticed that the Original Sensible Seeds strains have nice purple colours of the fan leave's stem.
All the same fertilization happens every 2nd day with the mix above and ratio.
One more thing:
I set the lamp 15 minutes shorter to switch off earlier so they receive 11:45 of darkness. I would like to imitate the nature when longer nights come with time till the 4th week (when they will receive 13 hours darkness a day 15 minutes minus 4 times = 1hour) so every week 15 min longer darkness for 4 weeks and then back to 12/12 to have bigger buds from the 4th week....

Likes
26
Share


@pifflestikkz
Follow
Day 71
09/09/24 Monday
Feed today using de-chlorinated tap water pH 6 with calmag.
Day 72
10/09/24 Tuesday
Nothing, just monitoring mould.
Day 73
11/09/24 Wednesday
(END OF QUARANTINE)
De-chlorinated tap water pH 6 only today.
Now I have put them to finish underground a 600w hps under 12/12 schedule with the Divine Black opium.
Luckily no more mould has spread, and all plants look happy healthy and still developing. Overall very happy I saved the crop ✌️💚
Day 74
12/09/24 Thursday
De-chlorinated tap water pH 6 today with Plagron products.
Finally a video and pictures update
✌️💚
Day 76
14/09/24 Saturday
De-chlorinated tap water pH 6 only today.


Likes
51
Share


@nonick123
Follow
Día 92 (20/01) CBD Auto 20:1 #1 - Reviso los tricomas, y a pesar de tener muchos pistilos blancos, detecto un 50% de tricomas nublados / 50% tricomas transparentes
La cosecha se acerca para este monstruo!
Día 93 (21/01) CBD Auto 20:1 #1 - Los cogollos siguen engordando! Never ending lady!
Día 94 (22/01) CBD Auto 20:1 #1 - Los cogollos siguen y siguen engordando. Increible!
Día 95 (23/01) CBD Auto 20:1 #1 - Cada día pistilos nuevos y mayor densidad! 😍💥
Día 96 (24/01) CBD Auto 20:1 #1 - Se acerca la cosecha
Día 97 (25/01) CBD Auto 20:1 #1 - Reviso los tricomas: 49% transparentes, 50% nublados y 1% ambar.
La senescencia general de la planta con muchas hojas amarillas y el estado de los tricomas me llevan a la cosecha!
Día 98 (26/01) CBD Auto 20:1 #1 - Cosecha! 😍💥💨😁
Un viaje apasionante con esta monstruosa planta que ha crecido hasta 1,60 metros tras Supercropping en dos ocasiones, LST en incontables veces, Lollypopping en 2 ocasiones, varias defoliaciones...
Hubiera sido increible tener en tierra madre (suelo) o en una maceta de 21 litros en exterior...
Cogollos estilo sativa, no muy gruesos pero si densos y con forma de bate de beisbol, que en ningún momento paran de formar más y más pistilos nuevos! 💥
El color de los tricomas y la senescencia general de planta nos indica que ya está lista después de 98 días desde germinación
Desprende un olor muy tropical, dulce, como una mezcla de papaya y mango, con un toque picante de fondo
Esperemos a ver con que perfil terpenico nos sorprende después del secado y curado!
Unos colores verde lima durante toda la fase de floración que ha ido mutando a morado en las puntas de los cogollos conforme se produce la senescencia
Esperando a probarla para el efecto 😁

Likes
17
Share


@FatalFarmer
Follow
What a ride,
Made some mistakes and missteps along the way but I learned so much about these plants and the intense care and attention that goes into growing quality herb 😵
Next grow I think I will stake branches instead of the scrog so I can easily reach/rotate or lift plants. I definitely need to focus on growing fewer larger branches off each plant because trimming larfy/airy popcorn nugs from all these little branches that popped up during flower is no fun😡. Probably should take my time more with the next one, I received a Dr Grinspoon seed so that obviously will force me to extended the flower time, might go longer in veg too removing more leaves/branches before flipping. Overall besides the trimming hell I've been in for the last week This was so much fun and I can't wait to go again and improve on my methods, try new ones and learn even more 😁
Thanks for checking out my first Diary,
FatalFarmer

Likes
5
Share


@Deebow
Follow
Gorilla glue is finally finishing up was a finicky one from the start
Straw berry pie is getting super frosty not a big fan of the bud structure


Likes
16
Share


@CheeRz
Follow
Time is flyin' by and the ladies already in flowerin' week 6. Buds are startin' to get thick and lookin' damn yummie 💚💚💚. This is why we doin' this growmies 👆🏼👆🏼👆🏼

Likes
19
Share


@Skinnytalls420
Follow
This was a really easy strain to grow!!! I had some personal problems while I was doing this diary!!! So didn’t update as much!! But so far this is my best one yet and best strain I have grown and the best harvest and yield I’ve had to this day!!!!
Likes
10
Share


@KingJayTk
Follow
Day 15: I removed both branches, in the second node position on the trunk, and LST'd her down in the direction of the removed-downward-node. Also, I noticed the lime green discoloration on the lower leaves which means a beginning of a nitrogen deficiency. I lightly top dressed her pot the first week because it's the first time I grow using these dry amendments. I top dressed her again yesterday and watered her today. It will take a week for the nutrients to break down so I think I will be brewing a terp tea grow to treat the deficiency while the dry ingredients break down.
Day 18: continued to lst her down. I top dressed the soil with 3 tsp of nitro bat guano, 2 tsp of terp tea grow, and 2 tsp of uprising bloom.
Day 20: She started showing sex so I'll be only lst'ing from now on.
Likes
49
Share

@squalino
Follow
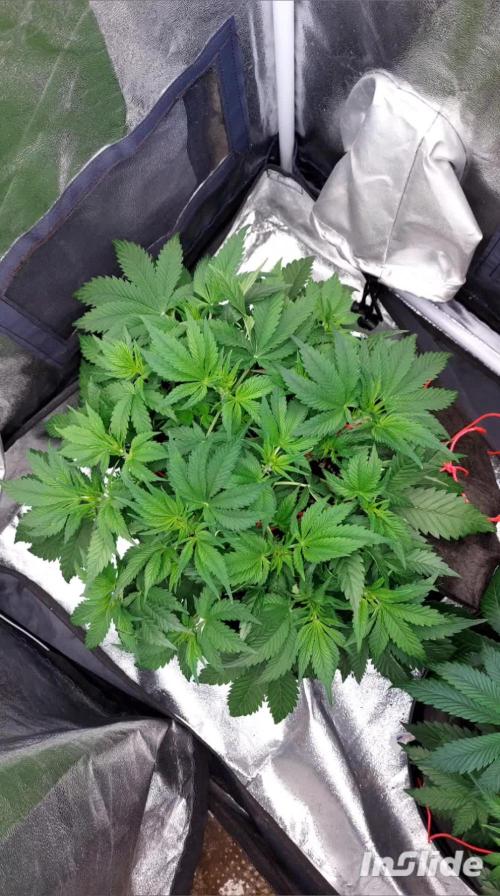
🌿 Journal de Culture : Cherry Cola (Auto)
Date : 12/03/2026
Âge : 49 jours (Semaine 7)
Phase : Pleine floraison (Production de résine intense)
📊 Paramètres de l'Environnement
Température : 24°C (Jour) / 20°C (Nuit).
Humidité : 55% (Parfait pour éviter la moisissure alors que les têtes se densifient).
Éclairage pureled 240 w 75% intensité) :
Distance Plante #1 : 69 cm.
Distance Plante #2 : 79 cm.
💧 Nutrition & Soins (pH 6,3)
Plante #1 : 1 Litre d'eau + 2 ml de PK 5-8.
L'ajout du PK (Phosphore et Potassium) va booster le gonflement des fleurs et la densité des bourgeons.
Plante #2 : 1 Litre d'eau pure. robinet
📏 Suivi des Plantes
Plante #2 (La Petite )
Taille : 26 cm (+4 cm depuis le 05/03).
État : Elle est devenue extrêmement touffue. Les fleurs sont d'un blanc immaculé avec des pistils bien vigoureux.
deldues signe de brulure sur les pointes mais rien d'alarmant.
Plante #1 (La Grande)
Taille : 38 cm (+6 cm depuis le 05/03).
État : Magnifique structure en "lustre" grâce à ton palissage. Les têtes sont plus avancées, plus larges et commencent à former des grappes denses. On voit clairement sur les gros plans que les trichomes (la résine) envahissent déjà les "sugar leaves" (petites feuilles de têtes). Le vert des feuilles reste sombre et sain.
🔍 Analyse
Le Stretch : La croissance verticale ralentit (seulement quelques centimètres cette semaine), ce qui signifie que l'énergie est maintenant presque totalement redirigée vers la production de fleurs et de THC.
Gestion PK : Plante #1. Elle est à son pic de demande en minéraux. Pour la Plante #2, l'eau permet de voir comment elle finit de digérer son dernier apport d'Orgatrex avant de lui donner aussi du PK .
Aspect visuel : Les têtes sont très "électriques" avec tous ces pistils blancs. C'est le signe d'une plante qui n'a subi aucun stress majeur. juste quelques légères brulures sur quelque pointes mais rien de sérieux.
15/03
plante 1 et 2
j'ai retiré les cordes qui formaient mon LST afin d'atteindre le tronc et pouvoir defolier endessous de la plante. pour que l'air circule mieux et couper quelque branches qui ne prenait pas la lumière et n'aurait rien donné de bon .la plante peux mieux diriger ses ressources au autre branche.
plante 1
le pot étant léger je vais lui donner 1,5 litres d'eau PH 6,4 .
MUSIQUE : FAST BUD NO 2
Processing
Likes
4
Share


@ReelEyezEnt
Follow
Finally flipped the lights over to flower mode and took the humidifier out of the tent.
So far so good we are gonna keep watching to make sure we didn't over do the nuts. Don't want any Nut burn that can be annoying.
make sure you hit the follow button


Likes
6
Share

@Bear_Grows_Green
Follow
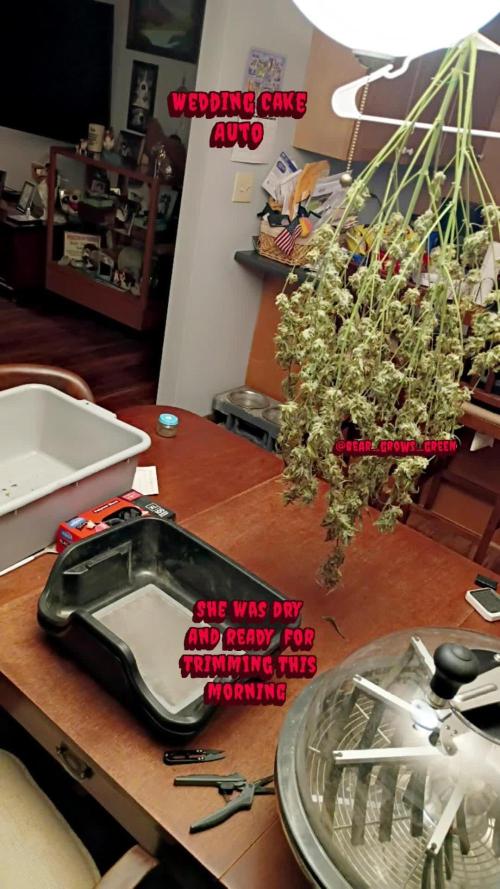
Chopped her down this morning got her having in about 63degress and 59% humidity with a little fan running on the floor. Stinking up the whole house since the drying closet has no filtration.

Likes
50
Share


@AsNoriu
Follow
Day 78. Last week for them . Margaret is started to crystallise , but leaves fade away and it will be trim jail for my yellow leaves OCD ;))
Dead Queen is enormously crystally and will be really strong weed. Fruity smell is not so strong and they smell so Tangie now.
Happy Growing !!!