


Likes
Comments
Share


@ChubbyBudBros
Follow
-
Day 63
The flowers look beautiful right now, very frosty, very phat, branches can't properly support them anymore and the smell is amazing.
Day 66
Noticed today that the pot was still pretty heavy after 24 hours, seems like she is drinking a lot less now. Hard to tell since when she started drinking less because I can't move her at this point, too risky with all the branches bending so far because the buds are so heavy and the stems can't stay up on their own.
Day 67
Pot is still very heavy today so I'm gonna skip watering today.
Day 68
Gave 3 liter light feed today, but noticed no run off now, while I was getting 1 liter run off when I was watering everyday, so might have to keep up the daily watering.

Likes
2
Share


@gr3g4l
Follow
Esta semana tocó la poda de los apicales y primer nudo dejando solo 4 nudos por planta.
Por lo que parece tienden a grandes hojas e internodos cortos.
Esta semana también aumenté la potencia del lumatex hasta el 75% unos 220W. Empecé con 100 W luego fueron 150 y ahora 220 , así hasta cambiar el fotoperiodo a 12/12h. Entonces al 100%, 300W.
Con 26 dias de vida ya tenian suficientes nudos, ramas y tocó hacer el apical y la poda del primer nudo a todas dejando 4 nudos por planta, 8 ramas secundarias.
Terminamos la semana con la nº5 con manchas en las hojas muy feas. Entiendo que tengo que tratarla diferente al resto por lo que la regaré menos y dejaré secar más entre riegos al menos un par de veces.
Likes
4
Share

@MartianFarmer
Follow
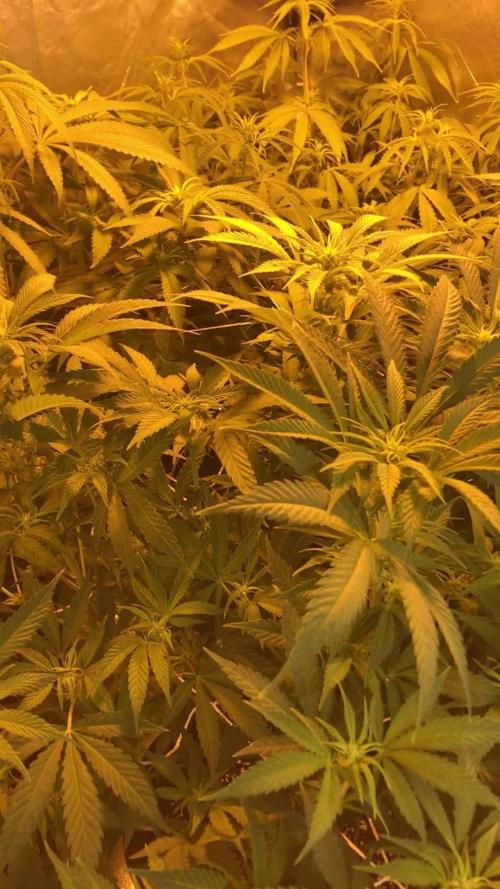
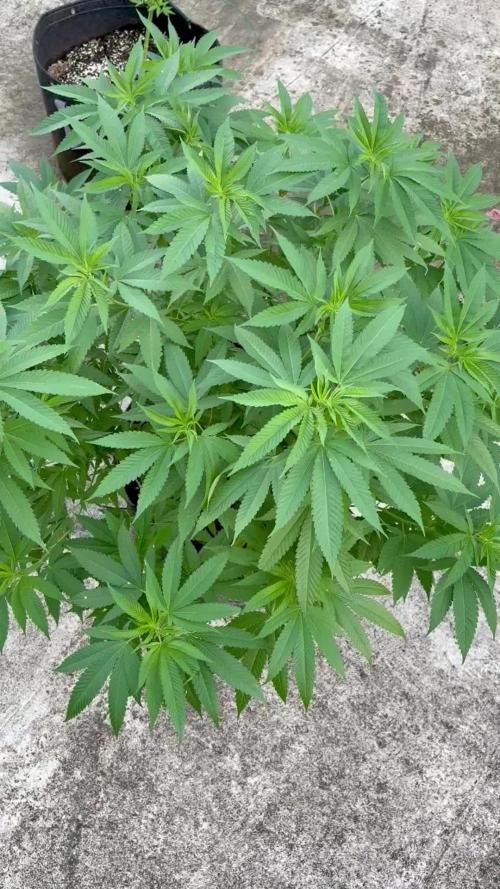
Just coming to the end of week 2 of flower will be upping the feed in this week ✌️☘️👽👩🚀




Likes
22
Share


@HappySkunk
Follow
Last week I got myself a humidifier. So right now my grow tent is 60/60/160 and features a Spider Farmer 2000, which is kinda oversized, but still works in there despite what other people told me - but who knows, maybe I’ll learn my lesson later on. There’s a small exhaust fan and a regular fan without oscillation + the humidifier. I also put in a young vegging chili plant I got from a coworker - it’ll be put outside eventually tho.
05/21: Starting week 5 and my plant is looking very bushy. She has gained some height in the past few days and I hope that’ll continue a bit. Can’t wait to see her flower.
05/22: She grew a bit since yesterday - especially sideways. Her newest leaves have yellow tips, which I suspect is due to me moving the light down to experiment - my mistake. I hope that’s what it is and that the next set of leaves won’t suffer.
05/23: Not much to say - she’s looking lush and nice to me! Since the beginning of this week she’s grown to 23cm height, so 5cms in a couple of days.
05/24: Found some down-clawing leaves today and some people suggest it can have something to do with air circulation. I only spotted two leaves doing this and I hope it’ll stay like that 😬
05/25: Haven’t had much time to look at my plant today, but my wife sent me a nice picture of her. She seems to be doing fine!
05/26: I think she’s started to flower? So that’s pretty cool. I also removed some of the lower branches, since I felt like she was too bushy for me. I like how she looks now.
05/27: I’m so happy with how she looks. She does have some burnt edges on her leaves - but she’s had that since she was born, so I’m starting to be less worried about that and just let her do her thing. I think defoliation was a good decision. She is also flowering now - it took me a little bit to realize... I thought the leaves were just looking super strange.

Likes
15
Share


@Korinthius
Follow
3/4/2021 3rd Node Appearing
3/7/2021 3rd Node Complete
3/10/2021 4th Node Spreading its leaves
3/13/2021 5th Node Spreading its leaves
Plant seems to be loving the Mars Hydro TS1000. I raised the light a few inches as this is a very stout plant and I wanted a little more stretch between nodes before topping. Otherwise, we should be topping this plant middle of next week.


Likes
2
Share

@deseed_uy
Follow
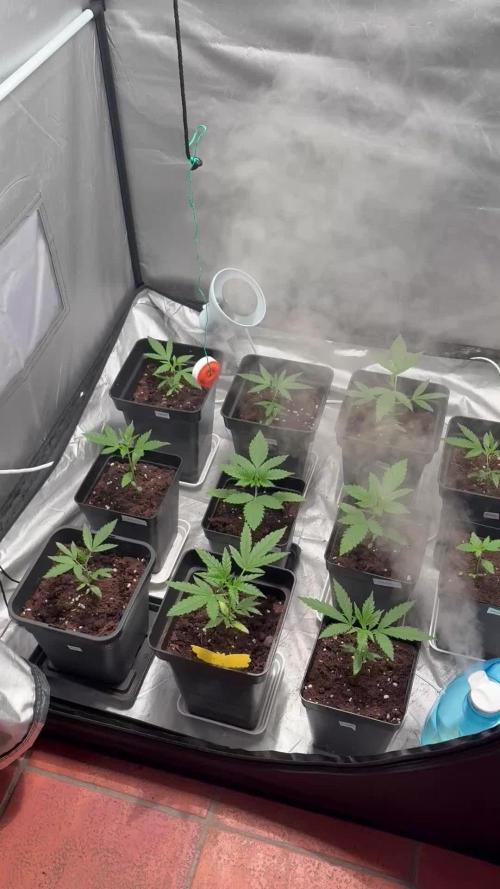
Ahora siiii buenas buenas😃
Recuperadisimas entraron en vegetativo a todo ritmo, en estos dias ya les voy a hacer apical y se viene una buena aplicacion de ipw para empezar a prevenir como tiene q ser.


Likes
47
Share


@Hydro_Hiebs
Follow
What up Growmies, this one grew hella fast maturing in 9 weeks from seed to harvest fast. Buds is true to their name. This one has some serious resin on the flowers reminding me of some sort of a gelato Gorilla glue cross, but we shall see when it's released! I could be far off lol. I had no problems growing her. She was really easy and happy her whole life. She's a great one for extractions!
Thank you grow diaries and thank you fastbuds for the opportunity to show the world my organic gardening skills! I appreciate all the support from the growing community here on grow diaries. Big thanks for my followers!


Likes
39
Share


@SamDo
Follow
Hello, 1ère semaine, on démarre en douceur, les plantes ont 1 jour, une graine de critical+ 2.0 n’a pas germé, mais cela arrive, je l’ai remplacée aujourd’hui.
J’ai mit vidéos du set up de la box et une qui reprend rapidement les conditions de cultures. C’est mon 1er journal, j’attend vos conseils et vos suggestions bienveillantes.. je ferais un update en fin de semaine...
Update fin de semaine fait. Toutes les graines sont cette fois bien sorties!!👍Il y a donc un léger décalage entre elles, mais aucuns soucis. happy grow!!😎

Processing
Likes
19
Share


@self_sustainer
Follow
Okay, so I didn’t think this seed would actually terminate as it was a joke. I didn’t use the cup of water and seed soak technique. I just planted it directly into some dollar tree soil I got for my kitchen window garden. So because the soil was so cheap, I didn’t even expect the seed to sprout. So I figured I’m going to grow it and see what I produce.
I’m not sure if the picture I chose uploaded, but the other plants in the picture are bell pepper plants.
Likes
6
Share


@SensimillaP
Follow
Shout out Seeds Mafia for sponsor this grow !! I'm very thankful for it🙏
As for the plant I'm very happy how it turned out, she didn't require much to give out those amazing buds !!!

Processing
Likes
5
Share


@Ensign420
Follow
Week 02 Introduction
This week has been a bit of a struggle. Had my first experience dealing with slime and brown algae. But I think adding enzymes and increasing the beneficial bacteria helped to fix the issue. Also experienced nutrient burn for the first time. My nutrient solution strength got as high as 671 PPMs. So backed it down to about 430 PPMs during the end-of-week reservoir change. Also cut Hydroguard (expired?), CaliMagic, and Superthrive from this grow. Now she's still stunted, but is starting to recover. Hopefully...
[START OF WEEK 02]
Day 01 - Monday - 08/10/20 - Total Days: 008
-----------------------------------
- [0830]: Still looks a bit yellow. But getting larger!
--- Solution strength was at 248 PPMs.
--- Just topped off with a bit of distilled water
--- PH went up to 6.1 so PH'd down to 5.8
--- Ran the top feed for a bit to wet the hydroton.
- [2130]: She's looking even more yellow now.
--- Even the new leaves are really yellow.
--- Decided to add more base nutes.
--- Added 4ml of Sensi A
--- Added 4ml of Sensi B
--- Now at about
--- Solution Strength went up to 304 PPM.
--- PH was at 6,
--- Also raised the water level a bit more.
--- I really hope it's a nutrient deficiency and not an over-watering issue.
--- Please live!
Day 02 - Tuesday - 08/11/20 - Total Days: 009
-----------------------------------
- [0830]: Looking less droopy. But still yellow.
--- Decided to do a reservoir change.
--- 4.5gal of distilled water
--- 8ml of Sensi Grow A
--- 8ml of Sensi Grow B
--- 8ml of Voodoo Juice
--- 4ml of B-52
--- 4ml of CaliMagic
--- 4ml of Hydroguard
--- 4 drops of Superthrive
--- PH'd down to 5.8
--- Solution strength: 302 PPM
--- Since I didn't want to risk over-watering the rockwool, I did not to do a top feed, may do one tonight after the sleep cycle (lights are still set to go off at 10am and back on at 4pm).
--- As I was doing a reservoir change, I noticed that the tubes and bucket were a bit slimy. Didn't really stink or anything. Is this normal? Maybe due to the Hydroguard and Voodoo Juice?
--- I hope she gets better soon!
- [2215]: Getting larger! But still yellow.
--- Also can see a root growing through the net pot! Tiny little thing but it's there! Will have to start dropping water once more appear.
--- After looking over a few DWC diaries using AN nutes, seems like my solution strength is still too low. Most around this stage average around 500 PPMs with about 4ml per gallon.
--- Top fed for a minute to wet the top of the hydroton.
--- Solution strength went down to 263 PPM.
--- Added 8ml more of Sensi A
--- Added 8ml more of Sensi B
--- Now base nutes are at 16ml for 4.5 gal of water.
--- PPMs went up to 411.
--- Still lower than 500 PPMs, but that's okay.
--- PH was at 6. Not sure if I should adjust PH using AN nutes. So going to not ajdust unless PH goes above 6.1.
Day 03 - Wednesday - 08/12/20 - Total Days: 010
-----------------------------------
- [0830]: Looks like more root growth!
--- She still looks yellow. But leaves are perky.
--- PH was at 6.2 so lowered down to 5.8.
--- Solution strength was at 394 PPMs
--- Since roots are still growing, I decide to lower the water level a bit. Now water level is a bit below the net pot.
- [2200]: Root is getting longer!
--- Slime is returning. Not sure why.
--- Solution strength: 357 PPMs
--- PH: 6.1
--- Decided to add an enzyme along with more beneficial bacteria to hopefully cure the slime.
--- Added 16ml of Sensizym
--- Added 5ml of Hydroguard
--- Added 8ml of Voodoo Juice
--- New solution strength: 430 PPMs
--- New PH: 6.1
--- Top fed for a minute.
--- This slimy residue is really freaking me out! I hope the added enzymes will help eliminate the slime.
--- Going to do a full reservoir sterilization/nutrient change over the weekend. Please survive until then girl!
Day 04 - Thursday - 08/13/20 - Total Days: 011
-----------------------------------
- [0930]: I think the enzymes worked! There is little to no slime now!
--- Although I think the root was also dissolved in the process. It's now just a little stub sticking just below the net pot. The enzyme is also suppose to dissolved dead roots too but guess that root was too weak? Not sure what happened there. But I think the slime is cured!
--- Solution strength went down to 395 PPMs. Decided to add more base nutrients.
--- Added 8ml of Sensi A
--- Added 8ml of Sensi B
--- Added 4ml of B-52
--- Solution strength went up to 598 PPMs.
--- PH was at 6.1
--- As long as the PH is between 5.5 and 6.3, I'm not going to use PH Up or Down. But still will monitor PH levels.
- [1715]: Checked up on her after her nap and shes looking alive but stunted. But no slime!
--- Decided to add some sugars to help maintain the enzymes and beneficial bacteria.
--- Solution strength was at 587 PPMs.
--- PH was at 6.2
--- Added 8ml of Bud Candy
--- Solution strength went up to 671 PPMs.
--- PH also went up to 6.3
--- Lowered water level a bit to hopefully promote more root growth.
--- Top fed for a minute.
--- She is getting bigger, but still looks yellow.
Day 05 - Friday - 08/14/20 - Total Days: 012
-----------------------------------
- [0915]: Leaves look a little burnt on the tips. Still no slime.
--- Going to back off on the PPMs to hopefully fix the nutrient toxicity.
--- Solution strength was at 632 PPMs
--- PH was at 6.3
--- Added/Removed water until PPMs were at 536.
--- PH was still at 6.3
--- Raised water up a bit, then top fed for a minute.
- [2200]: Looking better. Still yellow though.
--- Solution strength: 514 PPMs
--- PH: 6.5
--- Added PH down.
--- New solution strength: 518 PPMs
--- New PH: 5.2
--- PH was kind of high. So decided to PH down. Had to use quite a bit to bring it down. But eventually got it to drop down to 5.3. A little low, but so far, the PH has always gone up so wanted to start it really low.
--- Ran the top feed for a minute to re-saturate the top of the hydroton.
Day 06 - Saturday - 08/15/20 - Total Days: 013
-----------------------------------
- [0830]: She looks stunted. leaves are still yellow.
--- Solution strength: 514 PPMs
--- PH: 5.6
--- Top fed for a minute.
--- Not sure what to do at this point. Going to do another reservoir change soon. Hoping she lives until then.
- [2145]: Looking pretty much the same.
--- A bit of slime has returned. Since I've been diluting the nutrient solution, the enzyme ratio has dropped. So I guess this is expected.
--- Also noticed that slime build up was on the air-stones. Never really checked the stones so not sure how long that has been there. Looks brown too, which can't be good.
--- Going to do an H202 sterilization of the system (minus the net pot) tomorrow so did not add anything.
--- Lowered the water level to below the net pot.
--- Then top fed for a minute.
Day 07 - Sunday - 08/16/20 - Total Days: 014
-----------------------------------
- [0900]: STERILIZATION DAY!
--- Decided to skip today's night cycle for a deep clean.
--- I'm hoping that skipping a night cycle won't be too stressful.
--- Temporarily moved her to a new bucket.
--- Used about a half of gallon of straight distilled water to flush out the net pot.
--- Drained the system and wiped up all the brown sludge. Also removed the air stones and cleaned up all the goo.
--- Filled the system with 2 gallons of distilled water and at least 30ml of food grade hydrogen peroxide (35% strength).
--- Yea its a lot, but since I'm not going to sterilize the system overnight, I went with a really high doseage. Basically I kept adding until I started to see little bubbles start to form.
--- Then I ran the water pump.
- [0915]: Boiled the air stones in tap water for about 10 min. Then reconnected them to the airlines.
--- I let the air stones and hose soak in the sterilization solution for about 5 minutes so the peroxide can absorb into the stones. Then ran the air stone to help mix and agitate the solution.
--- Occasionally, I'd repeat the process of turning the air pump off for a few minutes to let the stones soak.
- [1000]: Covered the top two row of holes of the net pot with some aluminum tape. Hopefully this solves the light leaking in through the hydroton.
- [1200]: Used an old toothbrush and scrubbed the pump clean. Then drained the system.
--- Refilled with more distilled water and peroxide. Again added a lot.
--- Ran system again to sterilize even more.
- [1530]: Drained the system and refilled with distilled water to rinse.
--- Ran the system for a few minutes, then drained and rinsed again.
--- Did this a few more times over about an hour.
- [1630]: Added 4 gallons of fresh distilled water.
--- Added 15ml Sensi Grow A
--- Added 15ml Sensi Grow B
--- Added 12ml of B-52
--- Added 16ml of Voodoo Juice
--- Added 16ml Sensizym
--- Solution strength was at 430 PPMs
--- PH was at 5.6
--- I was going to add Hydroguard, but I think the bottle is expired. Since 2017 or 2018!? I think Hydroguard is good for up to 2 years from the date on the bottle or 6 months after opening. So not going to use from now on. I wonder if this could have contributed to the slime build up.
--- Also removed the CaliMagic and Superthrive too. Going to only use AN products to eliminate the chance of incompatible nutrients.
--- Placed her back in the bucket and top fed for a minute.
--- Here's hoping for the best. Going to let it ride until morning! Please feel better!
[END OF WEEK 02]
Likes
Comments
Share


Likes
25
Share


@pifflestikkz
Follow
Day 45
17/08/24 Saturday
Another watering today using de-chlorinated tap water pH 6 only.
Lemon skittles and XXL ammo are tall, bud nice and smelly plants!
The Kabul is more of a dense compact build, I'm excited to see what they grow into 😍
Picture and video update ✌️ 💚
Day 48
20/08/24 Tuesday
Feed today using de-chlorinated tap water pH 6. With Plagron PK13-14 and power buds.
Noticing the stretch stop, and now packing out there bud sites 💪💚
Vid + pic update ✌️💚


Likes
118
Share


@Roberts
Follow
Lemonade Haze grew great under the Spider Farmer SE3000 light. I did have a flowering delay due to wore out timer. So grow went a little long. The plant grew to the light within a few inches. So top foxtailing was inevitable. She smell like a sweet Lemonade. Super sticky. Thank you Ganja Farmer.🤜🤛🌱🌱🌱
Thank you grow diaries community for the 👇likes👇, follows, comments, and subscriptions on my YouTube channel👇. ❄️🌱🍻
Happy Growing 🌱🌱🌱
https://youtube.com/channel/UCAhN7yRzWLpcaRHhMIQ7X4g

Likes
38
Share


@GODSGIFT_2005_JM
Follow
For LIQUIDS & NUTES ******GREEN BUZZ NUTRIENTS***** organic.
Also i’m using their LIVING SOIL CULTURE in powder form!
MARSHYDRO ⛺️ has large openings on the sides which is useful for mid section groom room work. 🤩
☀️ MARSHYDRO FC 3000 LED 300W
💨MARSHYDRO 6” in-line EXTRACTOR with speed-variation knob, comes complete with ducting and carbon filter.
Likes
2
Share


@Green_Peace
Follow
Added Buddy halfway through this week. Really impressed with these nutrients so far, there's been no problems or defeciences the entire grow. All plants look happy, healthy and green. This plant is on the left of the timelapses.
Likes
44
Share


@The_Good_Twin
Follow
As with a lot of things in life, the harvest did not go as originally planned. I stated in my last entry in week 16, that I was going to continue the flush till I remembered and tried the dried, broken branch of C1. So I decided to harvest the plants on October 29th. Their last watering/feeding/flush was done on 10/27/21. I already had plans to take a day trip to see a MLS fútbol ⚽️ game I had tickets for on Saturday, 10/30/21; then I didn’t think parents would want to bring their kids near a house that wreaked of weed on Halloween, so not the 31st either. Then I had an appointment in the afternoon on Monday, and I didn’t want to get a late start, so not on 11/1/21 either. My wife had an appointment on Tuesday morning. Fortunately, her appointment was over by noon, so I got the chance to finally start the harvest on November 2nd.
I turned off the lights halfway through the 12 hour light schedule on Sunday morning (10/31), so my ladies received varying periods of darkness before the harvest was begun. I harvested one plant per day for three days beginning 11/2/21.
The day I started the harvest, I took all three plants outside for some pictures and to make a short video before cutting them up. The extended darkness before harvest made all three plants change their colors and become absolutely beautiful! I was very pleased with their final presentation.
02 Nov 2021 - C1
C1 was sitting in complete darkness for just under 48 hours when I took her outside to chop her up. Her buds were large, mixed with purples, blues, and pink. The trichomes glistened in the overcast sunlight and covered every bud like a protective blanket. I took some pictures of her by herself before starting her destruction.
I started by snipping her branches and laid them out on a foil covered cookie sheet. Then I took them inside and started trimming, trimming, and trimming. Her buds are very dense and super sticky! The smell is absolutely divine! It took several hours to complete the trimming, and once I was done I had no desire to continue with the next plant.
After I finished trimming all of C1’s buds, I got my wet weight on the branches before hanging them up to dry.
03 Nov 2021 - C2
C2 sat in complete darkness for nearly 72 hours before I took her out to harvest her flowers. The sun was shining, but it was windy and cold. I took some pictures of her in the sunlight and she was marvelous! Deep purples, with some pink edges mixed with some green in her foliage. She was truly a sight to behold.
Then I cut her up into pieces.
Wonderful, tight bud structure. Very dense. Trichomes a plenty and glistening! I truly love growing weed.
My house by this time is absolutely saturated with the sweet, berry, fruity scent of these wonderful buds. You might think it unpleasant, but it wasn’t.
I trimmed C2 for a long while because my hands are sore from two days of scissor snips and carefully holding and manipulating branches of sweet smelling, beautiful bud. The things we do for frosty buds!
Once I finished trimming I got the wet weight and hung it up to dry along with C1.
04 Nov 2021 - C3
C3 sat in darkness for approximately 96 hours before finally getting harvested. It had been over a week since she had any water, and she was still beautiful and vibrant!
The weather was not being friendly when I took her outside to cut her up. It started to rain lightly, so I wasn’t able to get any pictures of her before chopping her up. Sad, I know. I was in such a hurry to beat the downpour that I didn’t even think about it till it was too late. 🤷♂️ Oh well.
As with the other two; I cut off her branches and laid them out neatly on a foil covered cookie sheet and took them in to start the trimming.
As you may well imagine, I was sick and tired of trimming by this time, but I took my time to make sure that they were done well.
Once done; I got my wet trimmed weight and hung them up to dry.
Fast forward 4 days.
08 Nov 2021
C1 had been hanging to dry for 6 days, which is how long their mother took to dry. However, it was the end of summer when she was drying, and the relative humidity was between 50-60%. November is different! The humidity in my grow tent was very low at 39%, and not only was C1 super dry, but both C2 and C3 were also dry and ready for curing.
Starting with C1, I took each plant out of the tent and got the dry weight on the branches for direct comparison to the wet weight before hanging to dry. Then I separated the buds from the branches and weighed the loose bud to get the actual smokeable harvest weight. I hope you all followed that. Here’s how all the weights turned out by plant.
C1 - Wet trimmed weight: 8.566 oz.
Dry trimmed weight: 2.214 oz.
Actual harvest weight: 1.826 oz.
C2 - Wet trimmed weight: 8.332 oz.
Dry trimmed weight: 2.392 oz.
Actual harvest weight: 1.992 oz.
C3 - Wet trimmed weight: 8.750 oz.
Dry trimmed weight: 2.763 oz.
Actual harvest weight: 2.312 oz.
Blueberry Muffin Trio:
Hanging wet weight: 25.648 oz.
Complete harvest weight: 6.130 oz.
I am very happy with how this grow turned out! This Trio represent the only clones that I have ever been able to take root, and made it possible to get 4 complete grows from 1 plant. This grow was a success at the beginning, and with the experience I gained from my first three plants, the entire grow was wonderful! I hope you all have enjoyed this journey with me.
Happy growing everyone!!
