


Likes
Comments
Share


@TheBudWhisperer
Follow
Week 1 of the flower/transition is in the books and so far, so good. After chopping out all but the best branches from each plant we flipped the light cycle and dropped some more clones in to the aerocloner. I am so done with this run of genetics but still can’t deny quality cuts when they’re available. Again, if there was a run to test out this new system with it’s definitely this one. We’ve been plagued by calmag, nute burn, nute def. across all of em at some point over the last 8 months. But since incorporating the Druid nutes - all of Em have been perfect👌. This should be a prefect opportunity to see exactly what kind of buds each of these strains throws out👍.
Background
This ones tied to part 2 of the pollen chuck. They were supposed to be a clone run for pollination but the mothers all reveg’d due to a timer incident and high stupidity. These will be the inaugural flowering run of the revamped dutchy system. Growing made easy😉. Shit ton of finagling and setup but once she’s ready - sit back, relax and watch em grow😍😎. Thanks for take’n a look.


Likes
5
Share


@Lazuli
Follow
I flush this plant tommorow with 40 liters rain, then ill feed her again with finalpart another 10 days and we harvest

Likes
Comments
Share


@Dabking
Follow
Just for the pro mix competition, various plants i've harvested with Pro mix soil.
Thank you Pro mix for the soil, my plants and I both loved it.


Likes
3
Share


@B_AECH
Follow
Had a PH issue which almost spoiled the entire plant.
But fantastically I noticed the issue right from the start, so even though she became very yellow she's pushing through till the end and is back to absorbing nutes.
+Day 61 started flushing
SHE'S A TRUE FIGHTER <3
I'm happy that I managed to learn the importance of pH.

Likes
14
Share


@Canadian
Follow
When it comes down to this girl I think there’s not much to say a picture says most of the story react very well to training gives very large flower and with an incredible exotic Look the only thing the pictures cannot tell is the lovely fruity smell With skunk mix into that And of course the beauty that is unreal I’m not too sure if I’m going to leave her one or two more weeks definitely this girl you don’t want to rush her , you want her to be just perfect thank you for reading I will continue to update have a happy grow.

Likes
5
Share

@Chubbs
Follow
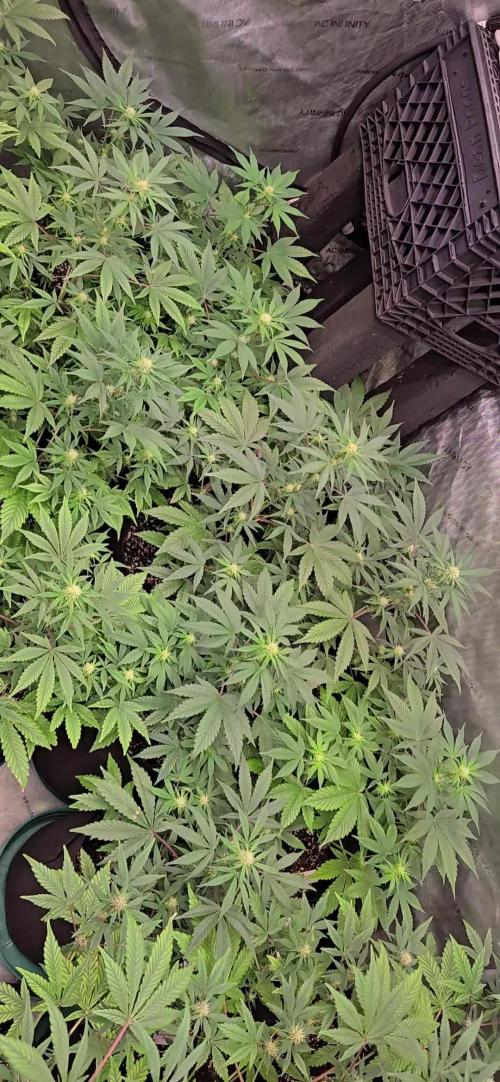
What up Fam, I apologize for the late update. Been away for 2 weeks from the ladies and my son who was watching them did amazing, as I came back to an absolute forest. The plants almost doubled in size which is crazy the growth they had while I was gone. I started adding bloom nutes and did a defoliation and lollipop this week. I'd normally start my training around week 3 but over all they're happy and healthy as can be. Let's Go Happy Growing.
Likes
2
Share


@DaddyPrime2
Follow
1/23/25
this plant has a beautiful, perfect structure. handles training well and forms nicely with minimal help so


Likes
8
Share


@Theia
Follow
Purple punch has gone nuts she had a lot of supercropping done on her and after 10 days has doubled in height and basically gone mental. Amazing strength in this genetic very vigourous growth and lovely bud sites everywhere.
I'm away in America doing the formula 1 so the updates are from photos and messages sent from my wife back home who is looking after the ladies..
No issues really apart from higher RH then we would like but she has gone in and defoliated a bit and things seem to have settled.
I'm awa until November 1st as I'm doing the Mexico formula 1 after this..
Updates will be a little light on detail I'm afraid and images will be generic from the room..
Thanks growmies.
Stay safe 😷
Grow well 🌿


Likes
12
Share


@Donbehzad
Follow
In this week, I started defoliating because the plant got bushier than last week and its blocking small colas underneath. I noticed that they are still potential colas blooming so i had to LST the plants by spreading it so the light would penetrate.
This will be the last week for nutrients starting next week (week 10) I will flush the plants, just ph balanced water for the remaining weeks.

Likes
4
Share


@DeepRootsGrowTrees
Follow
SPEEDY BOOM AUTO by KANNABIA
Week #8 Overall
Week #3 Flower
This week she's is looking good she's healthy she's dealing with the heat and the elements fine she's easy to grow. Stay Growing!!

Likes
211
Share


@PapaNugs
Follow
Another good week. Been trying to water with my mix a couple times a week. Otherwise I've been using the blumats. There has been twice though I overwatered with those and flooded slightly. Still trying to adjust them just right
Likes
209
Share


@Rock_n_Roll_Randy
Follow
Day 24 for the 54 plant grow. 42 different strains of photoperiods and 12 different autoflower strains in the:
8X8 GROW TENT WITH THE NEW FC-E6500, FC4800 AND TSW2000 and green buzz all organic/vegan fertilizers🤘
The girls are loving their home and everything is doing good and looking pretty nice and getting bigger👍
BREEDERS AND SEEDS:
DIVINE SEEDS:
MAZAR, OPIUM, WHITE WIDOW, OG KUSH, PABLO ESCOBAR, DIVINE INDICA.
AUTO WHITE WIDOW
AUTO PABLO ESCOBAR
AUTO WHITE RUSSIAN
AUTO FRACTAL
AUTO MONTREAL
AUTO OPIUM
AUTO KABUL
AUTO MAZAR.
WEEDSEED EXPRESS:
GREEN CRACK, GHOST TRAIN HAZE, LITHIUM OG, CHEESE.
DOCTORS CHOICE:
DC KUSH, AUTO NIAGARA, AUTO ROCK MACHINE.
EXOTIC SEEDS:
HIPPIE BERRY, MALASANA GELATO, EXOTIC ANIMAL.
GENE/MEME SEEDS:
BLACK HELL.
ORIGINAL SENSIBLE SEEDS:
PURPLE PUNCH COOKIES, WEDDING CAKE, PURE KUSH, GORILLA COOKIES.
SWEET SEEDS:
BLACK JACK, GORILLA GIRL, SWEET ZKITTLES.
EMERALD TRIANGLE SEEDS:
GORILLA GLUE, MASTODON KUSH.
SEEDSMAN SEEDS:
BLACK SUGAR, PEYOTE FORUM, PEYOTE WIFI, BADAZZ COOKIES OG, PURPLE GHOST CANDY, STRAWBERRY BANANA GRAPE, L.A. PEYOTE KUSH, PEYOTE WIFI CBD, FUEL DOG, CRITICAL PURPLE KUSH.
AMSTERDAM MARIJUANA SEEDS:
GIRL SCOUT COOKIES EXTREME, GREEN CRACK.
QUEBEC CANNABIS SEEDS:
BRUCE BANNER, GREEN CRACK, QUEBEC CBD 20:1.
I 💚 GROWING MARIJUANA:
SKYWALKER OG, BANANA KUSH, BLUEBERRY CBD.
FOR EVERYTHING MARS HYDRO VISIT:
www.mars-hydro.com
PROMO CODE: rocknroll
VISIT THE ALIEXPRESS STORE:
@marshydro_aliexpress2
Instagram: @marshydropenny
https://youtube.com/channel/UChU5ZWwNi-DvnO3oWVU3ceA
https://greenbuzzliquids.com/
#greenbuzzliquids
@GreenBuzzLiquids
https://greenbuzzliquids.com/en/shop/
PROMO CODE: rocknroll
https://www.youtube.com/watch?v=8hEqyS1jPpI
https://growdiaries.com/diaries/112437-grow-journal-by-rock-n-roll-randy/week/593118
Thanks for taking the time to read and check out my shit🤜🤛
New FC-E6500 Led Grow Light-FC-E6500 grow light with 3978pcs OSRAM BridgeLux Diodes & Moso Driver, market-leading PPF 2.7 µmol/J, Max 2.5g yield/watt with 30% higher Average PPE, more cost-effective compared with other same type lights.Only consumes 650W, perfectly cover 5x5ft (personal), 4x4ft (commercial) grow space.Innovative Precise Uniform Lighting-Built-in removable bars interval & dimmability enable the exact & dynamic PPFD control over each of the plant growing stages, FC-E6500 detachable bars deliverSuperior Heat Dissipation: Real Aluminum heatsink together with 6 slim profile passive cooled bars (THINNER & LARGER surface) and detachable Meanwell Driver, create less heat, save 50% energy than other old grow lights! Driver can be mounted remotely on the side of a grow tent/rack or on an adjacent wall to remove heat from grow space.Full Spectrum UV IR LED: With Yield Max spectrum (660nm Osram enhanced Deep Red,2800k-5000k,730-740nm IR,380-410nm UV LEDs), Average PPFD FC-E6500 LED grow lamp enable cultivators to produce Density Buds, perfect for full-cycle hydroponic,soil,grow tent/room growing.
Dimmable Commercial Grow Light: Cost-efficient,easy dimming & daisy chain max up to 20 lights, IP65 Waterproof, master light easily controlled for commercial & home horticulture.
GET THE MAX FROM MARS👍: Welcome one of the newest members of the Mars Hydro family🤜🤛🤘. The Mars Hydro FC 4800 480W LED Grow Light can accommodate up to a 4' x 4' area for flowering. It has OVER 2000 LED chips consisting of the best selling Samsung LM301B diodes which has a Luminous Efficacy of: 220 lm/W
0.2 W, 3 V mid power,
Osram 660nm Diodes, Infrared light and UV LIGHT👍. It boasts the incredible efficiency of 2.8 µmol/J, maximum 2.5gram yield per watt with 30% higher Average PPFD. This High-intensity spectrum is beneficial for plants at all stages - from veg to bloom, and creates Big dense Buds👍. achieve 50% higher yields & quality compared with the old lights! Only consumes 480W for 4x4ft personal grows, and 3x3ft for commerical grow. It comes with a dimmer and daisy chain function with a maximum of up to 15 lights, the master light controls the rest👍. Wide 6-bar design offers even & wide canopy coverage and can maximizes your grow space. slim 180° FOLDABLE DESIGN... YES I SAID FOLDABLE🤘🤣 , making it compact and easy to install, it's IP65 WATERPROOF and will give you no worries while growing in a humid environment and makes it a flexible high performance commercial grow light for enormous SUPER FROSTY yields.😛😛😛. MARS GETS EM FROSTY BOYS👍
AWESOME HEAT DISSIPATION: The Low energy consumption FC4800 growing light has 6 passive-cooled bars and an aluminum heat-sink a removable driver you can upgrade later or have it outside your tent. with zero noise you can save up to 50% in your electricity bill compared to HID's or HPS lights!
It also has a removable driver so you can upgrade it in the future or have it outside your grow space for better heat control in your growroom👍
UPGRADED FULL SPECTRUM: Yield Max Spectrum with enhanced red (Top-Bin Samsung 3000k-5000knm, Osram 660nm Deep Red), speed up blooming & fruiting, perfectly suited for full-cycle growing. The FC4800 LED grow lamp was born for Big Buds, perfect for commercial, grow tent, grow room, hydroponics, and all soil grows.👍
THE BEST SAMSUNG DIODES: THE FC4800 has Top Bin genuine Samsung Osram Diodes, combined with remarkable 2.8 µmol/J Efficacy, 30% higher Average PPFD, 50% less energy consumption, to maximize your yields. They give you a TRUSTED 3 years warranty 100% Satisfactory guaranteed!!!
The MARS HYDRO 8x8 Grow Tent interior is made of a unique diamond design mylar which is highly reflective. (Other companies mylar and reflective rate is as low as 50%, and it won't provide efficient light. They use thick 1680D oxford canvas, and being double stitched, it is tear proof and perfect for locking in the light. Their grow tent keeps 100% of the light inside the tent and helps your plants absorb more light. EXTRA-THICK material means No light leaks or rips at all.👍
Strong Stable metal corner adapters and poles are the trustful supporters of the tent. It's very sturdy, neither rusting or paint flaking off. quick and easy tool-free setup. They use heavy-duty metal zippers, with double layer black lining, by far the best on the market which creates a light-proof seal.
The Easy observation windows are made by double layers of cloth. Observe the growing conditions of your plants without opening the tent and avoid disturbing your plants. The observation windows also serves to dissipate heat and ventilate the air.
The tent includes 2 removable waterproof floor trays to hold soil and water. The removable tray can be taken out to wash easily.
They guarantee the grow tents are easy to install even if you've never done something like this before. Clear Instructions and no tools needed! They also offer 30-day unconditional refunds for quality problems. Just contact their friendly 24 hours customer service 👍
• New FC-E6500 Led Grow Light-FC-E6500 grow light with 3978pcs OSRAM BridgeLux Diodes & Moso Driver, market-leading PPF 2.7 µmol/J, Max 2.5g yield/watt with 30% higher Average PPE, more cost-effective compared with other same type lights.Only consumes 650W, perfectly cover 5x5ft (personal), 4x4ft (commercial) grow space.
• Innovative Precise Uniform Lighting-Built-in removable bars interval & dimmability enable the exact & dynamic PPFD control over each of the plant growing stages, FC-E6500 detachable bars deliver
• Superior Heat Dissipation: Real Aluminum heatsink together with 6 slim profile passive cooled bars (THINNER & LARGER surface) and detachable Meanwell Driver, create less heat, save 50% energy than other old grow lights! Driver can be mounted remotely on the side of a grow tent/rack or on an adjacent wall to remove heat from grow space.
• Full Spectrum UV IR LED: With Yield Max spectrum (660nm Osram enhanced Deep Red,2800k-5000k,730-740nm IR,380-410nm UV LEDs), Average PPFD FC-E6500 LED grow lamp enable cultivators to produce Density Buds, perfect for full-cycle hydroponic,soil,grow tent/room growing.
Dimmable Commercial Grow Light: Cost-efficient,easy dimming & daisy chain max up to 20 lights, IP65 Waterproof, master light easily controlled for commercial & home horticulture.
FOR EVERYTHING MARS HYDRO VISIT:
www.mars-hydro.com
PROMO CODE: rocknroll
VISIT THE ALIEXPRESS STORE:
@marshydro_aliexpress2
Instagram: @marshydropenny
https://youtube.com/channel/UChU5ZWwNi-DvnO3oWVU3ceA
Likes
6
Share


@20SYL
Follow
Arrosage plutôt léger cette semaine (tout les deux jours), après le sur arrosage et l'excès de nutriments de la semaine dernière elles se sont très bien remises. La dernière est toujours en retard, elle continue sa croissance donc pas d'inquiétude !
On entre dans une période de canicule (35/40°C) donc le climatiseur tourne à fond, j'arrive à limiter la température à 26/27 max et environ 24 de moyenne. L'humidité est un peu difficile à maîtriser malgres le déshumidificateur, en moyenne 57,7% mais il chauffe, donc il faut trouver le juste milieu.
Pour le moment tout va bien, j'attends de voir la suite ☀️

Likes
92
Share


@DogDoctorOfficial
Follow
🌸 Week 4 Flower Report: Growth, Challenges & Big Changes! 🌸
Hey, Grow Diaries Fam! ✨
We’re here at Week 4 of Flower, and what a week it’s been—packed with challenges, adjustments, and exciting progress! Before diving into the details, let’s start with a note on my flowering timeline. While this is Week 4, I don’t start counting flower days the moment I flip to 12/12. Instead, I wait for the plants to show true signs of bloom. It’s a small but significant distinction that keeps things accurate and aligned with the plants’ development. 🌱
Defoliation: Timing is Everything!
Defoliation is a critical part of the flowering stage, and I typically wait until Day 21. However, this week, I tackled it earlier on Day 17 because:
1️⃣ The room was simply too full.
2️⃣ And most importantly—the Papaya Zoap had other plans!
She’s a fighter—determined, defiant, and constantly reaching for the moon. Despite intense training like super cropping, she’s still pushing upward, nearly outpacing the LED lights. Challenges like this remind us of a simple truth: gardening mirrors life. It’s about resilience, adaptation, and unwavering determination. 💪
This week, I added a second SCROG layer. While this net will support the flowering colas, it’s also there to strategically manage the Papaya Zoap. Why? Because experience has taught me that if she grows out of the LED’s range, she won’t finish properly—and that could disrupt the balance for every other plant in the tent. It’s all about teamwork, even in the garden. 🌟
Defoliation was intense, removing nearly all the leaves with stems to clear space and boost airflow. The tent now looks dramatically different! For the full before-and-after transformation, be sure to check out my YouTube channel—trust me, you’ll want to see this process up close! 🎥✨
Switching to Aptus Holland Minerals
A major milestone this week: I’ve transitioned entirely to Aptus Holland Minerals. 🌊 From now on, it’s just minerals—no more organic inputs. This marks the start of a new chapter, and I’m incredibly curious to see how the plants react to these changes. Here’s the current nutrient mix:
• System Clean: 0.5 ml/L
• Regulator: 0.15 ml/L
• RO Water Conditioner: 0.8 ml/L
• All-in-One Liquid: 2.1 ml/L
I’m keeping the pH at 6.1 and TDS at 556 ppm, and so far, the plants are thriving. This week also included a thorough system clean, ensuring everything runs smoothly as we enter the final flowering stages. 🌿
Bud Development: Pure Magic!
The bud formation across all the genetics is nothing short of incredible. Every plant is thriving, and the canopy is lush, vibrant, and full of potential. I’ve raised the PPFD to 750 for this stage, with temps steady at 25°C and RH at 63%—keeping the VPD dialed in at 1.11. The TrolMaster ecosystem, paired with the AutoPots, makes managing these precise conditions seamless. With more time to focus on the plants, I can give them the daily care they deserve. 💚
Shoutouts & Gratitude
A huge thank you to my sponsors and supporters: TrolMaster, Aptus Holland, Pro-Mix, Cannakan, and the amazing seed banks. Your incredible products and technology make this journey possible. 🌟
To the Grow Diaries community and all my followers—thank you for your energy, love, and even the challenges from the haters. It all fuels this incredible process, and I apprecilove every bit of it.
Special shoutout to Brother Daggadna—check him out on Instagram and show some love! 💚
The plants are heading into the next phase of bloom, and I can’t wait to share how this story unfolds. 🌸✨
As always, stay tuned, stay positive, and let’s keep growing strong together! 🙌
Growers’ love to all 💚
#TrolMaster #AptusHolland #GrowLife #CannabisCommunity #FlowerWeek4 #NeverGiveUp #GrowWithLove #IndoorHorticulture #Defoliation #PPFD #ControlledEnvironment #SCROGNet #DogDoctorOfficial
Discount Codes so you can save big on your next check out 💚💚💚
Kannabia - DOGDOCTOR 30% off
SeedsmanSeeds - DOGDOCTOR 10% off
CannaKan- DOGDOCTOR 15% off
terpyz.eu - DOCTOR 15% off
The Neutralizer - PORKIT5-DOG 15% off
As always thank you all for stopping by, for the love and for it all , this journey of mine wold just not be the same without you guys, the love and support is very much appreciated and i fell honored and so joyful with you all in my life 🙏
With true love comes happiness 💚🙏 Always believe in your self and always do things expecting nothing and with an open heart , be a giver and the universe will give back to you in ways you could not even imagine so 💚
Friendly reminder all you see here is pure research and for educational purposes only
Growers Love to you all 💚💚💚
P.S. – A Deep Dive into the ICL-300: Revolutionizing Under-Canopy Lighting
The ICL-300 isn’t just another LED—it’s a game-changer for under-canopy lighting. Unlike traditional LED systems that project light in a single direction, the ICL-300’s 300-degree design ensures even light distribution beneath the canopy. 🌟 This unique feature means that no part of your plant is left in shadow, creating a balanced environment for lower buds to thrive.
Key Tech Specs & Benefits:
• 300-Degree Light Distribution: This design fills the under-canopy space with optimal light, enhancing photosynthesis where it often gets neglected. 🌱
• Full Spectrum Output: Tailored to meet the specific needs of plants at every stage, ensuring quality growth from base to apex.
• Energy Efficiency: Advanced LED technology delivers maximum output with minimal energy usage, keeping costs down and sustainability up. 💡
• Durability & Heat Management: Built with high-quality materials, the ICL-300 stays cool and reliable, even in intense growing environments.
Why It Matters:
Under-canopy lighting is a game-changer for growers aiming to maximize yield and quality. Typically, lower buds receive less light, resulting in larfy or underdeveloped flowers. The ICL-300 changes that dynamic entirely by turning shadows into opportunity. 🌟 With light evenly dispersed across the entire plant, you’re not just growing; you’re sculpting a masterpiece.
For me, the ICL-300 is more than a tool—it’s a partner in innovation. It ensures that every plant in my grow room has equal opportunity to shine, from the top colas to the smallest buds at the base. When paired with a carefully managed ecosystem, like the one powered by TrolMaster, the potential for consistent, top-quality harvests reaches new heights.
This isn’t just about adding light—it’s about adding value, efficiency, and balance to the grow process. I’m beyond excited to see how the ICL-300 transforms the game in my tent, and I can’t wait to share the results with you all! 💚


Likes
30
Share


@TightNugs
Follow
Budding like crazy under the new light,getting frosty.
Plant 2 now catching up a bit,no purps though 😡 dropped temps.
Around 20 days since first pistils
No issues 🤞🏴🍁
🍁🍁🍁🍁
Breeder-White label purple bud auto
🍁🍁🍁🍁
Light-Voost VST 240(discount code TightNugs) https://voost.com/

Likes
2
Share

@Ensign420
Follow
|»» LOG DISCLAIMER: Not intended as a grow guide. Grow log entries are usually posted 3-4 weeks later and are for my learning reference. ««|
Introduction - Week 23 Summary -
Ensign's log, stardate 17759.5,
Another grow week..
In the main tent, nothing but general checkups and straight RO water.
In the veg tent, been tending to solo cup waterings. Also transplanted rooted Coco Coins and topped the garden.
Furthermore, started the next grow cycle and cut more clones to begin my first breeding project.
Peace & Good Memories Father..
Onwards to next week..
[START OF WEEK 23]
==========================================================
---------- [ 3x3 VEG TENT - GR3 ] ----------
Heady OG BX1 #1 - WEEK 15 - Full Veg
TKO #2 - WEEK 05 - Full Veg
Chill Out OG #3 - WEEK 12 - Full Veg
Chill Out OG #2 - WEEK 08 - Full Veg
---------- [ 4x4 MAIN TENT - GR30 ] ----------
Chill Out OG #2 - WEEK 23 - Full Bloom Wk9
TKO #2-2 - WEEK 17 - Full Bloom Wk9
Heady OG BX1 #1 - WEEK 19 - Full Bloom Wk9
04/06/26 → 04/12/26 [WEEK 23]
This Week's Estimated Goals
----------------------------------------------------------------------------------------------
DLI: ~16 mol/m²/d
PPFD: ~400 μmol/m²/s
VPD: ~1.2 kPa
This Week's Meter Readings & Averages
----------------------------------------------------------------------------------------------
Light On/Off: 16:00 - 10:00 | Wattage: ~268.6W [LV03]
Distance From Canopy: ~[19”, 3”, 3”]
Plant Height: ~[33”, 49”, 49”]
Max Plant Height: ~52” [Lamp-to-Soil Distance]
DLI: ~14.73 mol/m²/d
PPFD: ~372 μmol/m²/s
VPD: ~0.61 kPa
Soil %: ~[53.7, 43.9, 47.6, 43.3, 50.0, 56.1, 49.0, 58.3, 50.7, 89.4]
==========================================================
Day 01 - Monday - 04/06/26 - Total Days: 152
-----------------------------------
Daily Averages ~[+01:00]
- Temps: 77.7°F [25.4°C]
- Humidity: 81.1%
- VPD: 0.61 kPa
- Soil %: [52, 41, 47, 41, 51, 57, 48, 59, 51, 88]
-----------------------------------
- [22:19]: Night check on the 4x4 tent.
--- Wow the garden is looking incredible and smelling even better.
--- The under canopy is looking great.
--- Harvest day is now 9 days away.
- [22:24]: Checked the Ecowitt soil moisture sensor data:
------------------ [ 3x3 VEG TENT – GR3 ] ----------------
------ 52% - [CH01 » M1 » VBL – Heady OG BX1 #1-1]
------ 41% - [CH02 » M2 » VBR – TKO #2]
------ 45% - [CH03 » M3 » VFL – Chill Out OG #3]
------ 41% - [CH04 » M4 » VFR – Chill Out OG #2]
----------------- [ 4x4 MAIN TENT – GR30 ] ---------------
------ 50% - [CH05 » P1 » FLT – Chill Out OG #2]
------ 57% - [CH06 » P1 » FLB – Chill Out OG #2]
------ 48% - [CH07 » P2 » BLT – TKO #2-2]
------ 59% - [CH08 » P2 » BLB – TKO #2-2]
------ 51% - [CH09 » P3 » FRT – Heady OG BX1 #1]
------ 88% - [CH10 » P3 » FRB – Heady OG BX1 #1]
--------- Veg: ~38%-45% | Flower: ~45%-55%
--------- General: ~30% [Dry] «| ~45-60% [Moist] |» ~70% [Wet]
- [22:38]: Checked the 3x3 veg tent.
--- Veg garden is looking great.
--- Two solo clones need watering.
- [22:44]: Here are the starting initial watering ranges:
------ Heady OG BX1 #1-2 » 255.4g → 335.4g
------ Gorilla Goat #1-2 » 294.4g → 325.4g
--------- General Weight Range: [Dry] ~275g «| [Dryback] ~300g |» ~325g-400g [Wet]
--- Both cups were last watered 2-4 days ago.
--- Took the starting weight of both clones before watering,
------ Heady OG BX1 #1-2 » 286.3g
------ Gorilla Goat #1-2 » 292.4g
--- While on a scale,
--- Evenly misted the top of both cups with RO water.
--- Did not spray the top growth.
--- Misted 10-20 sprays. Waited a moment, then misted again.
--- Repeated this process until both cups weighted at least 300g.
--- There was no runoff.
- [23:04]: Took the saturated weight of both cups after watering,
------ Heady OG BX1 #1-2 » 365.4g
------ Gorilla Goat #1-2 » 365.4g
--- Updated the wet weight and watering dates for both cups.
--- Placed both cups back into the tent.
--- Woah veg cuttings in the propagation tray look under-watered.
--- Misted each Coco coin with 10-15 sprays of RO water.
--- Also misted the top growth and added more RO water to the bottom drip tray.
- [23:19]: Checked the humidifiers.
--- Tanks are still full and no leaks found.
Day 02 - Tuesday - 04/07/26 - Total Days: 153
-----------------------------------
Daily Averages ~[+01:00]
- Temps: 77.7°F [25.4°C]
- Humidity: 82.2%
- VPD: 0.58 kPa
- Soil %: [52, 41, 46, 41, 50, 56, 48, 59, 50, 89]
-----------------------------------
- [20:39]: Night check on the 4x4 tent.
--- The garden is smelling incredible and buds are stacking weight.
--- The terpenes are definitely on the fuel-side (from fuel, earthy, floral, fruity/sweet).
--- Unfortunately based on terpenes, Chill Out OG is probably not for me. Although still have both the #2 and #3 as mothers in the veg tent.
--- More impressed with the growth of the #3 pheno which seems to express more broad-leaf growth (similar to the TKO #2 pheno) and may decide to flower her later. Will keep both mother plants for now, but unfortunately, probably won’t be breeding with them.
- [20:45]: Checked the Ecowitt soil moisture sensor data:
------------------ [ 3x3 VEG TENT – GR3 ] ----------------
------ 52% - [CH01 » M1 » VBL – Heady OG BX1 #1-1]
------ 41% - [CH02 » M2 » VBR – TKO #2]
------ 48% - [CH03 » M3 » VFL – Chill Out OG #3]
------ 41% - [CH04 » M4 » VFR – Chill Out OG #2]
----------------- [ 4x4 MAIN TENT – GR30 ] ---------------
------ 49% - [CH05 » P1 » FLT – Chill Out OG #2]
------ 56% - [CH06 » P1 » FLB – Chill Out OG #2]
------ 48% - [CH07 » P2 » BLT – TKO #2-2]
------ 59% - [CH08 » P2 » BLB – TKO #2-2]
------ 51% - [CH09 » P3 » FRT – Heady OG BX1 #1]
------ 89% - [CH10 » P3 » FRB – Heady OG BX1 #1]
--------- Veg: ~38%-45% | Flower: ~45%-55%
--------- General: ~30% [Dry] «| ~45-60% [Moist] |» ~70% [Wet]
- [20:46]: Checked the 3x3 veg tent.
--- Veg garden is looking healthy.
--- Clones don’t need watering and propagation cuttings are looking a lot better.
- [20:58]: Checked the humidifiers.
--- Tanks are still full and no leaks found.
--- With harvest 8 days away, have already started to plan out the next grow cycle which will also be my first long-term breeding project.
--- Need to ultimately decide on mother plants to breed to the keeper pheno of the Heady OG BX1 (#1).
--- As of right now, plan to do a full tent pollination in the main tent with 4 mother plants. Currently the mothers will be:
------ Heady OG BX1 [Mendo Dope Farms] (#1 pheno)
------ TKO [James Loud Genetics] (#2 pheno)
------ Garlic Budder [Humboldt Seeds Company] (original #1 pheno)
------ Gorilla Goat [Irie Genetics] (#1 pheno)
Day 03 - Wednesday - 04/08/26 - Total Days: 154
-----------------------------------
Daily Averages ~[+01:00]
- Temps: 78.8°F [26.0°C]
- Humidity: 81.6%
- VPD: 0.62 kPa
- Soil %: [53, 41, 48, 41, 48, 56, 49, 58, 50, 89]
-----------------------------------
- [16:05]: Evening check on the 3x3 veg tent.
--- Veg garden is looking great.
--- TKO #2 needs watering.
- [16:09]: Here is the starting initial watering range:
------ TKO #2 » 252.5g → 335.5g
--------- General Weight Range: [Dry] ~275g «| [Dryback] ~300g |» ~325g-400g [Wet]
--- Been 3 days since the last watering.
--- Took the starting weight before watering,
------ TKO #2 » 252.5g » 284.9g
--- While on a scale,
--- Evenly misted the top of the cup with RO water.
--- Did not spray the top growth.
--- Misted 10-20 sprays. Waited a moment, then misted again.
--- Repeated this process until the cup weighted at least 300g.
--- There was no runoff.
- [16:22]: Took the saturated weight after watering,
------ TKO #2 » 252.5g » 365.7g
--- Updated the wet weight and watering date.
--- Placed the cup back into the tent.
--- Going to start cutting clones for the next grow cycle.
- [16:47]: Filled a measuring cup with 1 cup of RO water.
------ Added 1/8tsp of Horticultural Aloe
--- Mixed the solution and poured it straight into a clear solo cup.
--- Placed the PVC rig into the cup just above the aloe water.
--- Okay! Time to take the cuttings!
--- Using a pair of clean trimmers,
- [17:35]: Cut several clonal cuttings.
--- Only need one cutting to root, but took extra cuttings of each cultivar.
--- Made sure to trim most of the branches leaving a top node or two.
--- Did not cut any leaf fingers and made sure to cut the tip of the stalk (about 45-degree) before placing each cutting into the cup of aloe solution.
--- Made sure each tube on the PVC rig had the correct names labeled.
- [17:36]: Also topped and defoliated the entire veg garden.
--- Mulched the trimmings.
--- Placed the cup into the veg tent.
--- Have the cup resting on top of the drip tray (front center pot).
--- Will change the water out tomorrow and plan to start rooting in two days.
--- The current rooting Coco Coin cuttings probably need to be transplanted into solo cups by now.
- [17:44]: Checked for roots and all Coco Coins had roots.
--- Going to transplant one of each pheno.
--- Planting into clear cups with bottom holes cut out for drainage.
--- Will also be using opaque red cups (without holes) to keep the roots protected from light damage.
--- Partially filled the clear cup with recycled BuildASoil 3.0 potting soil.
--- Made sure the soil at the bottom of each cup was well compacted and had enough room for the Coco Coin.
- [18:04]: Inoculated each cup with Great White mycorrhizae along with a bit of Beauveria Bassiana.
------ Sprinkled 1/16tsp of Great White
------ Sprinkled 1/64tsp of Beauveria Bassiana Plus
--- Mainly tried to dust the center of each cup.
- [18:07]: Placed a rooted Coco Coin into each inoculated cup.
--- Made sure each cup still had enough room for more soil.
--- To fully hydrate all Coco Coins, misted each with about 20-30 sprays of RO water.
- [18:17]: Gently filled each cup with more soil.
--- Completely covered each Coco Coin making sure to tuck the sides in.
--- Each Coco Coin is about 1/4-1/2 inch below the top soil.
--- Marked the names on each cup with blue painter's tape.
--- Also defoliated both cups and removed the lowest fan leaves.
- [18:35]: Covered the soil with BuildASoil Organic Straw Mulch.
--- Made sure the top soil was completely covered.
--- Culled the extra Garlic Budder and Chill Out OG phenos.
--- Mulched the trimmings.
- [19:01]: Filled a measuring cup with 2 cups of RO water.
------ Added 1/64tsp of Quillaja Saponaria Extract [60]
------ Added 1/16tsp of Horticultural Aloe
------ Added 1/16tsp of Horticultural Coconut
------ Added 1/8tsp of Mycrobe Complete
--- Mixed and poured the solution straight into a spray bottle.
- [19:03]: Took the initial dry soil weight before watering,
------ Garlic Budder OG#1 » 276.8g
------ Chill Out OG #3 » 260.0g
--- While on a scale,
--- Evenly misted the top of both cups with the wetting solution.
--- Did not spray the top growth.
--- Misted 10-20 sprays. Waited a moment, then misted again.
--- Repeated this process until each cup weighted at least 300g.
--- There was no runoff.
- [19:36]: Took the saturated weight after watering,
------ Garlic Budder OG#1 » 335.4g
------ Chill Out OG #3 » 335.3g
--- Marked the date, pheno names, and weight ranges on each red opaque cup with blue painter's tape.
--- Then placed both clear cups into their corresponding red cups.
- [19:41]: Placed both cups into the 3x3 veg tent,
--- Removed the seedling plug tray and have both cups resting in the propagation drip tray.
--- As for PPFD, at the lowest light intensity (and raised ~14 above the tray), the PPFD is around 40 μmol/m²/s which gives a DLI of 2.59 mol/m²/d under an 18/6 light cycle.
- [19:45]: Checked the Ecowitt soil moisture sensor data:
------------------ [ 3x3 VEG TENT – GR3 ] ----------------
------ 58% - [CH01 » M1 » VBL – Heady OG BX1 #1-1]
------ 42% - [CH02 » M2 » VBR – TKO #2]
------ 48% - [CH03 » M3 » VFL – Chill Out OG #3]
------ 41% - [CH04 » M4 » VFR – Chill Out OG #2]
----------------- [ 4x4 MAIN TENT – GR30 ] ---------------
------ 48% - [CH05 » P1 » FLT – Chill Out OG #2]
------ 56% - [CH06 » P1 » FLB – Chill Out OG #2]
------ 48% - [CH07 » P2 » BLT – TKO #2-2]
------ 58% - [CH08 » P2 » BLB – TKO #2-2]
------ 51% - [CH09 » P3 » FRT – Heady OG BX1 #1]
------ 89% - [CH10 » P3 » FRB – Heady OG BX1 #1]
--------- Veg: ~38%-45% | Flower: ~45%-55%
--------- General: ~30% [Dry] «| ~45-60% [Moist] |» ~70% [Wet]
- [19:47]: Checked the 4x4 tent.
--- The garden is smelling and looking great.
--- Buds are all ripening and smelling gassy and dank.
--- The under canopy is looking clean and all pots look good.
--- Took the trimmings from earlier and top dressed each pot.
--- Tried to spread the trimmings evenly.
- [20:07]: Quickly checked on the RO reservoir and auto-watering system.
--- Everything looked good and no leaks detected.
--- The gravity feed was holding steady at ~2 psi of pressure at ~22” from the floor.
--- Checked the humidifiers.
--- Tanks are still full and no leaks found.
Day 04 - Thursday - 04/09/26 - Total Days: 155
-----------------------------------
Daily Averages ~[+01:00]
- Temps: 79.2°F [26.2°C]
- Humidity: 80.7%
- VPD: 0.65 kPa
- Soil %: [57, 46, 51, 43, 49, 56, 49, 58, 51, 89]
-----------------------------------
- [19:06]: Night check on the 4x4 tent.
--- Garden is smelling dank and buds are looking frosty.
--- Bud growth is finishing up quite nicely and terpenes are louder than ever. Nice.
--- The under canopy is also clean and pots look good.
- [19:11]: Checked on the BluMat soil moisture sensors:
------ Chill Out OG #2 » 99mbars
------ Heady OG BX1 #1 » 59mbars
------ TKO #2 » 84mbars
--------- Watering Range: [Too Wet] ~25mbars «| [Ideal Target] ~40-80mbars |» ~125mbars [Too Dry]
--------- BluMat Max Values: [10mbars «||» 750mbars]
- [19:14]: Decided to make a slight adjustment to Chill Out OG #2’s watering carrot.
--- Using the BluMat key, increased the water moisture by rotating the tension cap slightly counter-clockwise.
- [19:15]: Checked the Ecowitt soil moisture sensor data:
------------------ [ 3x3 VEG TENT – GR3 ] ----------------
------ 56% - [CH01 » M1 » VBL – Heady OG BX1 #1-1]
------ 47% - [CH02 » M2 » VBR – TKO #2]
------ 50% - [CH03 » M3 » VFL – Chill Out OG #3]
------ 44% - [CH04 » M4 » VFR – Chill Out OG #2]
----------------- [ 4x4 MAIN TENT – GR30 ] ---------------
------ 48% - [CH05 » P1 » FLT – Chill Out OG #2]
------ 55% - [CH06 » P1 » FLB – Chill Out OG #2]
------ 49% - [CH07 » P2 » BLT – TKO #2-2]
------ 58% - [CH08 » P2 » BLB – TKO #2-2]
------ 52% - [CH09 » P3 » FRT – Heady OG BX1 #1]
------ 89% - [CH10 » P3 » FRB – Heady OG BX1 #1]
--------- Veg: ~38%-45% | Flower: ~45%-55%
--------- General: ~30% [Dry] «| ~45-60% [Moist] |» ~70% [Wet]
- [19:18]: Checked the 3x3 veg tent.
--- Veg garden is looking healthy.
--- Two solo clones need watering.
- [19:21]: Here are the starting initial watering ranges:
------ Heady OG BX1 #1-2 » 255.4g → 335.4g
------ Gorilla Goat #1-2 » 294.4g → 325.4g
--------- General Weight Range: [Dry] ~275g «| [Dryback] ~300g |» ~325g-400g [Wet]
--- Both cups were last watered 3 days ago.
--- Took the starting weight of both clones before watering,
------ Heady OG BX1 #1-2 » 296.9g
------ Gorilla Goat #1-2 » 262.8g
--- While on a scale,
--- Evenly misted the top of both cups with RO water.
--- Did not spray the top growth.
--- Misted 10-20 sprays. Waited a moment, then misted again.
--- Repeated this process until both cups weighted at least 300g.
--- There was no runoff.
- [19:39]: Took the saturated weight of both cups after watering,
------ Heady OG BX1 #1-2 » 365.4g
------ Gorilla Goat #1-2 » 365.5g
--- Updated the wet weight and watering dates for both cups.
--- Placed both cups back into the tent.
- [19:47]: Time to swap the aloe water out for the cuttings.
--- Filled a clear cup with fresh RO water (1.5cups).
--- Gently lifted the PVC rig out of the cup of aloe water and set it gently into the RO cup.
--- Going to let these soak for another day before transplanting into Coco Coins for rooting.
--- Solo cups in the propagation tray look good and no need to water.
- [19:58]: Checked the humidifiers.
--- Tanks are still full and no leaks found.
Day 05 - Friday - 04/10/26 - Total Days: 156
-----------------------------------
Daily Averages ~[+01:00]
- Temps: 79.1°F [26.2°C]
- Humidity: 82.0%
- VPD: 0.61 kPa
- Soil %: [55, 47, 47, 45, 52, 56, 49, 58, 51, 89]
-----------------------------------
- [20:44]: Night check on the 4x4 tent.
--- Five more days until harvest and the garden is looking and smelling great.
--- Buds are ripening and terpenes are smelling loud and dank.
--- Under canopy is looking clean and pots are all good.
- [20:48]: Checked the Ecowitt soil moisture sensor data:
------------------ [ 3x3 VEG TENT – GR3 ] ----------------
------ 55% - [CH01 » M1 » VBL – Heady OG BX1 #1-1]
------ 46% - [CH02 » M2 » VBR – TKO #2]
------ 46% - [CH03 » M3 » VFL – Chill Out OG #3]
------ 45% - [CH04 » M4 » VFR – Chill Out OG #2]
----------------- [ 4x4 MAIN TENT – GR30 ] ---------------
------ 51% - [CH05 » P1 » FLT – Chill Out OG #2]
------ 56% - [CH06 » P1 » FLB – Chill Out OG #2]
------ 49% - [CH07 » P2 » BLT – TKO #2-2]
------ 58% - [CH08 » P2 » BLB – TKO #2-2]
------ 51% - [CH09 » P3 » FRT – Heady OG BX1 #1]
------ 89% - [CH10 » P3 » FRB – Heady OG BX1 #1]
--------- Veg: ~38%-45% | Flower: ~45%-55%
--------- General: ~30% [Dry] «| ~45-60% [Moist] |» ~70% [Wet]
- [20:55]: Checked the 3x3 veg tent.
--- Veg garden is looking healthy and good.
--- The next grow cycle of cuttings are ready to be rooted in the Coco Coins.
- [21:04]: Filled a measuring cup with 2 cups of RO water.
------ Added 1/64 of Quillaja Saponaria Extract [60]
------ Added 1/32tsp of Horticultural Aloe
------ Added 1/16tsp of Mycrobe Complete
--- Mixed the solution thoroughly.
- [21:05]: Dropped 6 Coco Coins into the measuring cup.
--- The coins immediately started to expand.
------ [» ~5 MINUTES LATER «]
--- Placed each fully saturated Coco Coin into half-cut clear cups.
--- Using a squeeze bottle filled with Clonex,
- [21:16]: Gently filled each pre-made hole with Clonex rooting gel.
--- Using a pair of clean trimmers, made a final 45° cut.
--- Also stripped and scrapped some of the stem’s outer membrane.
--- To help with planting, gave each Coco Coin a squeeze to loosen the coco.
--- Made sure to insert each stem straight and snug with the tip about a 1/4 inch from the bottom of the Coco Coin.
--- Also secured the stem by pinching and pressing in the top of the Coco Coin.
- [21:39]: Once each cutting was planted,
--- Placed each Coco Coin into the propagation plug tray.
--- Made sure to keep each cutting properly tagged.
--- Did not spray the top growth with any water.
--- As far as PPFD,
--- At the lowest light intensity (and raised ~14 above the tray), the PPFD is around 42 μmol/m²/s which gives a DLI of 2.72 mol/m²/d under an 18/6 light cycle
--- Culled the extra cuttings.
- [23:00]: Checked the humidifiers.
--- Tanks are still full and no leaks found.
--- Since the next grow cycle is going start off my first breeding project, plan to reverse Heady OG BX1 (#1 pheno) to pollinate TKO #2
--- As this will also be an open air pollination, plan to include Heady OG BX1 #1 as a pollen receiver along with Garlic Budder (original #1 pheno) and Gorilla Goat (#1 pheno). Regrettably, have decided to not include Chill Out OG #2
--- If successful, plan to pheno hunt through the Heady OG BX1 to TKO seeds for keeper phenos to begin trait stabilizing.
--- Anyways.
--- One impossible task at a time..
Day 06 - Saturday - 04/11/26 - Total Days: 157
-----------------------------------
Daily Averages ~[+01:00]
- Temps: 77.9°F [25.5°C]
- Humidity: 81.8%
- VPD: 0.59 kPa
- Soil %: [54, 46, 46, 46, 50, 56, 50, 58, 51, 90]
-----------------------------------
------ [ » NO GROW LOG ENTRIES FOR TODAY « ]
--- Peace & Good Memories Father.. 🖖
Day 07 - Sunday - 04/12/26 - Total Days: 158
-----------------------------------
Daily Averages ~[+01:00]
- Temps: 77.2°F [25.1°C]
- Humidity: 81.3%
- VPD: 0.59 kPa
- Soil %: [53, 45, 48, 46, 50, 56, 50, 58, 51, 92]
-----------------------------------
- [20:03]: Night check on the 4x4 tent.
--- Garden is looking great..
--- Under canopy is clean and pots look good..
- [20:09]: Checked the Ecowitt soil moisture sensor data:
------------------ [ 3x3 VEG TENT – GR3 ] ----------------
------ 53% - [CH01 » M1 » VBL – Heady OG BX1 #1-1]
------ 44% - [CH02 » M2 » VBR – TKO #2]
------ 47% - [CH03 » M3 » VFL – Chill Out OG #3]
------ 45% - [CH04 » M4 » VFR – Chill Out OG #2]
----------------- [ 4x4 MAIN TENT – GR30 ] ---------------
------ 52% - [CH05 » P1 » FLT – Chill Out OG #2]
------ 56% - [CH06 » P1 » FLB – Chill Out OG #2]
------ 50% - [CH07 » P2 » BLT – TKO #2-2]
------ 58% - [CH08 » P2 » BLB – TKO #2-2]
------ 52% - [CH09 » P3 » FRT – Heady OG BX1 #1]
------ 93% - [CH10 » P3 » FRB – Heady OG BX1 #1]
--------- Veg: ~38%-45% | Flower: ~45%-55%
--------- General: ~30% [Dry] «| ~45-60% [Moist] |» ~70% [Wet]
- [20:40]: Checked the 3x3 veg tent.
--- Veg garden is looking healthy..
--- Two solo cups need watering..
- [20:48]: Here are the starting initial watering ranges:
------ Heady OG BX1 #1-2 » 255.4g → 335.4g
------ Gorilla Goat #1-2 » 294.4g → 325.4g
--------- General Weight Range: [Dry] ~275g «| [Dryback] ~300g |» ~325g-400g [Wet]
--- Both cups were last watered 3 days ago.
--- Took the starting weight of both clones before watering,
------ Heady OG BX1 #1-2 » 281.5g
------ Gorilla Goat #1-2 » 245.6g
--- While on a scale,
--- Evenly misted the top of both cups with RO water.
--- Did not spray the top growth.
--- Misted 10-20 sprays. Waited a moment, then misted again.
--- Repeated this process until both cups weighted at least 300g.
--- There was no runoff.
- [21:14]: Took the saturated weight of both cups after watering,
------ Heady OG BX1 #1-2 » 365.5g
------ Gorilla Goat #1-2 » 365.4g
--- Updated the wet weight and watering dates for both cups.
--- Placed both cups back into the tent.
--- Cuttings in the propagation tray are looking good..
- [21:27]: Checked the humidifiers.
--- Tanks are still full and no leaks found.
--- Onwards to next week..
[END OF WEEK 23]

Likes
15
Share


@AdamCajda
Follow
Once again girl are stretching like crazy and had to be bent to avoid heat issues. Couple of branches snapped but luckily survived with some tape aid,
I keep defoliating quite heavily other everyday but it's still jungle, one bigger defoliation coming on program today.
I feel like the buds are forming pretty slow but that's probably because I look at them evey 2 hours haha
Apart from the height issues and little bit of heat stress on the top no known issues :)
Will update with some pictures tonight.
thanks for checking <3

Likes
7
Share


@BIYEI
Follow
Vegetación (Tiempo estimado 28 días)
Quinta Semana de Vegetación
04/01/2024 - 5:00hrs y 22hrs: Se verifican parámetros básicos del agua, mantener cuidados específicos.
Agua de osmosis: Ph 6.0, PPm 1050-1300, Ec 2.1-2.5, Temperatura 20°C - 24°C, Humedad 75%
Ambiente: Temperatura 22 °C, Humedad 75%, Ventilación 15%, 18 hrs de luz , 6 hrs de obscuridad.
05/01/2024 - 5:00hrs y 22hrs: Se Hace cambio de solución nutritiva y se limpia el recipiente, se verifican parámetros básicos del agua, mantener cuidados específicos, el Ec y PPm Varean por los aditivos.
Agua de osmosis: Ph 6.0, PPm 1050-1300, Ec 2.1-2.5, Temperatura 20°C - 24°C, Humedad 75%
Ambiente: Temperatura 22 °C, Humedad 75%, Ventilación 15%, 18 hrs de luz, 6 hrs de obscuridad.
06/01/2024 - 5:00hrs y 22hrs: Se verifican parámetros básicos del agua, mantener cuidados específicos.
Agua de osmosis: Ph 6.0, PPm 1050-1300, Ec 2.1-2.5, Temperatura 20°C - 24°C, Humedad 75%
Ambiente: Temperatura 22 °C, Humedad 75%, Ventilación 15%, 18 hrs de luz, 6 hrs de obscuridad.
07/01/2024 - 5:00hrs y 22hrs: Se Hace cambio de solución nutritiva y se limpia el recipiente, se cambia la lampara en la madrugada por una de 1000 w, se empiezan a hacer pruebas a 50% de la potencia, pero el calor en la mañana estresa a la planta demasiado y evapora casi toda el agua, se hace cambio de agua por la tarde y de recipiente, se verifican parámetros básicos del agua, mantener cuidados específicos, el Ec y PPm Varean por los aditivos.
Agua de osmosis: Ph 6.0, PPm 1050-1300, Ec 2.1-2.5, Temperatura 20°C - 24°C, Humedad 75%
Ambiente: Temperatura 22 °C, Humedad 75%, Ventilación 15%, 18 hrs de luz, 6 hrs de obscuridad.
Likes
79
Share


@420DeepGrow
Follow
💐 🍁 La variedad Mob Boss es una genética de cannabis rara y especial que ha podido ser salvaguardada y estabilizada por Anesia. Con sus flores extremadamente escarchadas y resinosas y su alta producción se ha hecho un nombre e inspira a todos los cultivadores que alguna vez la cultivaron. Los cogollos son impresionantemente cristalinos y a menudo de color rojo o pruple. Los efectos de Mob Boss son duraderos, extremadamente fuertes y rápidos. Tiene un contenido de THC de hasta el 28,7% y está especialmente recomendada para usuarios experimentados.
Mob Boss es una planta perfecta para los metodos SCROG, ya que producira grandes colas en ramas laterales bien entrenadas y continua creciendo mas densa hasta la proxima vez. Esta planta parece dar la mejor combinación de rendimiento y calidad cuando se cultiva hidropónicamente.
🌻 🚀 Consigue aquí tus semillas:
https://anesiaseeds.com/es/product/mob-boss/
💡 Mars Hydro TS 3000, como la lámpara de cultivo LED más grande de la serie TS, ofrece suficiente cobertura para un área de 4 × 4 pies con un precio asequible y rendimientos de calidad; a cambio, se puede aplicar tanto al cultivo doméstico como al cultivo comercial.
Potencia - 450w
Cobertura Vegetal – 5×5 pies
Cobertura de flores - 4 × 4 pies
La opción abrumadora para la mayoría de los productores que la aplican en tiendas de campaña.
Consigue aqui tu lámpara:
https://marshydro.eu/products/mars-hydro-ts-3000-led-grow-light/
📆 Semana 8:
Engordando como locas, esto va que vuela 😍, la resina esta cada vez mas presente ❄️ , los cogollos empiezan a madurar.
Esta semana estará el TS-3000 de MarshHydro al 100% y 30cm de distancia.
Se estan desarrollando mejor que nunca, con una floracion mucho mas rapida, noto una gran mejoria gracias al Marshydro TS-3000.
Continuo con defoliaciones
Aplico una solución con nutrientes EC 1500 y otra con agua del grifo reposada y PH 6.6
