


Likes
Comments
Share


@Northern_Ent
Follow
Aug 29: PGC is doing great.
I’m still using the far red light every night at dusk as a bloom booster. Dont take flash pics unless you follow it up right away with the red light.
Noticed several ladybugs doing their pest control magic.
Sep 3: wow, all the buds are really filling in. Very nice. Will start getting cooler nights soon so maybe some purple colour for this one.


Likes
6
Share


@NatureSolutions
Follow
This thing stinks! Dank smell everywhere in the garden. Happy days;) gave the last feed of terra bloom and now i will flush with 3liters of phd water at a time when the soil is dry. Many leaves started the transformation to red now. I think that will be even more visible after the first flushload

Likes
6
Share


@Lovemabud
Follow
The plant went crazy this week, easily doubled its size. Really happy with how its going, nice even canopy after the LST from weeks 2-4. I decided to fertilise this week with some left over Mills nutrients I had from a previous grow. Really think the plant appreciated it. Hopefully it shows me the appreciation with fat juicy buds.
Likes
23
Share


@Hashy
Follow
📋 Comments
Zoap by MSNL is a really good strain, very rapid growth early on in its life and continues at a nice rate right up to harvest. From my experience I'd say this was one of the easiest plants i have ever grown.
📋 Data
Seed to havest=112 days.
Veg time=40 days.
Flower time=72 days.
Wet weight=990g
Dry weight=79g
📋 Smoke report
Trimming this was a delight. I let her hang for 15 days before trimming. Nice easy plant to trim. I didn't have any real larf either, the trim is coated with trichomes so I'll do a hash run with it. The buds are pretty damn solid with plenty of sticky trichomes all over them, just like we want. I was getting a citrus smell when trimming.
After 2 weeks curing in the terplock groove bags I had a sample (miles better then jars). 1st sample was using my pax plus. 2nd sample was a joint. I'm getting an earthy cherry taste with a sweet aftertaste. This high is great, I'd guess at 25%Thc or more.
📋Grow stats for GDG 22
#1 Lemon cherry gelato=104g
#2 Zoap=79g
Total=183g
Lights on.
20hrs×7days=140hrs
18hrs×33days=594hrs
12hrs×78days=936hrs
Total hours=1670hrs
Light power=211.09Kw
Rad power=415.73Kw
Extractor=43.5Kw
4 gang=56.62Kw
Top fan=27.82
Total electricity=754.76KW
Electricity cost @£0.25/Kw=£188.69
Average light power a day=1.78Kw
Average watt per hour=106w
g/watt=(183÷106)=1.72g/w
£/g=£1.03/g
📋Final word.
Considering how cold it's been i have managed to get a decent VPD throughout the grow, I'd go as far to say the extra money spent on electricity was definitely worth it. I didn't run into any major problems and the Plagron nutes were excellent, I'm thinking these are going to be my goto from now on. I combined the trim from both plants to make a hash run and managed 14g of hash. That takes my total to 197g for the grow. Very happy.
Back soon.
Take it easy.
********************************************

Likes
35
Share


@Pot_Portraits
Follow
Week 8 +-, She got another cleanup, removing lower leaves and branches.
I always keep the lower third of my plants clean, especially with hydro plants it helps with ariation.
Feeding is still the same as before, no changes, its just a case of refill the res every 3 days +- and change and clean res every 7 days roughly.
This rythm will continue till we hit a later stage of flower where we will add Green Sensation.

Likes
41
Share

@Fatnastyz
Follow
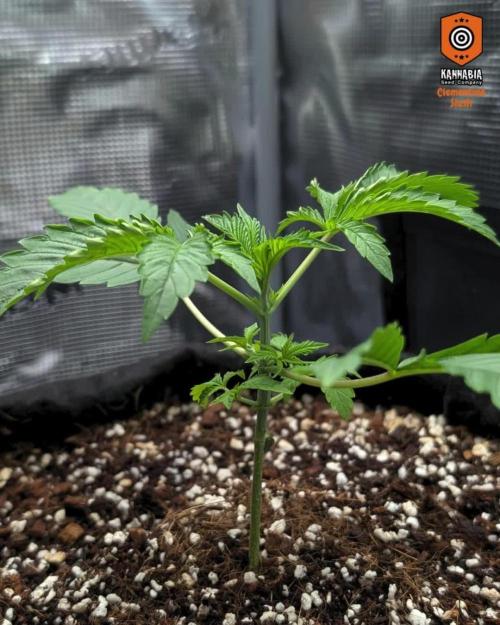
Day 15 - 7/29
- This is her last feed at half strength, will move to full strength tomorrow
- Fed 500ml today
- 3.5" tall still
Day 16 - 7/30
- Full Strength today!!!
- Moved her to 600m at 752ppm
- 3.5" tall still
Day 17 - 7/31
- Gave her another 600ml today
- ALMOST 4" tall LOL
- Will move to a full pot water starting tomorrow, her leaves are about to the edges now
Day 18 - 8/1
- Moved to a full pot water today!!
- Still using about 740ppm at 6.1ph
- Just dumping 2500ml into the coco around her now
- I will let her dry a bit before watering next, not too dry just a bit dryer on the top, probably in 2 days
- 4" finally LOL
Day 19 - 8/2
- Still wet, just like I wanted. Will water tomorrow
- I did decide, that I want to simplify things a bit. Tired of the multiple bottles of nutrients I am using with Success, so...while she is still young...I'm switching things up a bit. I am starting Plagron on her next watering, but just the basic grow and bloom....maybe some power buds in flower, but keeping it simple here. Success was just too much to mix, too time consuming LOL.(at least for me, I like simple and lazy LOL).
- Still 4" tall
Day 20 - 8/3
- Holy shit! She grew a lot finally! LOL. 5" tall today!
- Today is her first feeding with Plagron. Just Cal Mag and 1/2 strength Terra Grow today at 5.8 PH. Starting slow
- Gave her 4000 liters or 1 gal today. Again, I will wait 2 days for her next watering
- Lana, my pretty little baby, bit a leaf today. I'm sure you can see it in the pics
Day 21 - 8/4
- No water today
- She has her 5th node
- 5.5" tall
Alright, second week down. I don't think I'm going to top her. Other than the leaf nibble, it's been a good week of grow!
I'm very excited to start her on Plagron, I like Success but I just don't have the time. It was taking me 1 to 2 hours to mix my water there was so much and I was working at the same time. I just needed something easier. I've been wanting to try it for a while now, so I'm finally ready to switch it up.

Likes
59
Share

@Hempface86
Follow
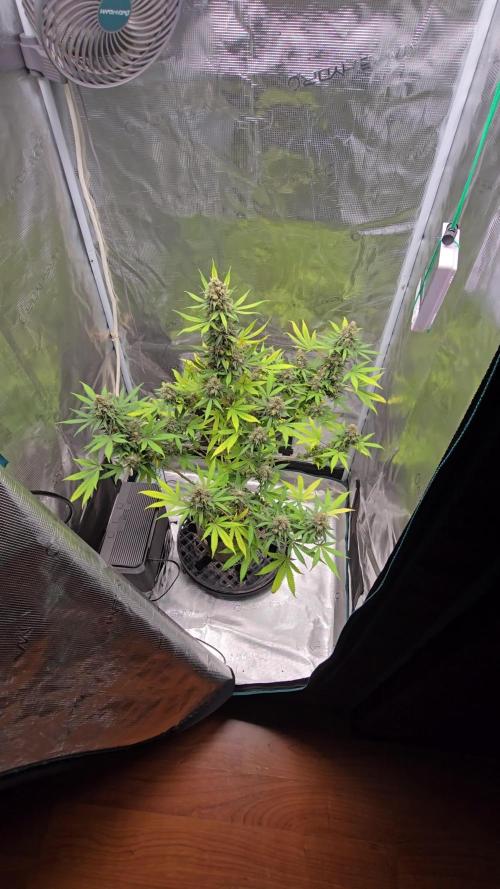
So this is definitely the last update before the chop... My landlord is complaining of the smell, so here we go again lol .. but i'm looking forward to freeing up the space for my king's kush breath =) .. probably later today I'll be trapping her. So in the next day or two I will be doing another update... Again?Have no idea what this strain is, but she's got some frost onthe buds anyway so i'm hoping she's a decent smoke.. The fact that it's not an auto flower means it has a better chance of being or better.. If you know you know .. oh, bed one is doing well.God bless and happy growing 🙏 RIPCK
Likes
35
Share


@DudeGrowsWeed
Follow
January 24, 2019
The girls are doing WELL. Seedsman Cream & Cheese CBD in a close second in the bud development category this week (just behind the Critical+). But as you can see in the video, she is sticky and stinky! 👍
This week I fed/watered 3 times (basically once every other day). The first time I fed with Recharge, Mammoth P and Big Bloom. The second time, I fed with Mr B’s Green Trees Bloom and Cal Mag. The third time was water only.
Likes
78
Share


@ClubRiot
Follow
Week 11 ,
pH Perfect Connoisseur Bloom Part A ( 1 ml/L )
pH Perfect Connoisseur Bloom Part B ( 1 ml/L )
CarboLoad Liquid ( 2 ml/L )
Sensi Cal-Mag Xtra ( 2 ml/L )
Sensizym ( 2 ml/L )
Bio-Heaven ( 2 ml/L )
Overdrive ( 2 ml/L)
Nirvana (2 ml/L)

Likes
1
Share

@RageTdavis
Follow
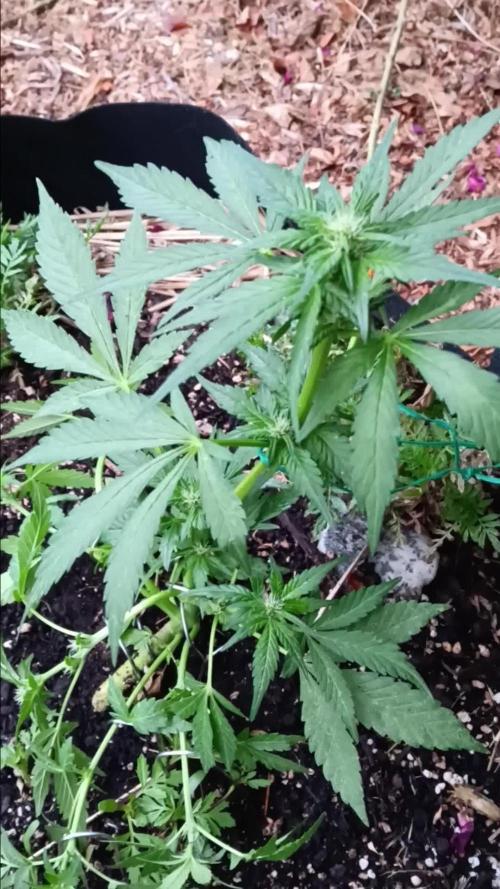
9-29-25. I added more steaks to my branches to see if buds production would increase 🤔 i bump up my nutrients a because im at 30 or more days until haverst date base on first sight of veg on 8-17 peace


Likes
38
Share


@GardenSchool
Follow
March 2, 2021 (Week 8, Day 57, Flower 8): First day of week 8! Pots were light today so watered with 4l per plant with 3ml/l pH Perfect Bloom + 2ml/l pH Perfect Grow + 2ml/l Sweet Raw + 1ml/l Big Bud + 1ml/l Cal-Mag Plus at 6.0 pH. Runoff sitting at 6.4 pH. Removed all remaining LST ties from Unknown 1. Lots of healthy growth. The stretch continues. Averaging 50% rH and 70℉.
March 3, 2021 (Week 8, Day 58, Flower 9): Another inch and a half of growth in the last 24hrs. Unknown 1 is leading the pack at 17" followed closely by Gelato 1 at 16.5". The runt is still Unknown 2 at 15.75". It's seriously crazy how fast these are growing now. Plants are looking amazing overall. Soil is still wet from yesterday. I'm not sure what one, but one of these plants is starting to smell like straight gasoline and I haven't even seen any buds yet. Averaging 50% rH and 72℉.
March 4, 2021 (Week 8, Day 59, Flower 10): More stretch overnight. Unknown 2 is trying to catch up to the others and grew about an inch and a half. Bud sites are looking great. I will definitely have to defoliate the lower fan leaves here eventually. Thinking about experimenting with two defoliation during flower. One at day 21 and another at day 42. Not sure if I can wait that long as there's already giant fan leaves getting relatively little light at the bottom of the canopy. We'll play it by ear. Averaging 50% rH and 72℉. 👽
March 5, 2021 (Week 8, Day 60, Flower 11): Soil is dry and pots are still a little heavy. Will most likely water tomorrow. Plants tacked on a bunch more growth. They're growing healthy and steadily. Averaging 50% rH and 72℉. Nothing else for today.
March 6, 2021 (Week 8, Day 61, Flower 12): Pots are light and leaves are slightly droopy - today is watering day. Watered with 4l per plant with 3ml/l pH Perfect Bloom + 2ml/l pH Perfect Grow + 2ml/l Sweet Raw + 1ml/l Big Bud + 1ml/l Cal-Mag Plus at 6.0 pH. Runoff sitting at 6.2 pH. Vertical growth is looking fantastic. Gelato 1 is the first one out of the gate with bud formation. Pistils are starting to shoot out the top of the growth sites. Will be interesting to see how they develop over the next couple of days! Averaging 50% rH and 72℉. Happy Saturday! 😺
March 7, 2021 (Week 8, Day 62, Flower 13): Everything looks great. Plants perked way back up after the watering yesterday. More stretch. More bud development. Just loving how everything is coming together so far. Averaging 50% rH and 71℉.
March 8, 2021 (Week 8, Day 63, Flower 14): Amazing what 24-hours can do. Unknown 2 is really kicking into high-gear starting to develop some dense looking buds and is smelling very, very sweet. Pistils are starting to shoot out everywhere, but not a crazy amount of stretch. Unknown 1 continues to stretch like crazy with minimal bud development so far - but the plant has started shooting pistils out everywhere. Gelato 1 is a mix of both stretching and bud development so far and is looking fantastic. Gelato 1 and Unknown 2 are so leafy I've had to tuck some leaves to expose the bud sites to light and air. I will do my first round of fan-leaf defoliation on flower day 21, but until then I'll continue tucking leaves. I tilled the top half-inch of soil in each plant. Averaging 50% rH and 71℉. I haven't filled my humidifier in days. My grow room is starting to smell amazing - it's hard to zip up the tent and walk away. This is so much fun so far. 😻
On to week 9!

Likes
15
Share


@Bread_n_Buds
Follow
And here we are in full swing. We have only reached day 19 and our Wurlz F1 Hybrid is truly very very competitive.
It grows well, regularly, the internodal distance seems average but we're waiting for another couple of floors to rise, as you can see for a day 19 we're in great shape... You'll say similar reviews, and guys the F1s are very similar, the differences will come soon with the beautiful buds.
We're keeping our fingers crossed because there's no word soon but our f1 Hybrids seem to keep what our trusted breeder says.
As feeding we are giving the Plagron Alga Grow 2 ml/l.
Come on gentlemen, I can't wait to see the flowers.
So seeds of all brands, in addition to these great F1 Hybrids and the entire Zamnesia line, fertilizers and everything related to the world of cannabis, you should buy them from the best online store in the sector www.zamnesia.io
Wurlz F1 seeds specifically
https://www.zamnesia.com/10669-zamnesia-seeds-wurlz-f1-automatic.html
Site Description
ZAMNESIA SEEDS - WURLZ F1 HYBRID AUTOMATIC: EFFECTS TO LEAVE YOUR HEAD IN A WHIRL!
As the end product of combining Runtz with Watermelon Candy, Wurlz F1 hybrid Automatic showcases a reliable, uniform, and, above all, easy growing experience. The resulting buds offer mind-blowing flavors and soothing effects, making Wurlz F1 Automatic more than worthy of being on your radar.
GROWING WURLZ F1 HYBRID AUTOMATIC
As an autoflowering strain, it takes just 9–10 weeks for Wurlz F1 Automatic to move from germination to harvest. Fortunately, there's very little required other than a bit of maintenance along the way. This is partly due to the F1 genetics that make this strain robust and uniform, resulting in plants that reach a similar height and provide a similar (large) yield. Moreover, Wurlz F1 Automatic is highly resistant to disease, pests, and other ailments.
Reaching heights of about 65–80cm, Wurlz F1 Automatic is not an overbearing plant and can fit into smaller spaces with zero fuss. Once ready to yield, growers have the potential to see a return in the region of 450–500g/m² indoors and 50–150g/plant outdoors.
AROMAS, FLAVORS, AND EFFECTS OF WURLZ F1 HYBRID AUTOMATIC
After Wurlz F1 Hybrid Automatic wows you with its easygoing growing experience, the best is yet to come: the smoke test. Teeming with terpenes, this cultivar offers a fruity and candy-like flavor tinged with just a little bit of pine for good measure. In terms of effects, Wurlz F1 Automatic is bolstered by 24% THC and a finely tuned array of cannabinoids, making for a soothing, physically relaxing, and, in larger amounts, couch-locking high. So settle in with some of your favorite friends, snacks, and movies; this is relaxation at its finest.
As for fertilizers, I'm doing a small comparison experiment to finish off the fertilizers I had at home, it's not 100% indicative, it's only on two specimens but given the stable genetics I decided to try to compare the results of Plagron Vs Aptus , both excellent brands which they will certainly produce beautiful plants which are already of excellent stable genetics. In the next few weeks the comparison will be more evident now the seedlings are still very small and just potted.
So seeds of all brands, in addition to these great F1 Hybrids and the entire Zamnesia line, fertilizers and everything related to the world of cannabis, you should buy them from the best online store in the sector www.zamnesia.io

Likes
4
Share


@TheGreenGroomer
Follow
🌱 Grow Diary Update 🌸
What’s up! It’s Week 7, Day 1 of flower, and the girls are keeping me on my toes. 🌿
After getting the PPMs back in range last time, they’ve crept up again, so it’s flush time once more. 💧 I think letting the coco dry out too much between waterings might’ve been the culprit. Lesson learned—keeping a closer eye on that from now on!
Besides that little hiccup, everything’s looking good. These buds are getting juicier and stinkier by the day, and there’s no serious nutrient burn, so we’re still in the clear. 🙌
Wish me luck as I ride out these last couple of weeks—hoping to finish strong! 🍀
Catch you in the next update! 💚


Likes
5
Share

@BlaKX
Follow
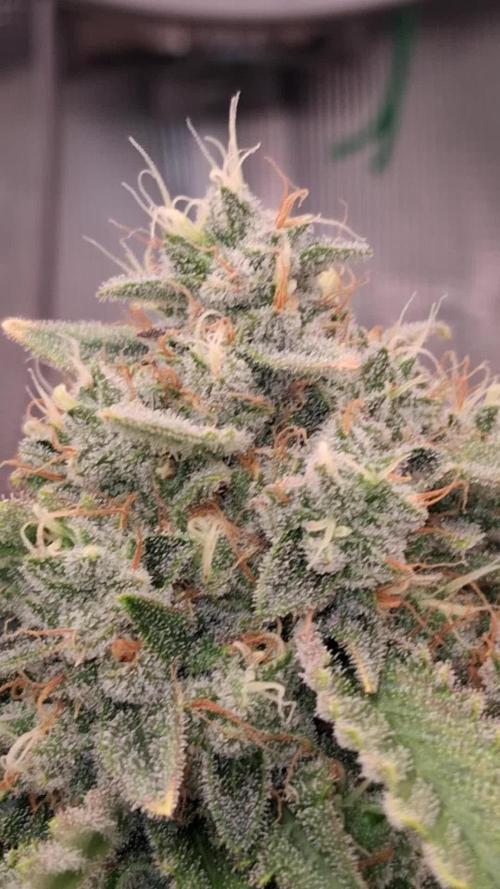
Ende der 9 Woche Growmies!
Der Frost und Geruch sind phenomenal. Die Entscheidung den Mainbud zu entfernen war wegen dem Mangel an Platz optimal wenn man sieht wie groß sie geworden ist!
Likes
69
Share


@nonick123
Follow
Día 108 (16/09) Tras el flush las plantas muestran tímidamente nuevos pistilos blancos! 😍
Hoy no es necesario regar!
Día 109 (17/09) Me he encontrado a OnionOG #1 y a Purple Punsh completamente sedientas! Con las hojas caídas!
Riego con 1,25 litros de H2O a cada una de ellas (el resto no necesitan riego)
Día 110 (18/09) Riego con 500 ml H2O
Las plantas con el bloqueo empiezan a mostrar nuevos pistilos, sobre todo en las partes inferiores
Día 111 (19/09) Riego con 250 / 500 ml H2O
Se vuelven a formar pistilos blancos en todas las plantas que han sufrido el bloqueo! 😍💥
OnionOG #1 va como un cohete formando y apilando flores 💪 🚀 😍
Día 112 (20/09) Día lluvioso. Riego ligero 250 ml H2O
Día 113 (21/09) Otro día lluvioso. Riego ligero con 250 ml
Día 114 (22/09) Detecto algunas moscas blancas apoderándose de las plantas y decido hacer una aplicación foliar de piretrinas (Spruzit a 15 ml / l)
Riego con 1 Litro de Té Floración de Lurpe Solutions. Preparación: 24 horas con bomba de aire (oxigenación) con ingredientes:
Healthy Harvest 8 ml/L + Insect Frass 16 ml/L + Kelp Hidrolizado 0,3 g/L
💦Nutrients by Lurpe Solutions - www.lurpenaturalsolutions.com
🌱Substrate PRO-MIX HP BACILLUS + MYCORRHIZAE - www.pthorticulture.com/en/products/pro-mix-hp-biostimulant-plus-mycorrhizae
Likes
8
Share


@CampaCavallo
Follow
Conclusioni 🏁:
Bella pianta, bello tutto, ma la vera prova di questo ciclo è stata: DRYROCKET 🚀
Probabilmente era il pezzo mancante per ottenere un raccolto 🌟🌟🌟 3 stelle! Che spettacolo! Gestisce autonomamente l umidità relativa ideale per fare un essicazione pro!
All apertura della tenda di essicazione, ho trovato i miei fiori essicati in maniera magistrale e pronti per essere messi nei barattoli di conservazione! Felicissimo di avere Dryrocket 🚀 nel team CampaCavallo 💚
Consiglio a chiunque di provarlo! Ho finito di temere brutte essicazioni.
Grazie di cuore Dryrocket 🚀💚

Likes
9
Share


@GrowPassionItalyChris
Follow
Sono felice di tutte e 4 le banche semi che mi hanno regalato qualche seme alla fiera canapa mundi di Roma, già in passato ho sempre provato casualmente tantissime varietà,sono affezionato ad una banca semi in particolare ma voglio bene a tutti. Queste varietà sono fino ad adesso perfette per le mie esigenze perché crescono facili,rapide e molto resistenti e sono già in fioritura! Ogni varietà si sta sviluppando in maniera impeccabile e sono molto felice perché hanno resistito ai cambiamenti climatici e stanno resistendo benissimo la presenza di afidi sotto le foglie, ogni settimana stiamo utilizzando olio di piretro ad azione rapida e sta funzionando. Il colorito della piante ed il vigore che hanno nel crescere e fiorire è dimostrato nel video e nelle foto! Hanno avuto una crescita molto rapida in questa settimana. Il clima è migliorato e le temperature sono di tipo estive quindi non faranno che migliorare. Io coltivo in maniera biologica e non uso potature particolari e queste varietà sembrano ideali per me. Affinché avrò la passione di coltivare sicuramente useremo anche queste varietà perché questo 2023 in Italia il clima è stato pessimo durante le prime 3 settimane di vita di queste varietà e hanno resistito a grandine,pioggia e sbalzi di temperatura. Iniziano a fiorire ed il caldo estivo ormai è arrivato! Un abbraccio a tutti

