


Likes
Comments
Share


@TheBudWhisperer
Follow
Finishing out at a full 9 weeks of flower for the rest of this cycle. All of em are at various stages of doneness and now nothing left to do but chop em up and see what we got. It was a generally flawless run, save issues with WPM, a bit of nute burn on the northern lights and one leaky pot. The seals cracked on all of em again and we’ll mod the outlets to uniseals next run and see if that is the final missing piece to this hydroponics puzzle😎. The 5ml/L baking soda solution did wonders to keep the WPM in check and it’s also a much cheaper option than h2o2. We’ll draw about 1/2oz per plant when alls said and done - pretty much exactly what we were trying for with this grow of clones. Nothing but top shelf, rock hard bud🤟👍. Really happy to get these strains dialed in. The nutrient system was nothing short of phenomenal too. We could’ve jumped on the nute burn issue with the NL a little earlier but for a first run of this one component system, this is a fantastic result regardless. Proof that you can get a hydro run to scale on a recirculating system that accommodates multiple strains (with the right nute system)🤩🤩🤩.
As much as I’m dying to give the whole thing a go with straight fem seeds that’ll have to wait a couple months. We’ve got bigger fish to fry and a new cross to start drilling down on. The layover may be short lived if we end up with multiple fem cuts on that grow. We’ll see what happens. Harvest details will follow shortly and until the next one - thanks to everyone who stopped in for a look👊.


Likes
2
Share

@NAG420
Follow
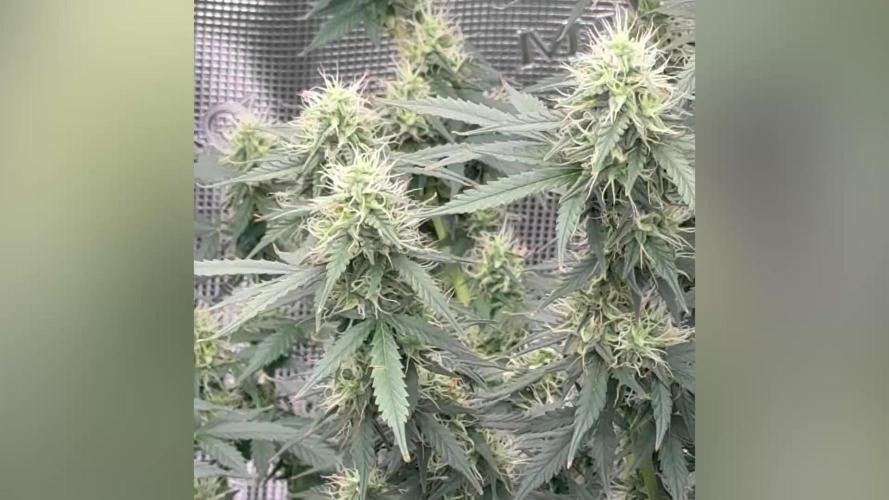
Wow she is getting bigger and bigger she is in the start of 11th week still have some time due to a mess up earlier on the grown I snapped the main branch lower part will post pick how the recovery took but slowed her down by two weeks or so. I really like how she is turning out 1st time using theseedconnectusa from AZ money will spent with the nice recovery and she still got bigger.
Likes
4
Share


@603grower
Follow
Start of week 9 and the girls are just about done. Think I over watered the last two weeks. For some reason I feel like they don’t smell as dank as they did a few weeks ago. Maybe I’m just getting used to them my wife says it still reaks!! Gonna be chopping the girls down in a week days. The gas cream could of been chopped last week but I wanted the Saturn to finish


Likes
7
Share


@mn_home_grown
Follow
Well, not much has changed, so it's kind of like 'same same but different' around here. The plants are still vibing, doing their thing, just with a little more oomph this week.
Likes
24
Share


@Canaryweed_tf
Follow
Ya tenemos la tercera semana de vida de esta feminizada Purple Kush de Kannabiaseeds, esta creciendo suer bien, tiene muy buen color y espero que siga por ese camino!💪


Likes
14
Share


@Bushleague_Botanicals
Follow
Topped and pruned this week. Probably too late. Definitely watered a lot less. Be fore I am certain that I Was drowning them


Likes
56
Share


@nonick123
Follow
Día 15 (04/11) Las plantas se muestran esplendidas después del 1er riego e introducir la 1ª Bio Tab! 😍
Subo a DLI 35
Día 16 (05/11) Las plantas se muestran espectaculares y radiantes!
Un color verde intenso y sano! 😍
Día 17 (06/11) CBD Auto 20:1 #1 tiene un crecimiento increíble!
El resto tiene un desarrollo perfecto para sus días 17 días de vida!
Día 18 (07/11) Mudanza y riego!
Las plantas se mudan al armario definitivo de 60 x 120 cm por varios motivos:
- CBD Auto 20:1 #1 está empezando a tocar las paredes del armario pequeño
- CBD Auto 20:1 #2 ha tenido una ventilación menos adecuada que sus compañeras, ya que el ventilador quedaba justo encima de ella, y el flujo de aire era inadecuado
Esto ha provocado que la maceta de CBD Auto 20:1 #2 no se seque a la misma velocidad que el resto. Espero que no afecte a su crecimiento
- Las plantas pasan a tener dos lámparas a su disposición (230W + 100W) ajustadas con el regulador al 60%
- Mantenemos DLI 35 tras varios ajustes (tener 2 lámparas simultáneamente es más complicado de ajustar!)
- Colocamos dos ventiladores oscilantes para que el flujo de aire sea adecuado dentro de la carpa
Riego: 4 días después del 1er riego, las macetas se muestran "ligeras" excepto CBD Auto 20:1 #2 por la falta de ventilación comentada arriba
Riego con 750 ml de H2O RO excepto CBD Auto 20:1 #2
Día 19 (08/11) Las plantas se muestran esplendidas y creciendo mucho!
Día 20 (09/11) Macetas poco pesadas, pero no lo suficientemente ligeras para regar
Se muestran las preflores! 😍
Día 21 (10/11) Introduzco la 2ª Bio Tab a 5 cm de profundidad, lado izquierdo
Riego con 750 ml de H2O RO a todas excepto CBD Auto 20:1 #2 que se riega con 1 Litro
Aplicación foliar de Boom Boom Spray 5 ml/L. Aplicar justo después de encender la iluminación.
Aplico LST a CBD Auto 20:1 #2
💦Nutrients by Bio Tabs - www.biotabs.nl/en/
🌱Substrate PRO-MIX HP BACILLUS + MYCORRHIZAE - www.pthorticulture.com/en-us/products/pro-mix-hp-biofungicide-plus-mycorrhizae
"GDBT420" 15% DISCOUNT code for the BIOTABS Webshop https://biotabs.nl/en/shop/
Likes
14
Share

@Bread_n_Buds
Follow
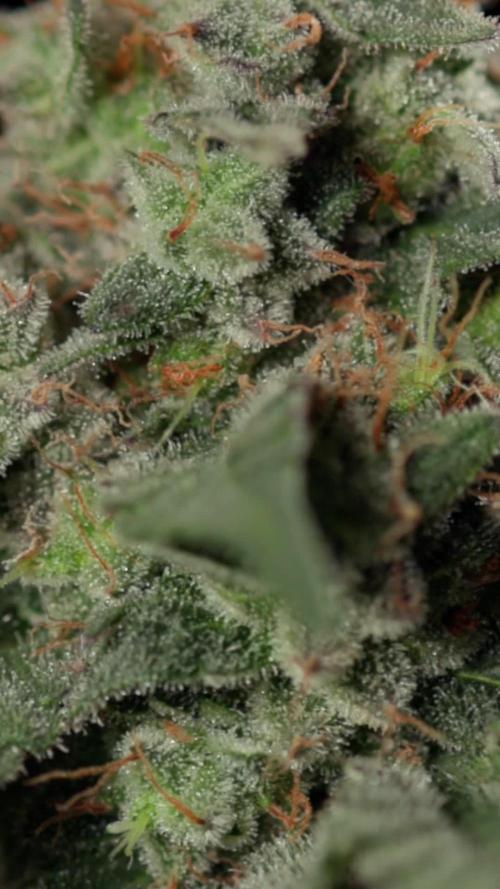
This week I'm showing you the harvest of the first of two London Pound Cakes, which was left to grow as Mother Nature intended, preserving the main cola and allowing you to see it in its natural state compared to the main cola you'll find next week.
The plant is truly beautiful, with a beautiful main cola and numerous peripheral flowers with excellent, super-tasty resin.
Pot and Soil - This plant was grown in an 11-liter pot with Plagron's BioLight Mix organic soil, which gave us a solid start, and then we proceeded to fertilize.
Lighting/PPFD - A Zamnesia Phytonaut 480W LED lamp was used from mid-flowering until fruiting. We achieved a PPFD (photosynthetically active photon flux density) between 800 and 1200 μmol/m²/s, with a cycle of 24 hours, then 23 hours, then 20 hours, and finally 18 hours. All with CO2 to mitigate the effects of heat and excessive light.
Z - https://www.zamnesia.io/it/14526-led-grow-lamp-phytonaut-480.html (National link, use Google if it doesn't work)
Growing system: Zamnesia Ecosystem, fan, extractor, and grow box, all manufactured and branded by Zamnesia.
Trichhomes: We still have a good amount of amber trichomes, starting at 30%. There are several 40-45% opaque and transparent trichomes. In this case, we've gone much further than usual in terms of maturity because the plant is indica-dominant, and we need and want to bring out its characteristics, even at the risk of some oxidation (the amber color is caused by oxidation. Don't fall into the common mistake of thinking that all or a majority of amber is needed; the harvest window opens at 15%, and you don't need a lot of amber, especially if the plants are sativa).
Nutrients: Grown with Plagron Official, a 100% organic base fertilizer, and all recommended additives.
Visit www.plagron.com for grow cycle calculations, product selection, and general information.
All nutrients are available on the Zamnesia website. Also check out the live substrate and the fantastic new Zammi product line.
You can find this excellent strain here:
https://www.zamnesia.io/en/11114-london-pound-cake-zamnesia-seeds-feminized.html
(Google if the link doesn't work; it's a national link)
Terpene Profiles // Caryophyllene, Myrcene, Limonene
Parents // Sunset Sherbet x Larry OG
Genetics // 80% Indica / 20% Sativa
THC // 22%
CBD // 0-1%
Flowering Time // 9-10 weeks
Taste / Aroma: Sweet, Citrus, Spicy, Vanilla, Creamy
Effect: Relaxing, Euphoric, Happy, Balanced, Calming
Zamnesia Description:
London Pound Cake is a decadent hybrid that satisfies both the palate and the soul. Derived from a potent cross between Sunset Sherbet and Larry OG, this strain combines intense dessert flavors, high-level potency, and lush growth, making it a true delight for growers and connoisseurs alike.
In the grow room, London Pound Cake displays vigorous growth and a textbook indica structure, with sturdy branches and dense, trichome-covered buds. With just 9–10 weeks of flowering, London Pound Cake offers impressive yields, up to 600 g/m² indoors and a whopping 900 g/plant outdoors by October. The aroma is decidedly indulgent: sweet, creamy, and citrusy, with hints of vanilla and spice filling the air like a working oven.
With 22% THC, London Pound Cake's effects are deep, relaxing, and euphoric, melting the body and mind and promoting a happy, fulfilled state of mind. Perfect for evenings, creative relaxation, or as a special treat after a long day, London Pound Cake combines flavor and potency in impeccable balance.
For those who appreciate premium flavor and performance, London Pound Cake by Zamnesia Seeds is a pure comfort strain, offering indulgence, an irresistible aroma, and a deeply satisfying effect.
Music - Frequencies 432 Hz and 528 Hz and black musc from www.radionula.com
"The best that nature has to offer"
www.zamnesia.com

Likes
14
Share


@CampaCavallo
Follow
9ª Settimana di Fioritura 💐💐💐💐💐💐💐💐💐
Com'è cresciuta la nostra bella RUNTZ 💓😍.... Grazie di cuore a ZAMNESIA 💙🗿 ed a PLAGRON 💜✅ per questa bella esperienza cannabica 🔝
Likes
13
Share


@buzbun
Follow
Its good growing plant,good cloning its all from 1 freebie seed!On flowering they stretching 2x maybe more im not expect it but all good.think need more Silica for plant like that for more strong stems

Likes
46
Share


@KingSalomonsWeed
Follow
Day 106 Flower 64.
17.03.
Hallo Leute.
Hat die an Glitzer zugelegt. 😍
Plus weiterhin Gewicht Zunahme.
Und Volumen.
Der Kohlgeruch ist komplett weg. Es bleibt ein Geruch nach heißem Plastik.
+ 3 Wirklich 3 Gerüche, die ich als Großmeister noch nie gerochen habe.
+ Weed.
PLANET SUHH. Dort ist der Geruch wohlbekannt.
PLANET ERDE. Der Grower ( mich) staunt.
Der Rauch steht noch aus, aber wow.
Sowas von, ja krankhaften ( nicht aufzuhalten, Manisch, enervierend ) WACHSTUM.
Erst pumpen sich Knospen auf, dann werden sie hart, und danach pumpen sie in gleicher Weise weiter.
Also habe ich harte geile Knospen mit bis zu 32 % Thc.
Ohh, das ist viel.
Sehr viel um genau zu sagen.
Hängt auch genug dran. Bin zufrieden.
In, wie nennt es ANESIA?
Psychedelisch.
Oh je.
Habe trotzdem Lust drauf.
Mein Gehirn schreit JAAAA.
Danke fürs liken lesen und alles.
19.03. Day 66 der blüte.
Schnick schnack schnock: DARKNESS für 3 Tage.
20.03 (Pferdewiehern) WIIIHIHIHHHIIII
Leute in meinen Zelt , sind gerade 2 Bomben am trocknen. Diese hier und ne Future 1. Explosive Mischung sage ich nur .
23.03. es ist vollbracht. Gecuttet. Aufgehängt.
Eine Testbund von unten wurde zerkleinert zum trocknen, konsumieren.
Selbst die Stämme waren Gummiartig klebrig.
25.03. Wie die Testbud war? ICH KANN MICH NICHT ERINNERN!😳
Ich habe den ganzen Abend davon geraucht. ... Sandelholz Zitrone Aroma.. das weiß ich noch... Aber Turn... Ähh tut mir leid, ich kann mich nicht erinnern..
😳😂
27.03. geil, ich kann's kaum Erwarten bis alles fertig ist.

Likes
5
Share


@banditman1200
Follow
these two ladies I hope are not going to get any bigger, but now into bud.


Likes
17
Share


@FrankieBones
Follow
Hi 420 Family.
Start of week 6, and we are well into the blooming stage. So far so good, these ladies have gained a lot of growth over the past 2 weeks, they have stretched a lot and have now shifted their energy into making buds. The one WW is a little ahead of the rest in maturity it seems, the other two WW's not far behind. PL's I think will flower for an extra week or two looking at the bud sites and the pistils. At this stage they are getting about 1L of bloom feed every 1.5 days but it does seem to pick up and they are getting more thirsty every watering. I guess they will eventually settle on about 1L per day.
D36 - 11 Aug - All good and no complaints, other than the stretchy PL's. Let's hope they just make for awesome bud sites.
D38 - 13 Aug - Steady as it goes... Bud sites are forming nicely and I have not again spotted any sacks on the WW that initial had about 6/8 sacks on the oldest branches, nodes closest to the main stem. Very happy that I didn't kill her; I am still keeping a close eye tho. The PL's have again stretched a little bit but not as much as last week, thank goodness. They were watered yesterday morning and will be letting them dry out properly before giving them another feeding.
D38 Heights:
WW1 - 46CM
WW2 - 45CM
WW3 - 62CM
PL1 - 65CM
PL2 - 72CM
PL3 - 76CM
Stay blessed and I wish you all a happy grow!
Likes
20
Share

@Marijuanaut
Follow
Time flies when youre having fun! 😁
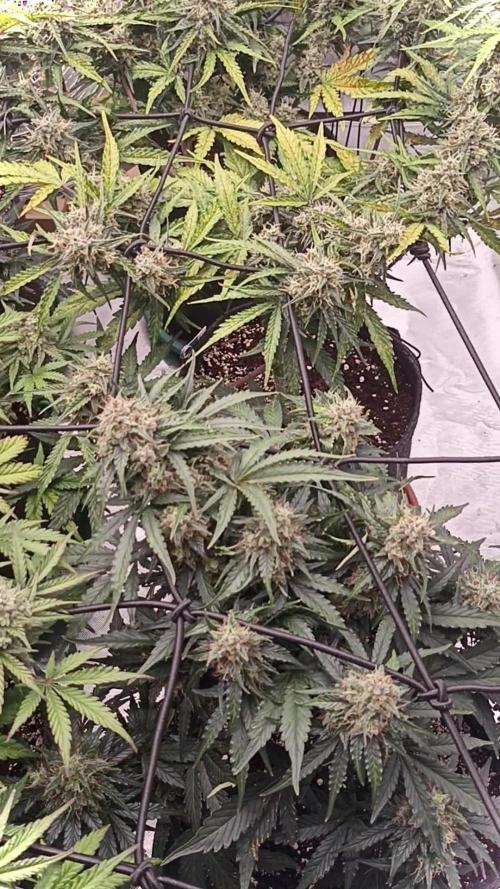
Getting stacked and approaching the final stages... it´s gonna be tricky since they some look closer than others! Have to keep an eye and start with the daily inspections 😉
This grow I was focusing more on quality and it seems it´s an improvement from the last one! 😍
❤️💛💚

Likes
18
Share


@sandokan5_9
Follow
ES: Segunda semana, 26/09/2021 a 03/10/2021, al parecer todo va bien, aun con la duda acerca de como contar las semanas, ya estan soltando un olor ligero lo cual es interesante. No mucho mas que decir, la temperatura se ha regulado bastante, hace mas calor lo cual es bueno.
EN: Second week from 26/09/2021 to 03/10/2021 it seems like everything goes accordingly, still with doubts about how to count up the weeks, the plants are starting to give off an scent which is interesting. Not much to say, temperature levels have been sorted out so that's good.
Likes
1
Share


@Mollyboo
Follow
Pulled the smallest plant out. It’s been under no light for 36 hours now. Will chop down in a day or two


